3d printed ship models
Done for now…
Original Post: 03/08/2020
I needed a Corona diversion, so I started a new 3D printing project!
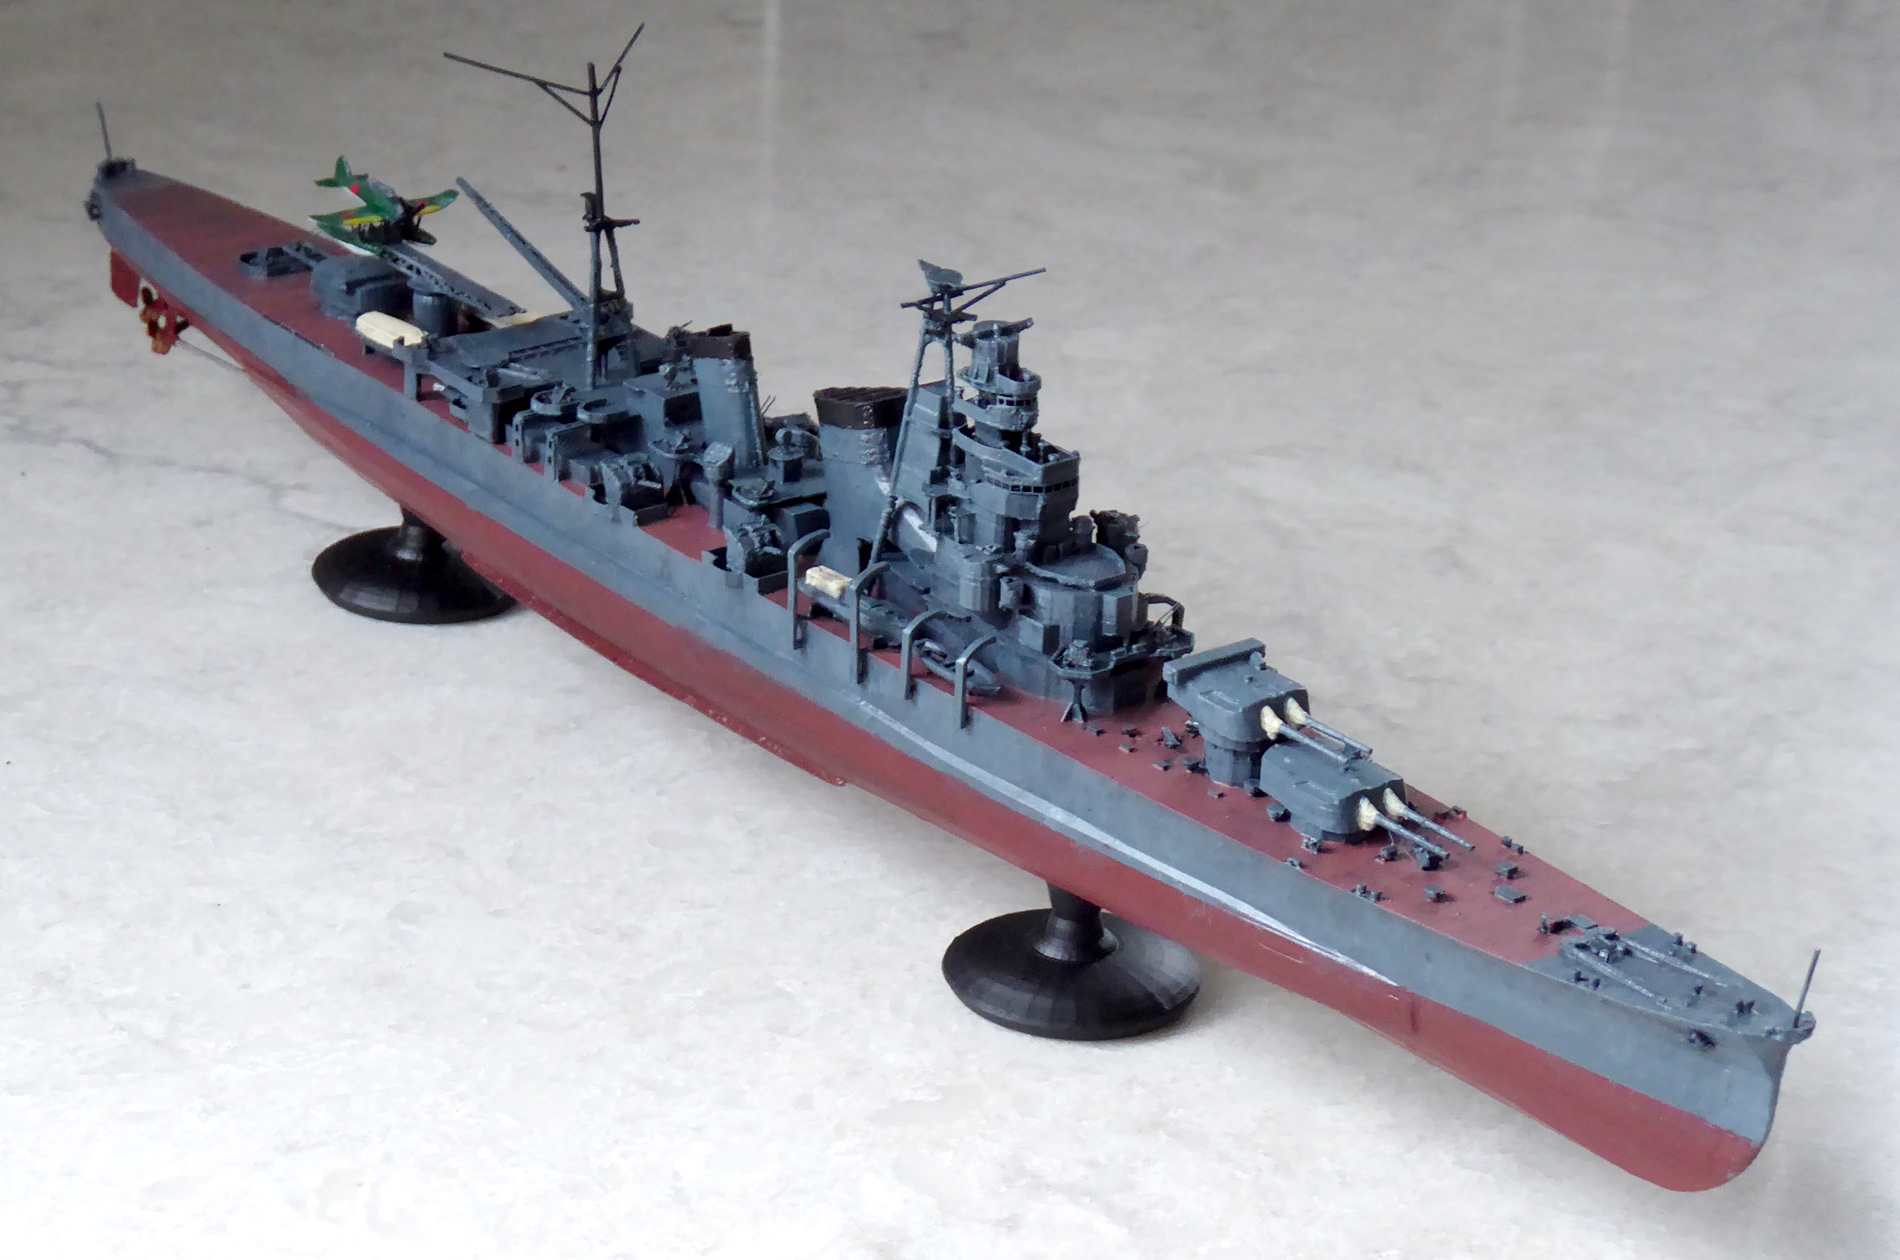
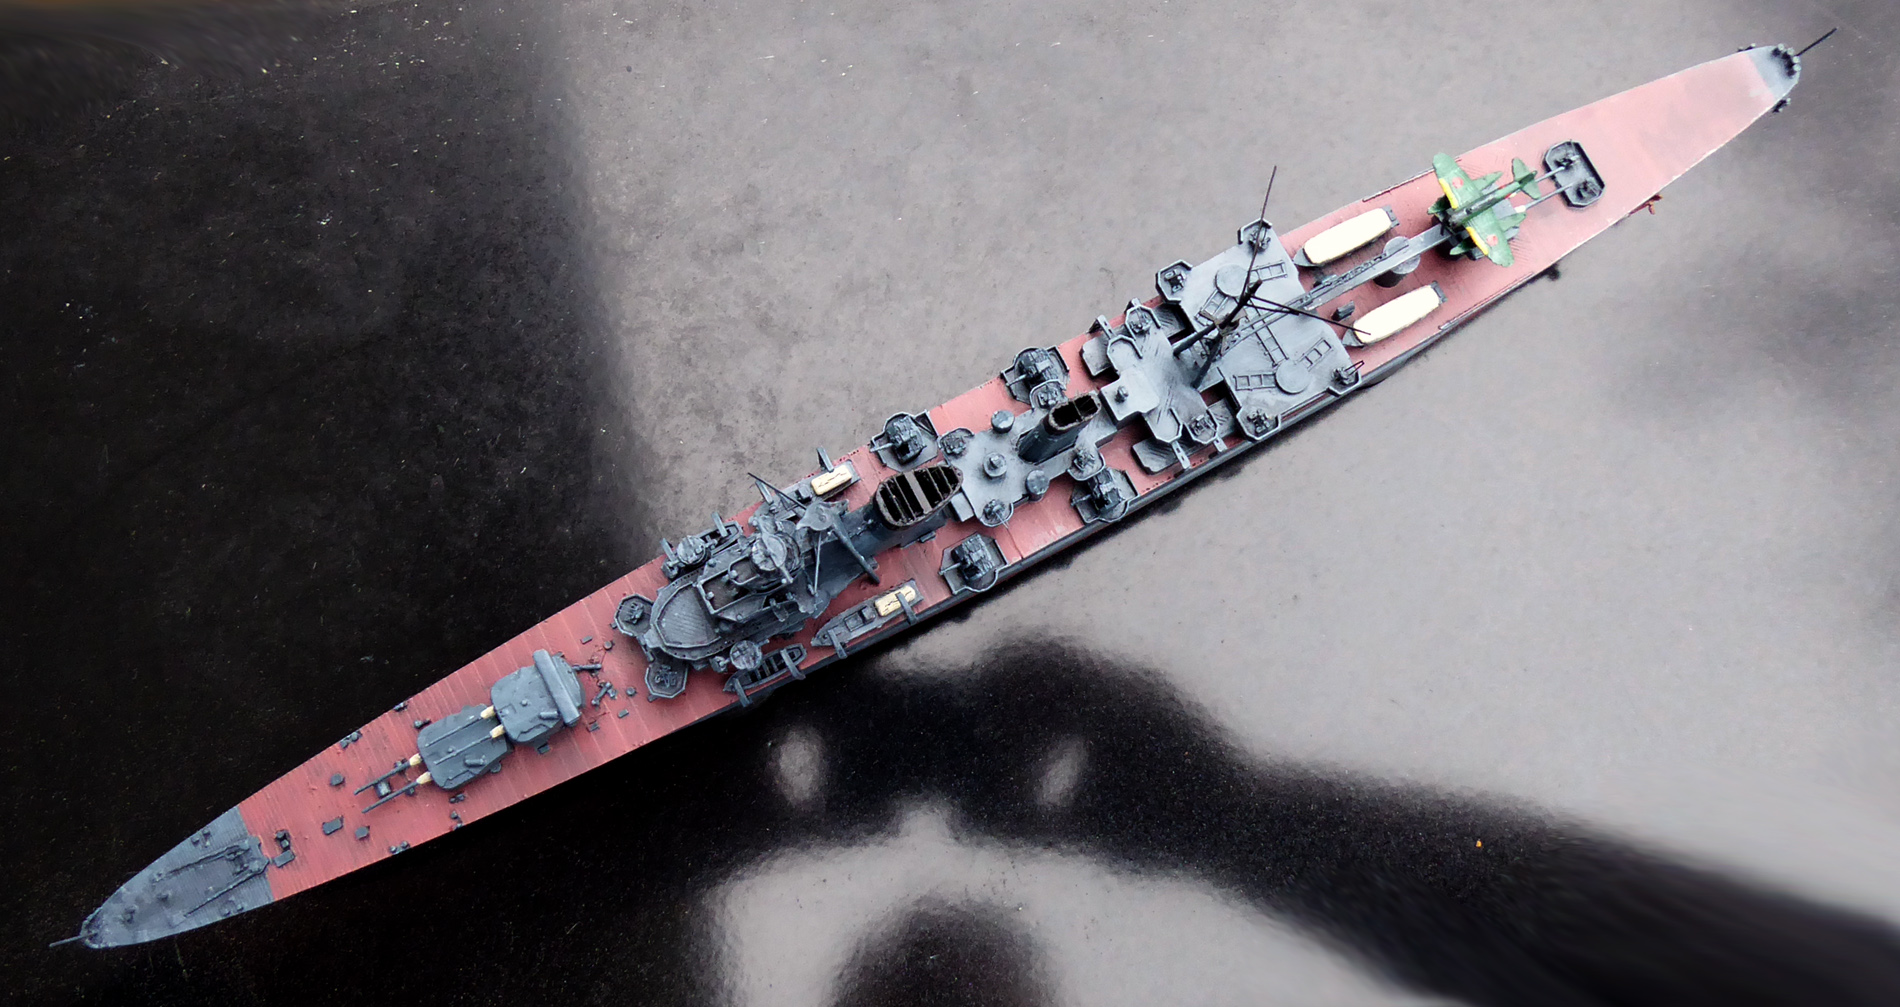
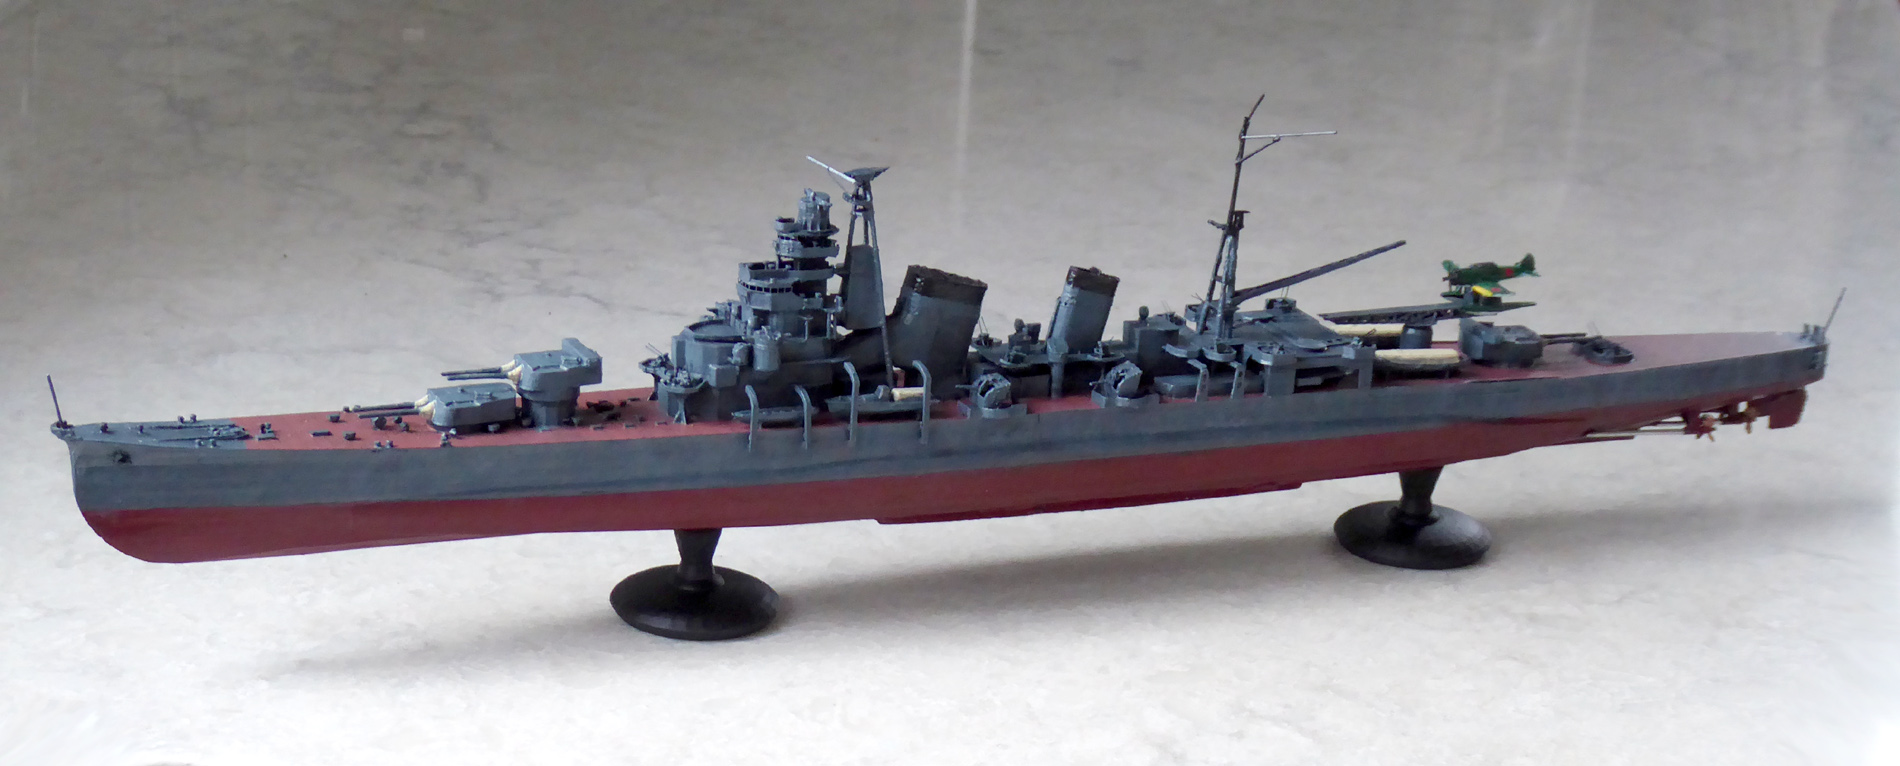
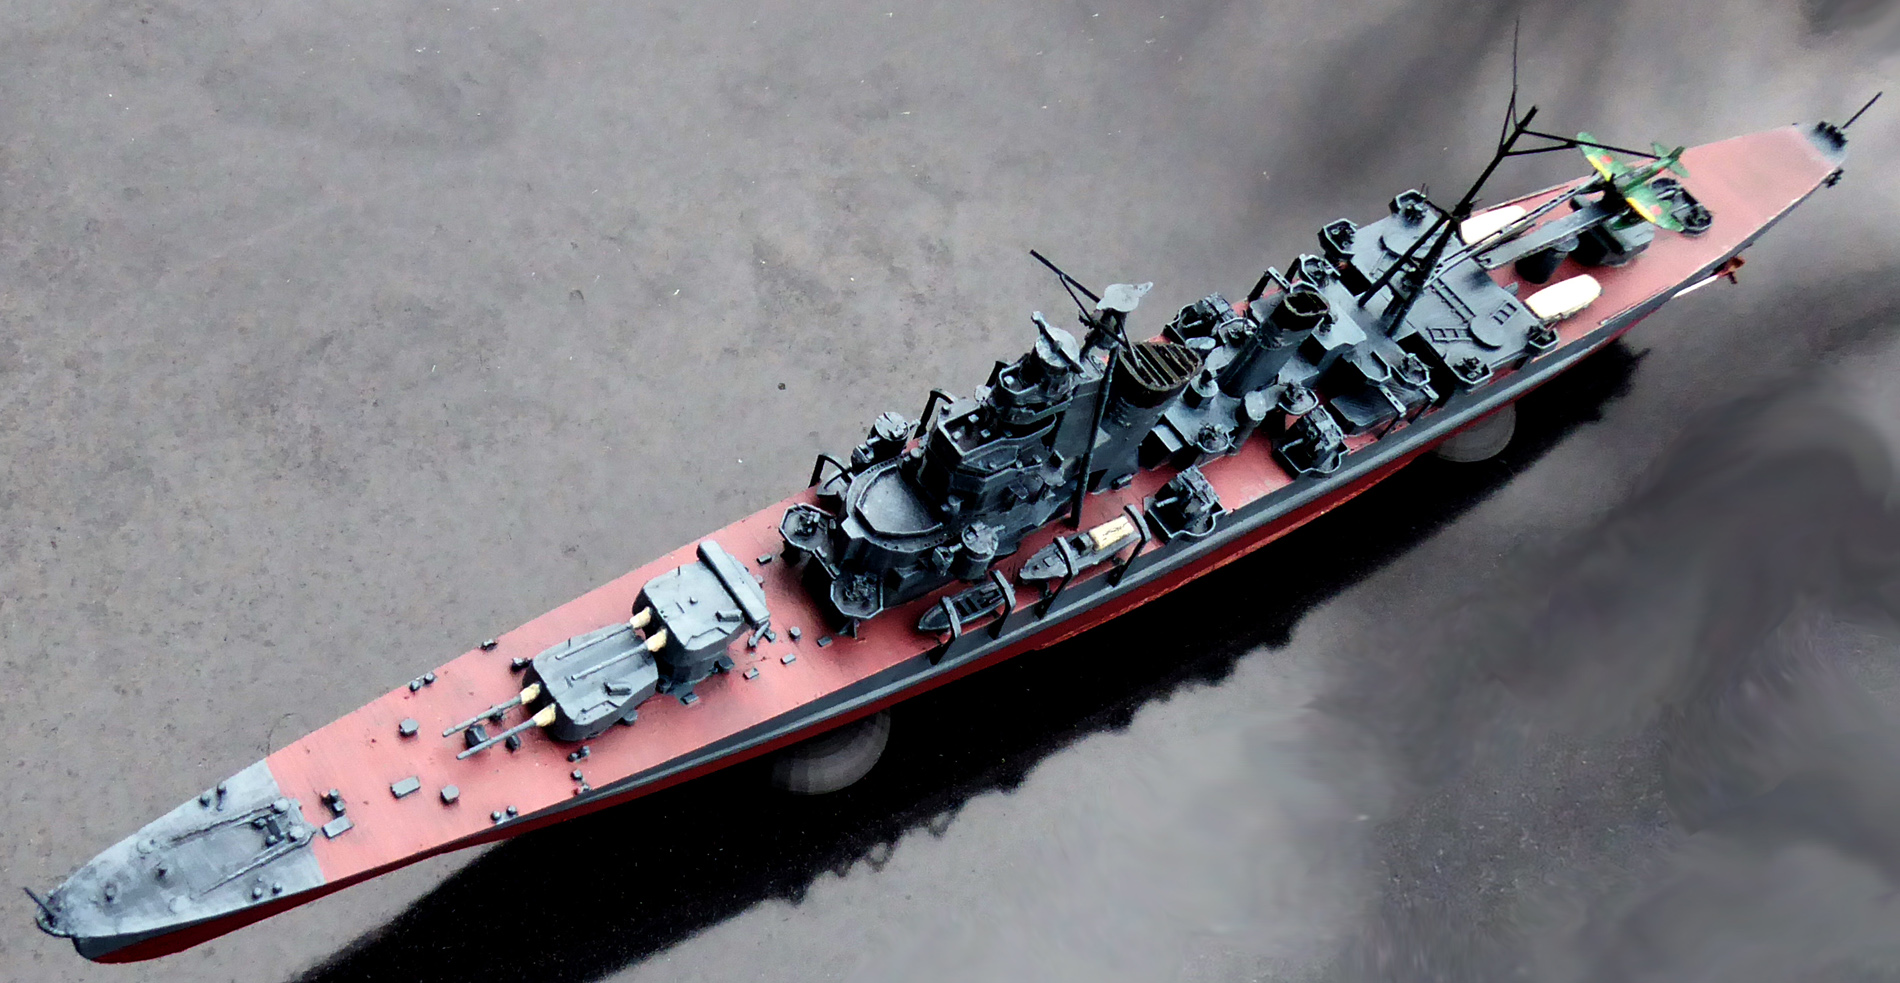
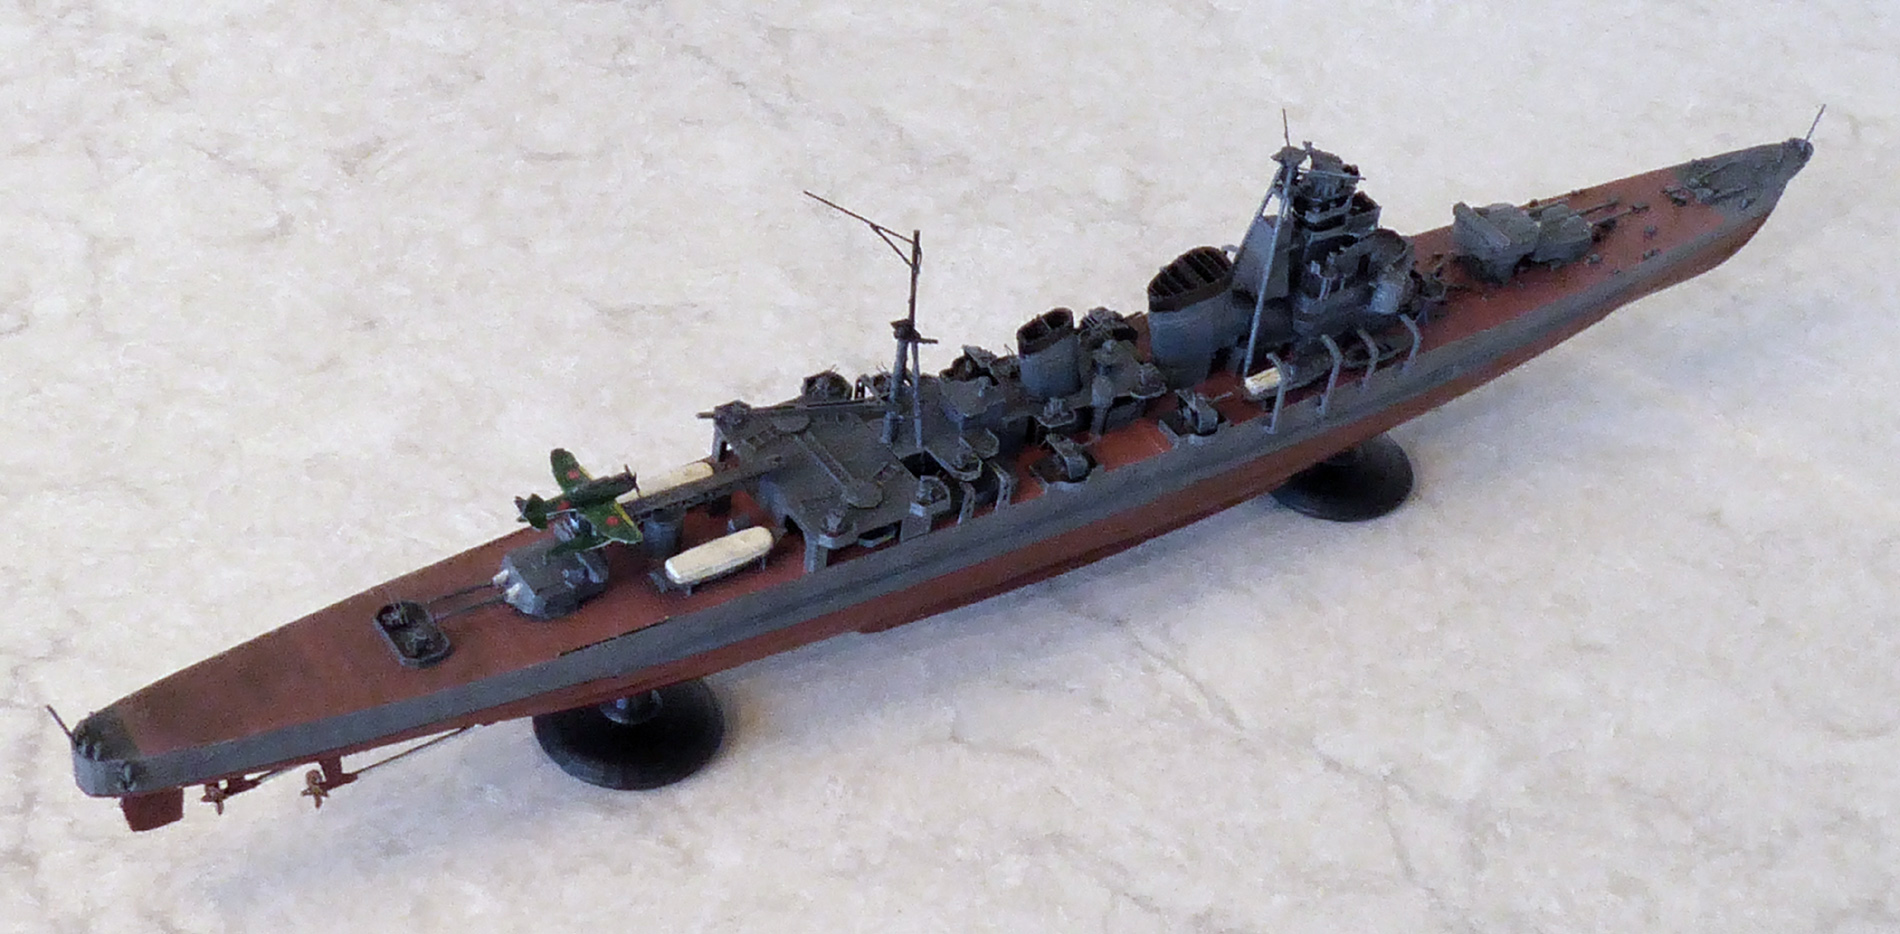
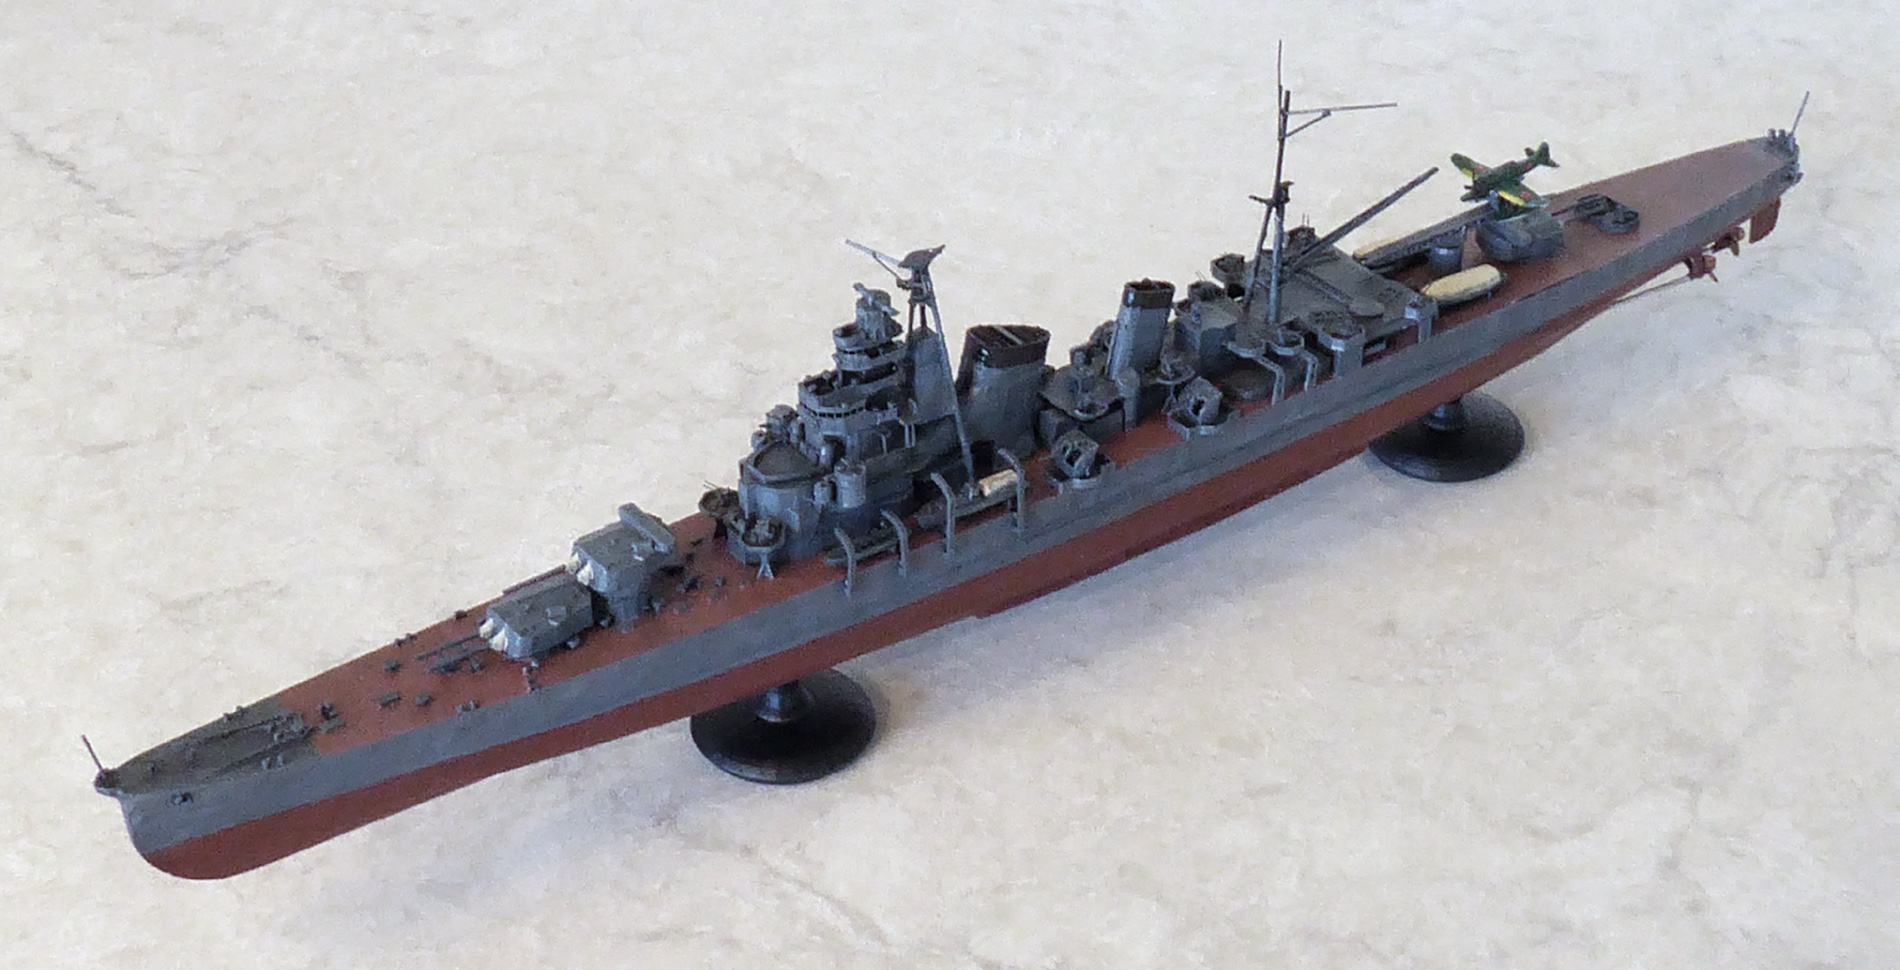
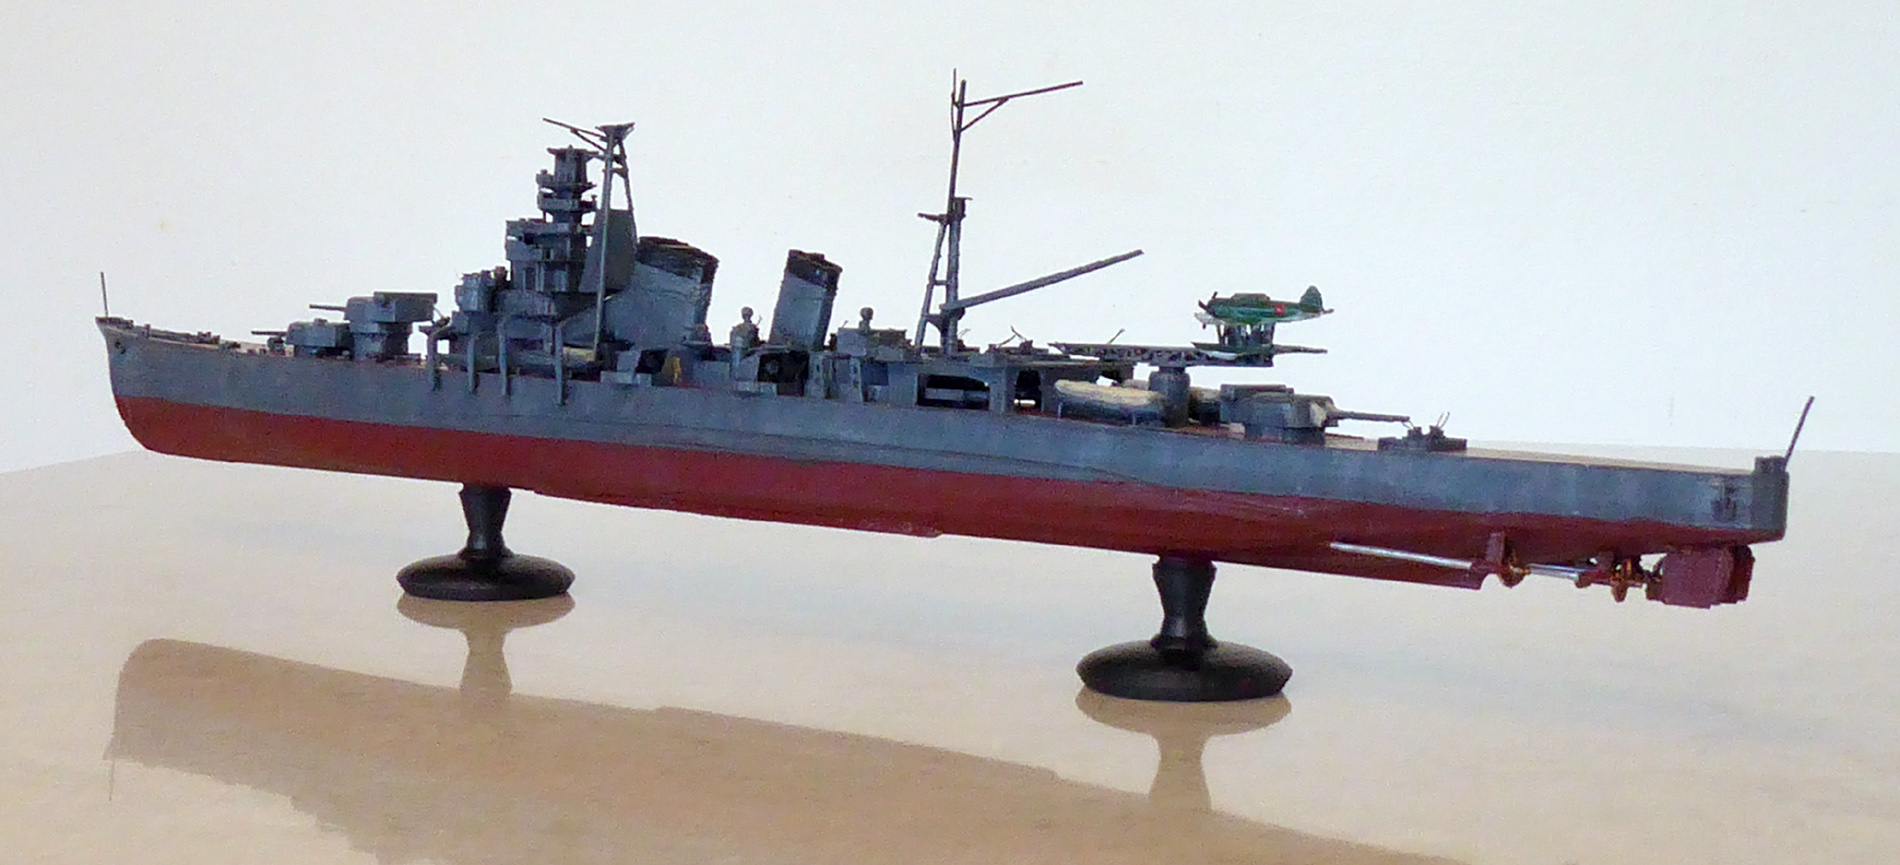
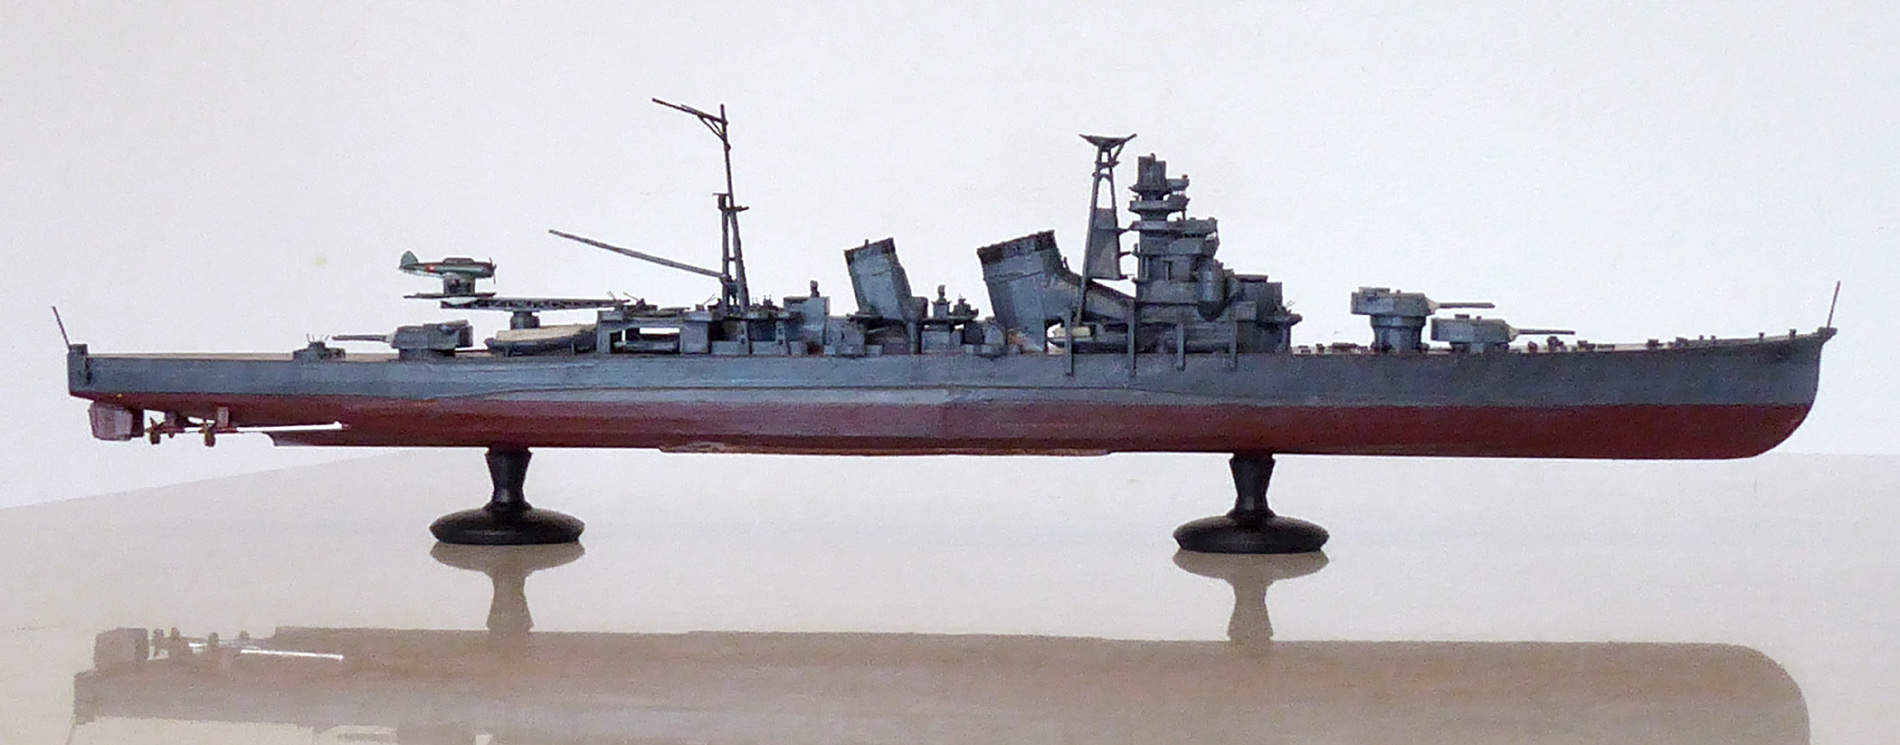
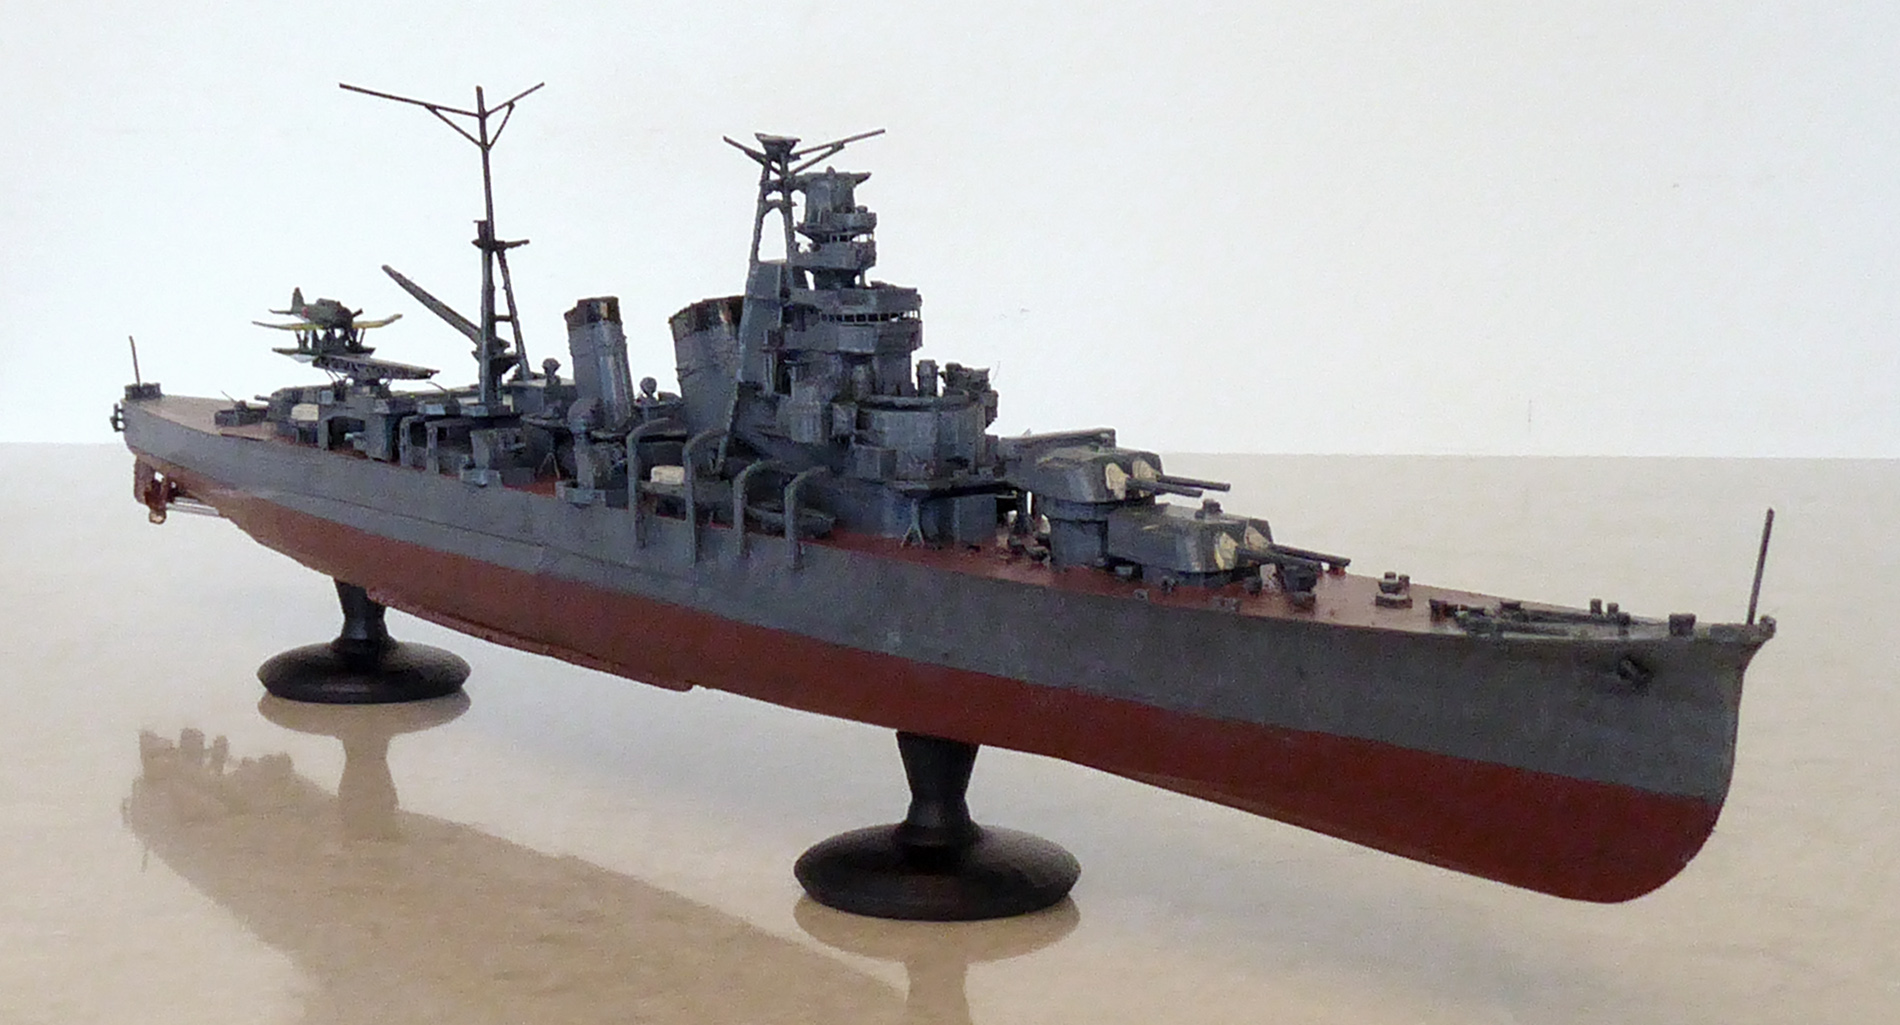
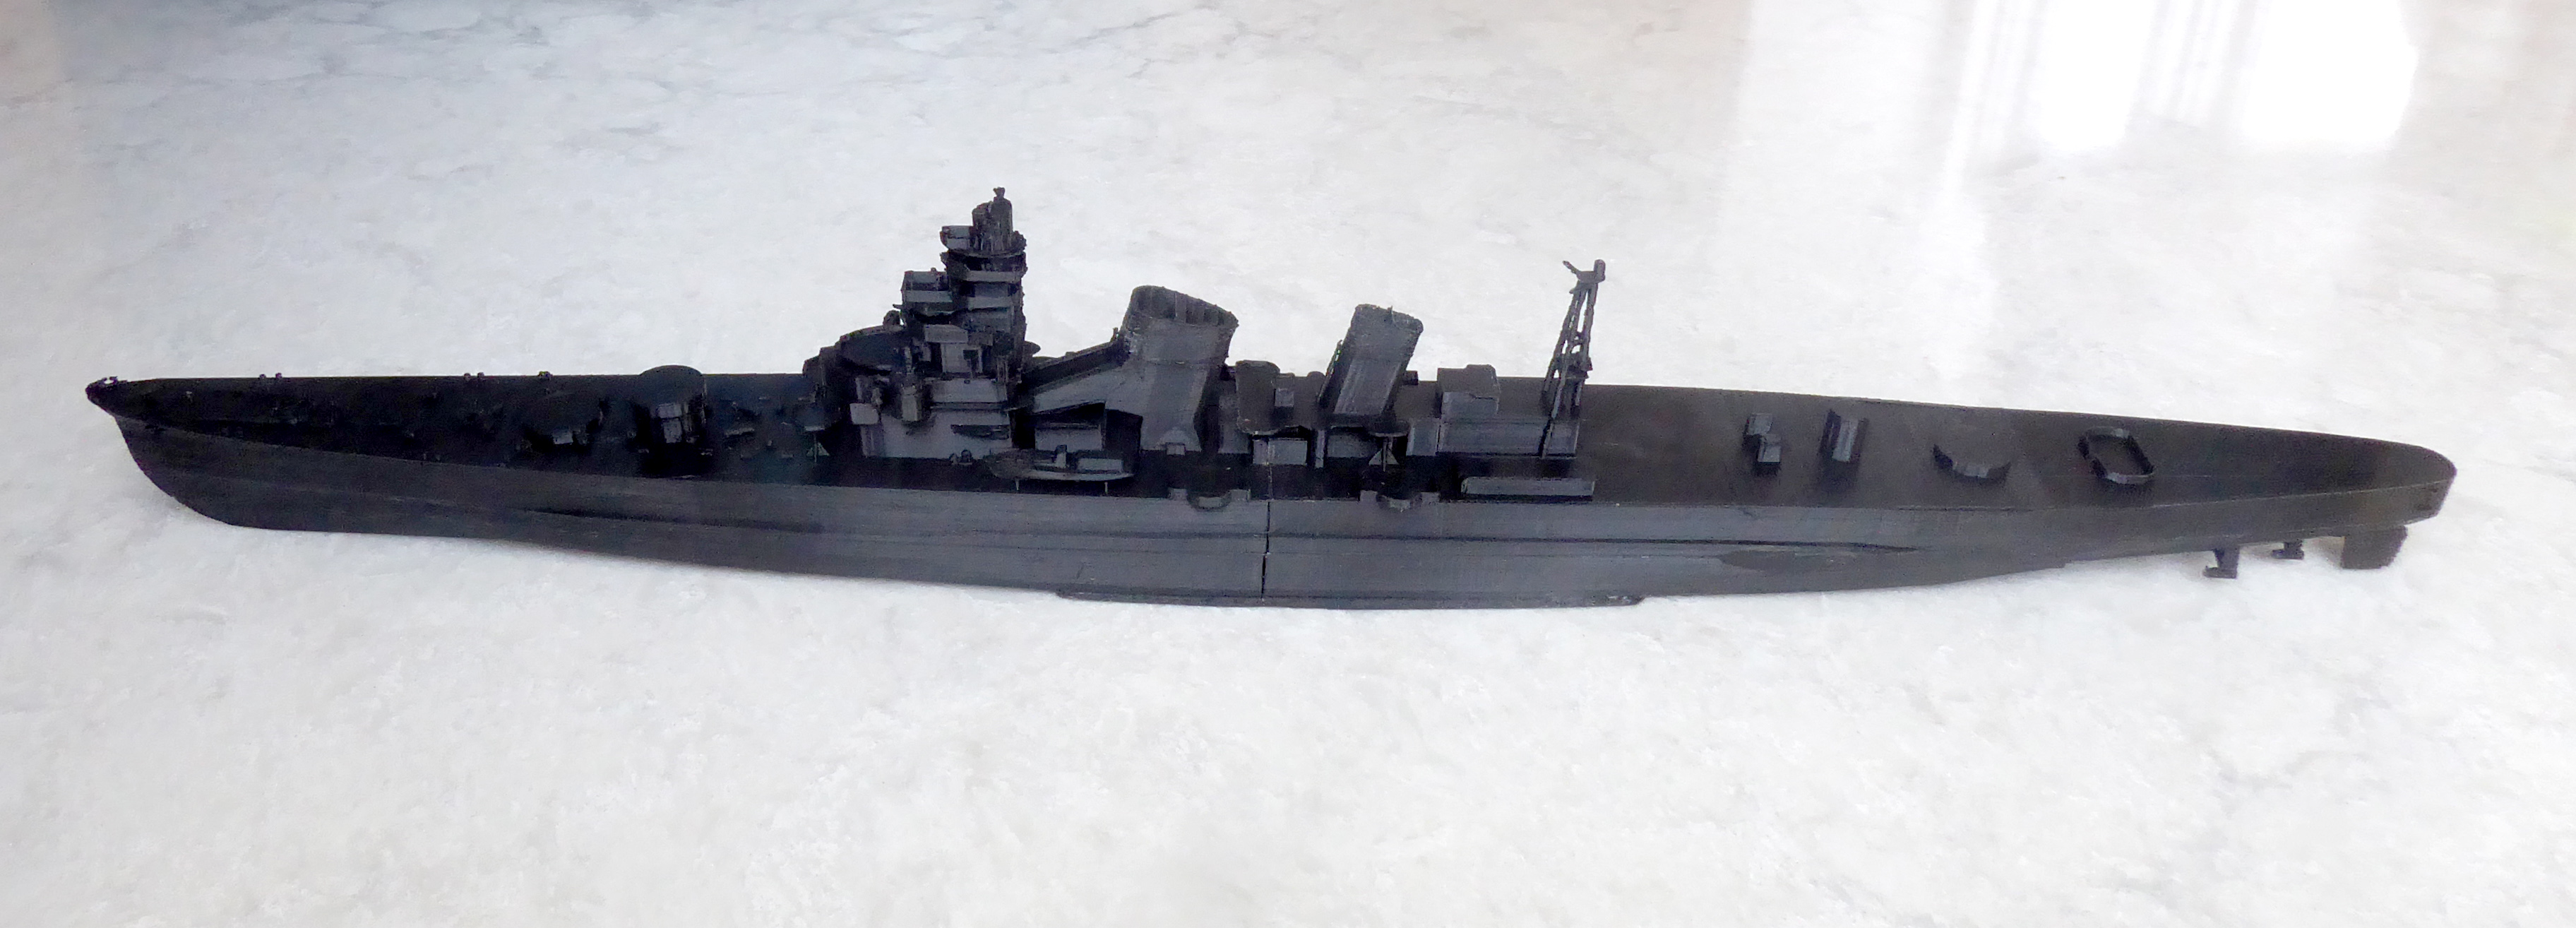
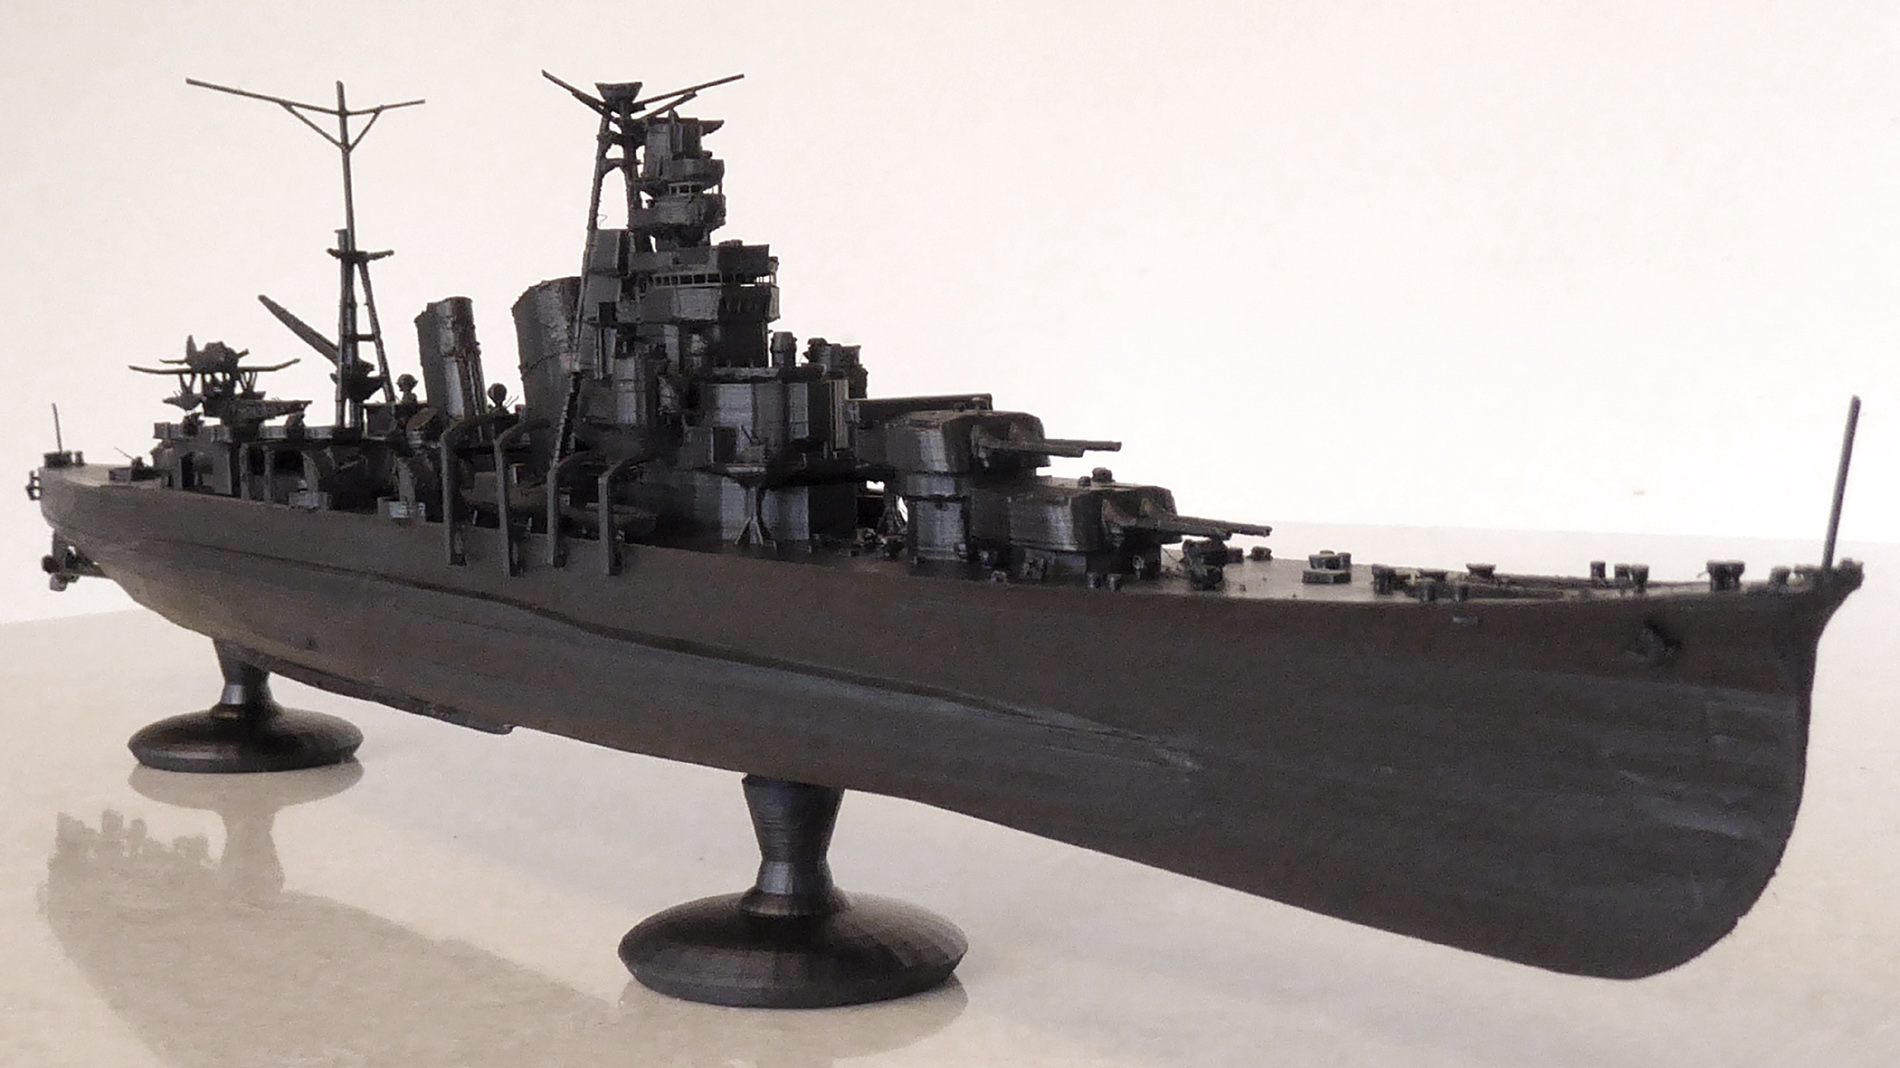
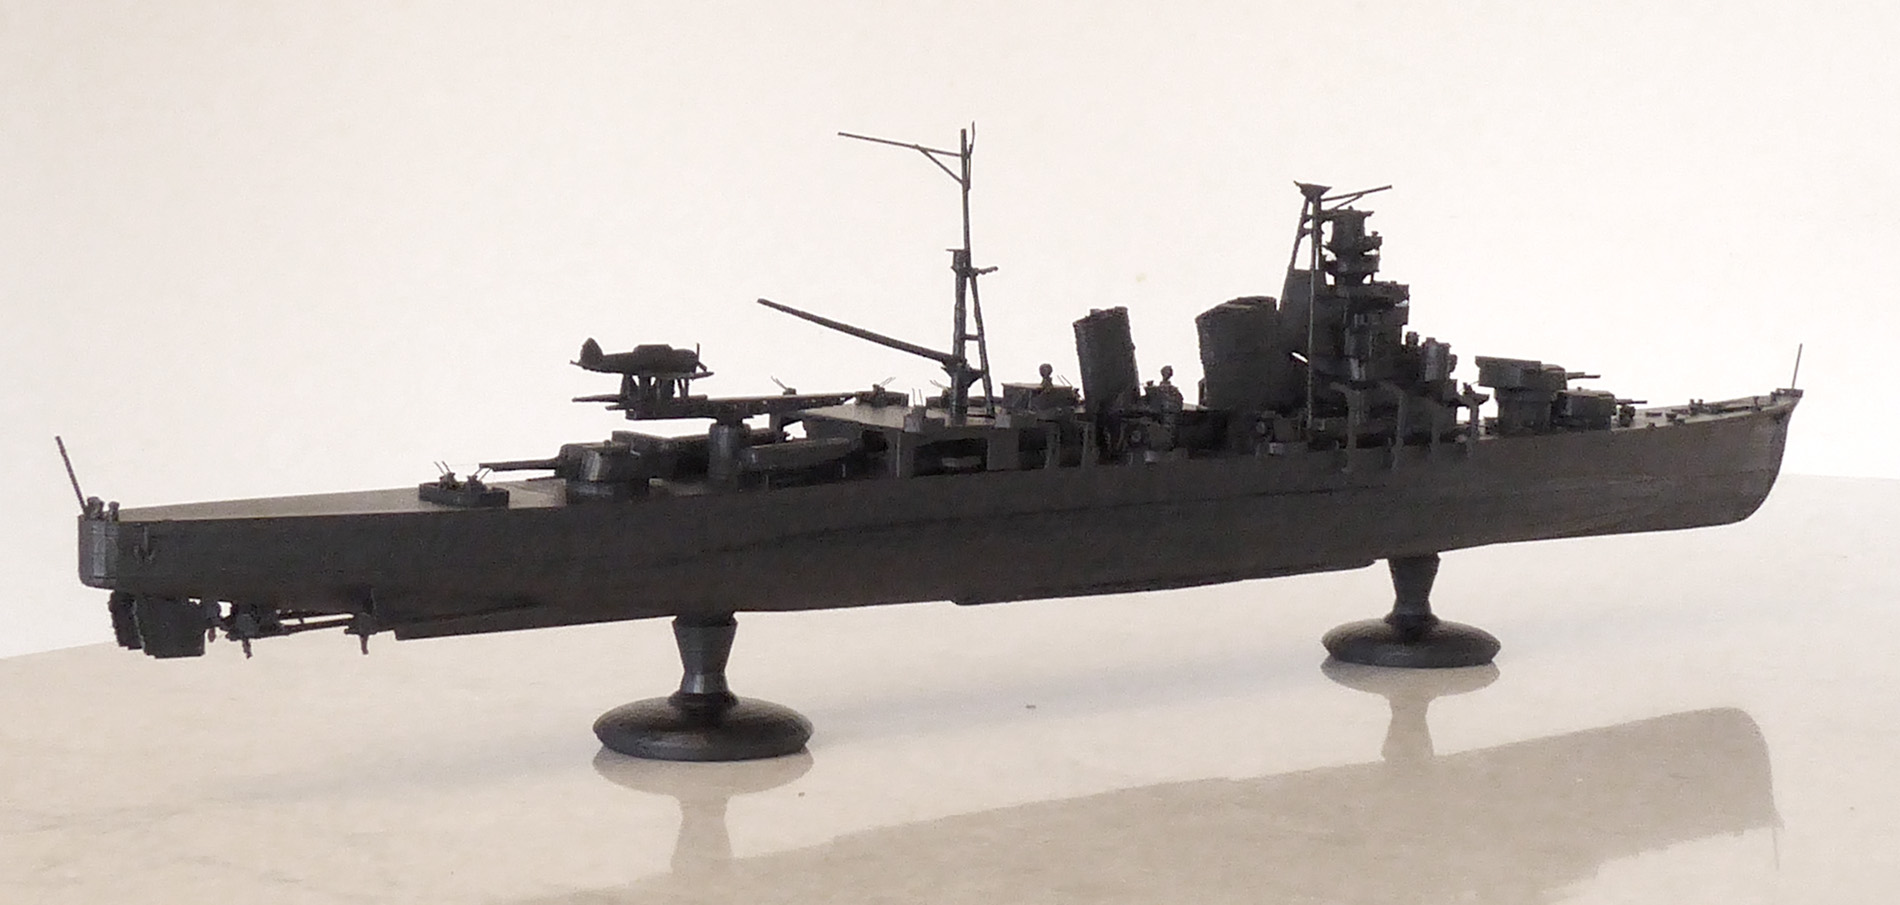
I chose the IJN Aoba Cruiser. She and her sister the Kinugasa and their half sisters Frutaka and Kako were the first products of Japan’s cruiser modernization efforts started after WWI. All incorporated design elements and lessons learned from their predecessor IJN Yabri. One lesson apparently never learned was also repeated – these ships were all top heavy, requiring extensive refits to mitigate. That said, their armament was modest compared to the larger IJN classes to follow, mounting only six 8 inch guns in three dual turrets. Nonetheless they all performed admirably and show the genesis of the classic IJN cruiser design exemplified by IJN Myoko.
A Great Start
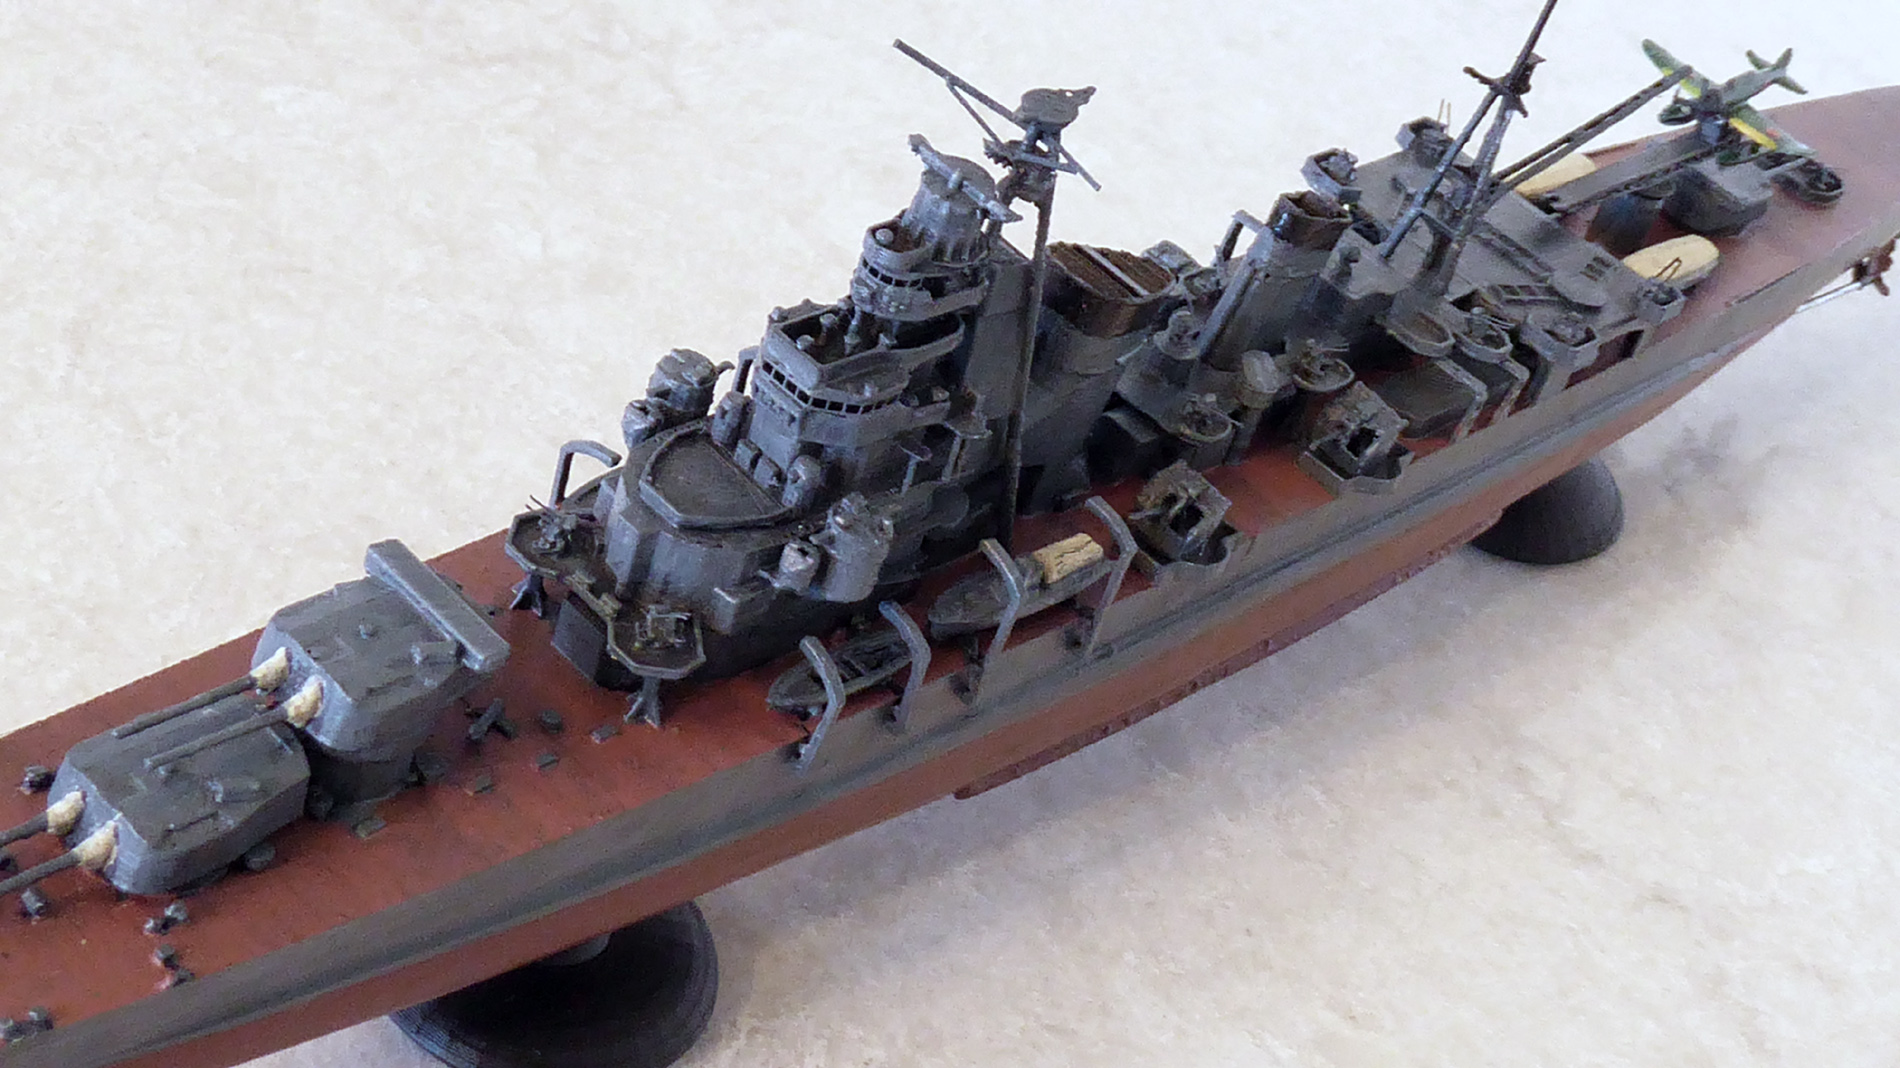
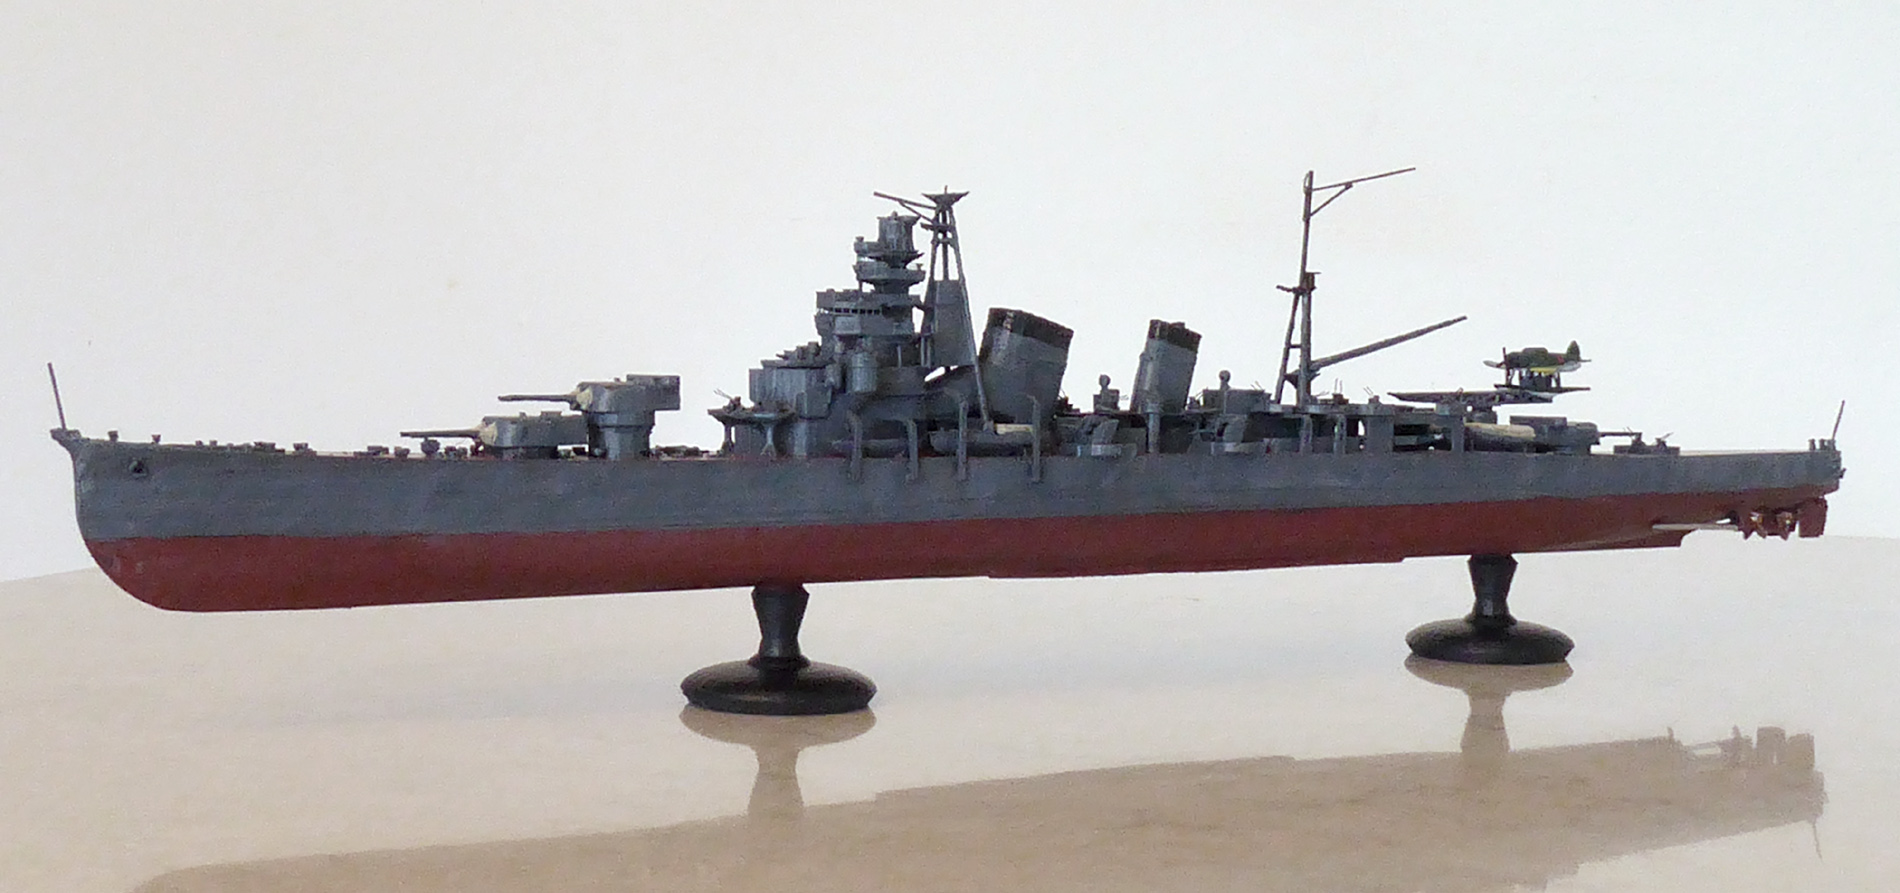
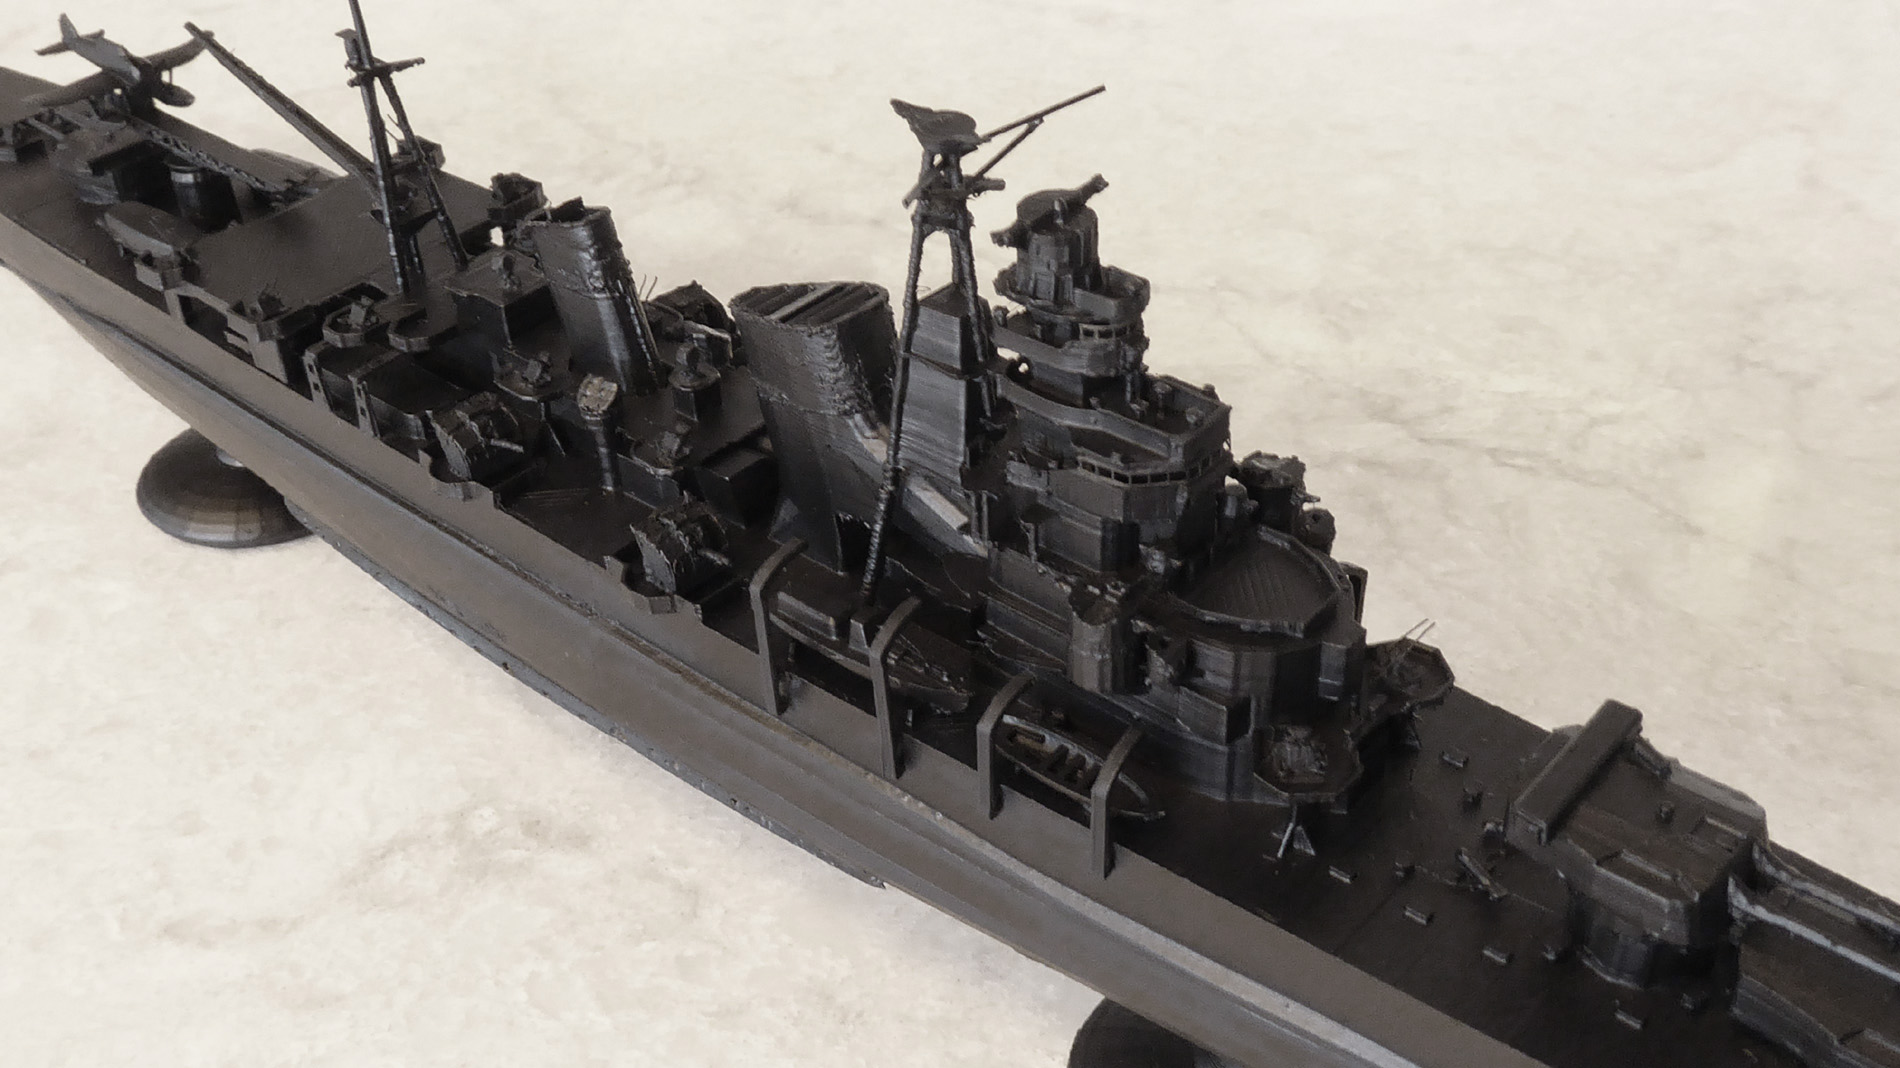
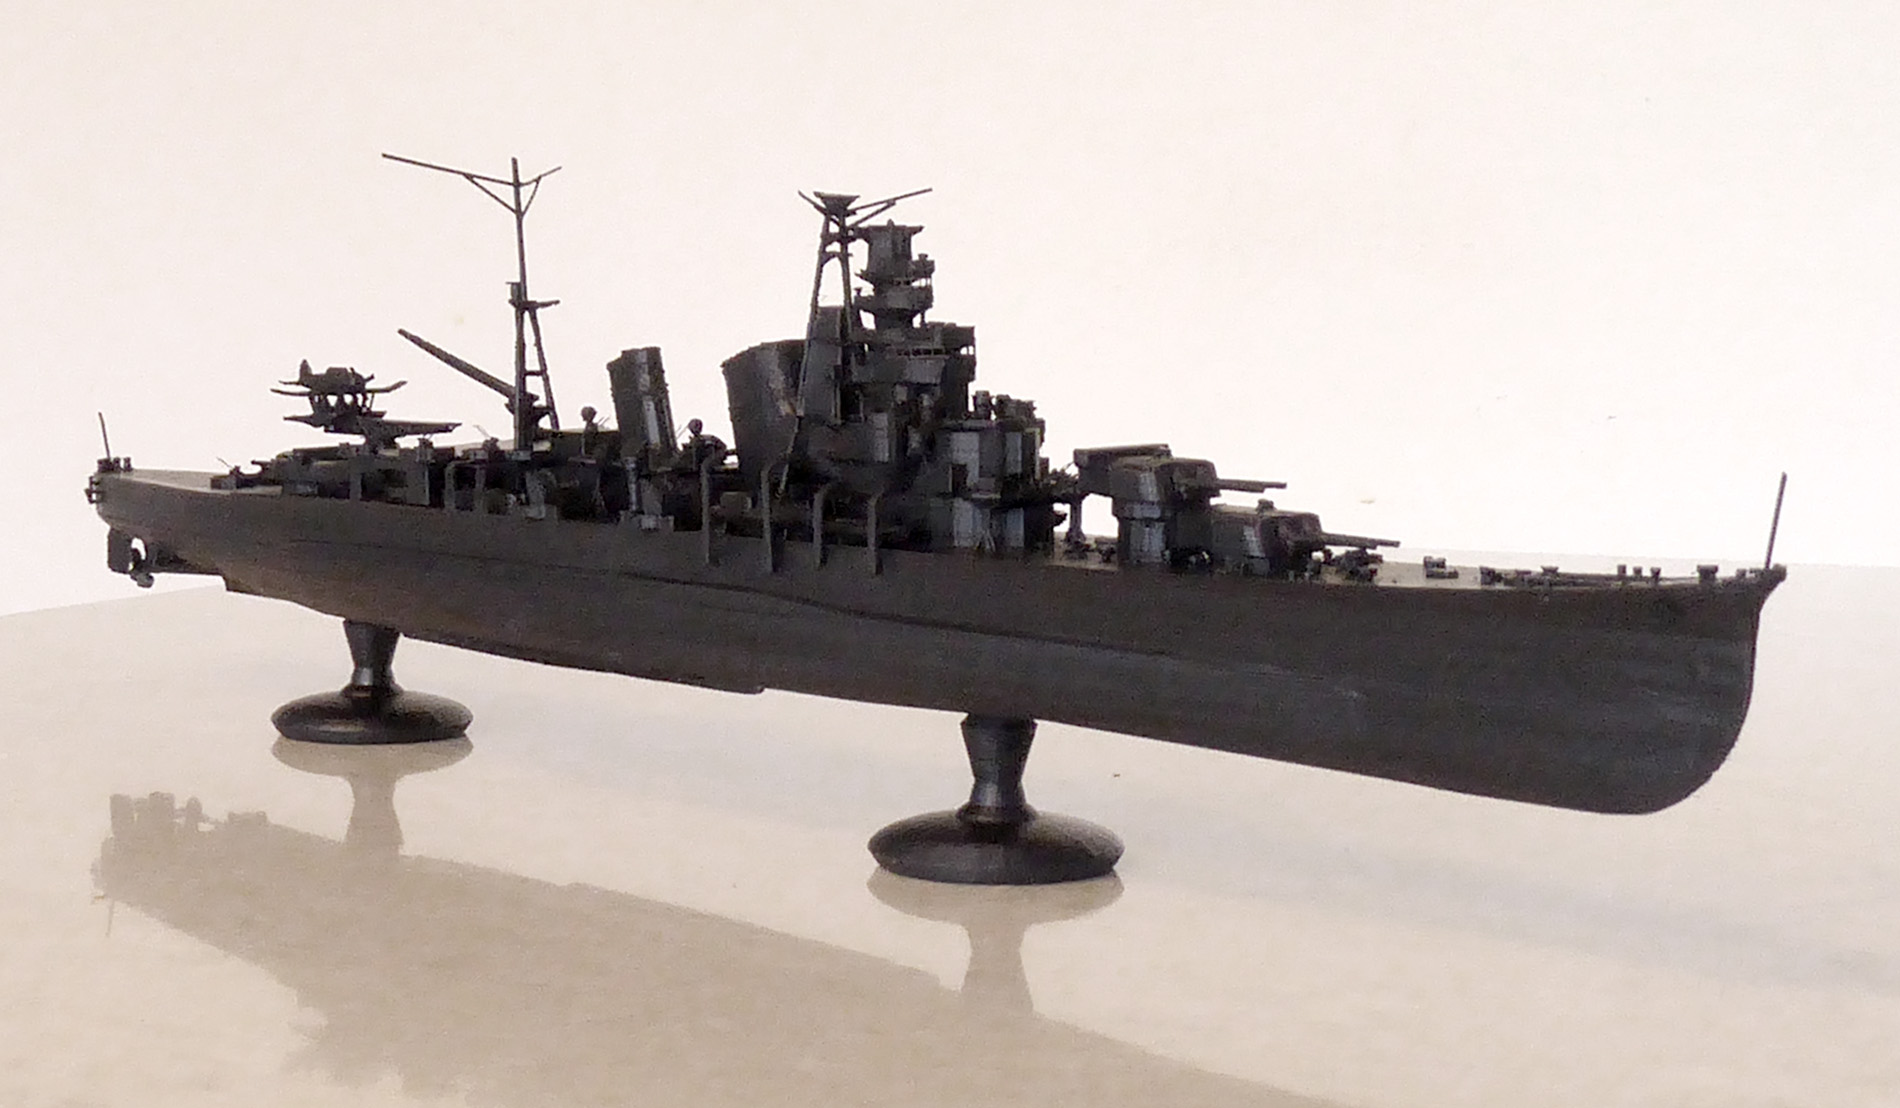
I was very happy with the prints, I tried some new Cura settings and was delighted with the results. They were marked as experimental but seem pretty solid. they are: “Make Overhang Printable” and “Use adaptive layers” I found that I could forgo scaffolding if I didn’t get overly ambitious with unsupported overhangs. This is a game changer for me, as I’ve ruined many a printed object trying to remove supports. With these settings I was able to reduce the breakdown of complex objects. Check out the bridge and aft crane tower in the first two pictures, no supports were needed and they came out better than they would have had supports been used. More importantly, I didn’t destroy the delicate parts trying to remove their supports.
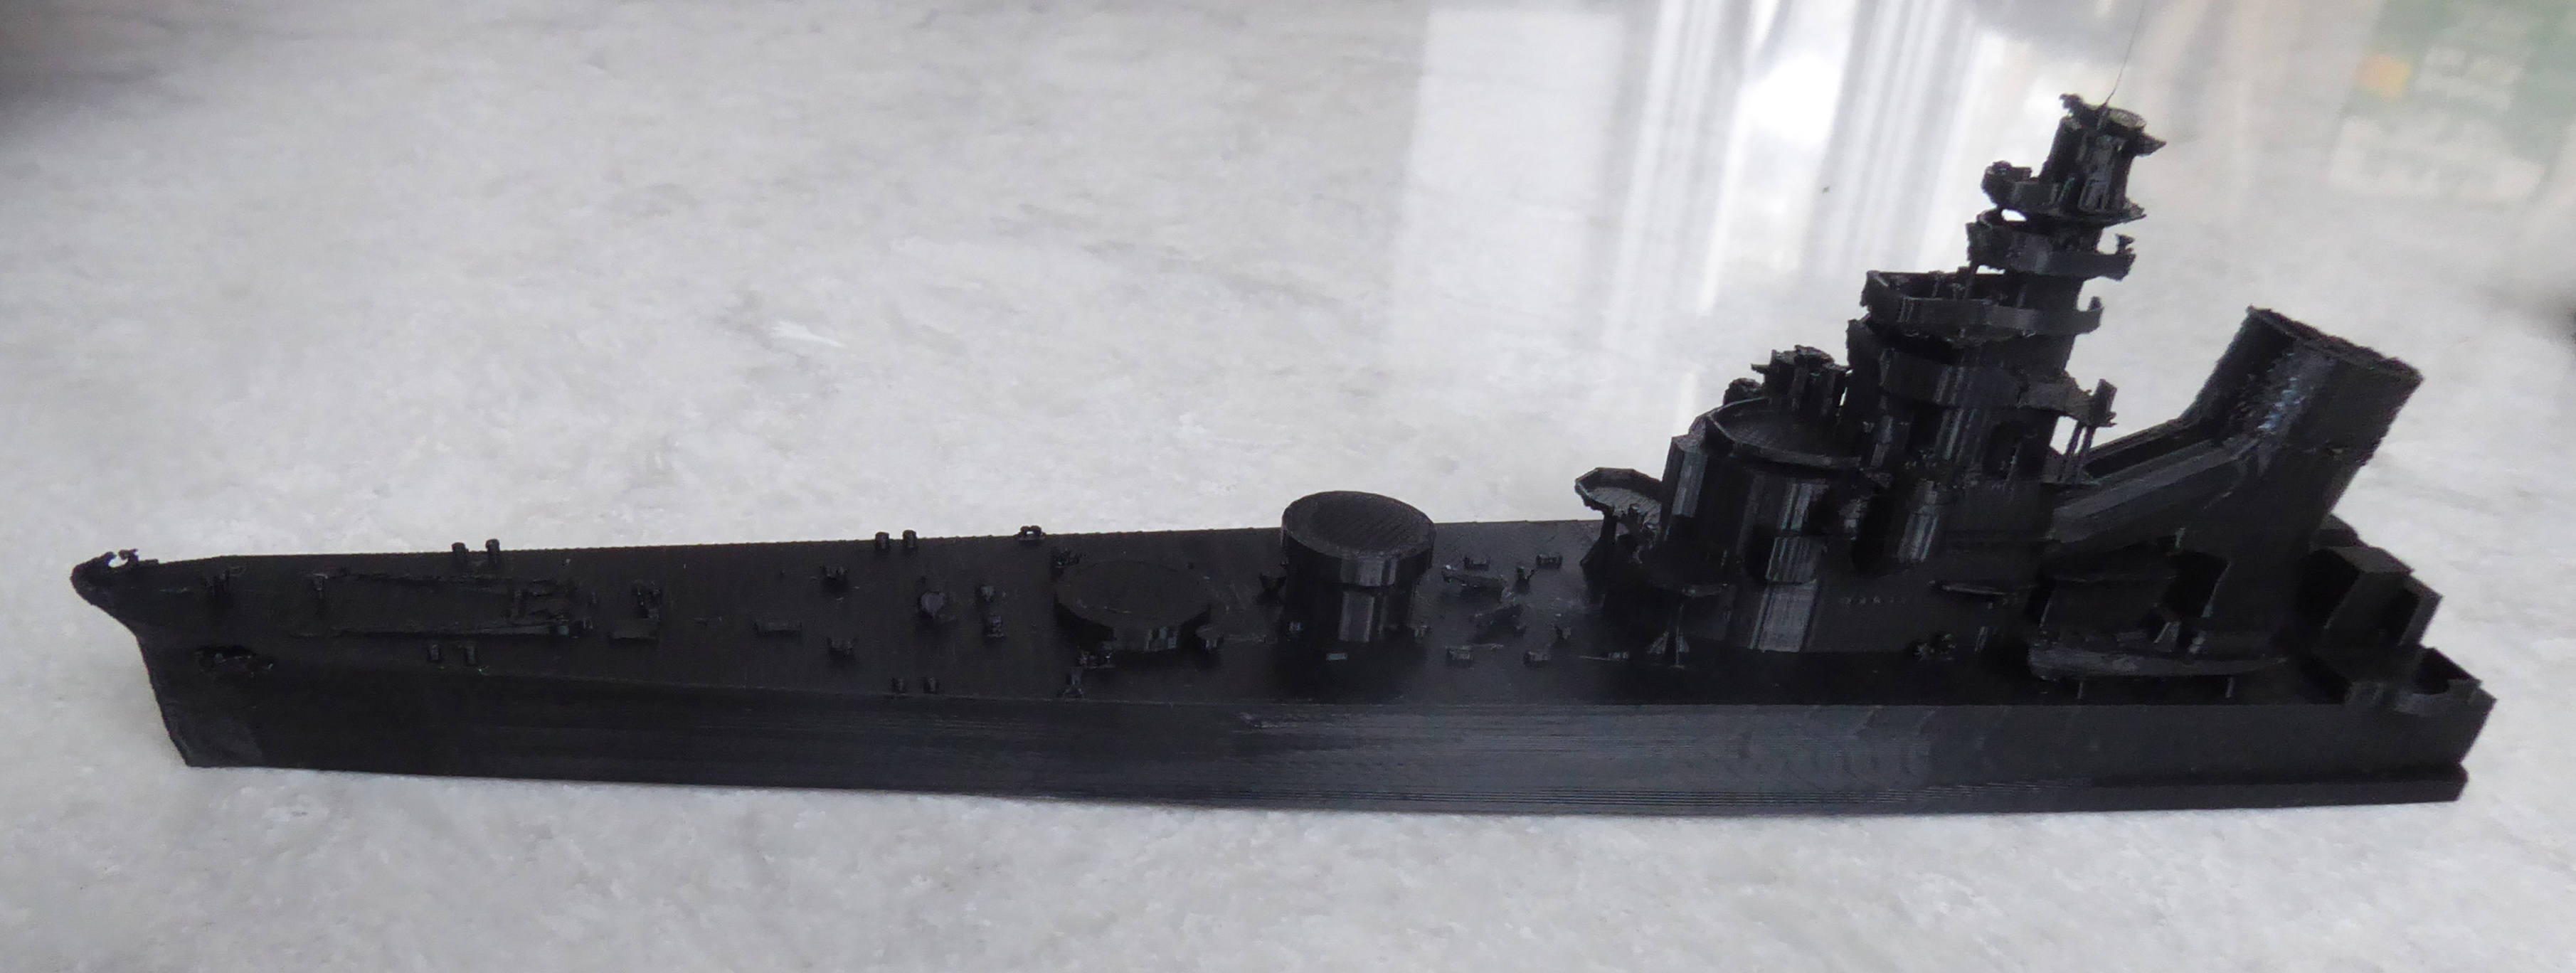
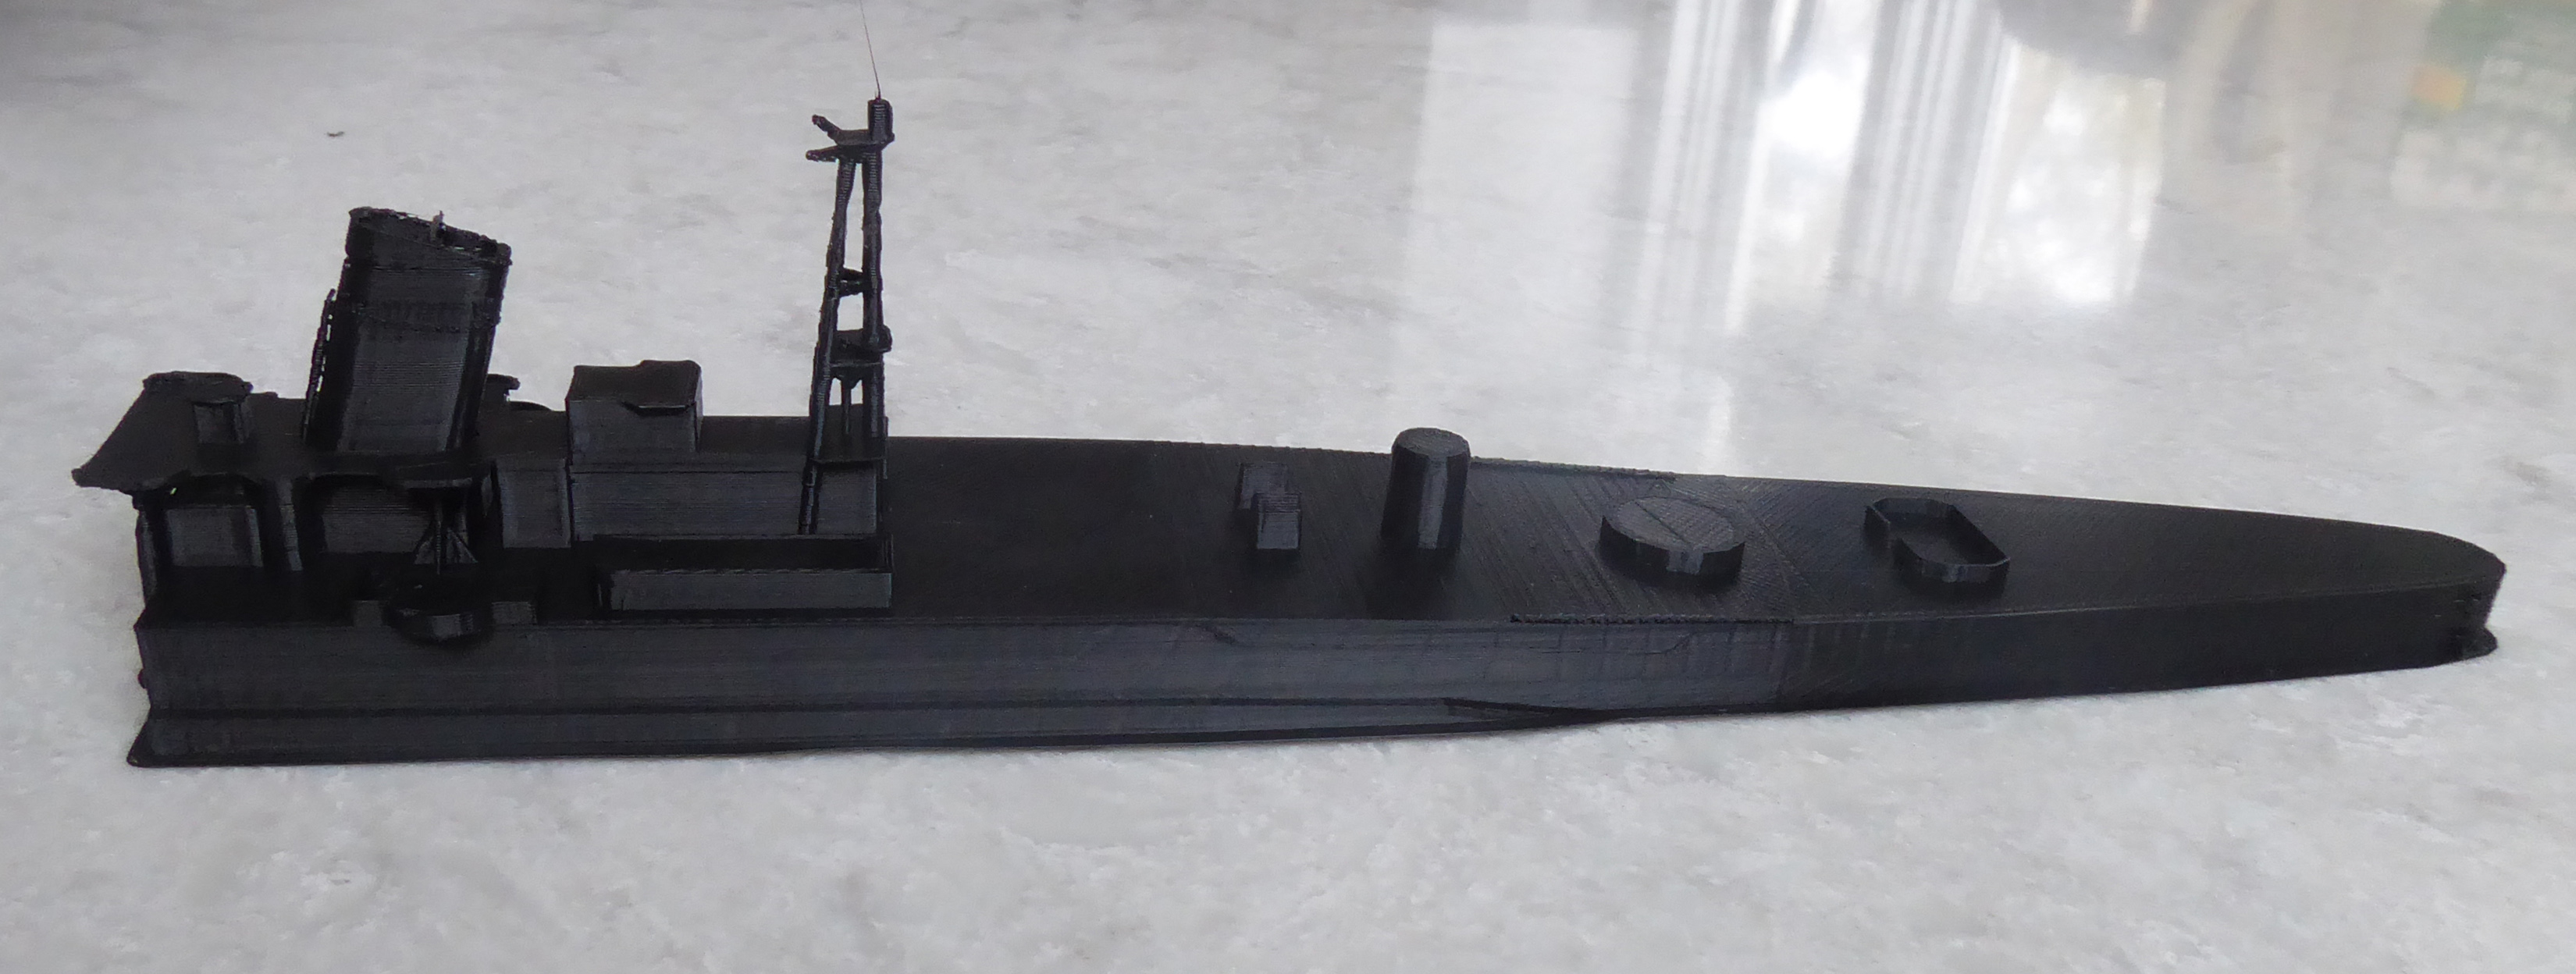
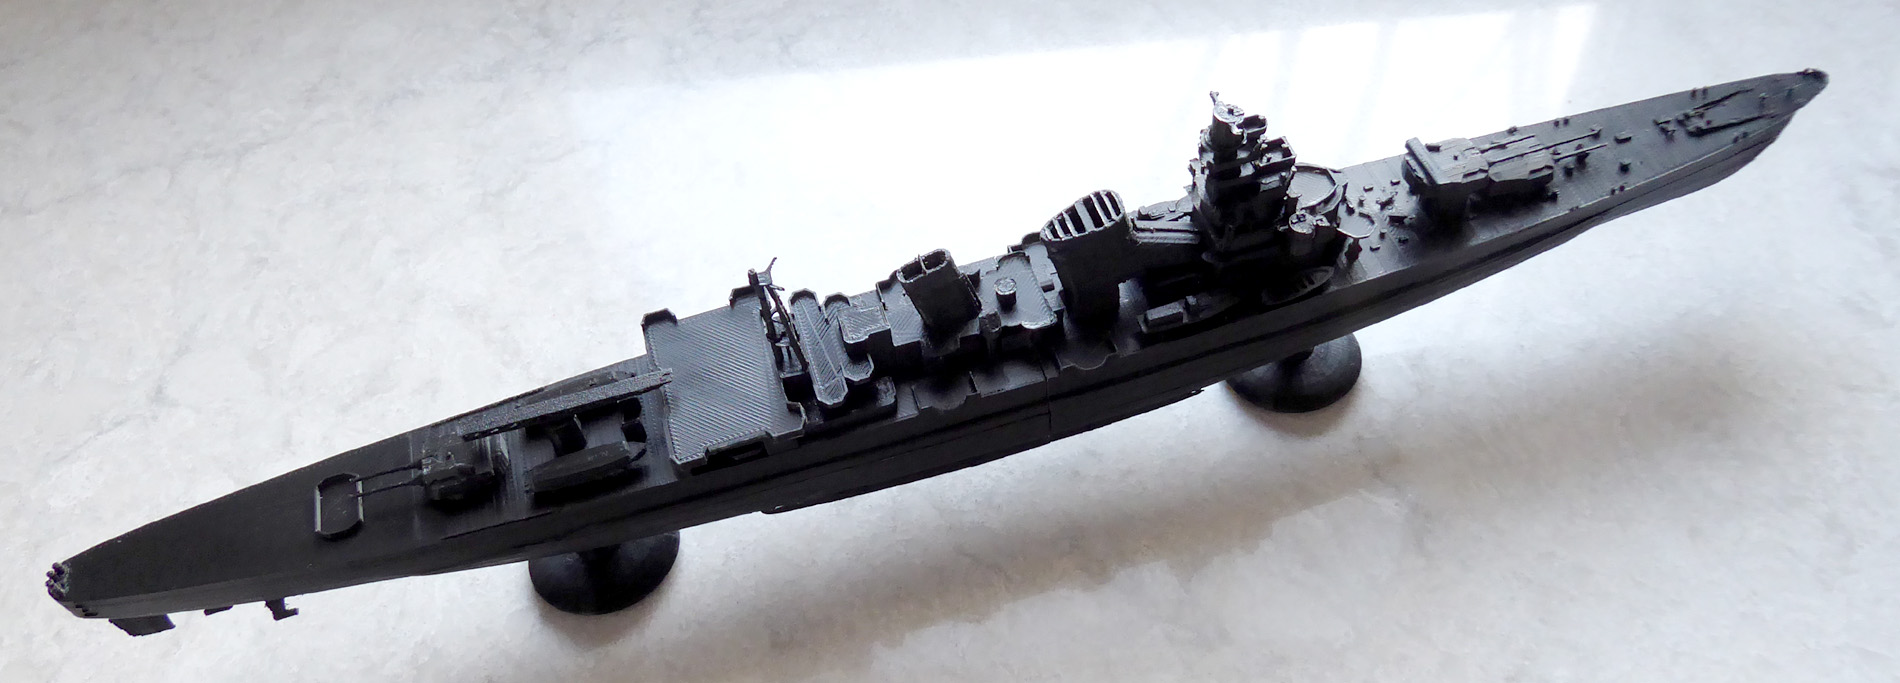
Main hull prints and initial assemblies
When Luck Isn’t
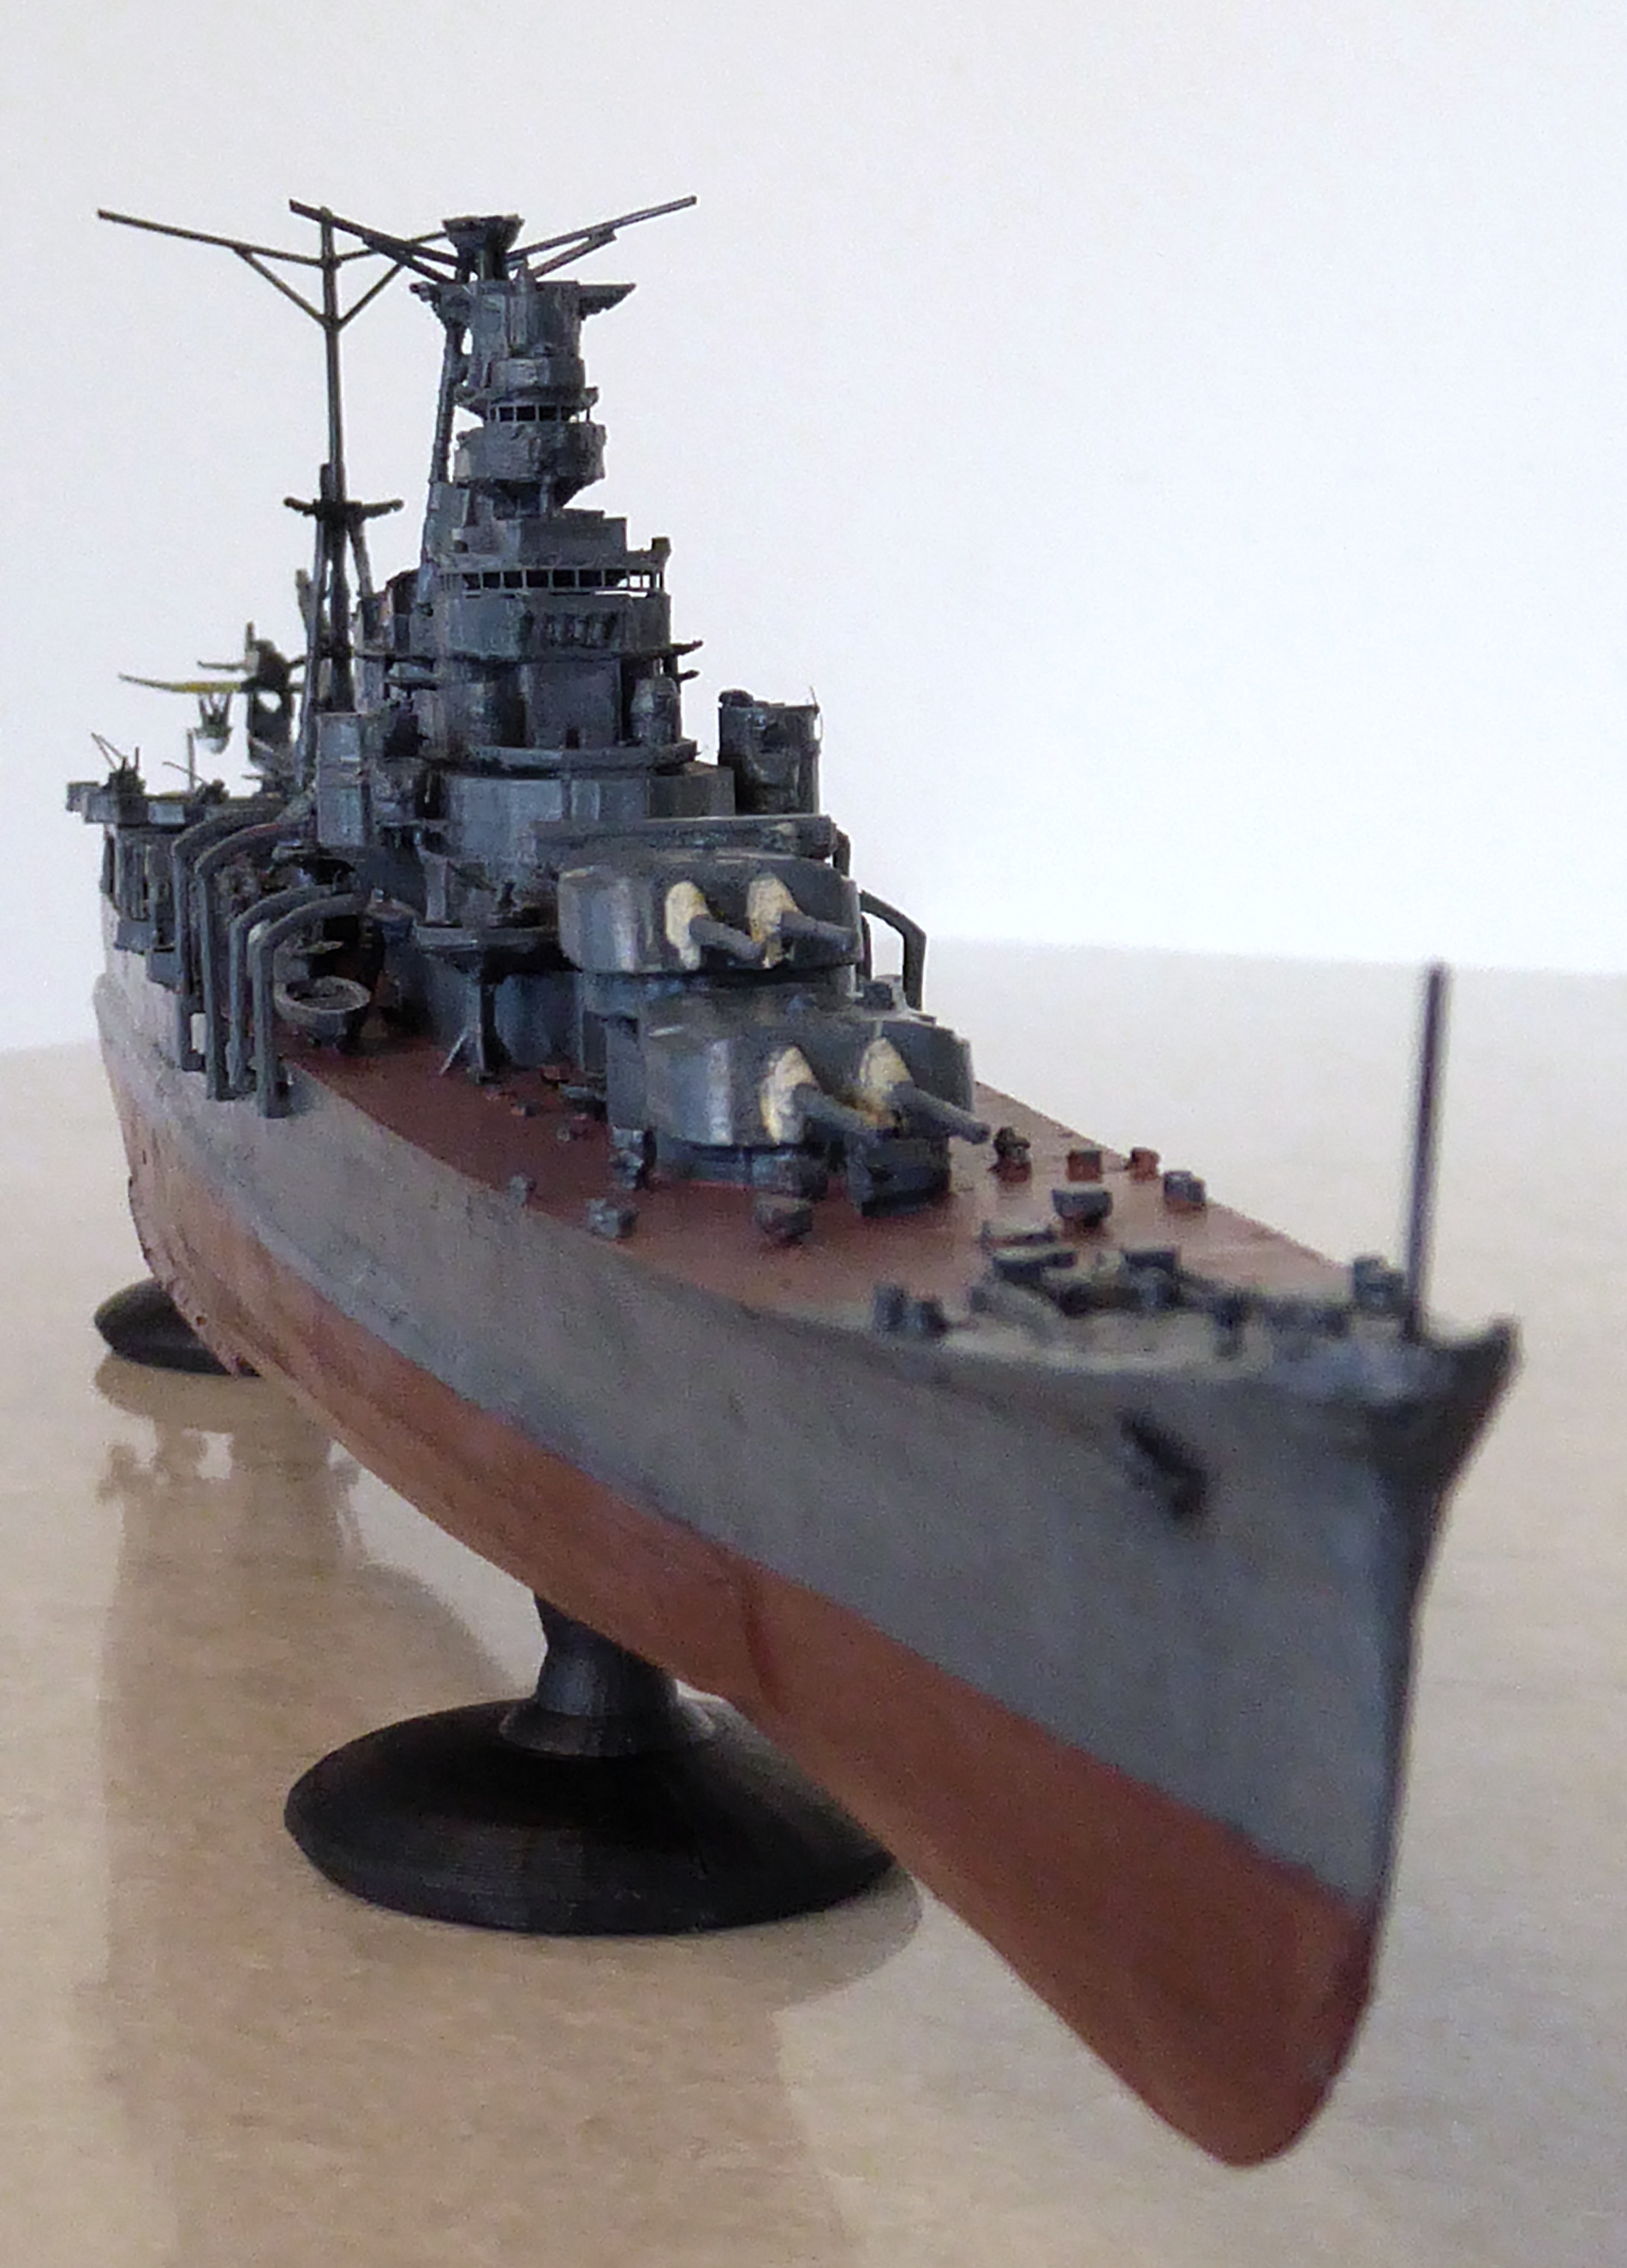
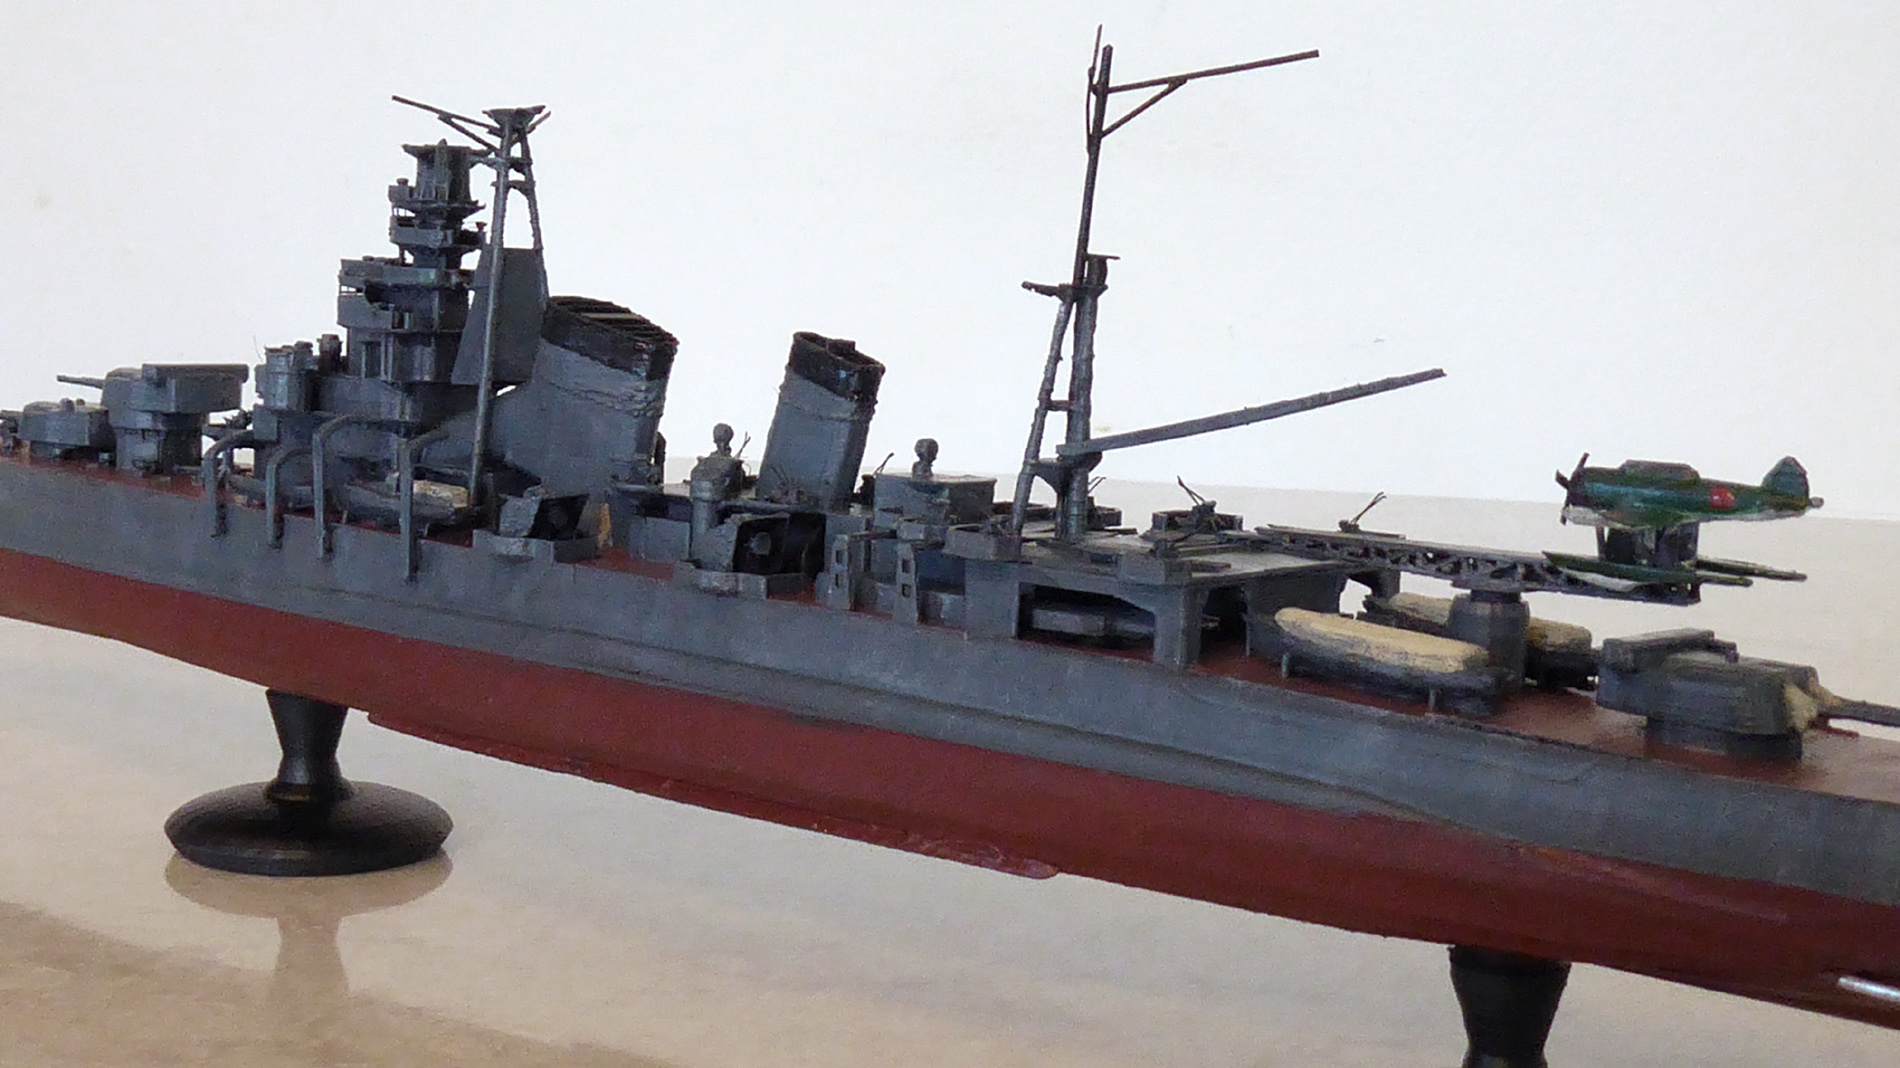
My COVID diversion was going great, then I made an error that robbed me of probably having my best build yet. I used a can of flat black Krylon paint + primer for my base coat. It was the only can of flat black I had lying about and I thought myself lucky to find it. Wrong again.
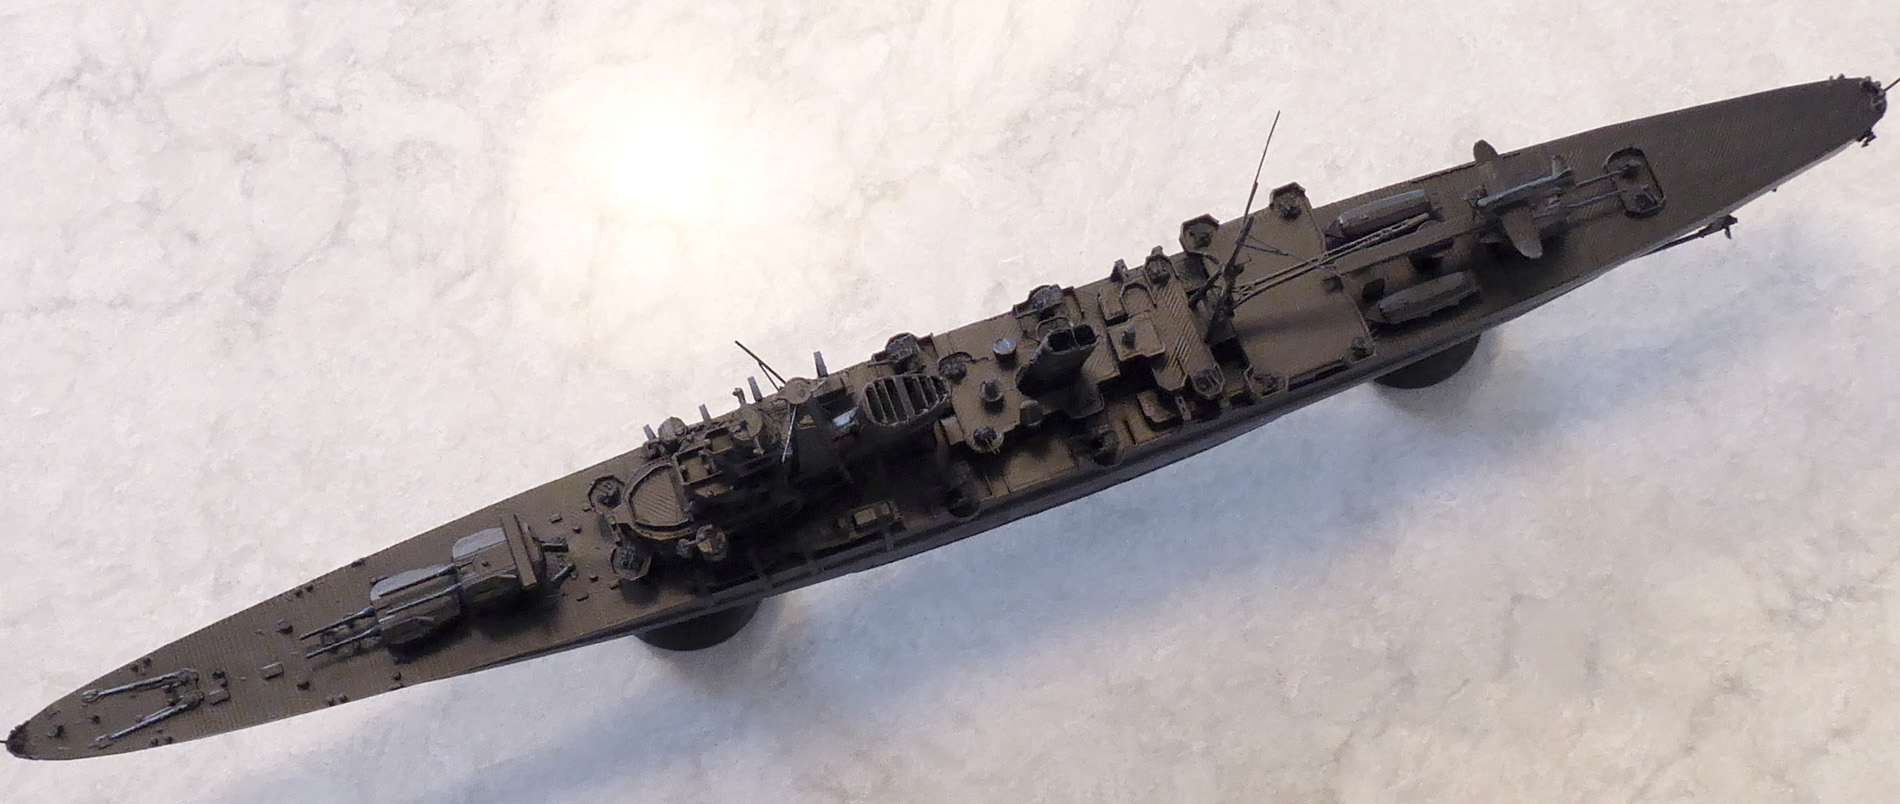

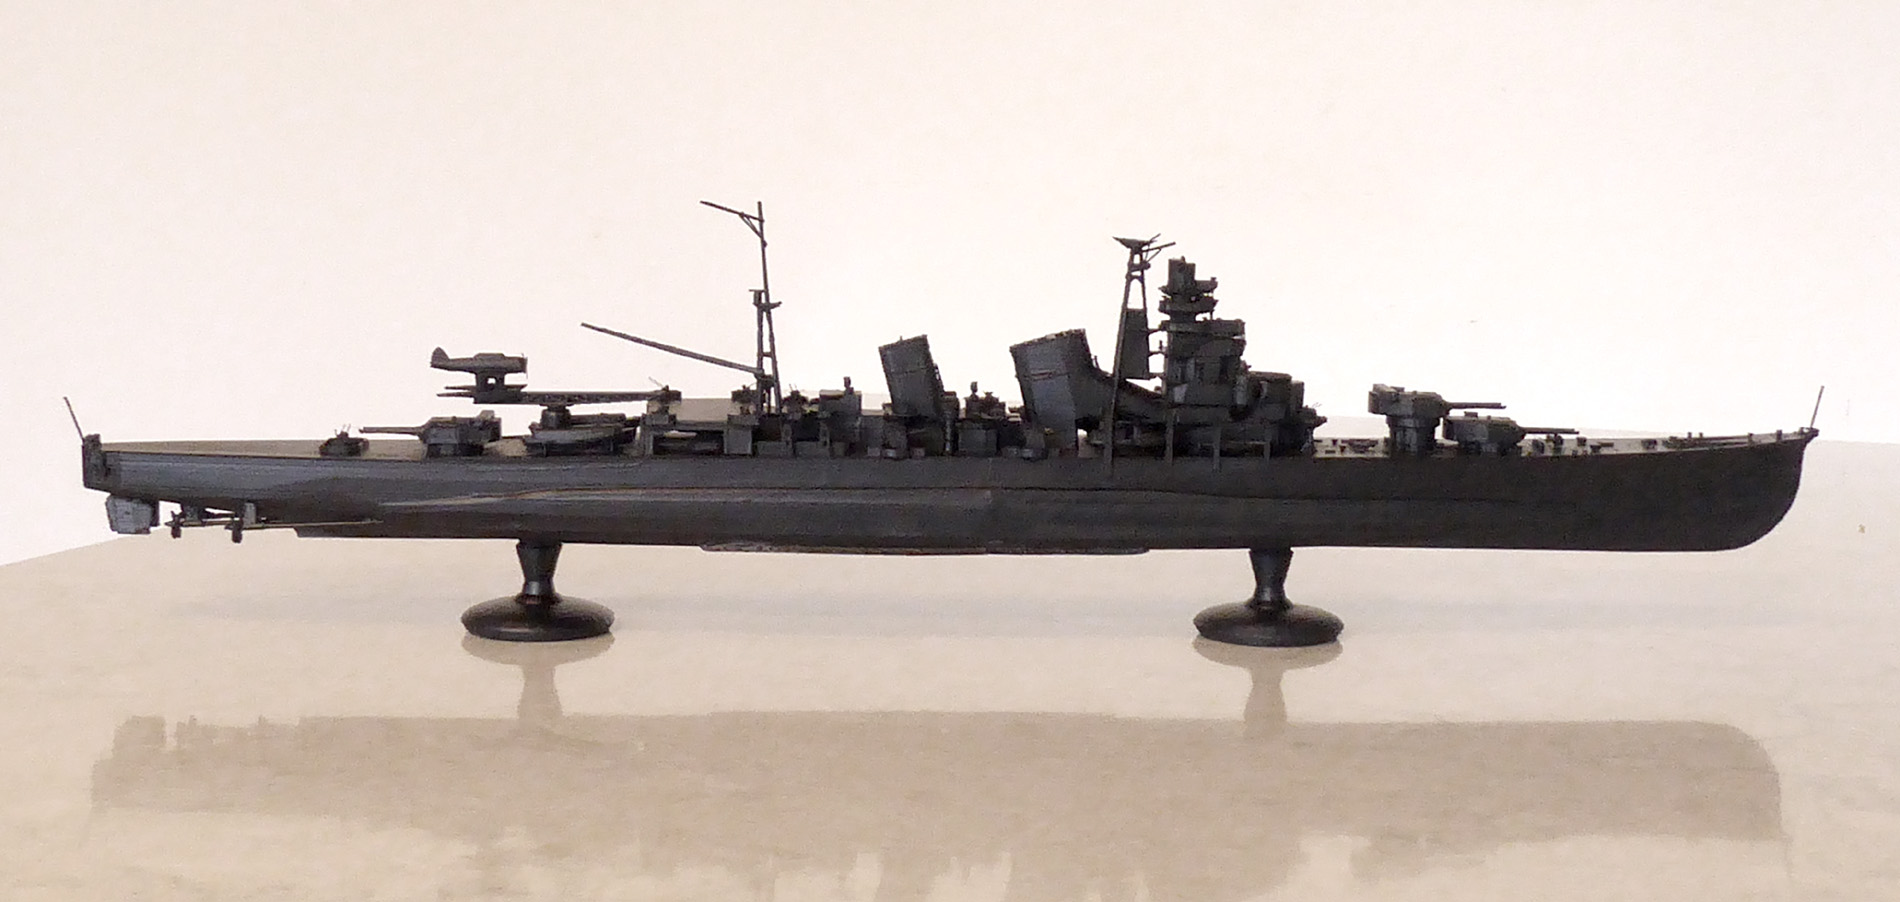
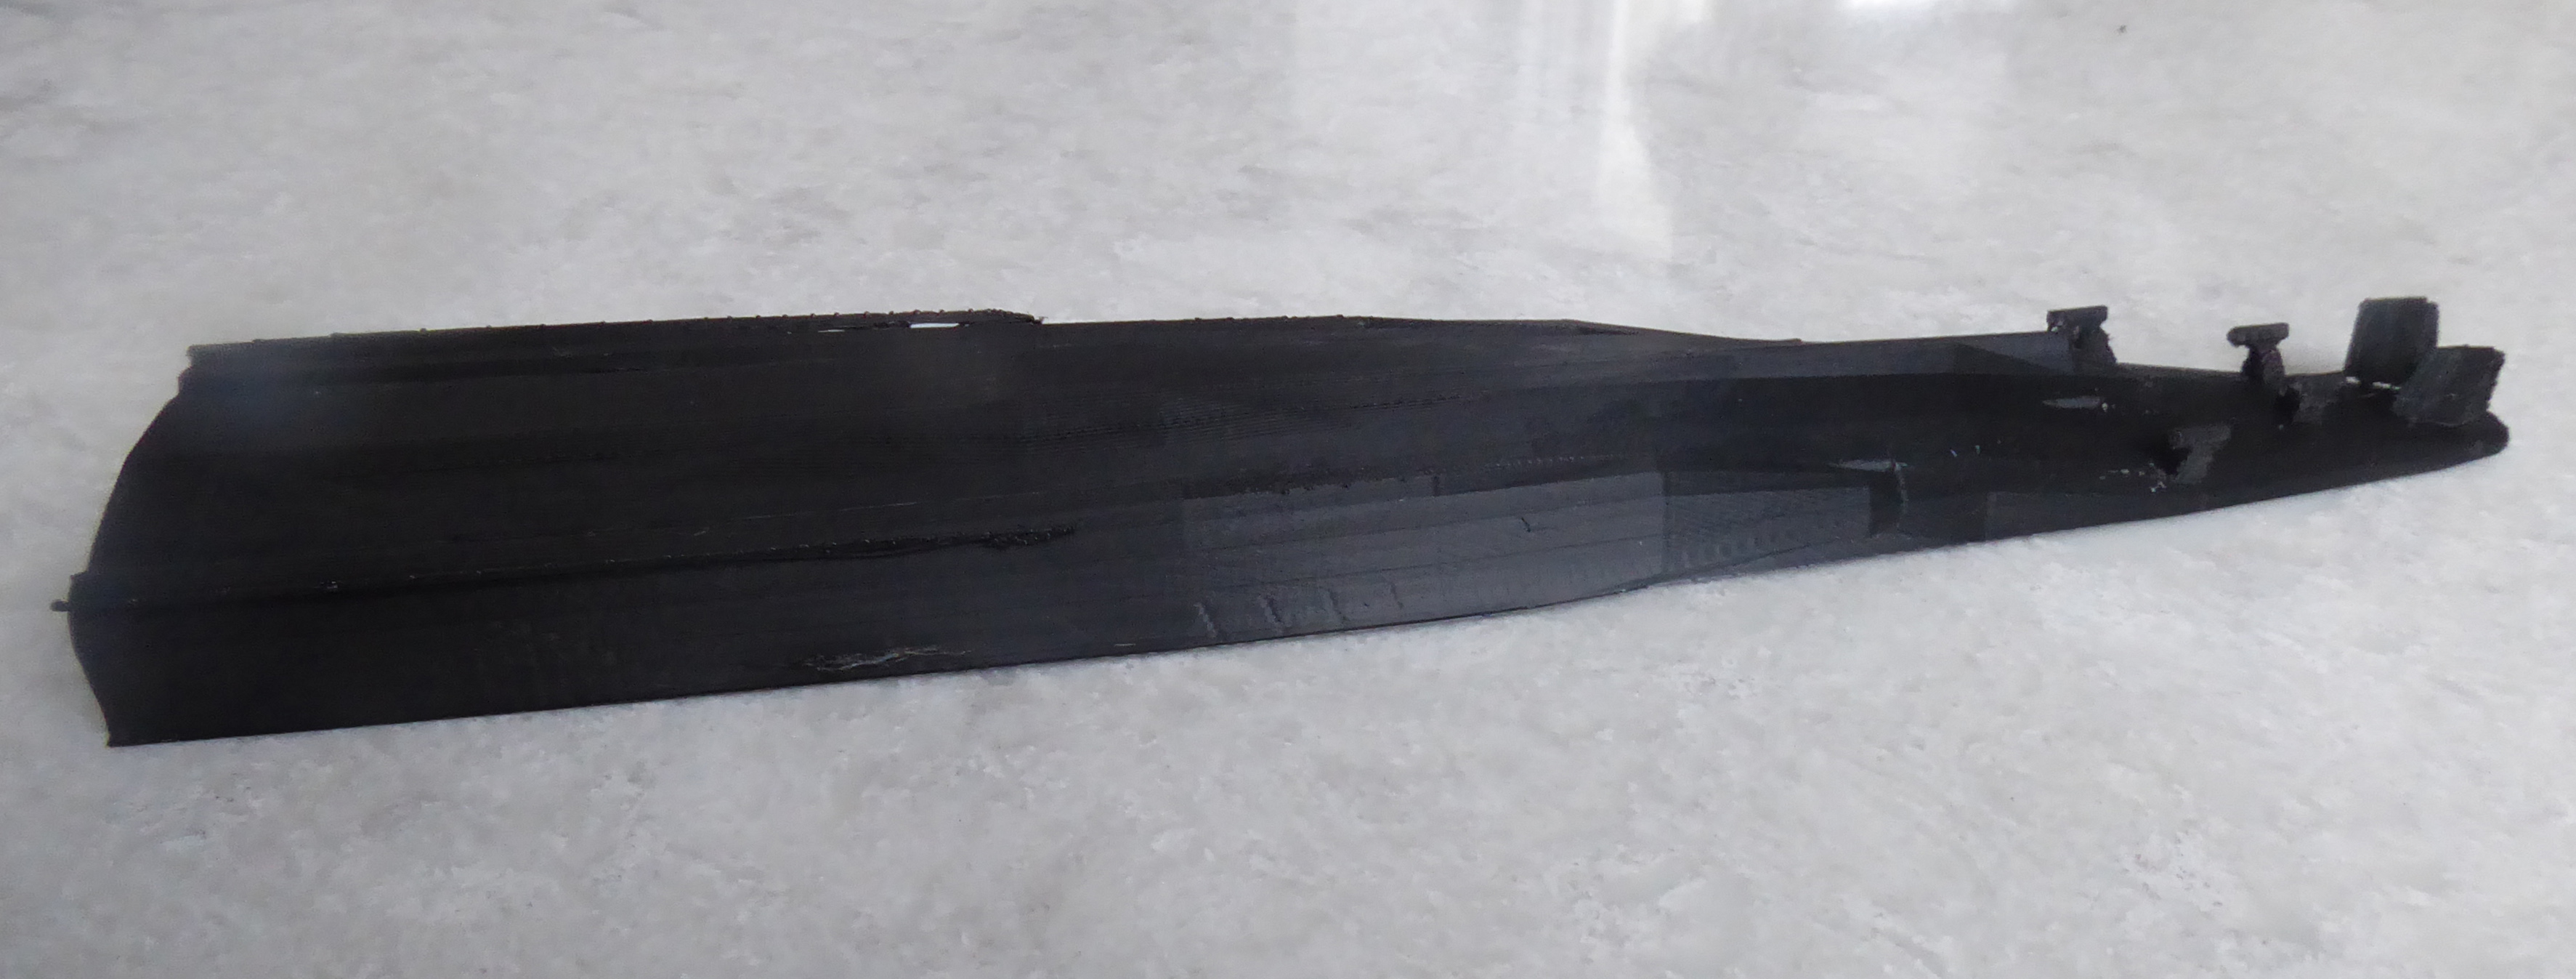
Fully assembled and “primed”
Turns out paint + primer isn’t the same as primer. I noticed that the model was tacky to the touch the day after priming. I figured I’d given it a good thick coat, so the alarms weren’t really going off yet. I painted the lower hull red next. This went pretty well though, I did notice the continued tackiness of my “primer” coat. Still the red came out well and I called it a day. Next I wanted to get the majority of the ship coated, I figured everything should be solid by now. Nope.
More Woe
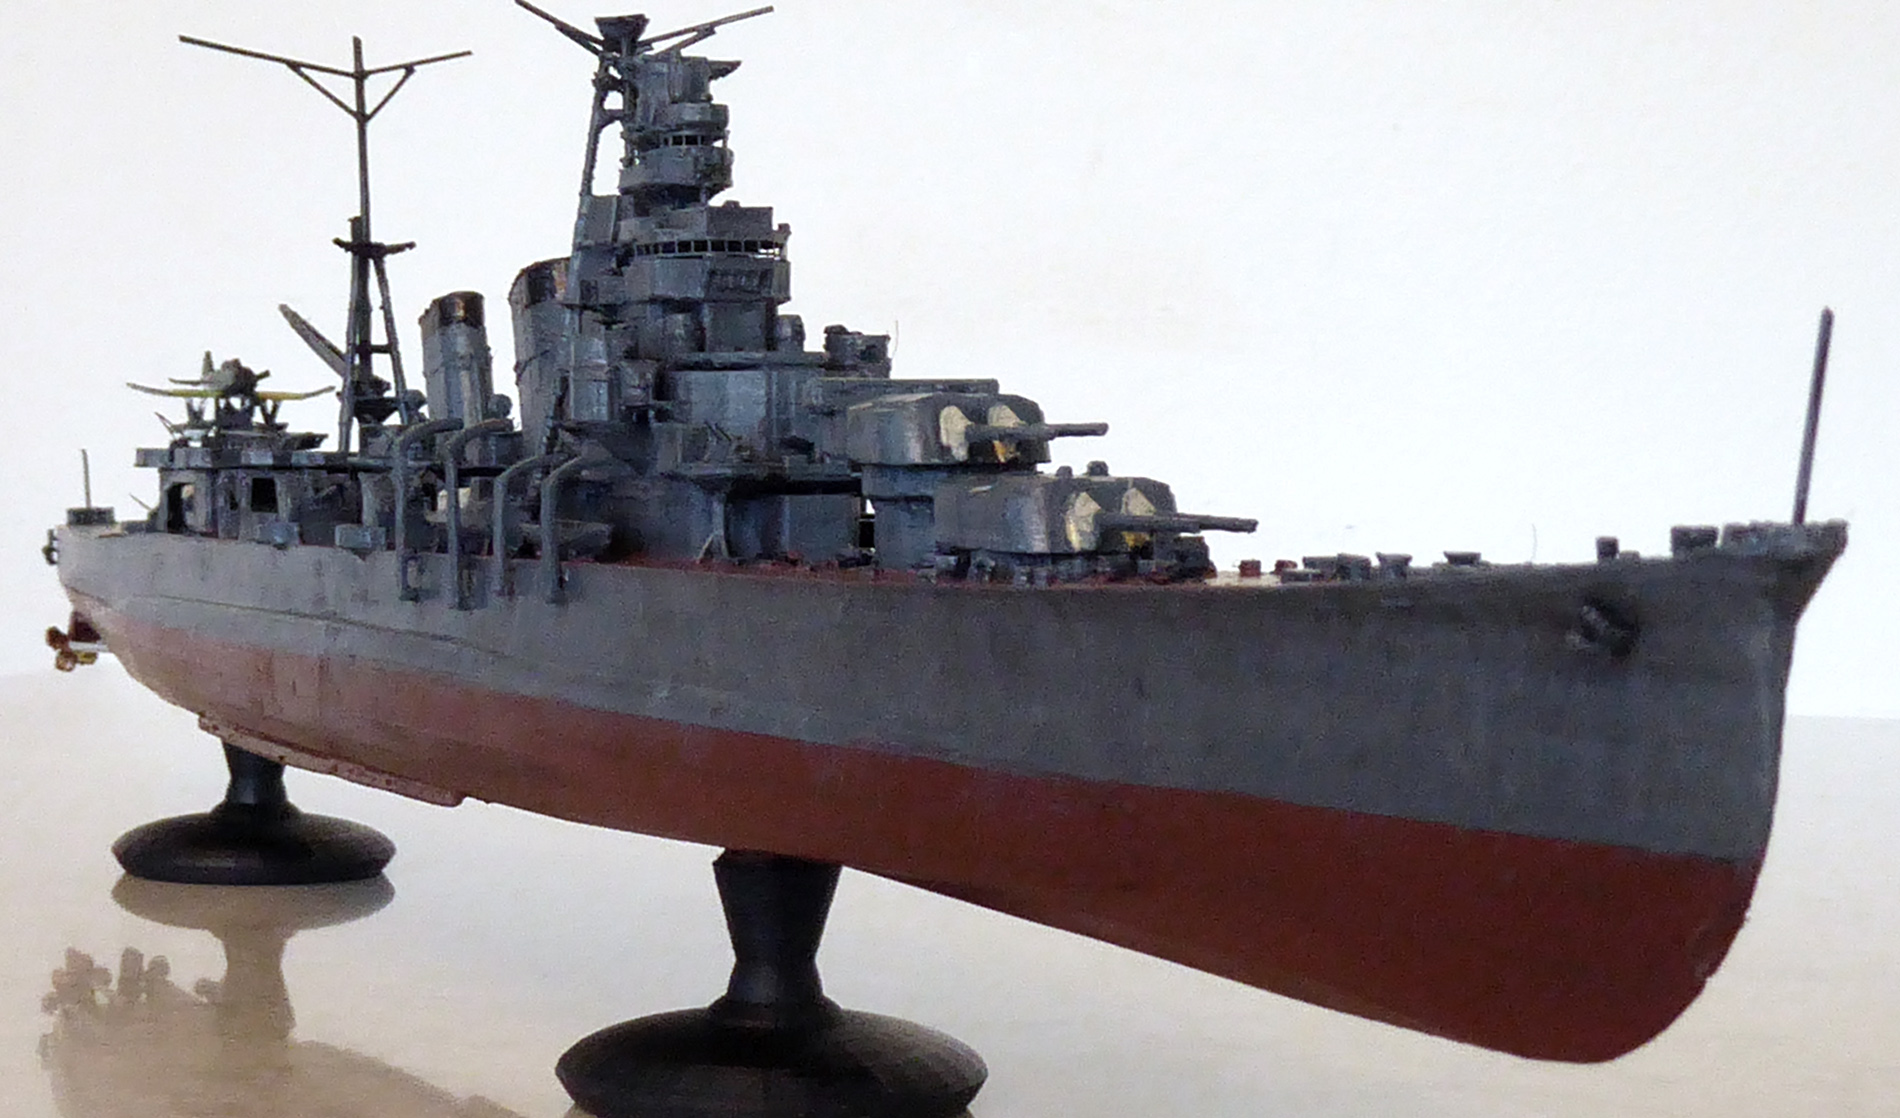
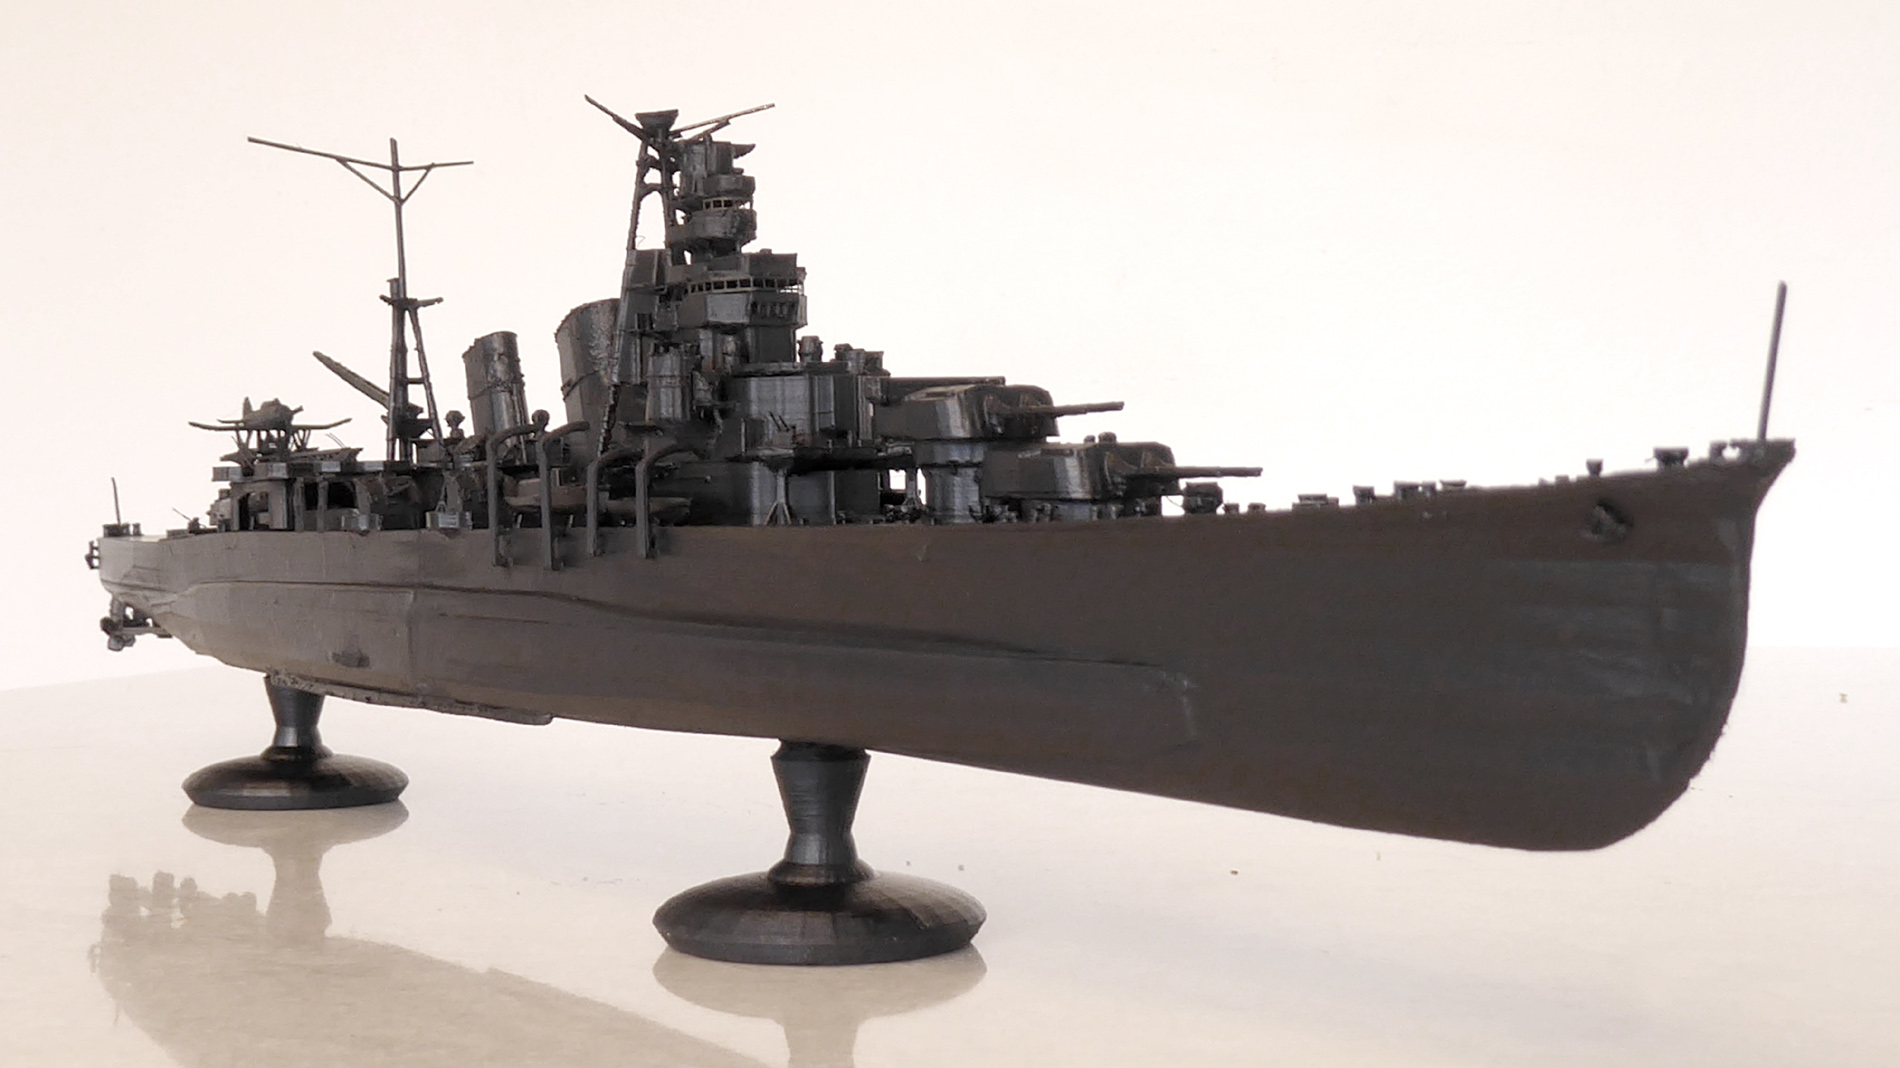
As I was taping off the lower hull in order to get a nice crisp border between the lower hull red and the upper colors I notice things were still just a tad tacky. Mildly concerned I forged ahead, the upper hull coat went on fast and pretty easy too. I let this dry for an hour or so then started on the superstructure holding the model by the hull while doing so. Damn, the stupid thing was sticky! As I continued to work, I noticed fingerprint marks starting to appear on the hull… even worse I started to suspect that as I worked and reworked a section of the superstructure that the color I was applying was getting darker. Apparently dissolving the black Krylon “primer” coat and blending. Not only that but the “primer” coat had a glossiness to it that I wasn’t happy about and as it dissolved into my finish coat, was making it glossy too.
Epitaph
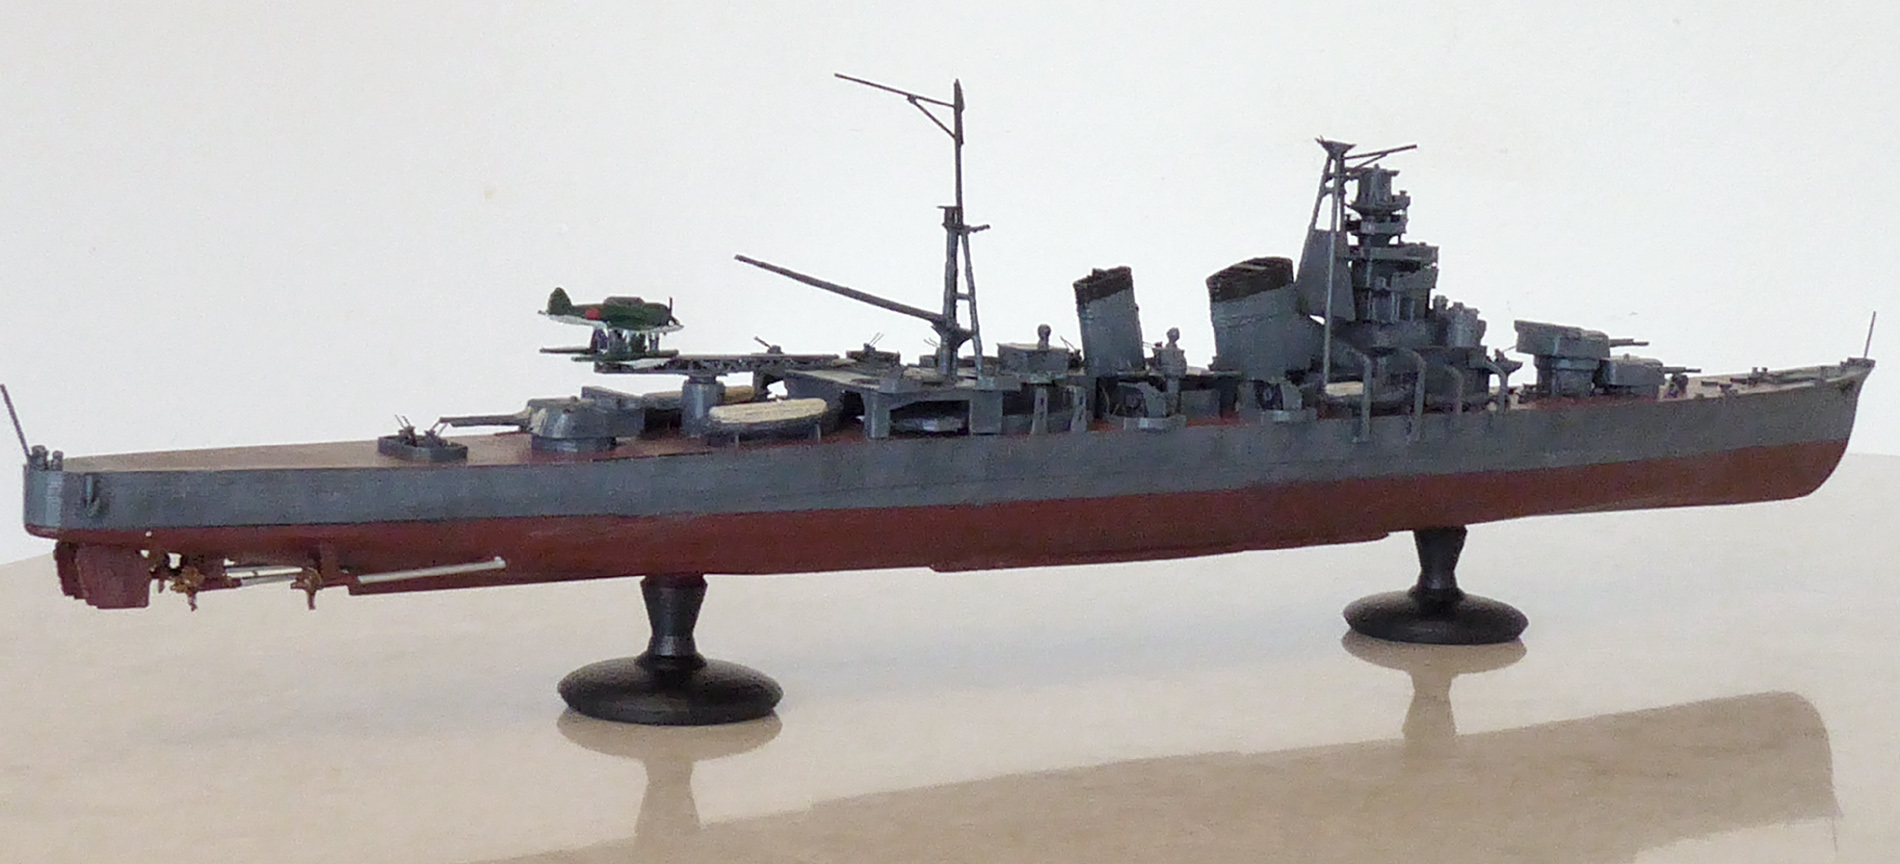
IJN Aoba started out extremely promising, I’d never been happier with an initial print. So, I’d like to say that it all worked out great – but that would be a lie. She came out a bit muddy and glumpy looking. At arms length she’s a looker but up close the truth is less flattering. She is however good enough and I wont be rebuilding her any time soon (probably not anyway…) . In the future I will definitely be more choosy when selecting my primer coat.
Ender 3 pro print example, Ender 3 pro print sample, IJN Aoba, 3D print, 1/450 scale ship model, WW2 ijn cruiser, 3d printed Japanese warship
where do you find the stl for tohse models?
If I don’t build them from scratch I get the base model from Sketchfab.com, usually in obj or blend format. Then add or remove detail as desired or needed and slice them up to make them suitable for printing.
There are plenty of 3d object sites out there but I find sketchfab is one of the least sketchy :). Sketchfab also has incredible variety and a surprisingly large selection of free to download models and many reasonably priced ones too.