5/3/2020 My version of the Worlds Only Surviving WWI Dreadnought USS Texas is complete. Visit her project page to view her updated pictures and see what Creality’s Ender 3 Pro and LD-002r 3D printers can do.
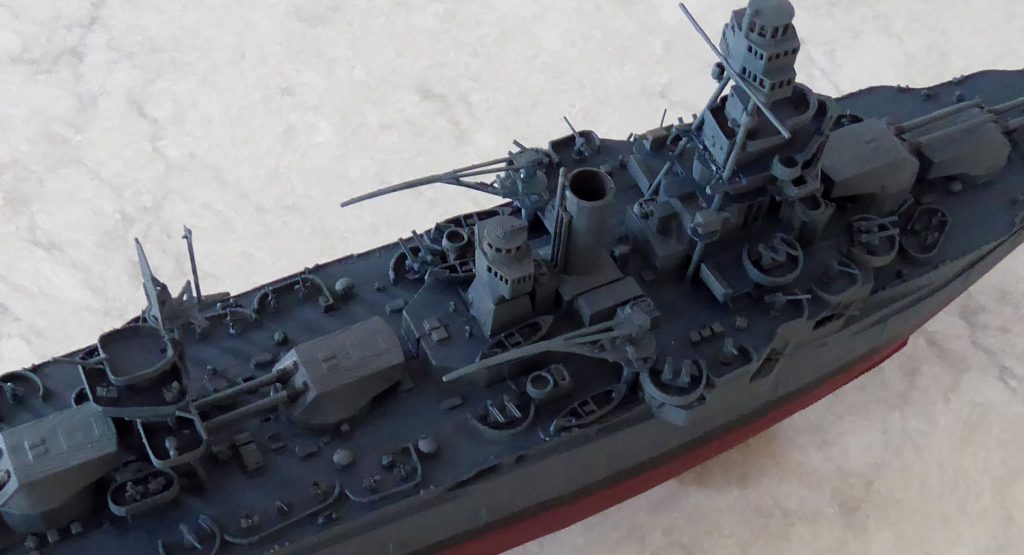
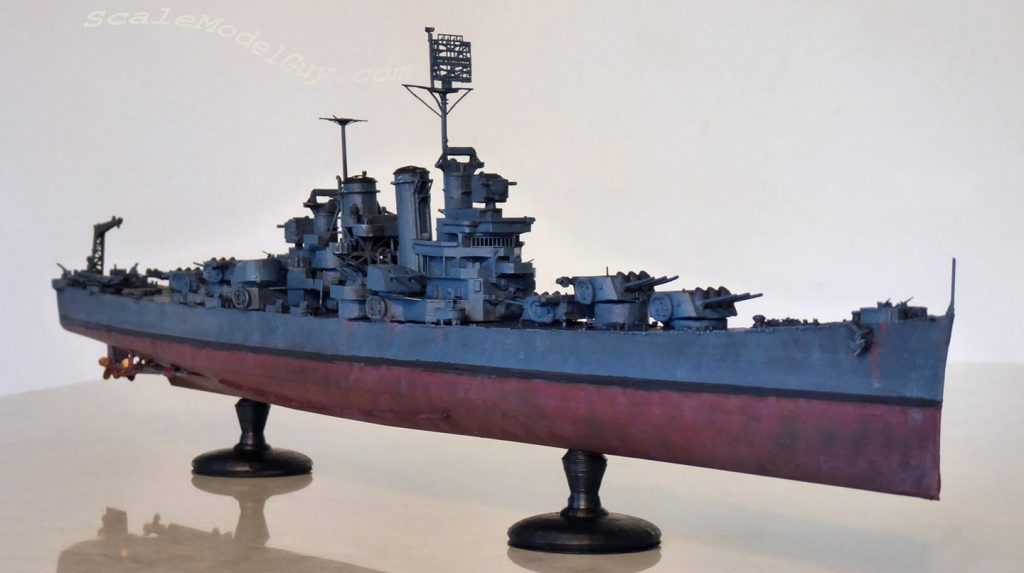
American WW2 Battleship USS Texas 3D printed in 1/450 scale using Creality: Ender 3 Pro and LD-002r printers
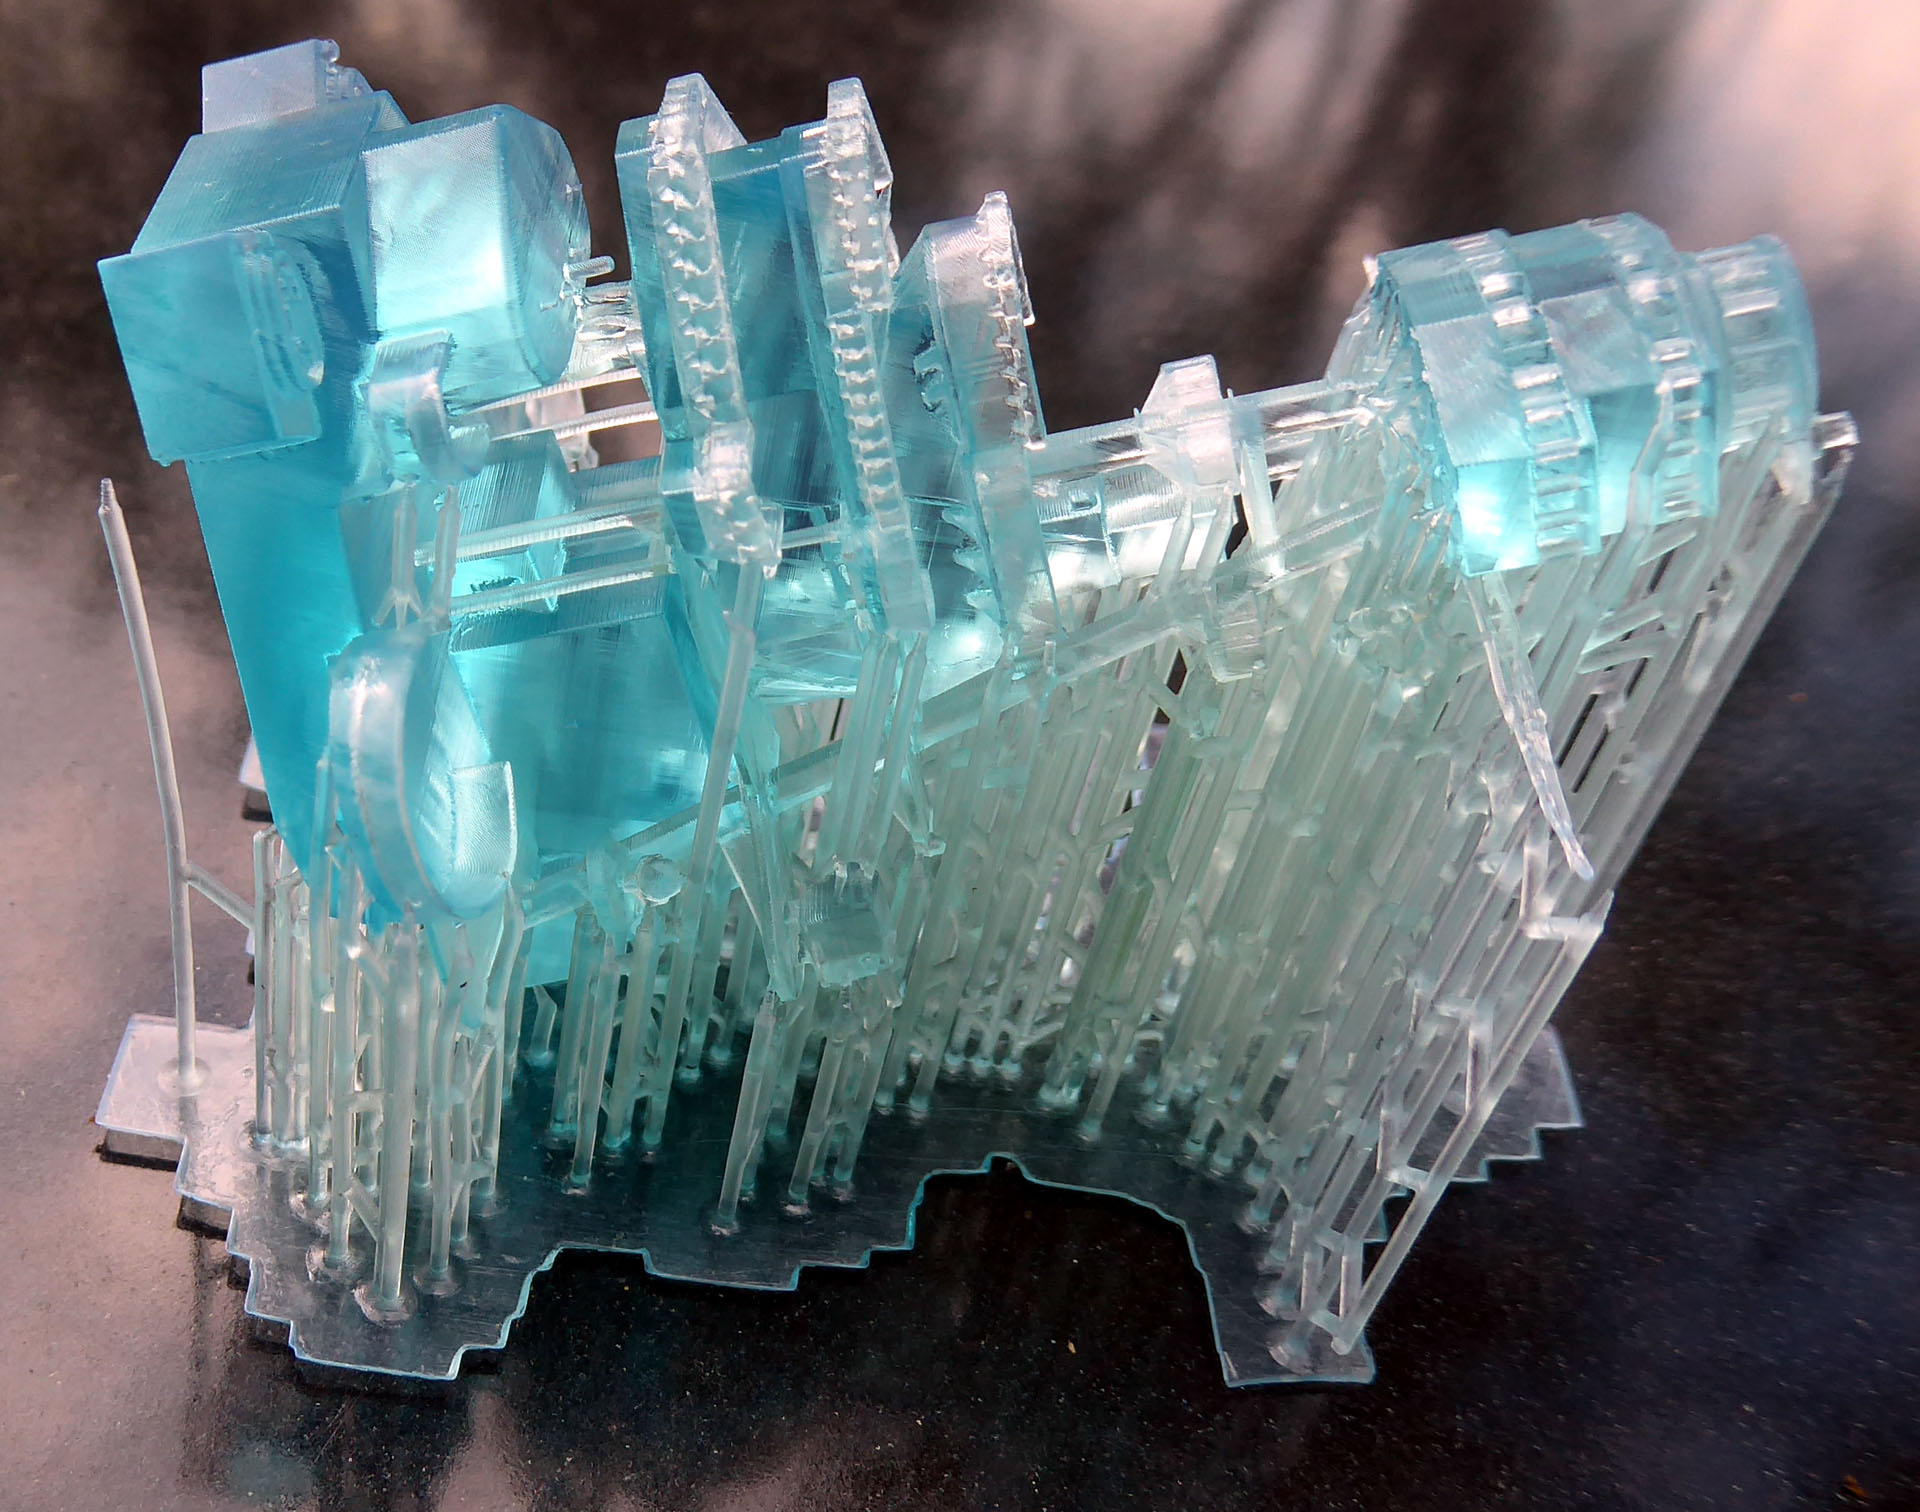
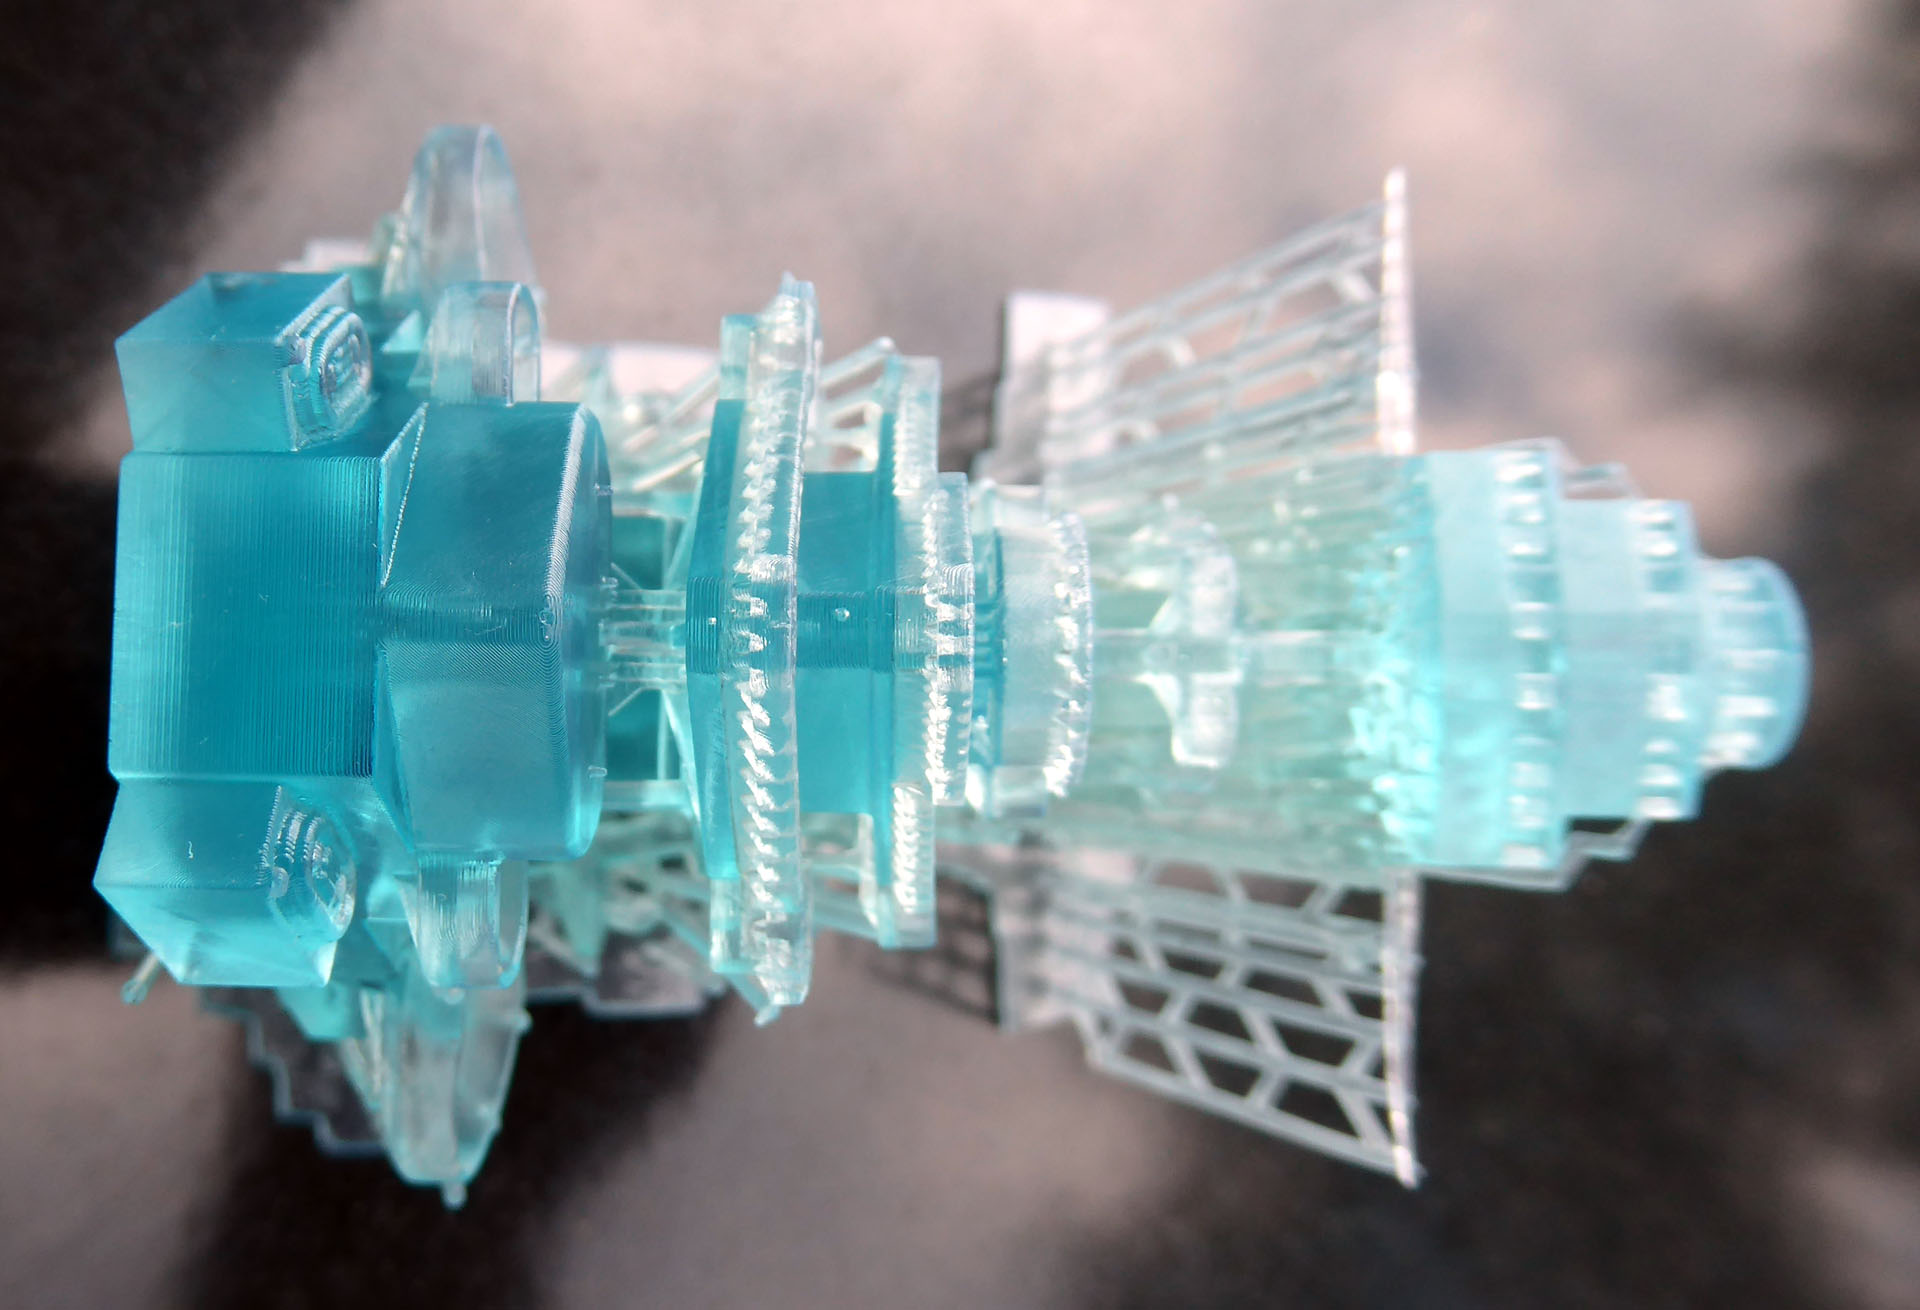
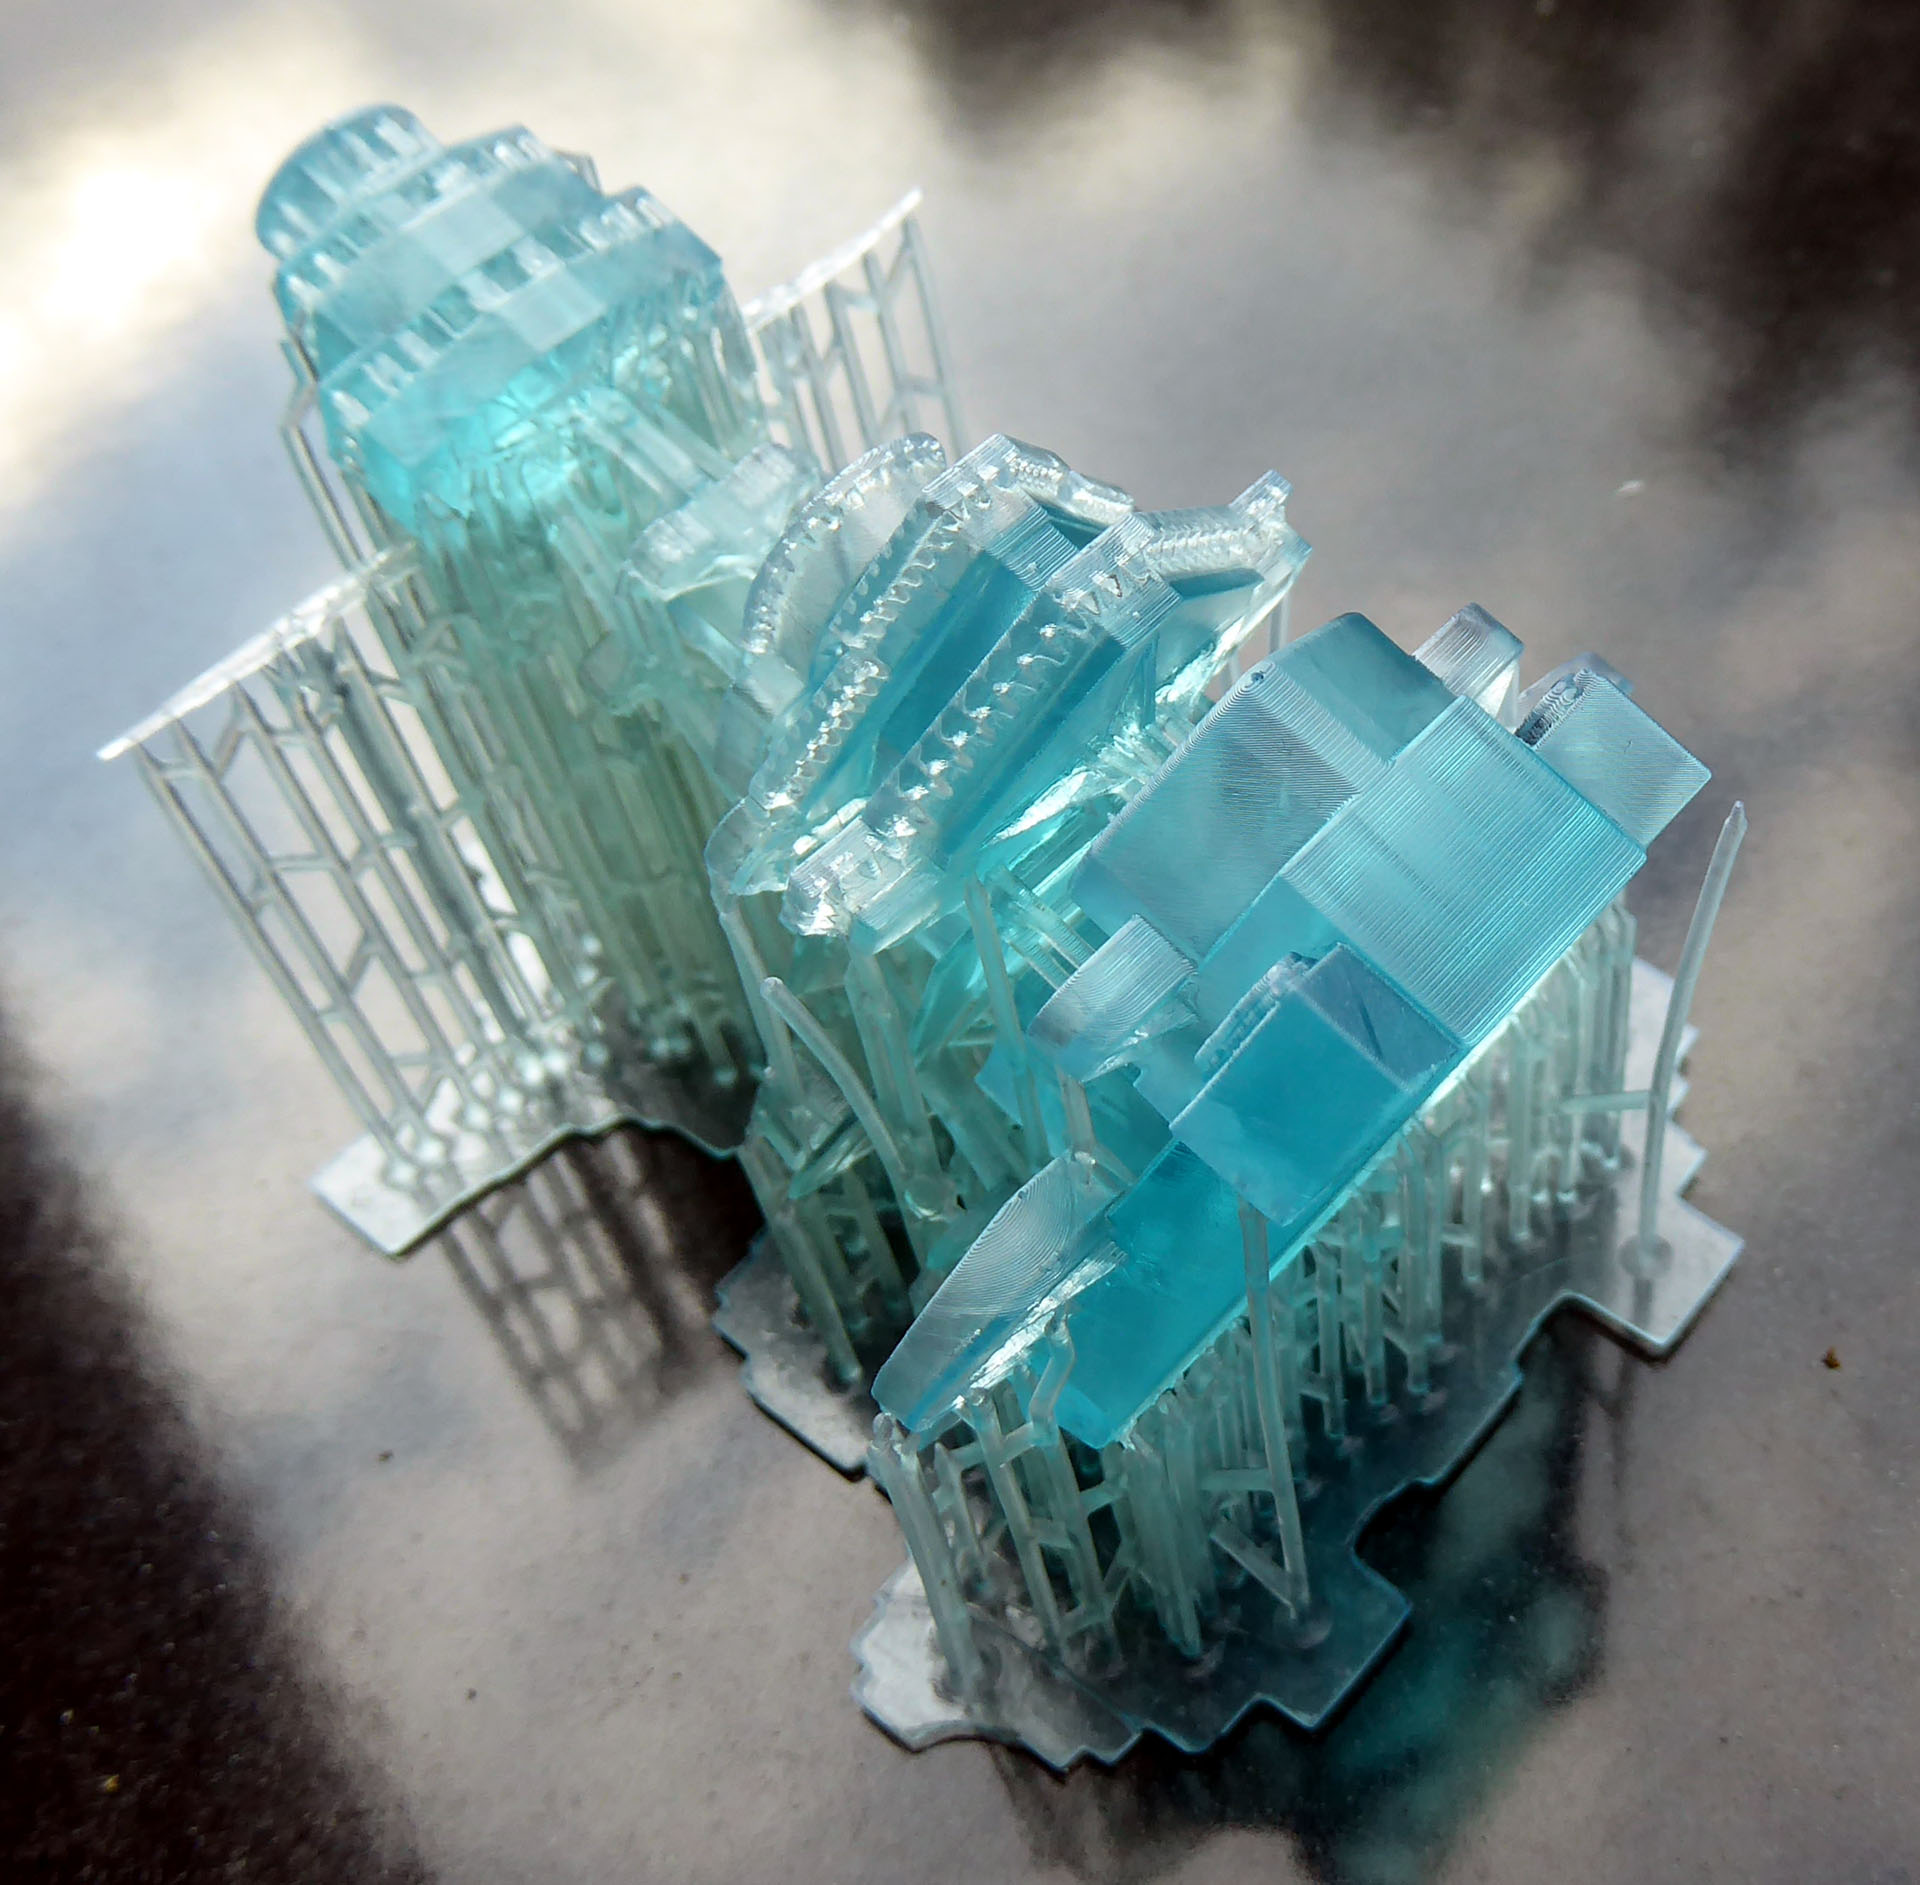
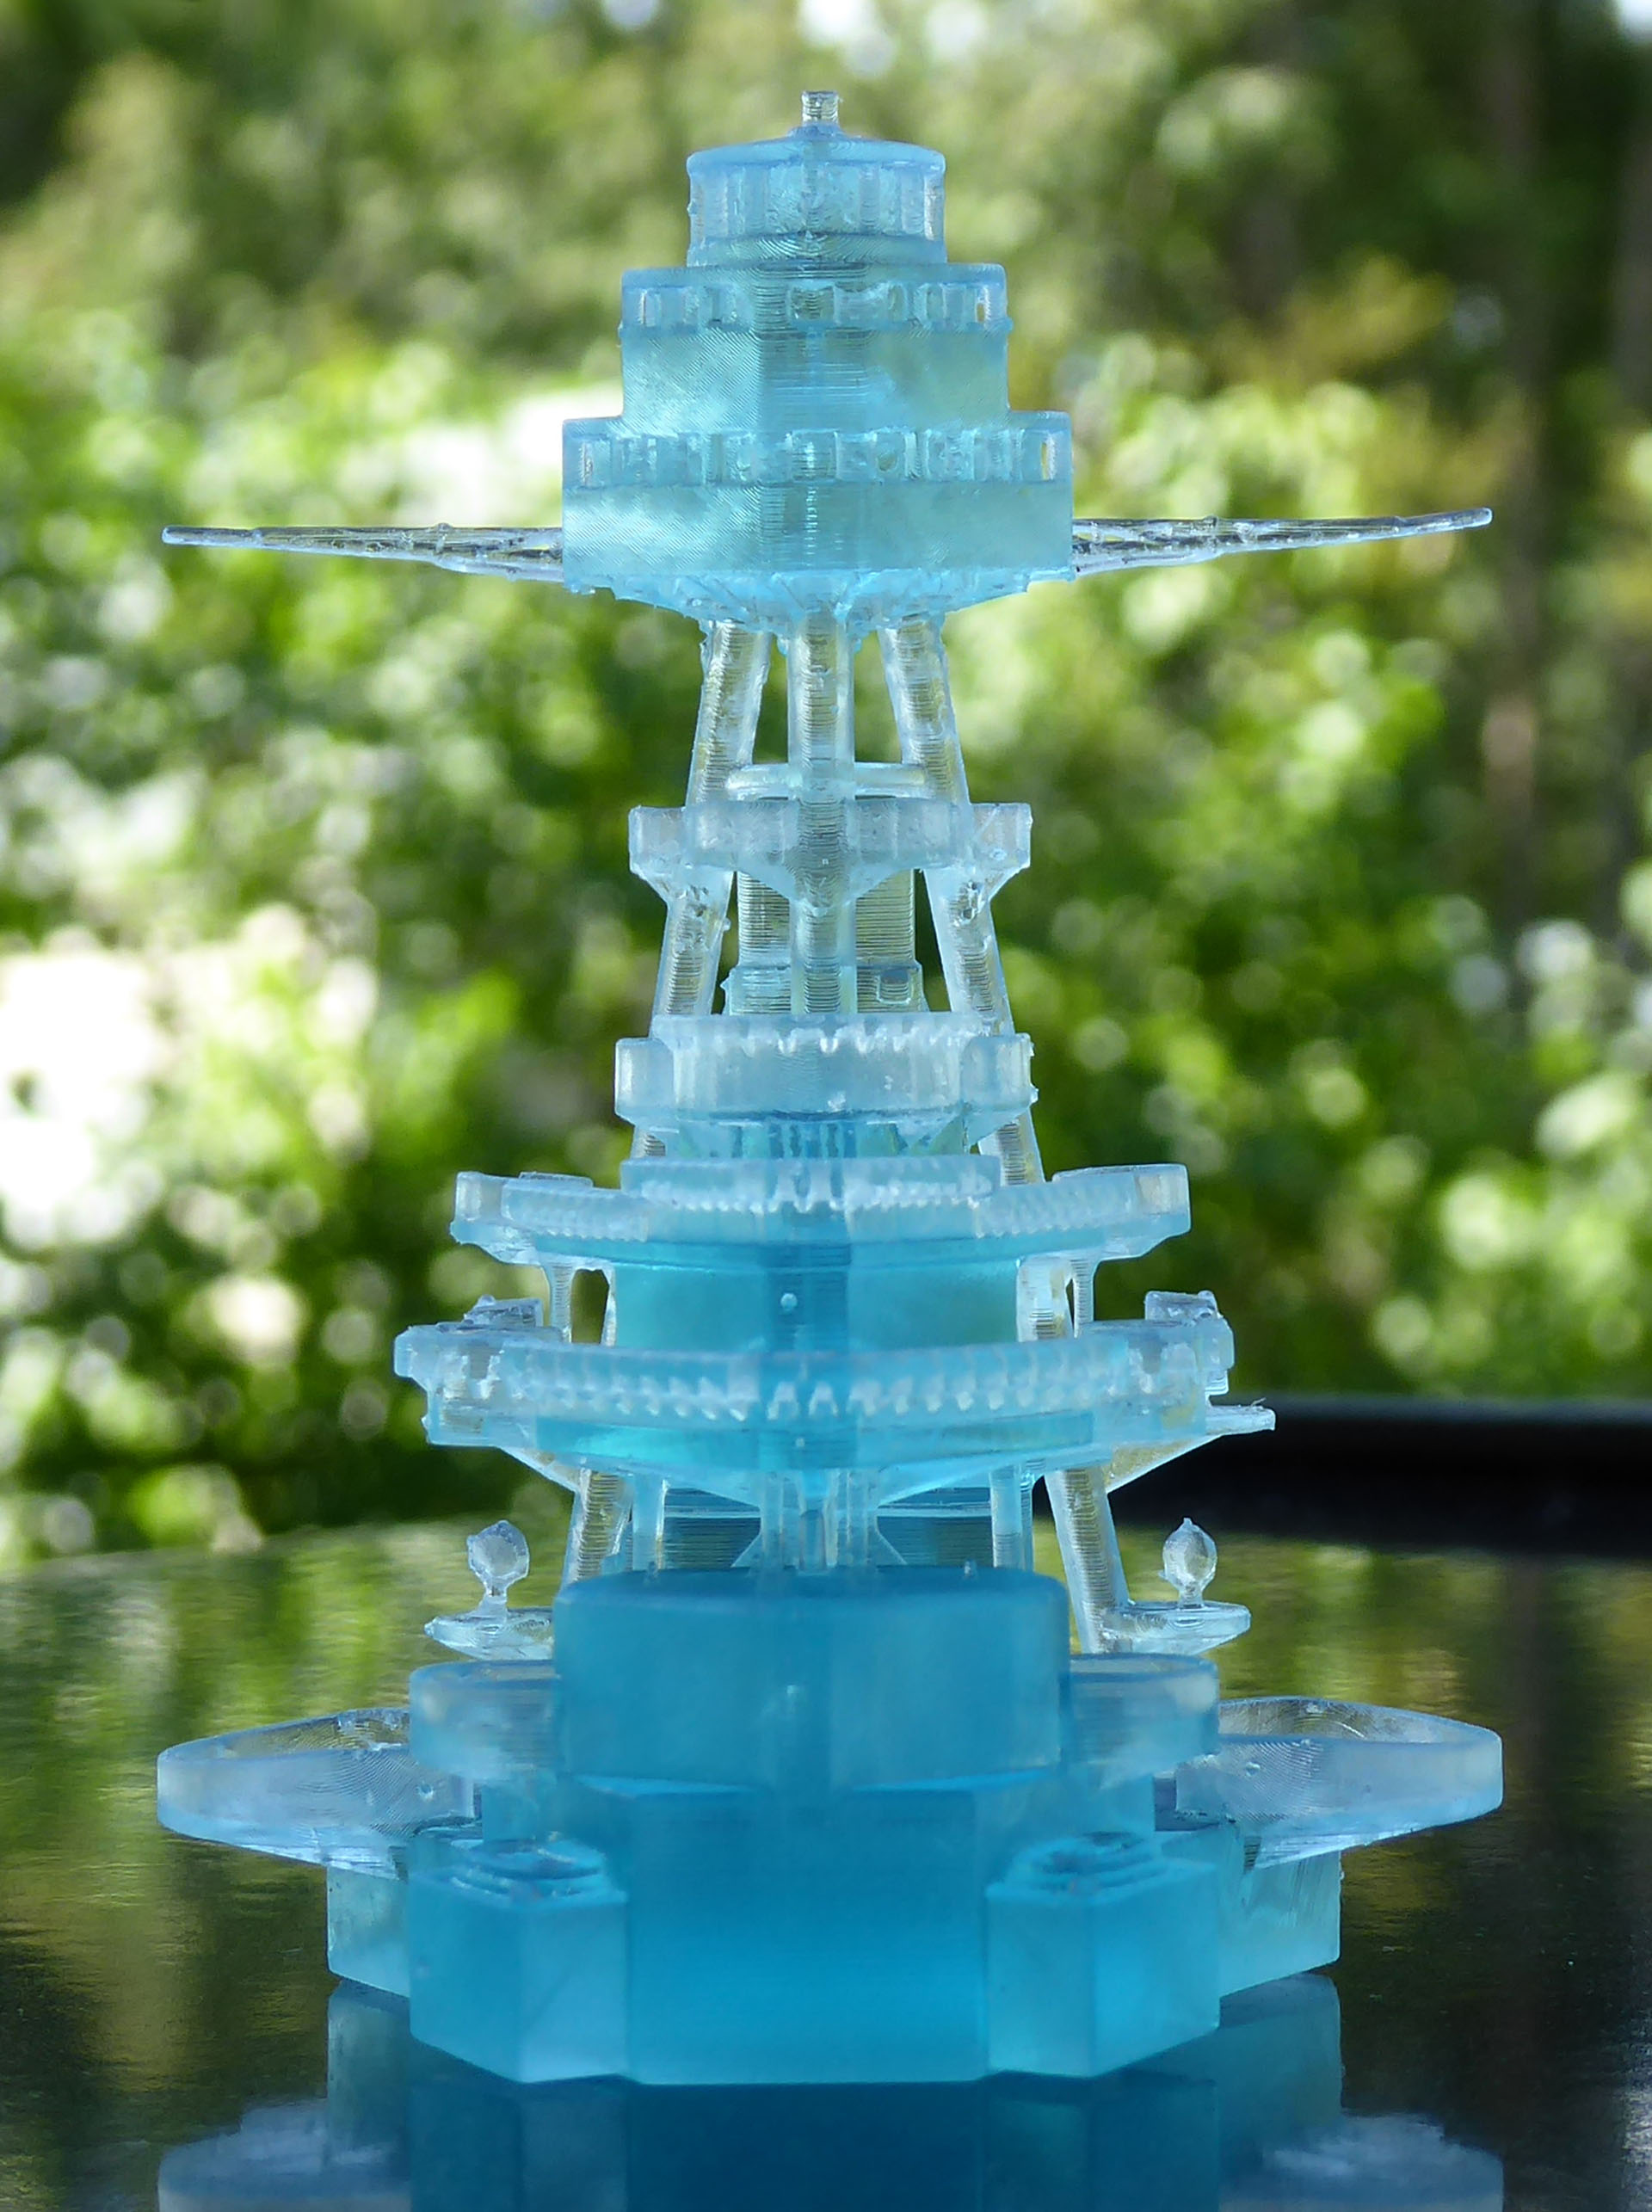
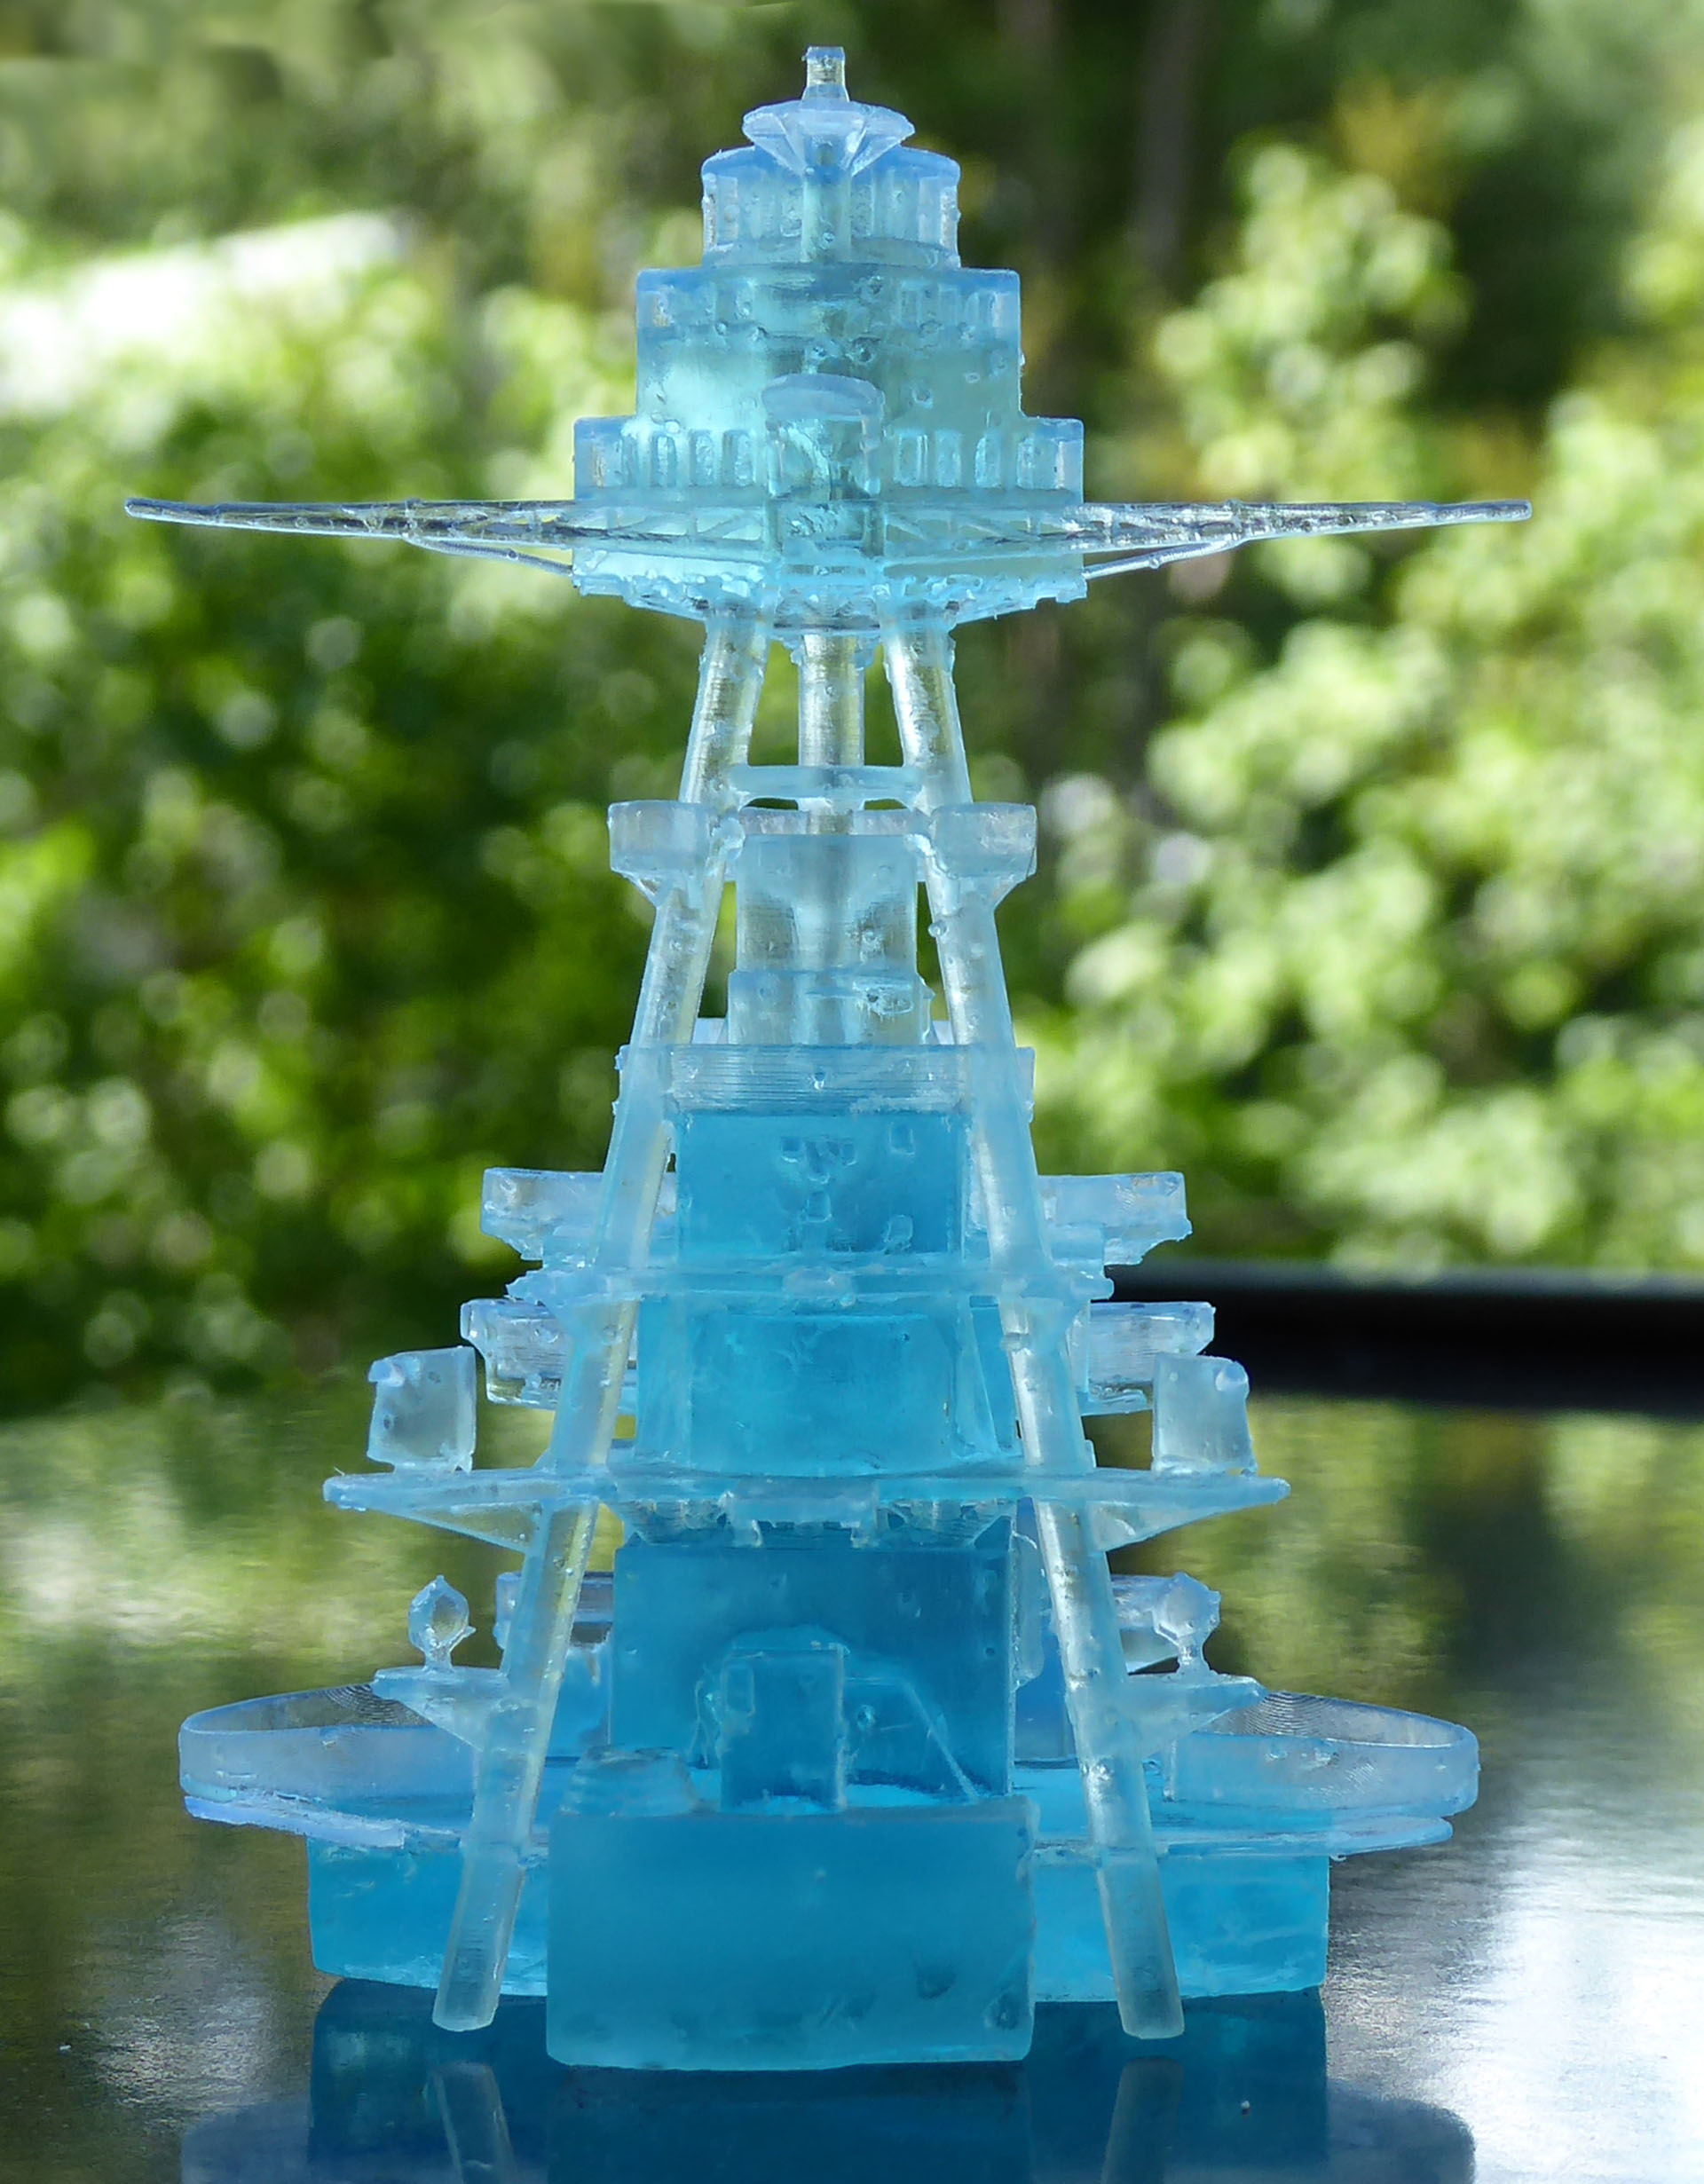
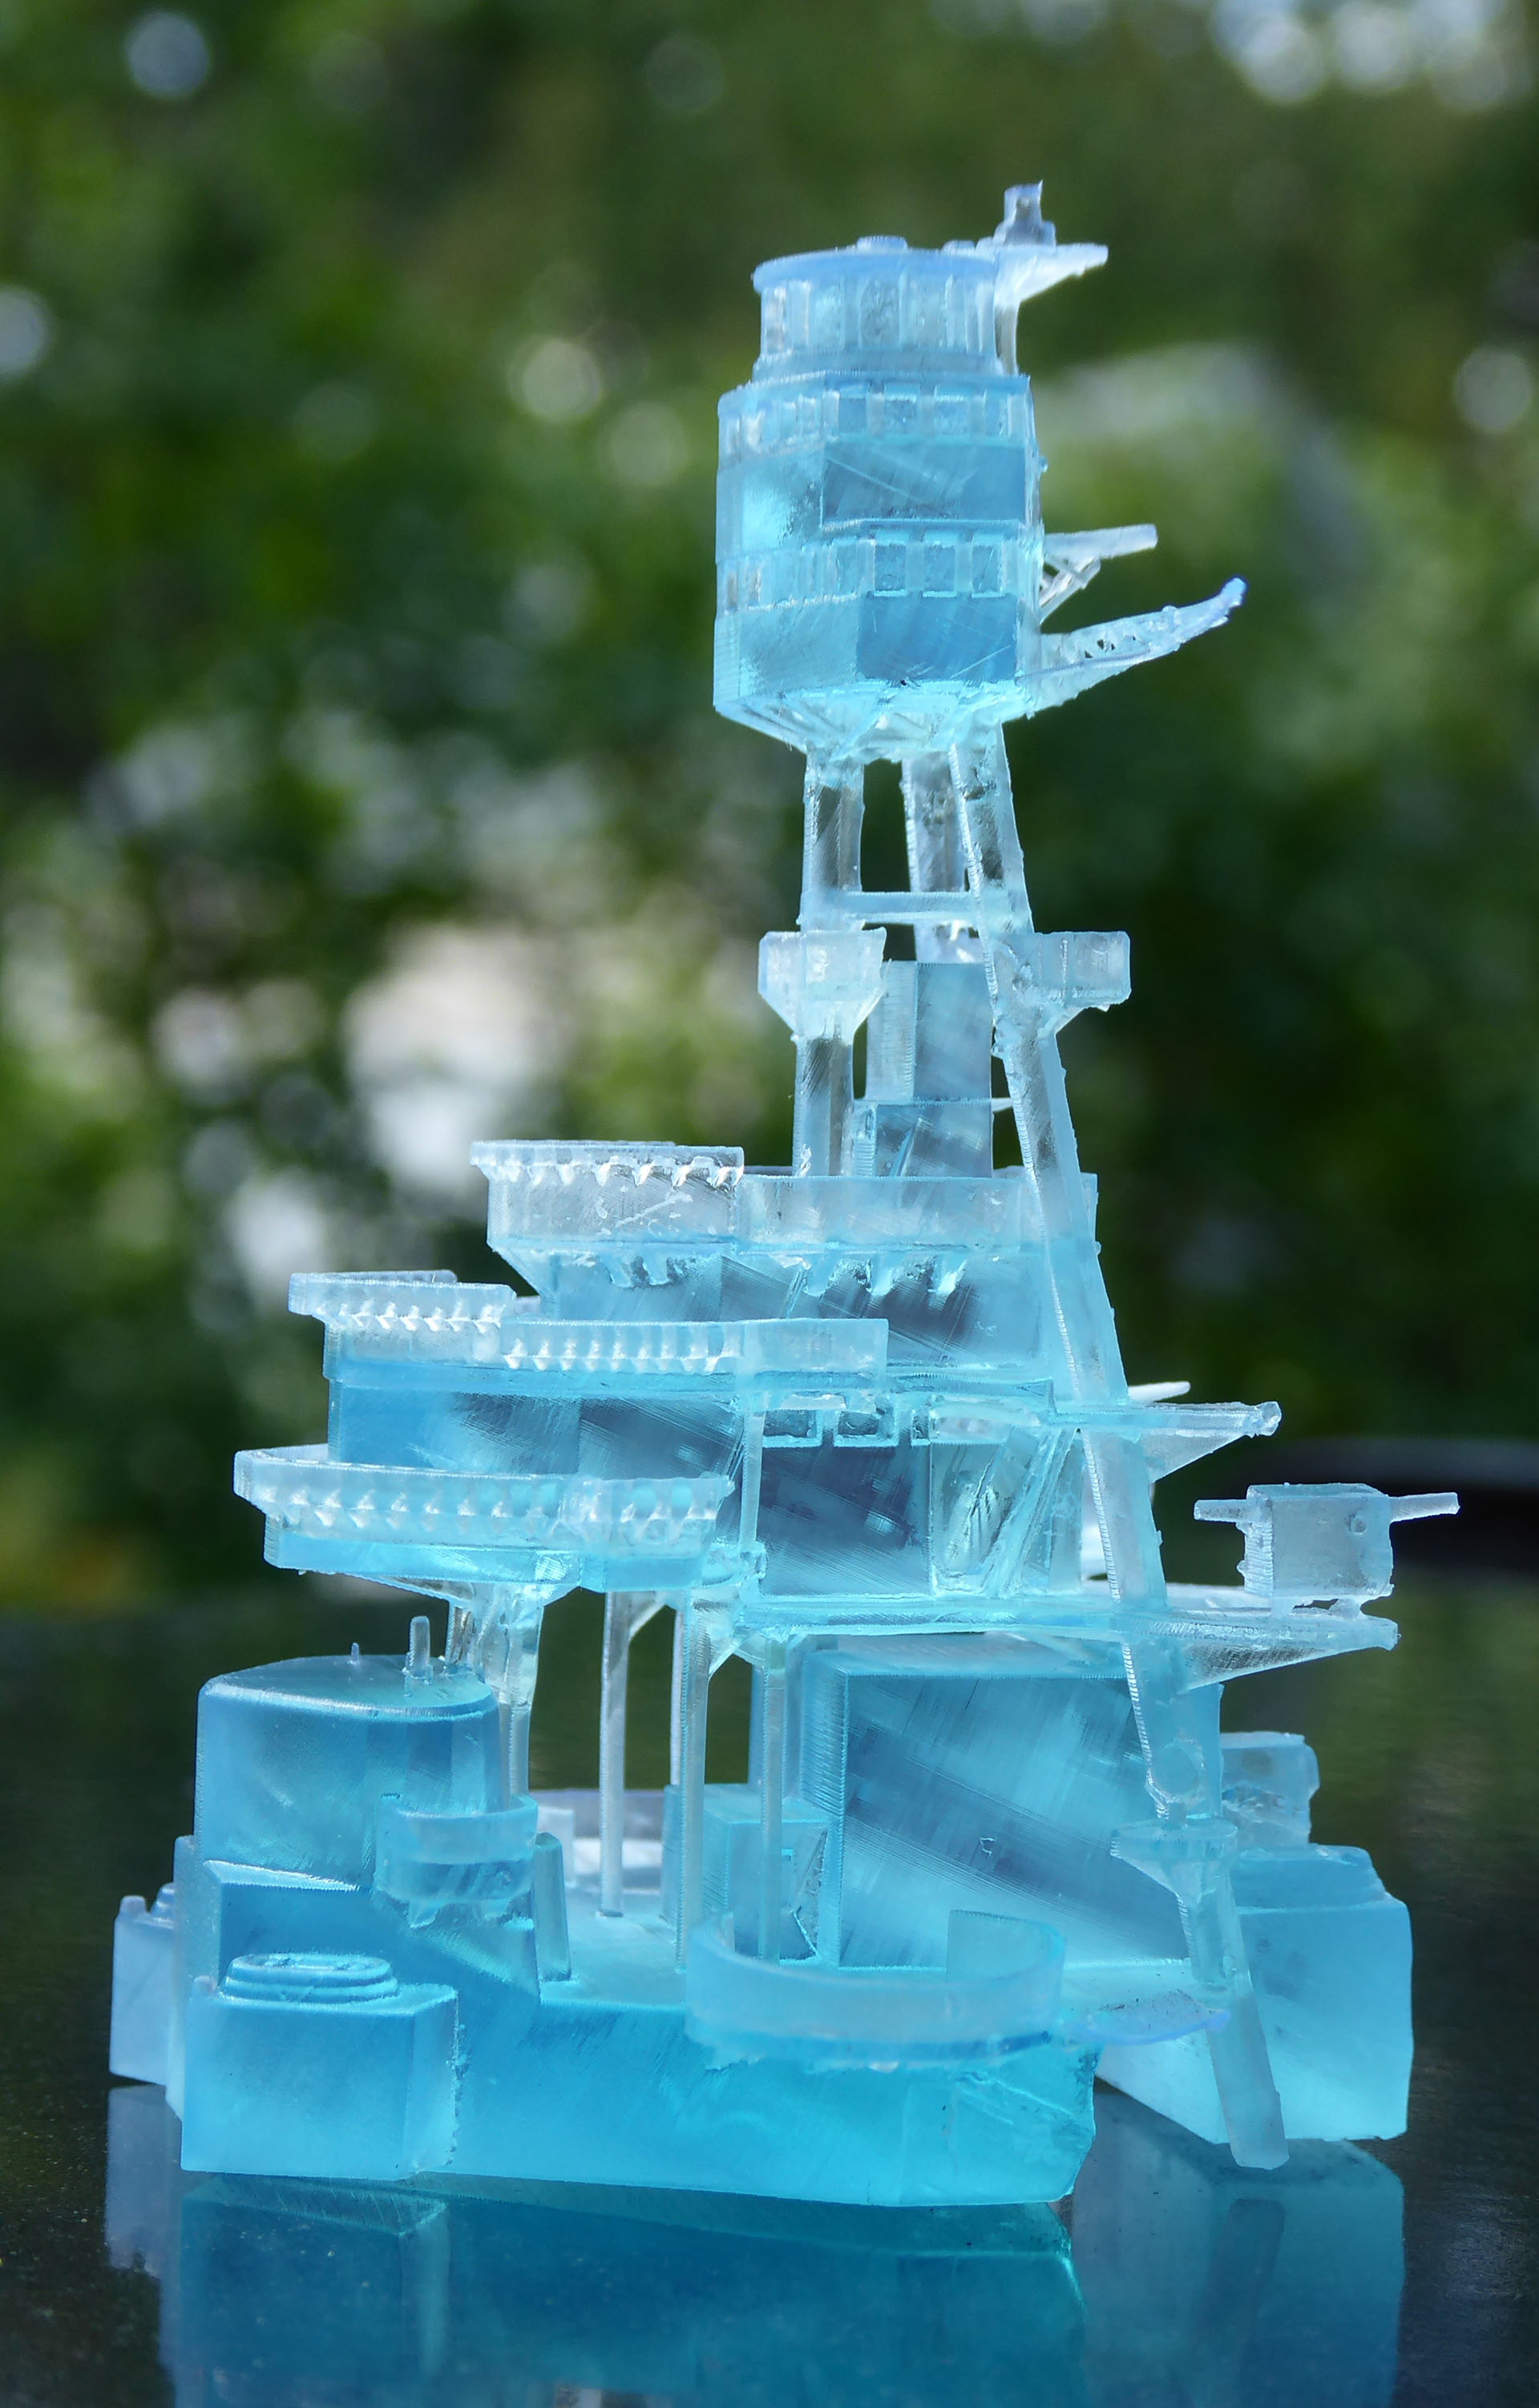
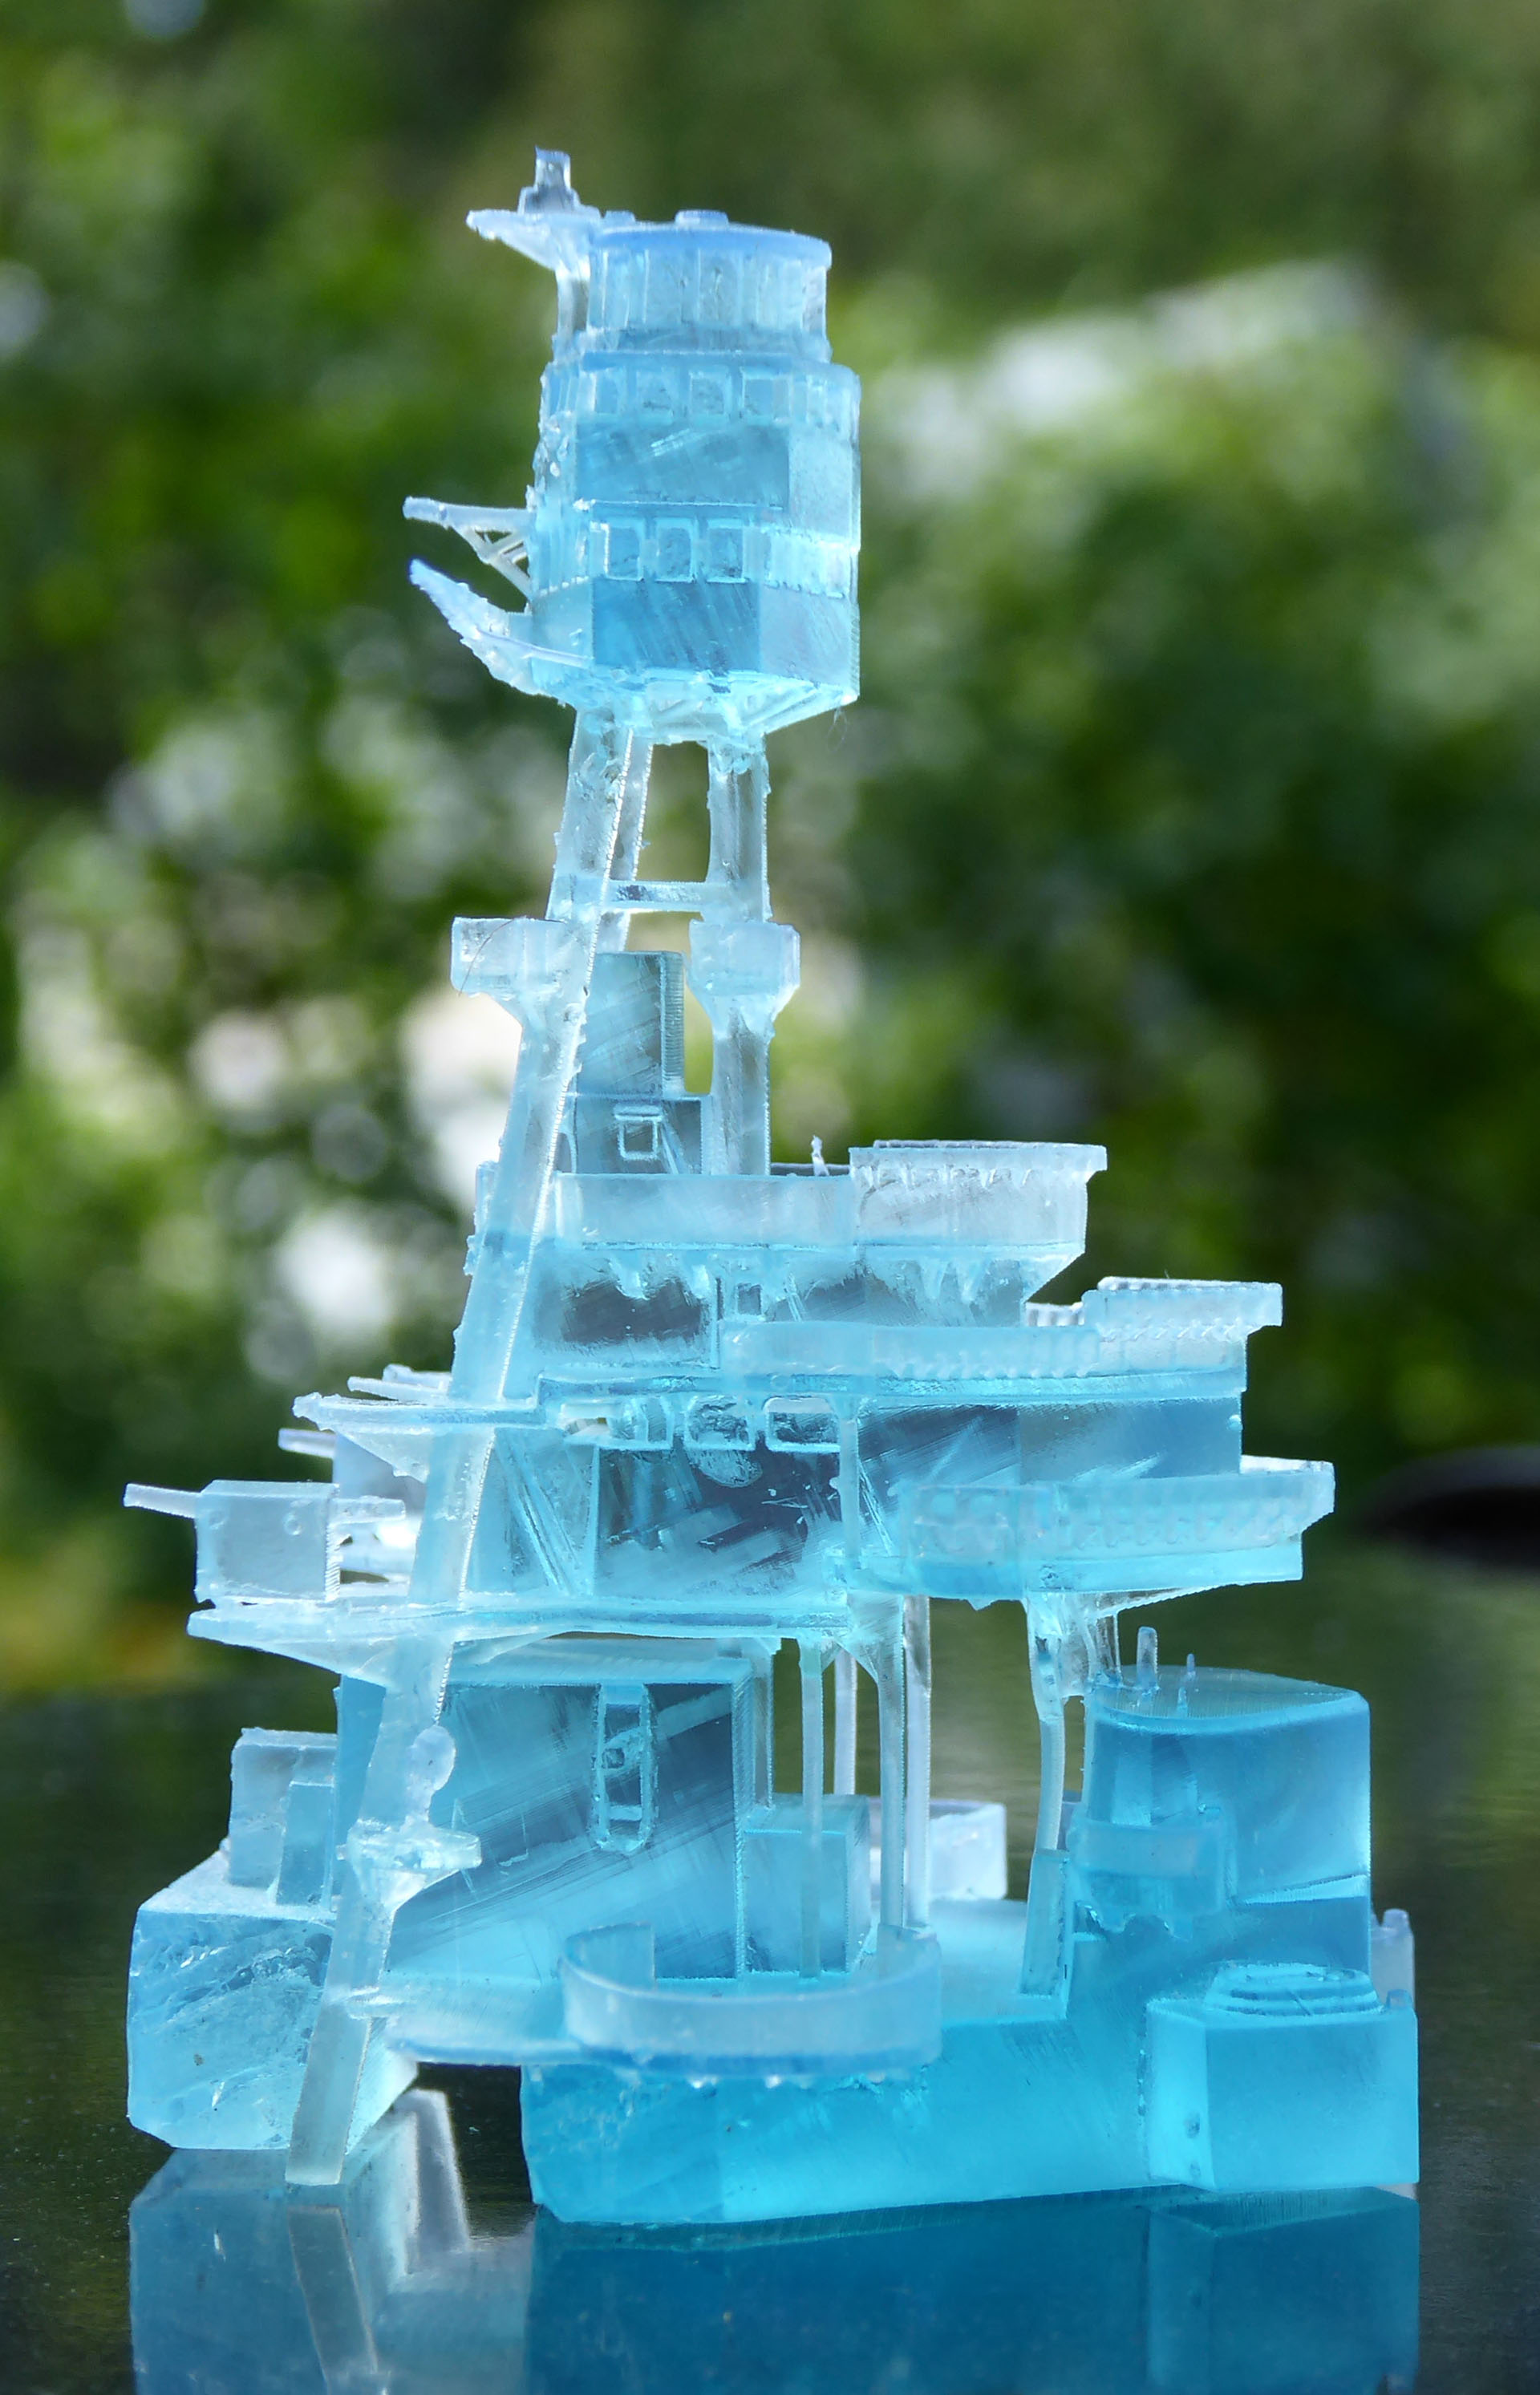
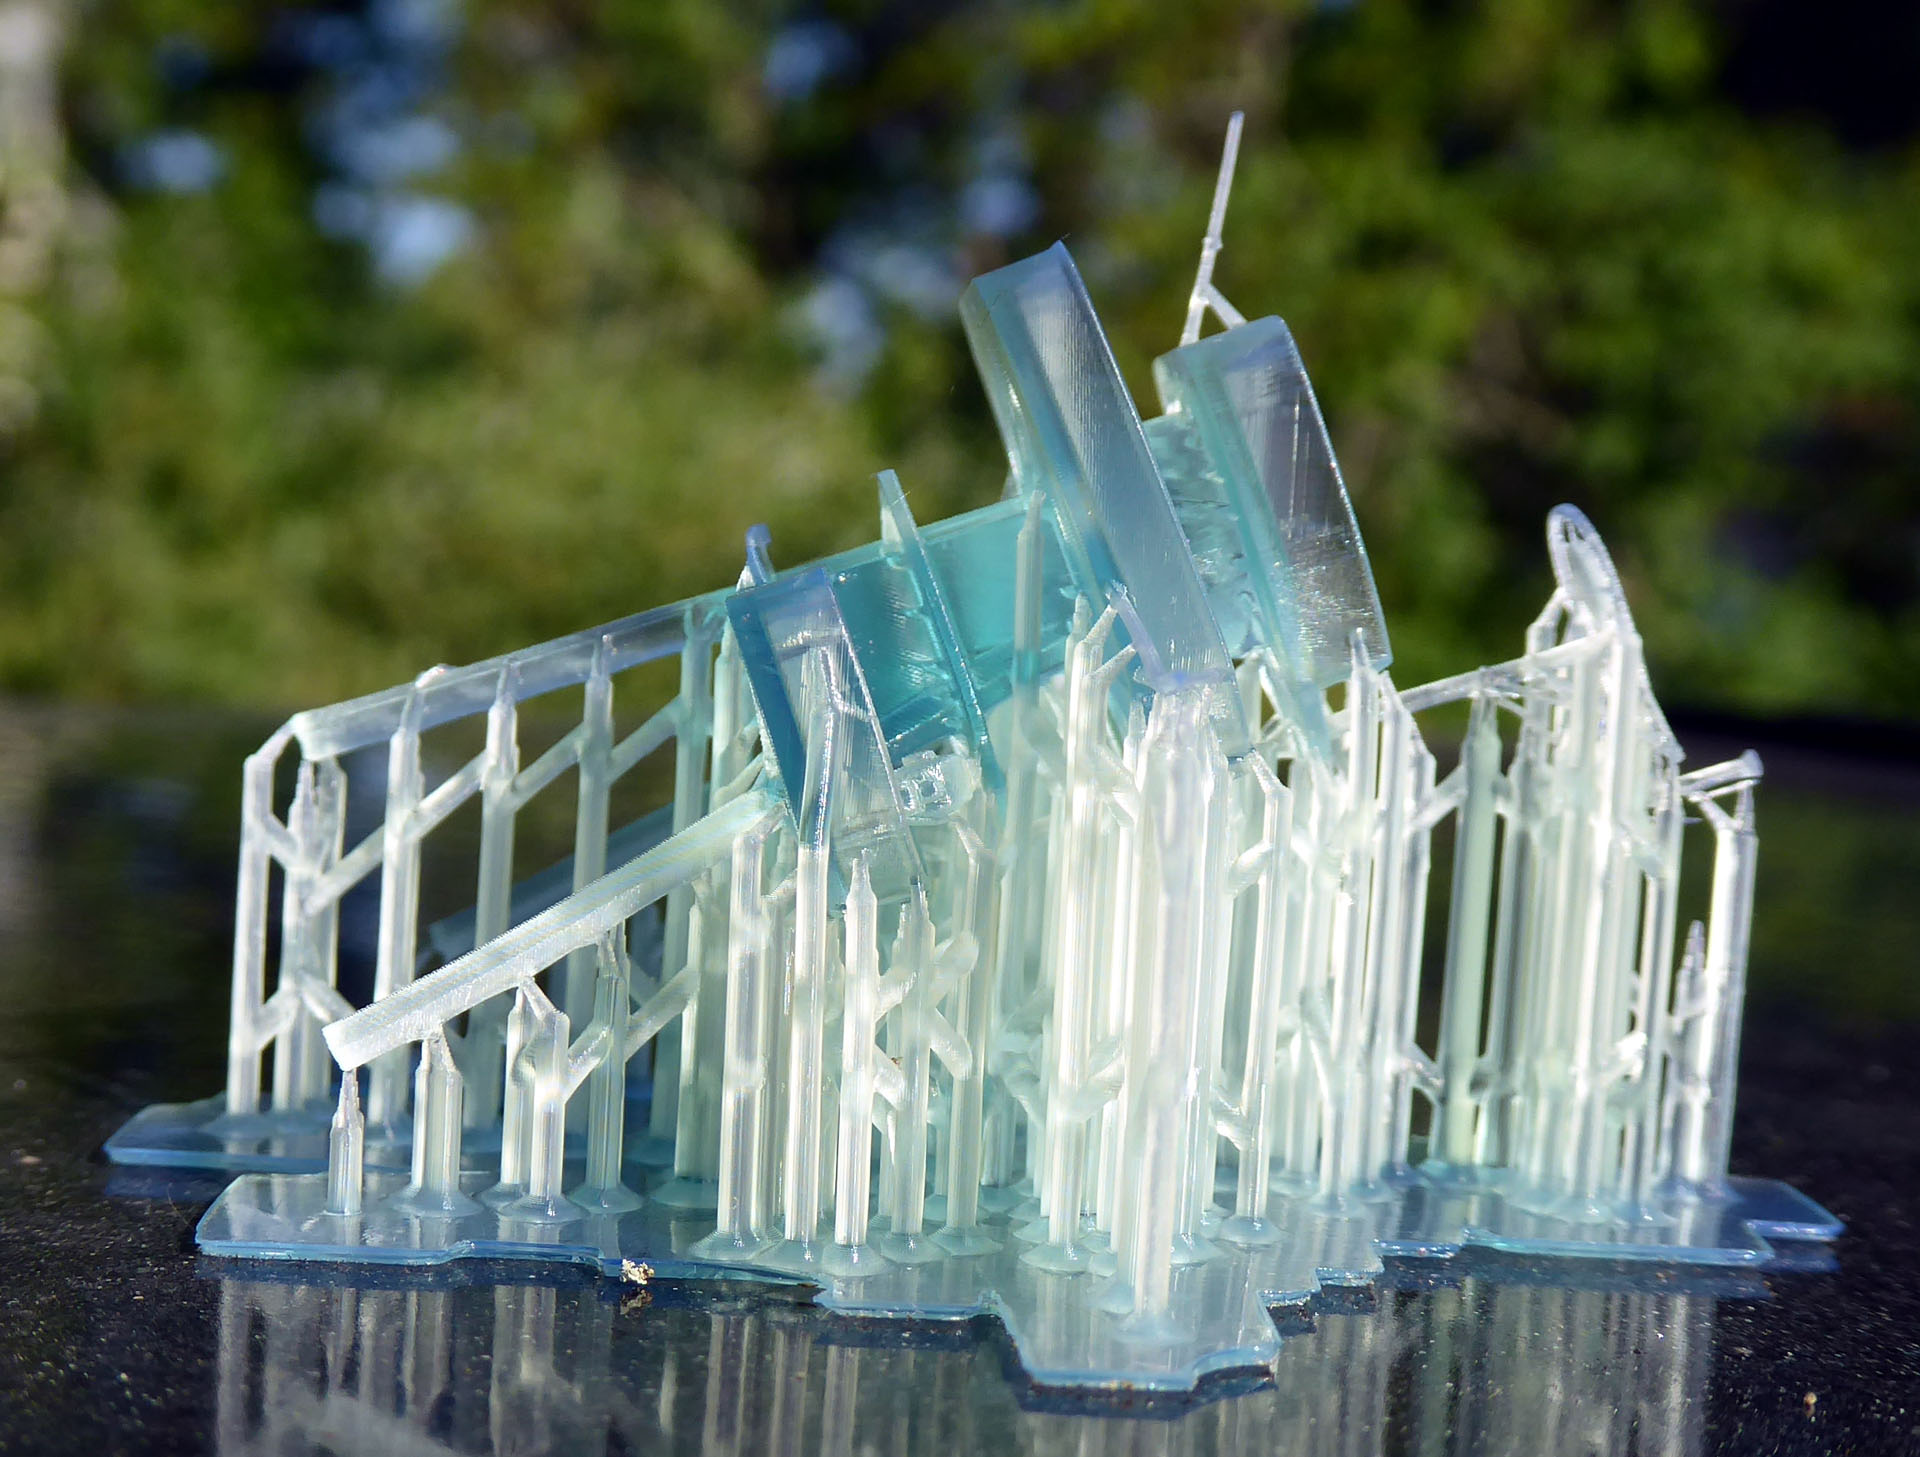
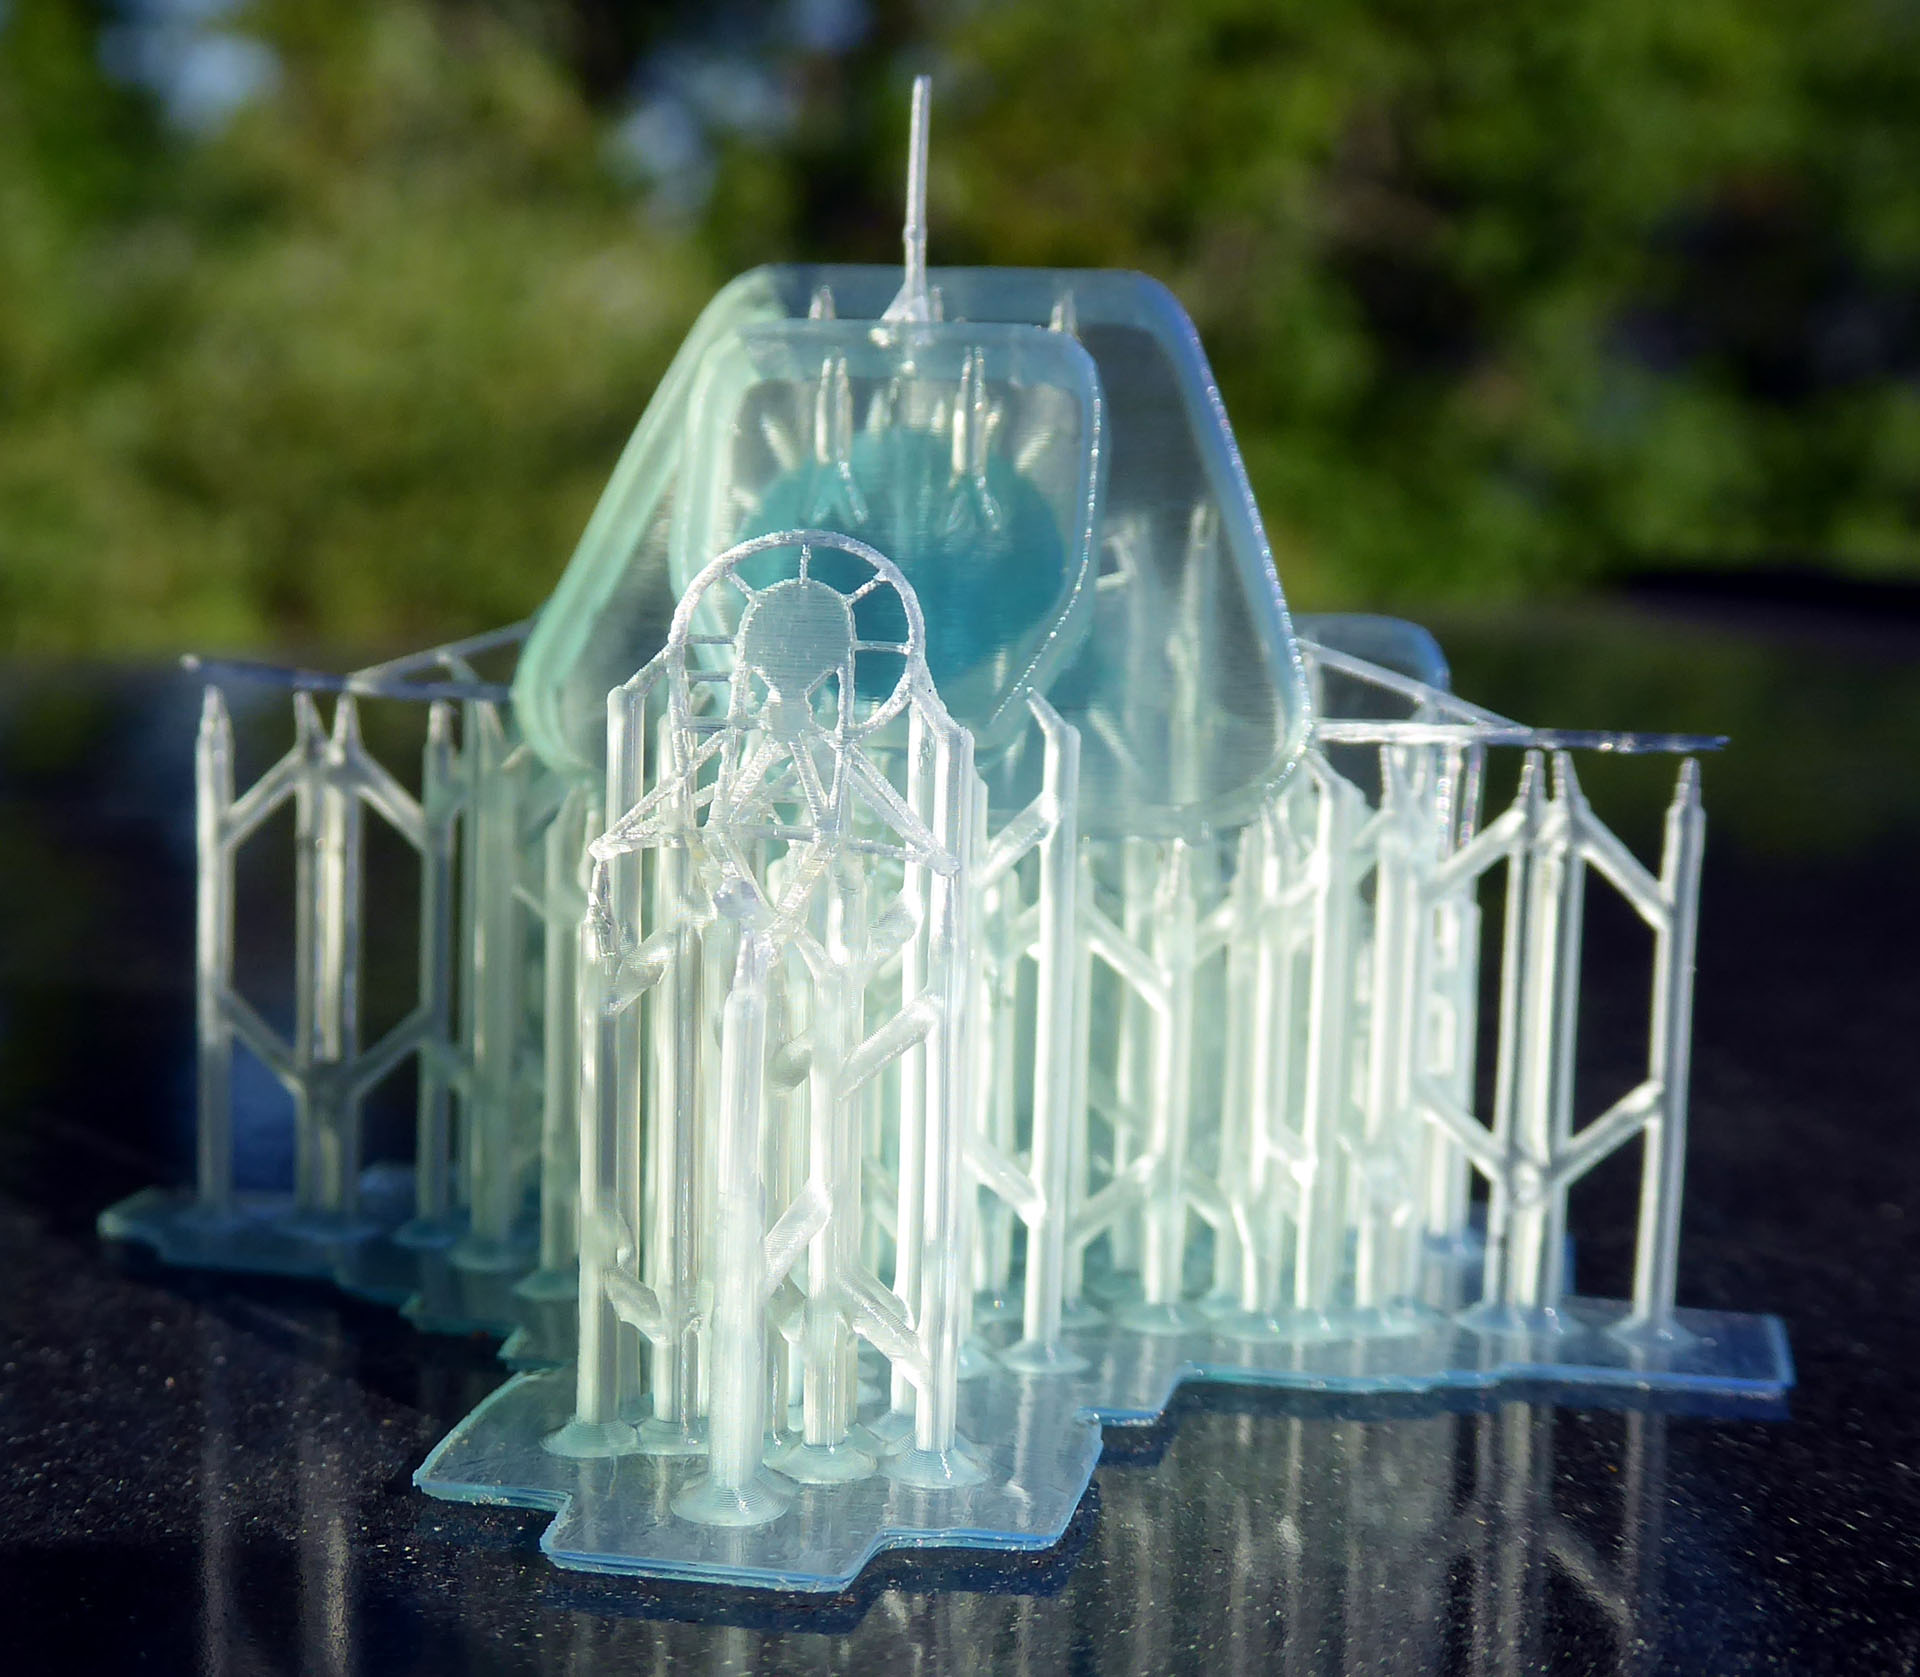
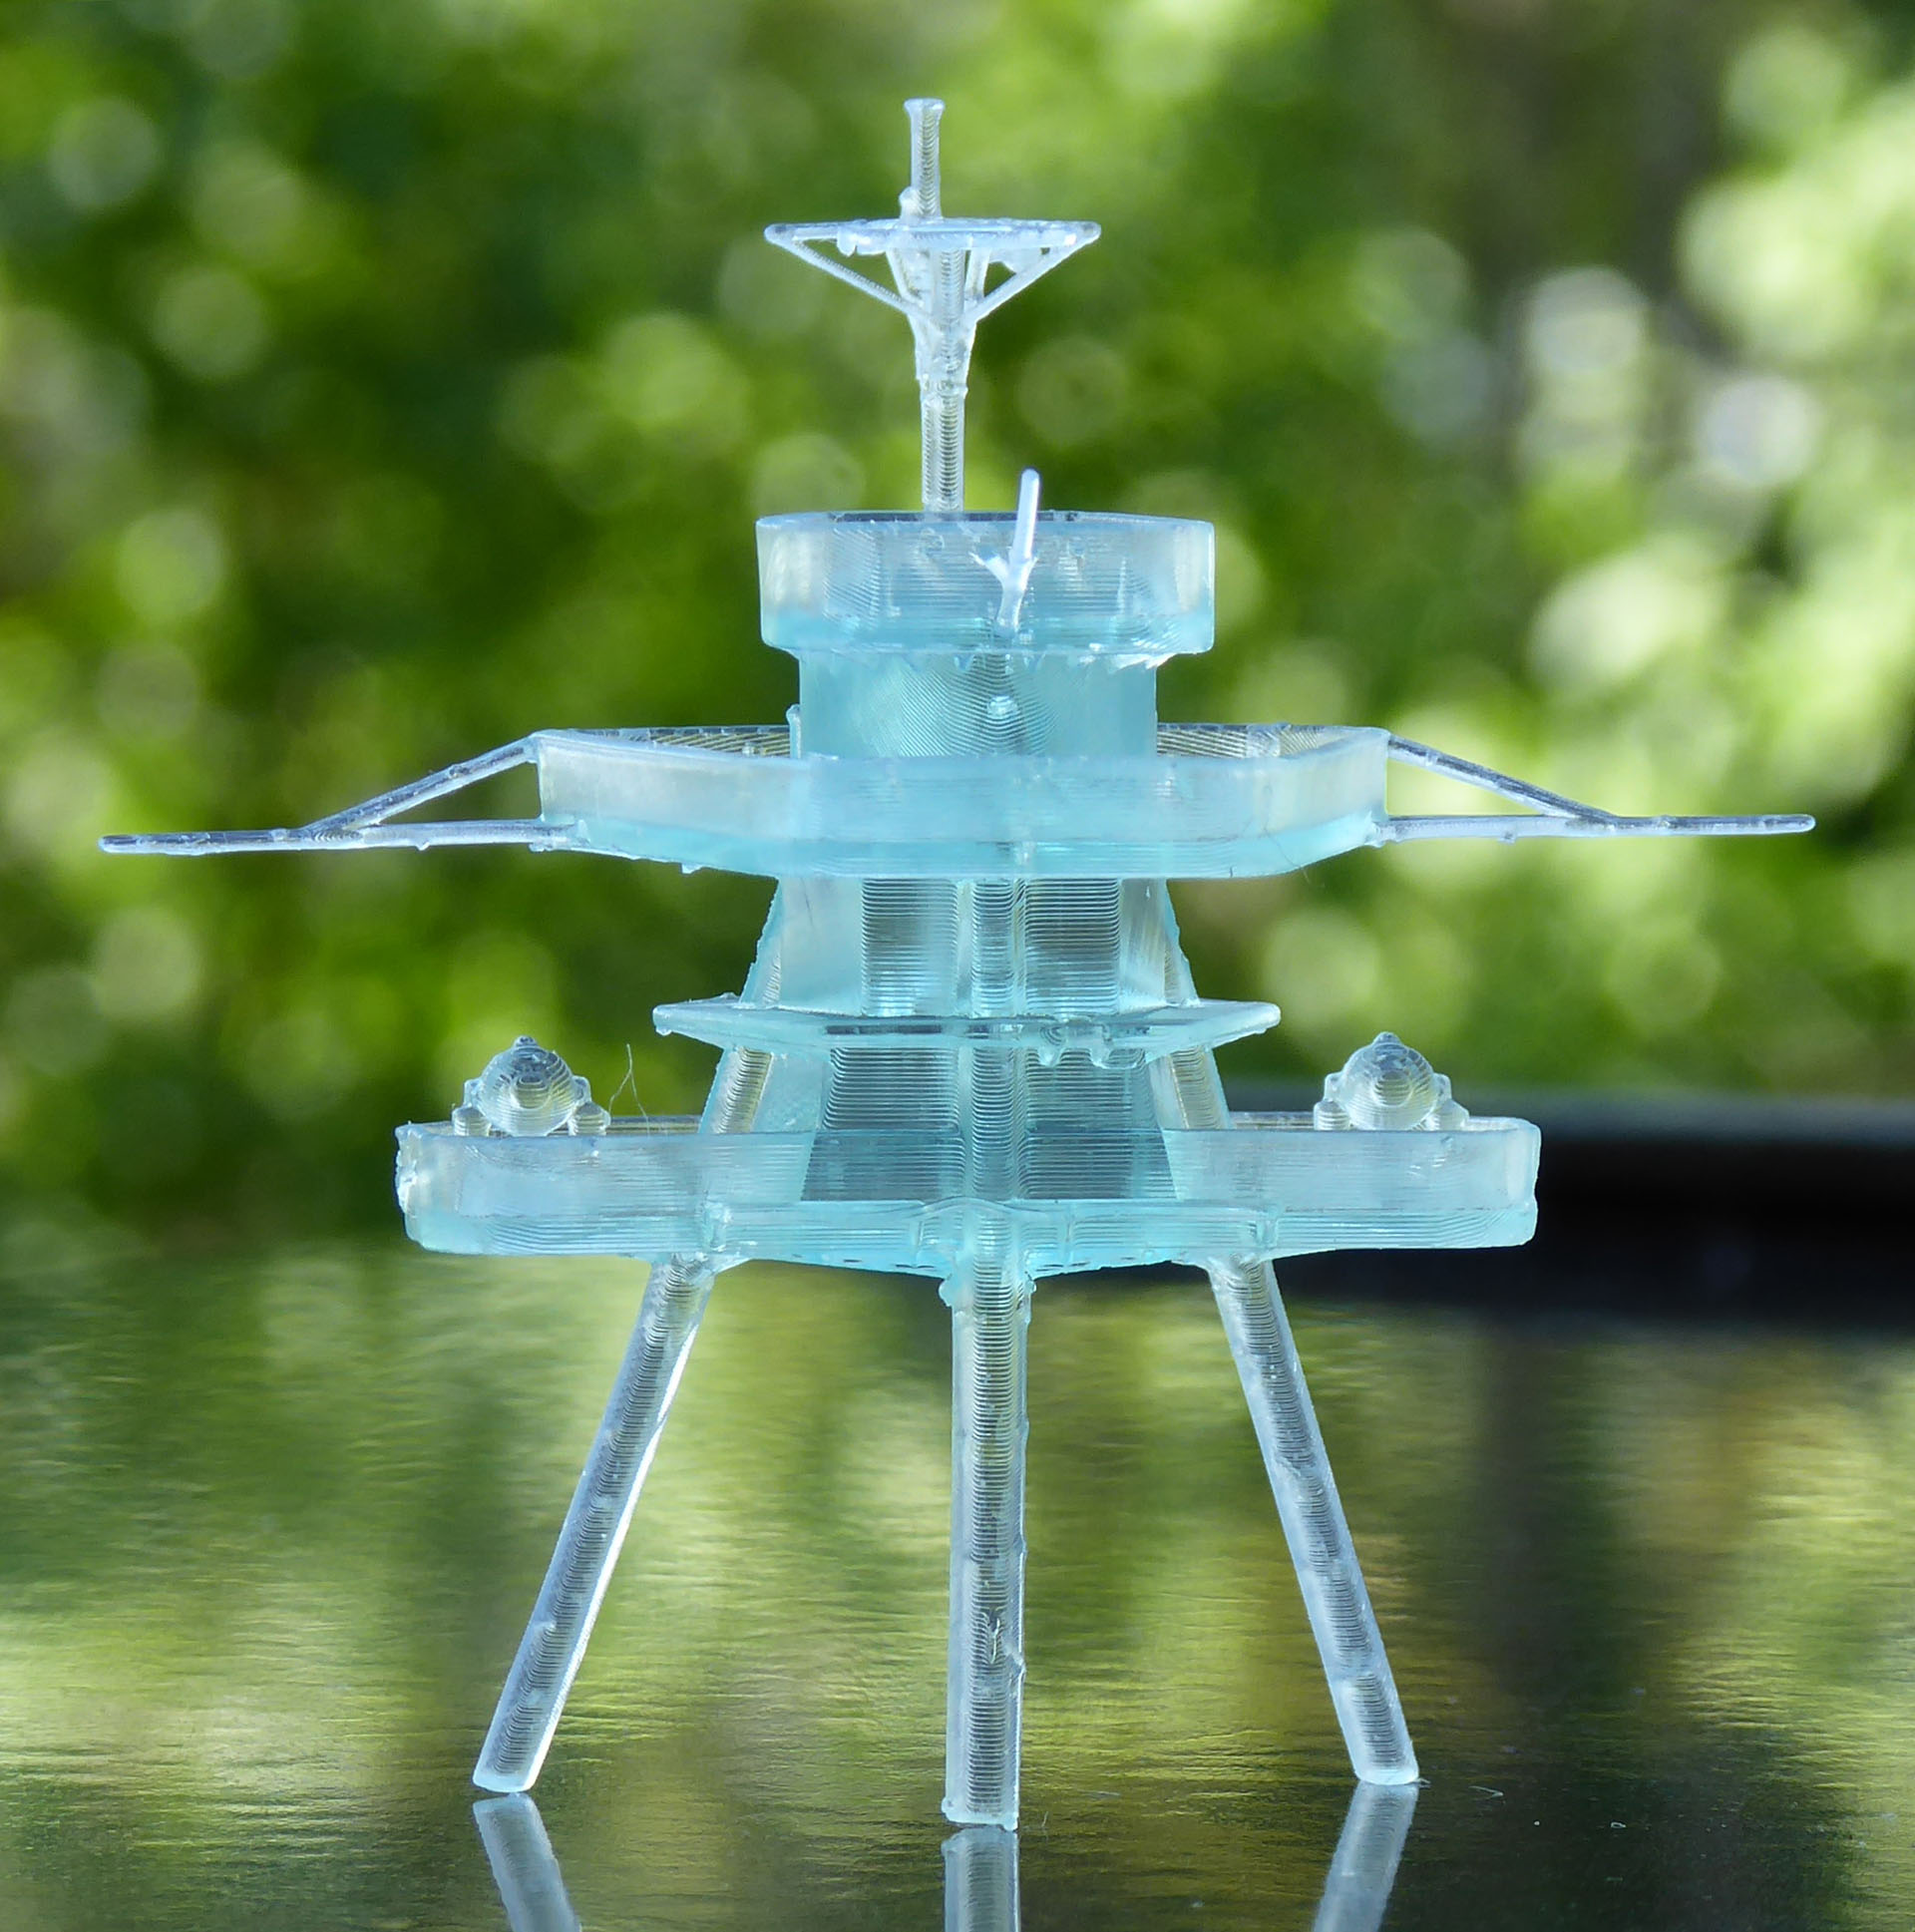
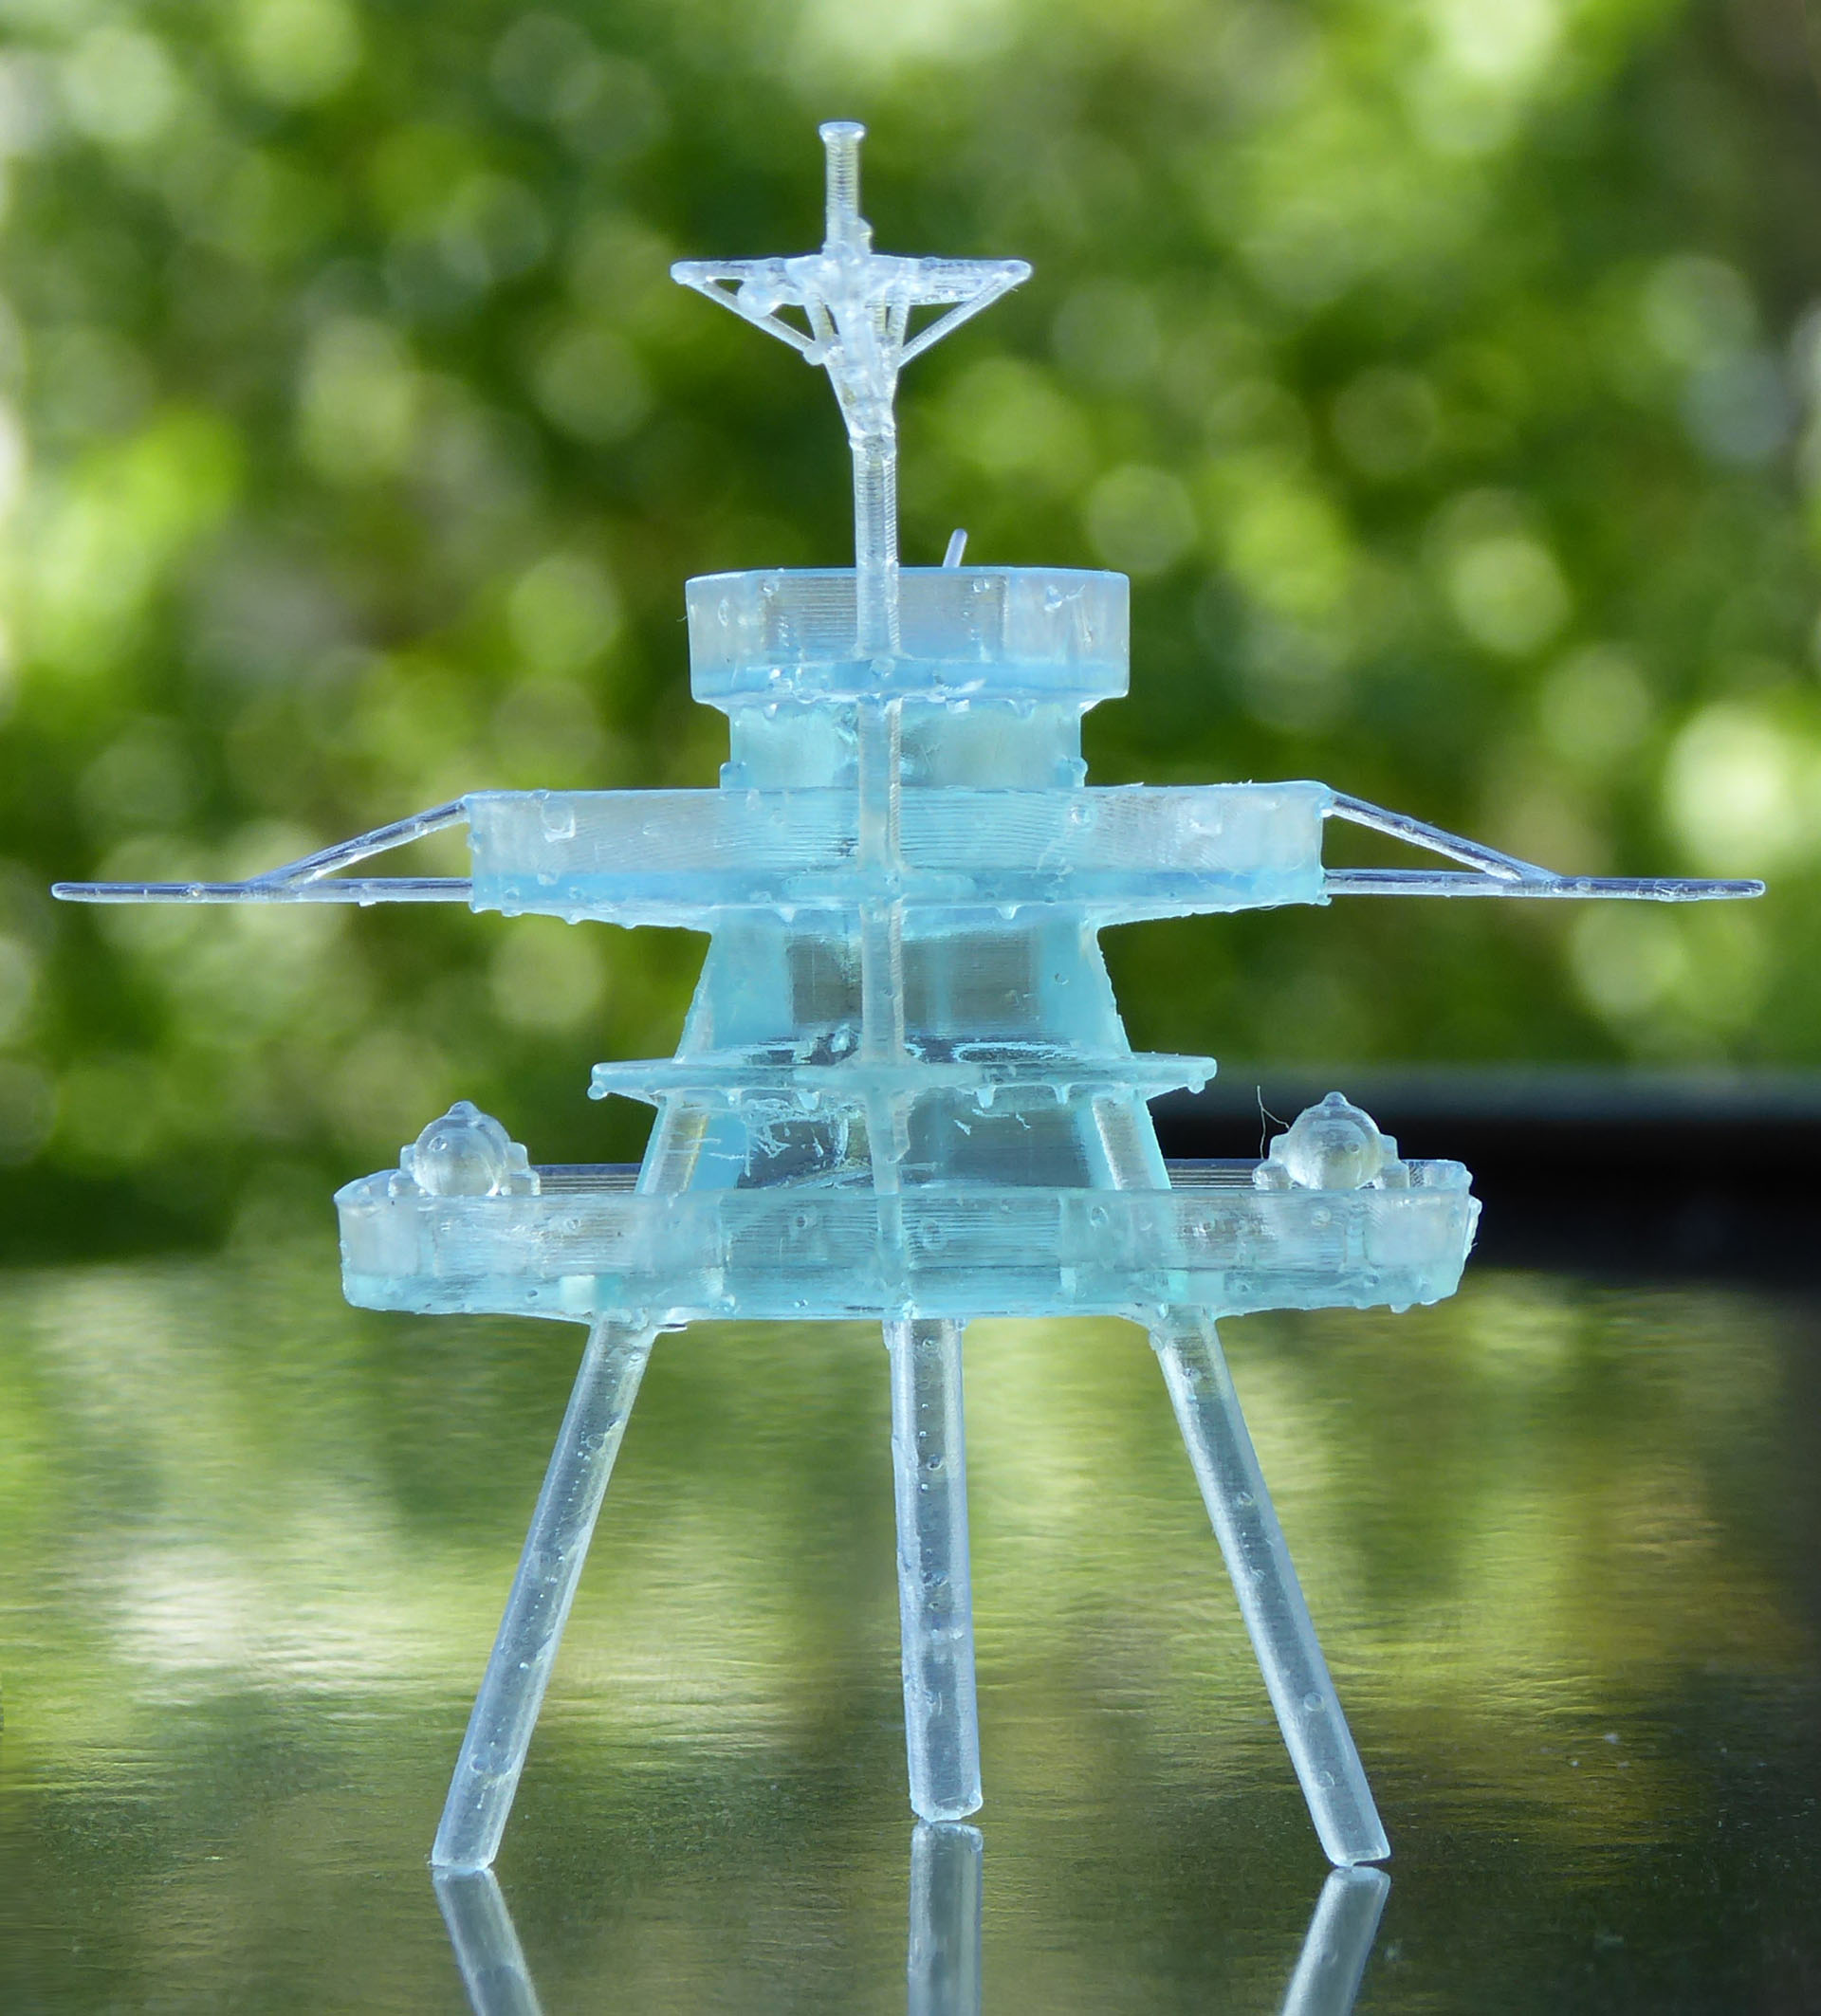
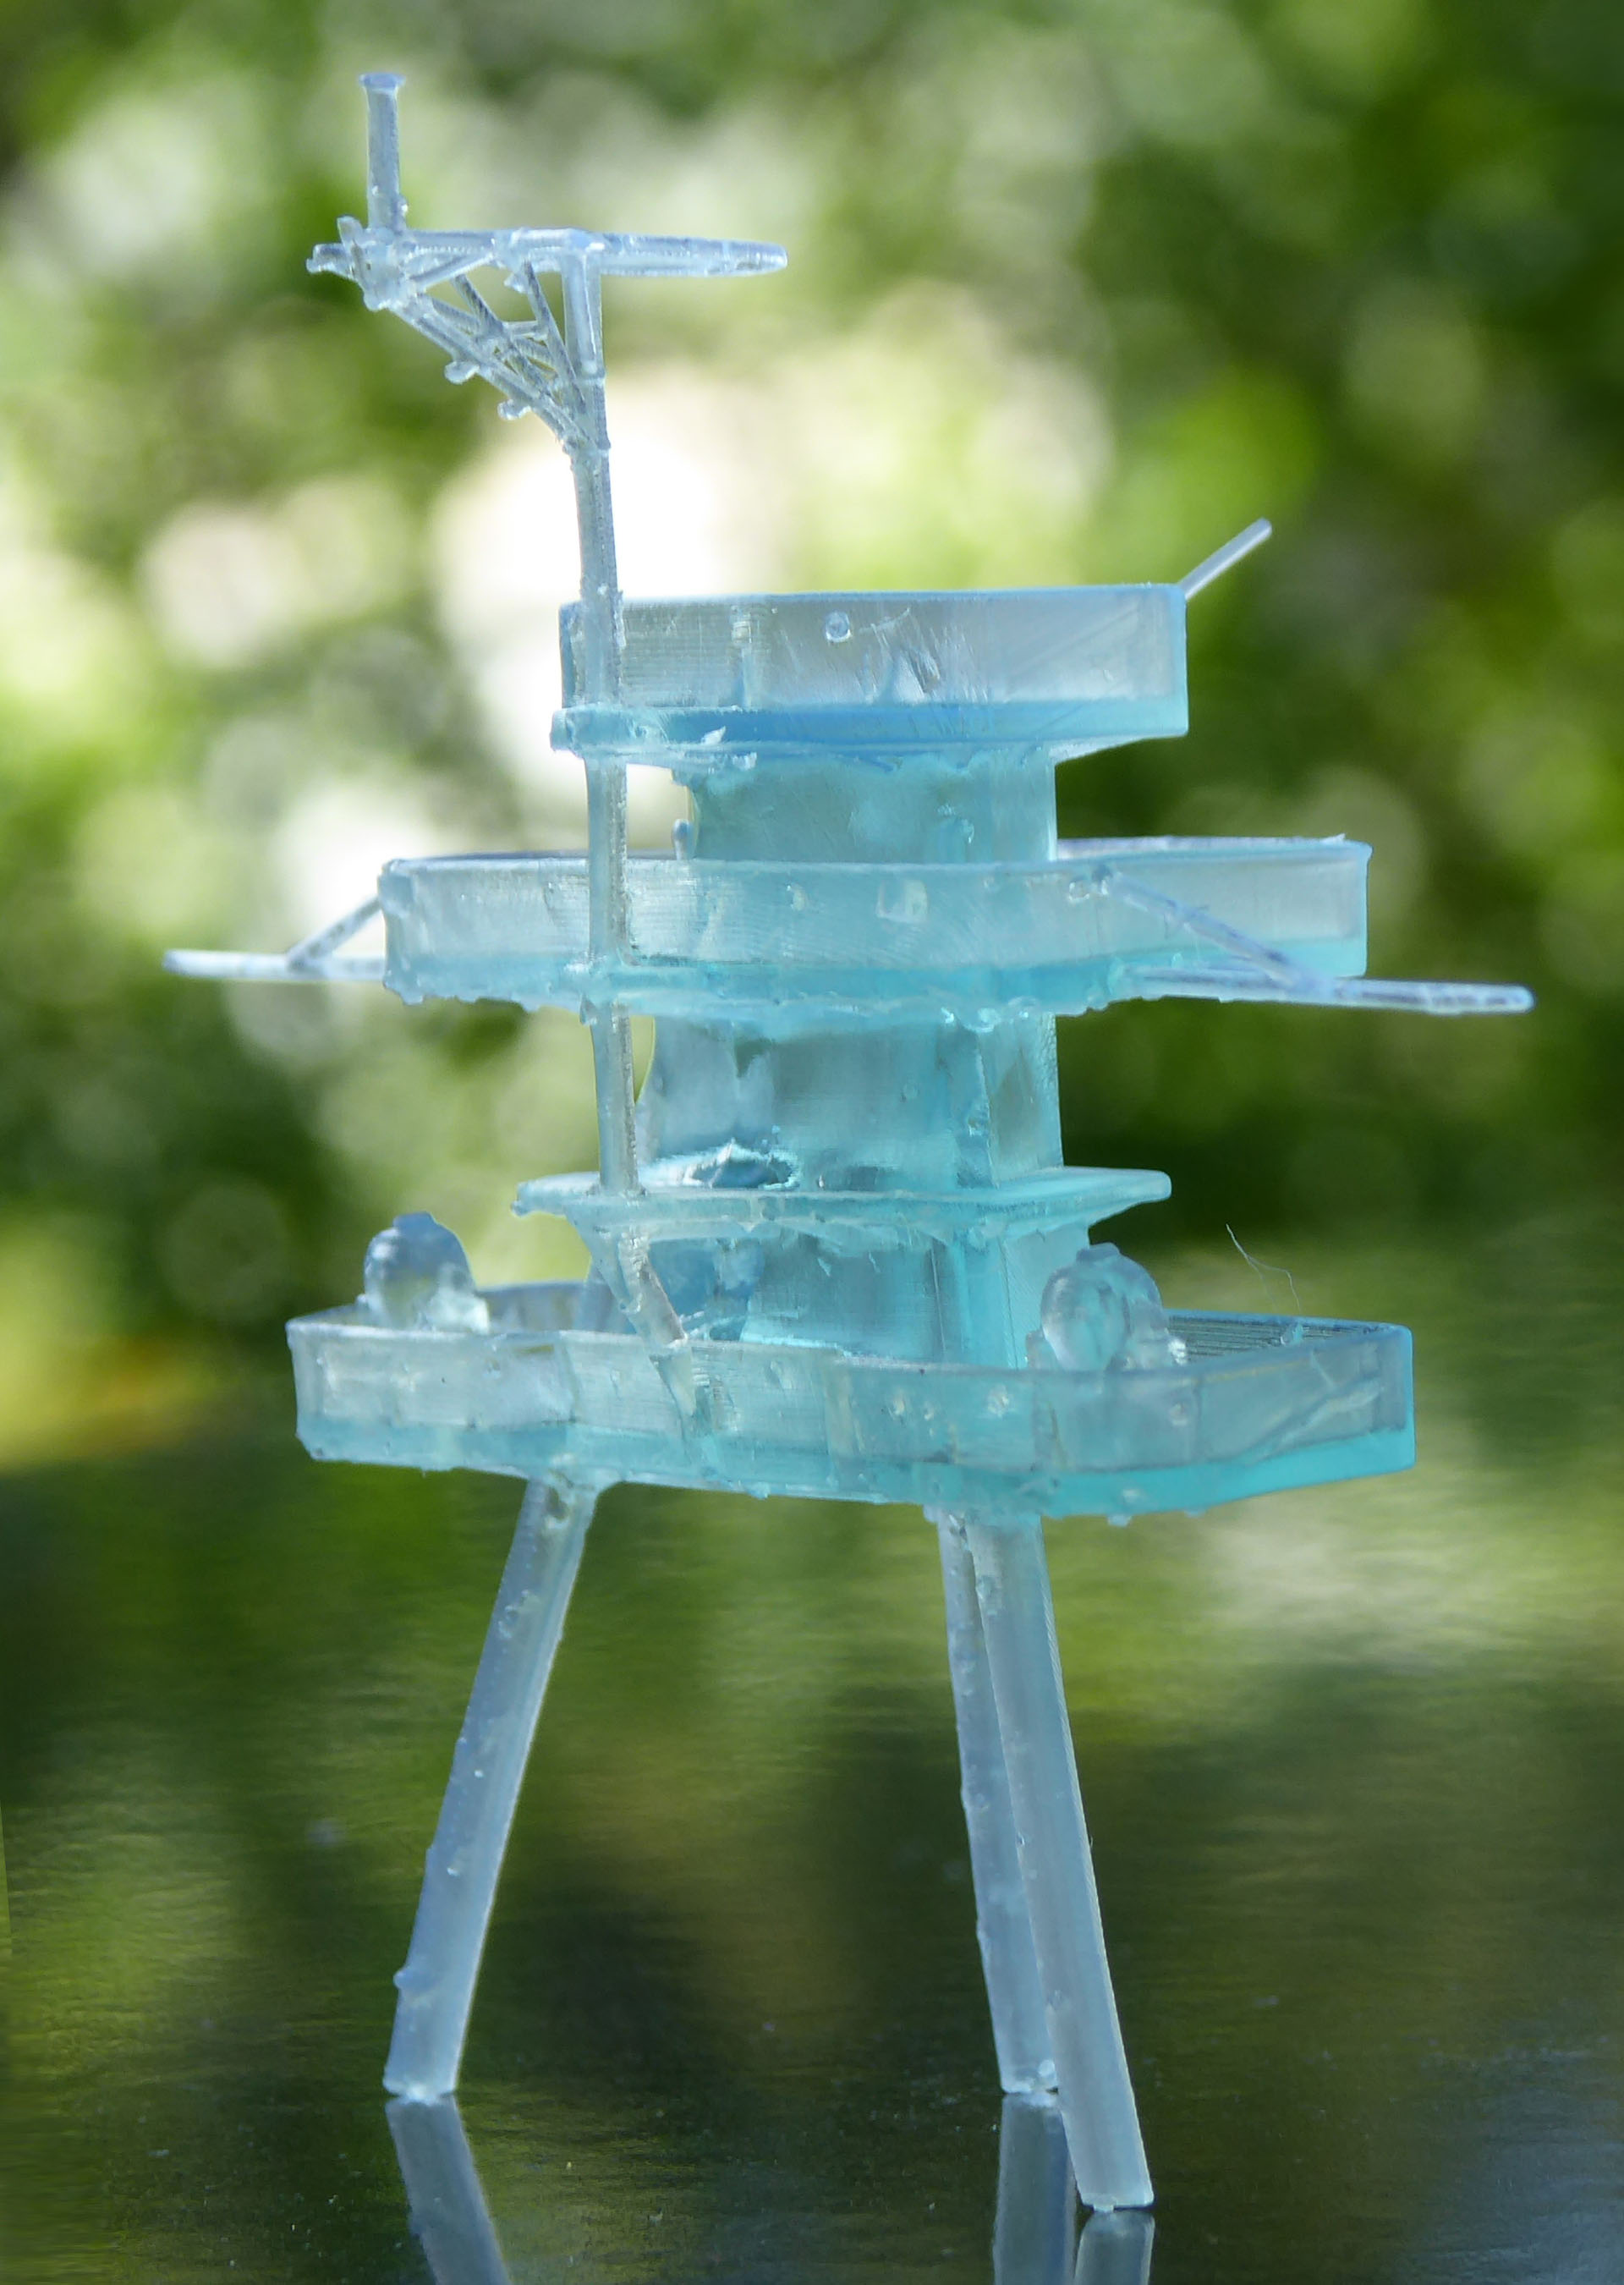
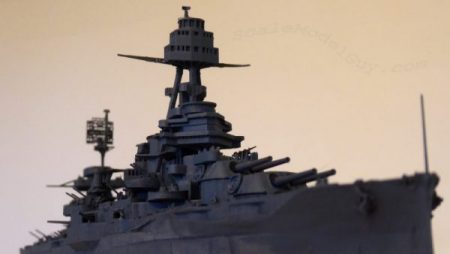
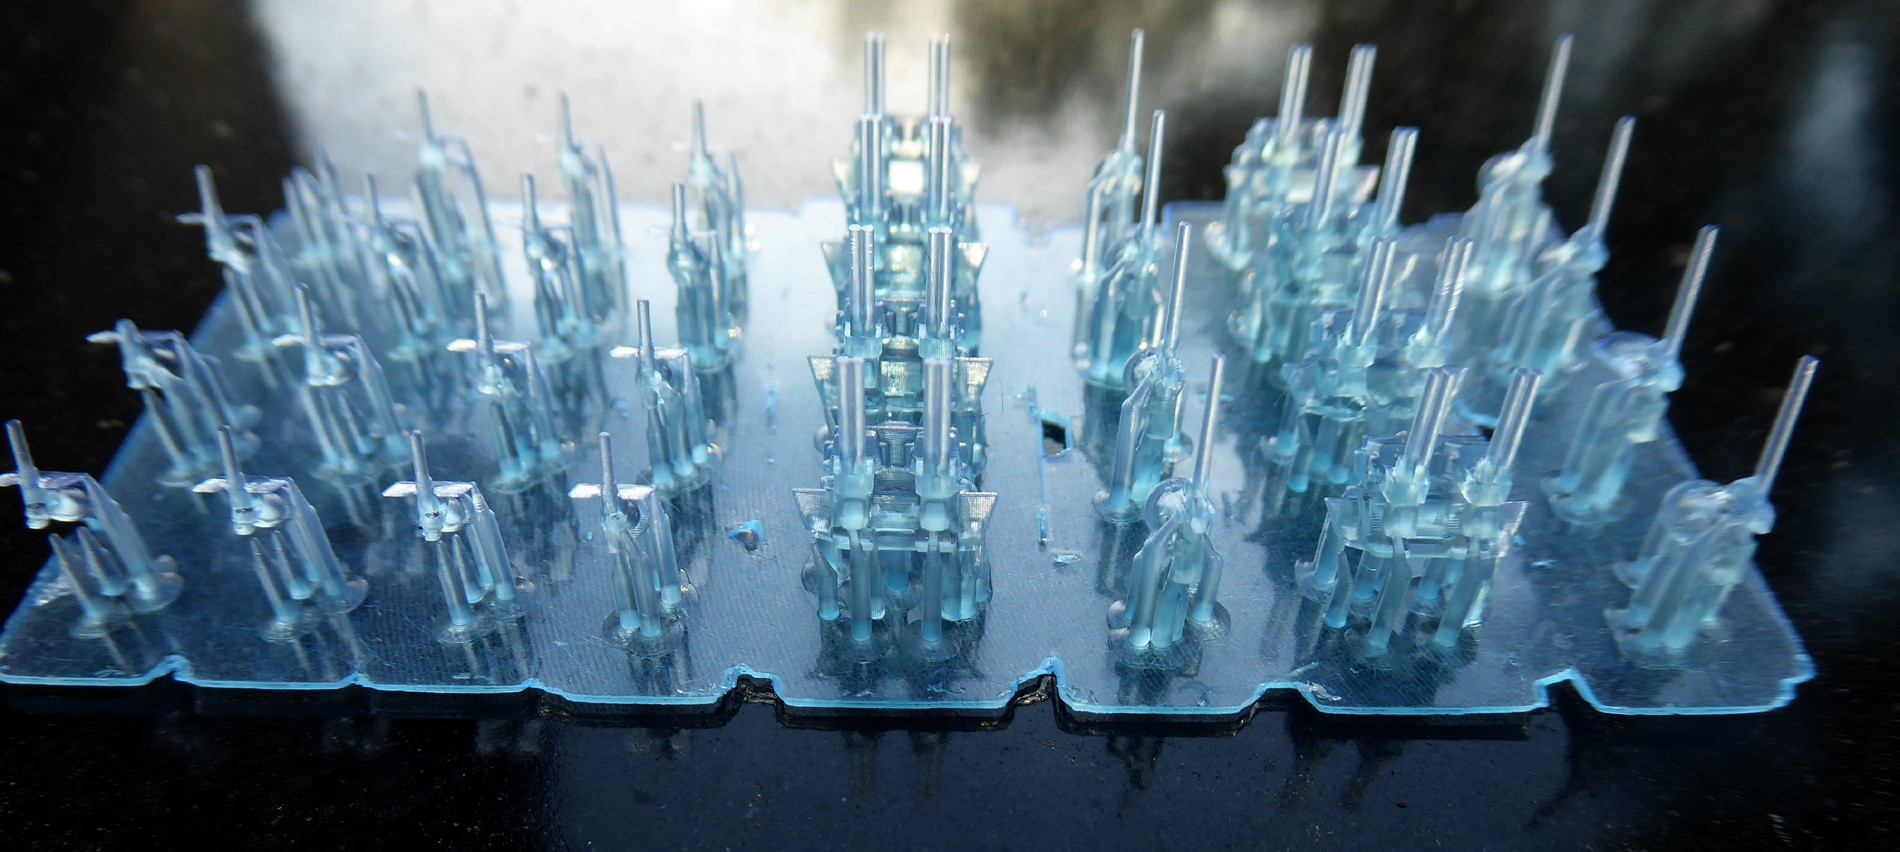
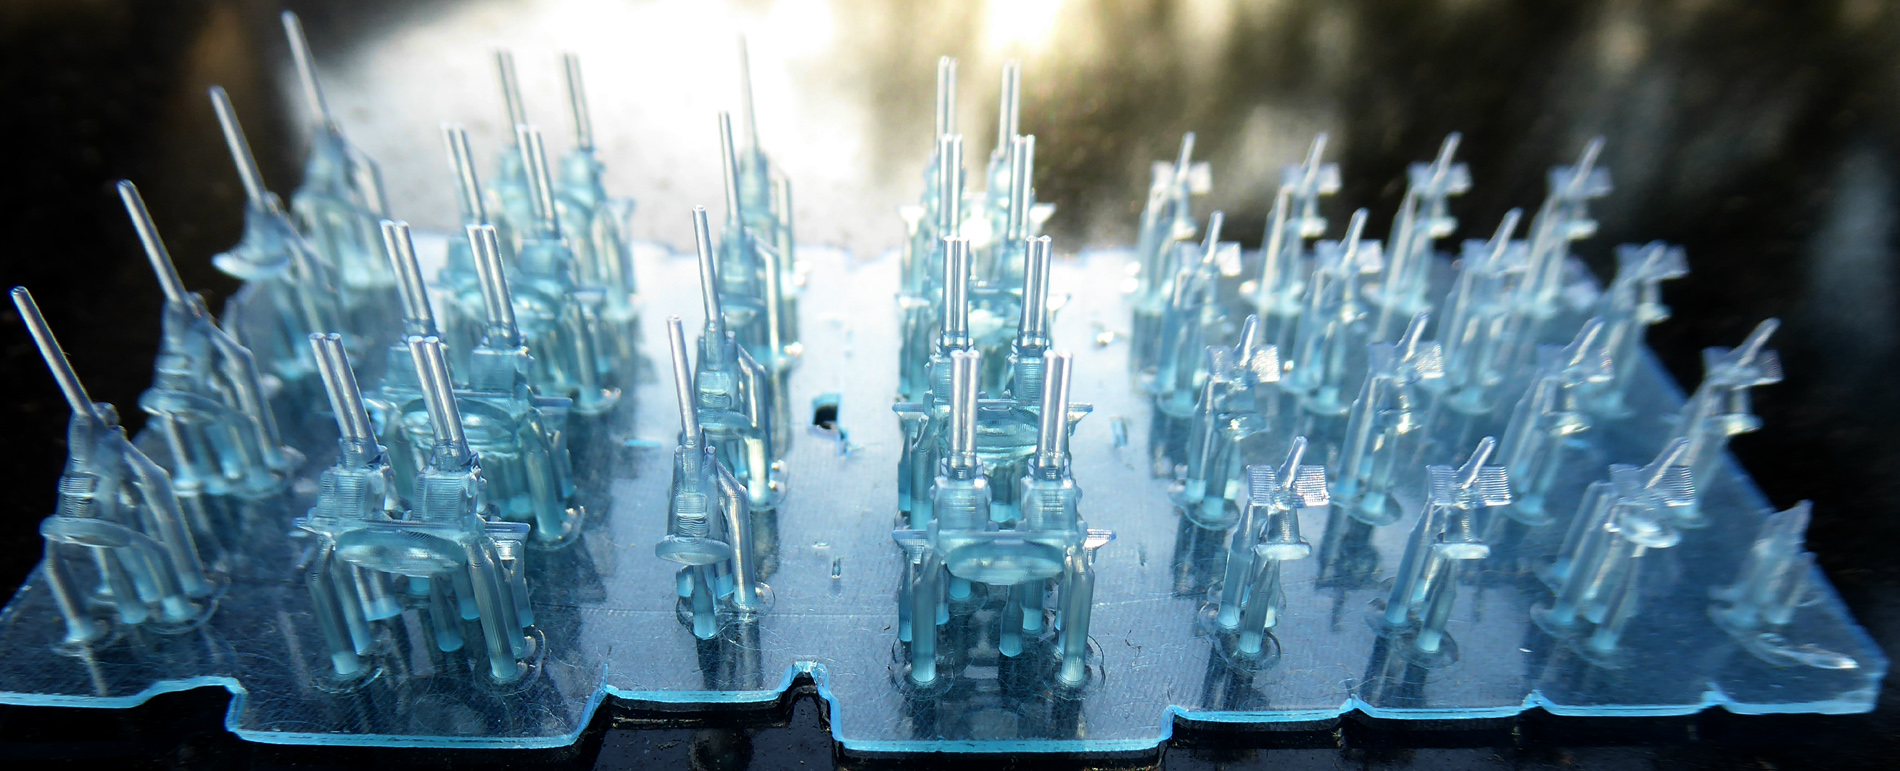
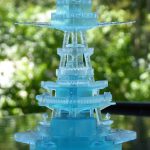
Posted: 7/11/2020 I had recently completed and printed the tower bridges for both my USS Texas and IJN Nagato battleships with my Ender 3 Pro when I ordered my Creality LD-002r printer. While I was quite happy with The Ender’s output I had to print the bridge for USS Texas in multiple figgity parts, clean them up, then carefully assemble them. I was hoping the LD-002r could do a better job and do it in one shot, no assembly required. I was correct!
These are the nicest print examples yet from my LD-002r. The main tower bridge piece took 4.5 hrs to print the stern tower a bit over 4. I auto generated the supports (base only) in Chitubox, deleted some supports that looked destructive to the model, then added some back in as needed.
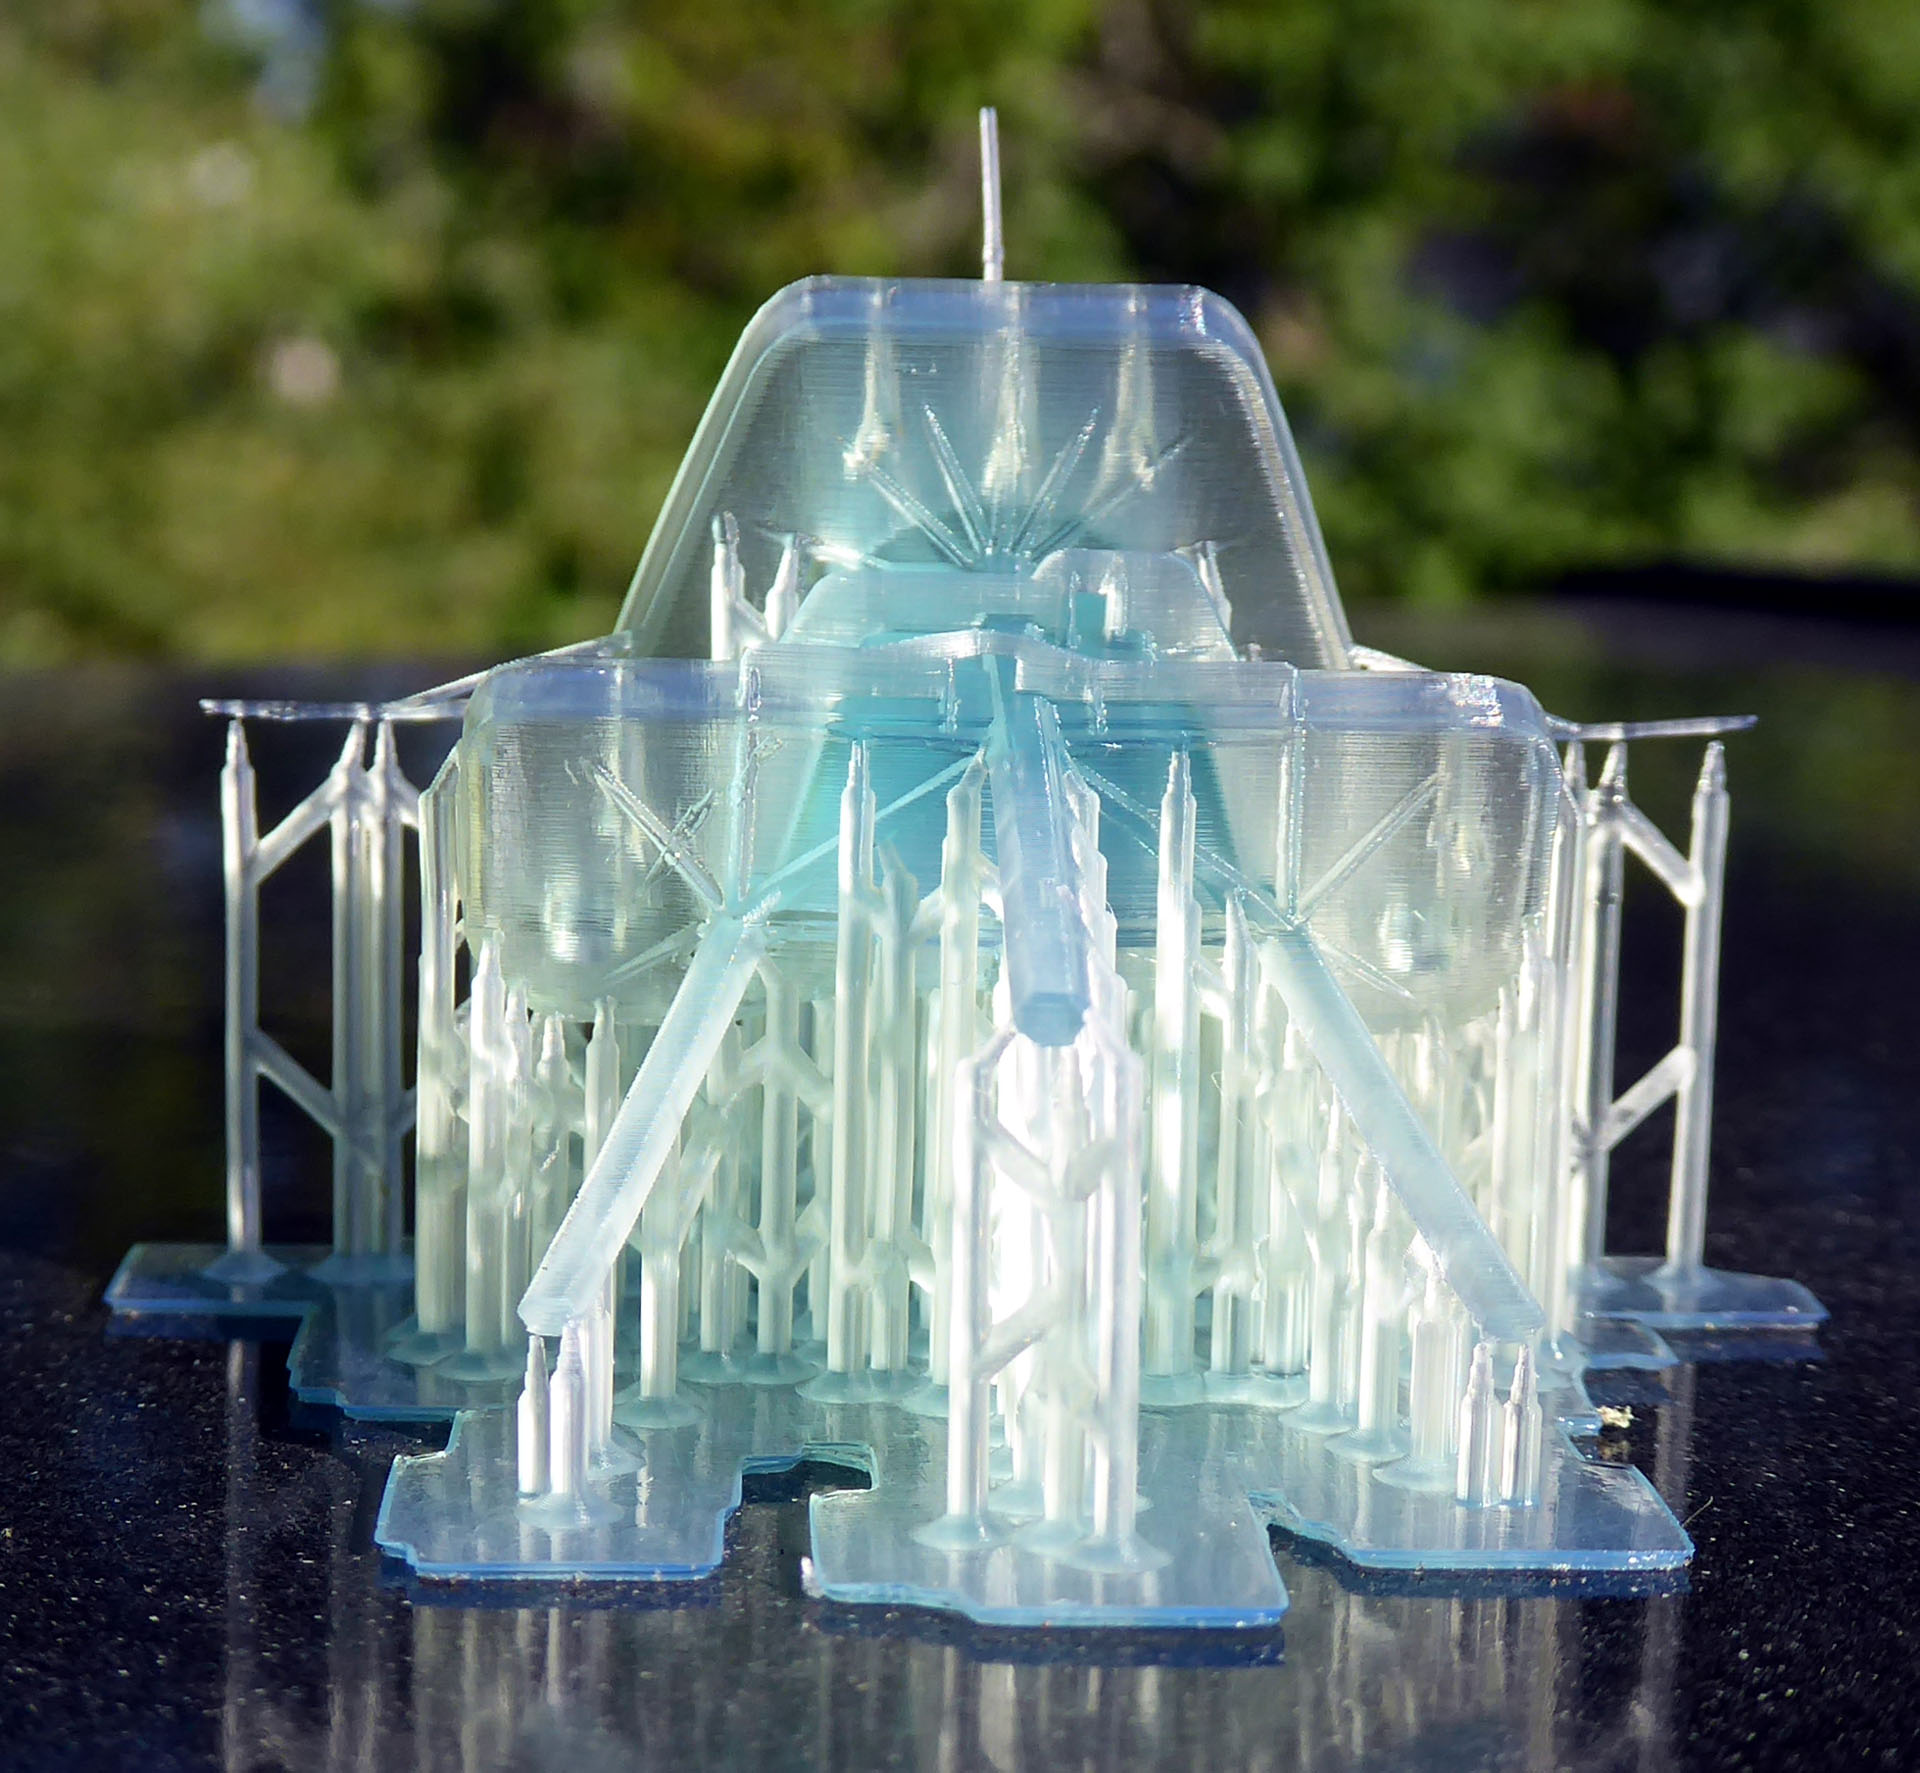
Not one part of these two prints failed or was stuck to the bottom of the resin vat! I printed both back to back without issue. My only gripe is that, again on the backside of the main tower bridge there was a bit of the slag resin buildup I mentioned in my first LD-002r post. not too bad though as I angled the print so no surfaces were parallel to the build plate (as much as I could) but there is still a muddiness noticeable. The backside detail is definitely not as crisp as the front
The hardest part was pruning the multitude of supports away from some of the more delicate structures without breaking them. Once the majority of the supports were gone, cleaning up the tiny nubs where they had attached to the model was also tricky and time consuming. Still the end product is a vast improvement over the Ender 3 Pro’s output, both in level of detail and time needed for post processing.
I had originally planed to replace the towers on my current USS Texas project with the new LD-002r parts. I now want to totally redesign and construct a new USS Texas from scratch, printing as much detail as possible with the LD-002r and using the finest settings on the Ender 3 Pro for the remaining large hull pieces.
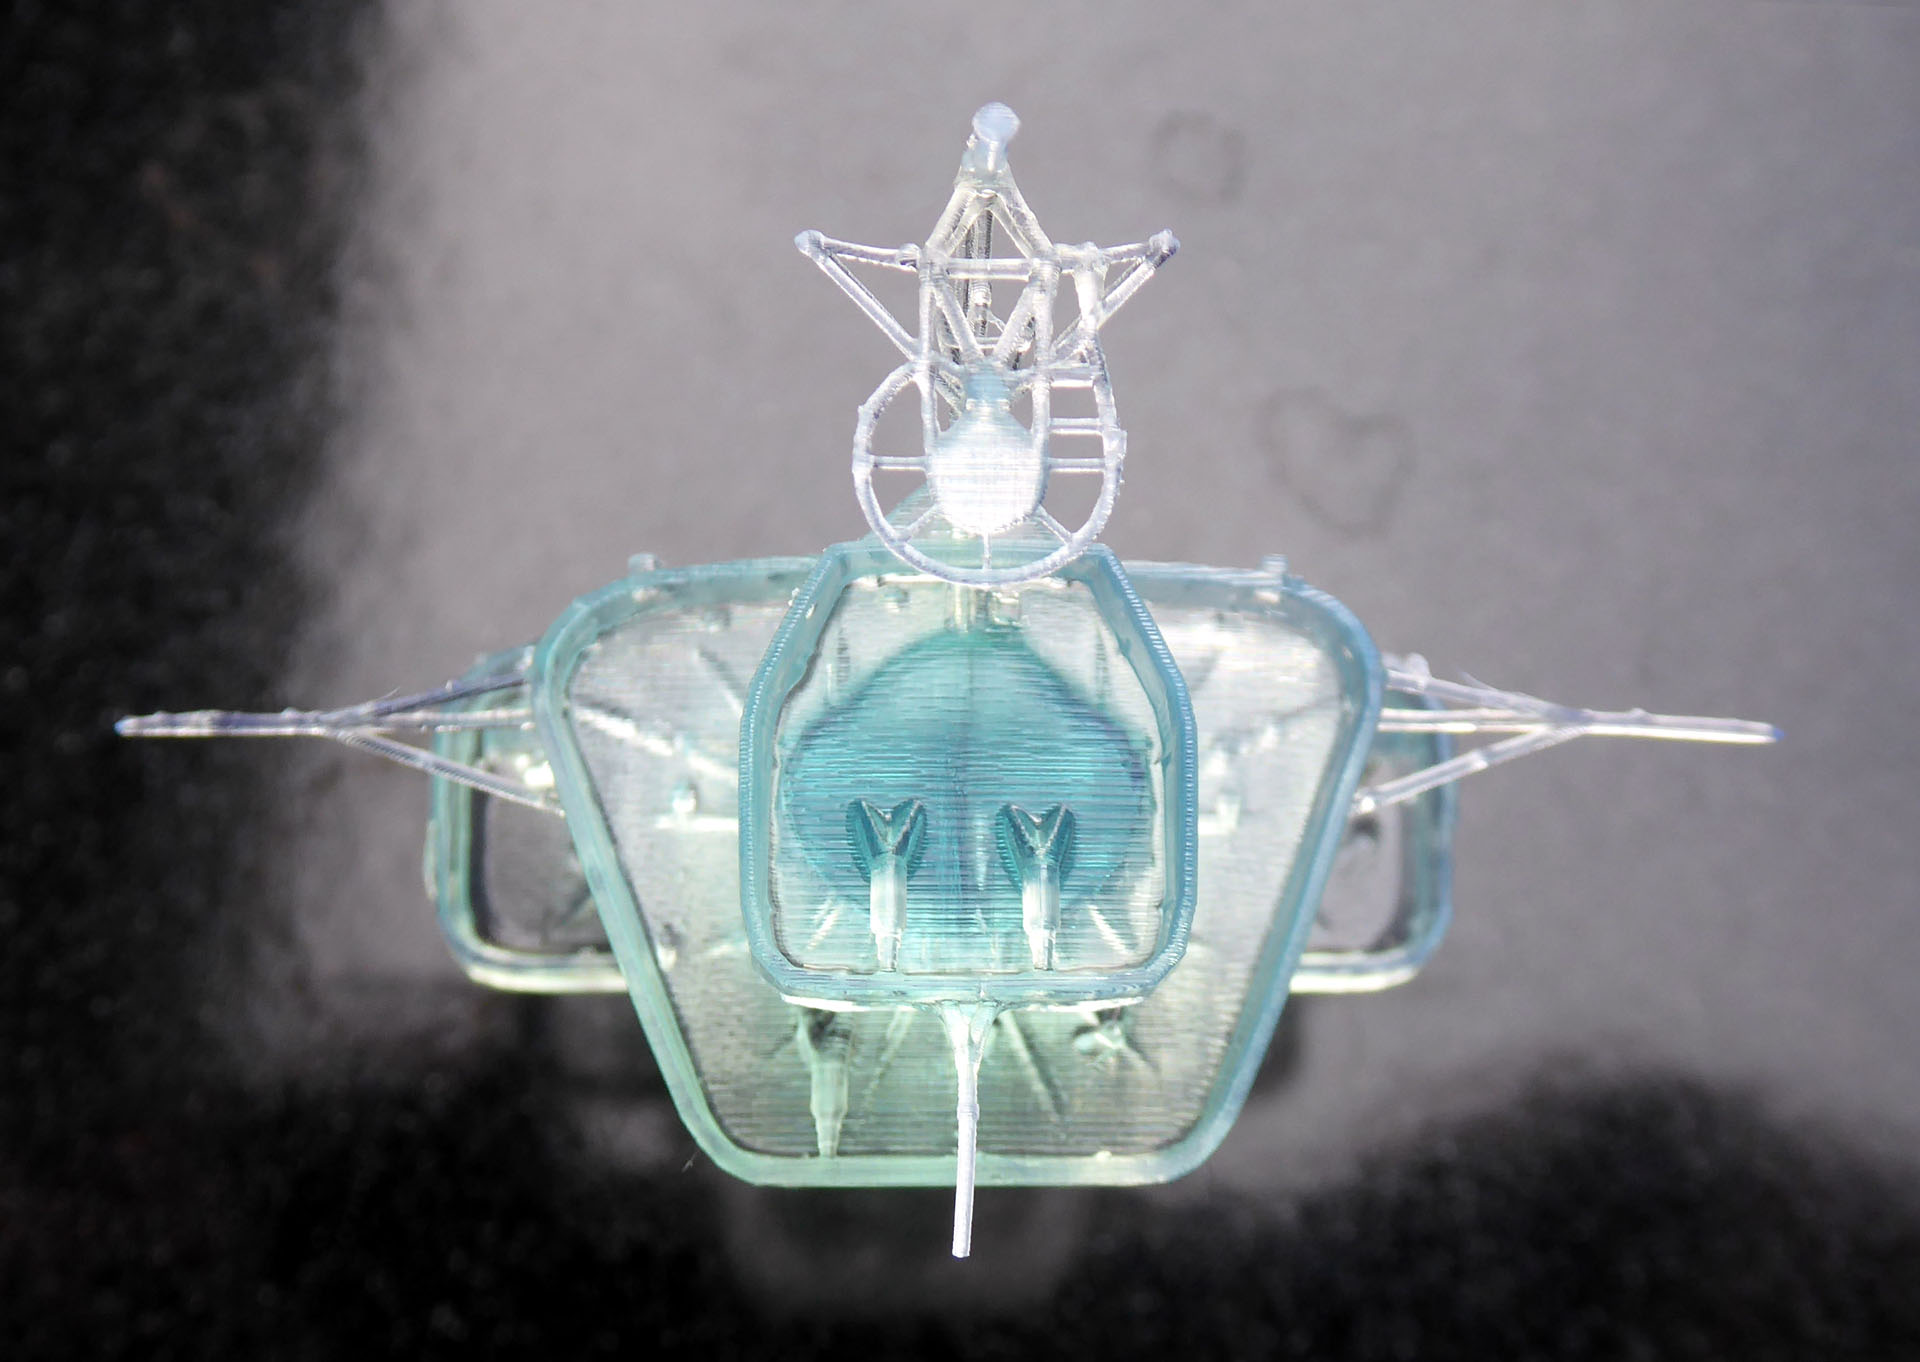
Updated:9/26/2020 Q: What’s more valuable than first impressions? A: Hindsight. Above are some of my latest print examples from my LD-002r. The jury is in, I love this printer. In my original post below you will read that I liked the results when all was well but my early print attempts were plagued with failures in one form or another and of various degrees. I suspected Chitubox was at the heart of my problems and undoubtedly how I was using it. Hindsight tells me I was correct.
Bottom line: don’t let Chitubox auto-generate your supports and rarely use “light” supports unless the thing they are supporting is extremely light.
For my first prints I used auto-generated light supports exclusively =BAD IDEA. I reasoned they would leave less destructive attachment crud – and they do. However if what they are supporting is bigger than a green pea there is a good chance they will not retain their hold on the object and their attachment to it will break, leaving a nasty blob for you to clean up on the bottom of your resin vat. I thought I could just add more supports and this kind-of works but contributes to the slag layer of semi cured resin build up on the side of your object facing the build plate.
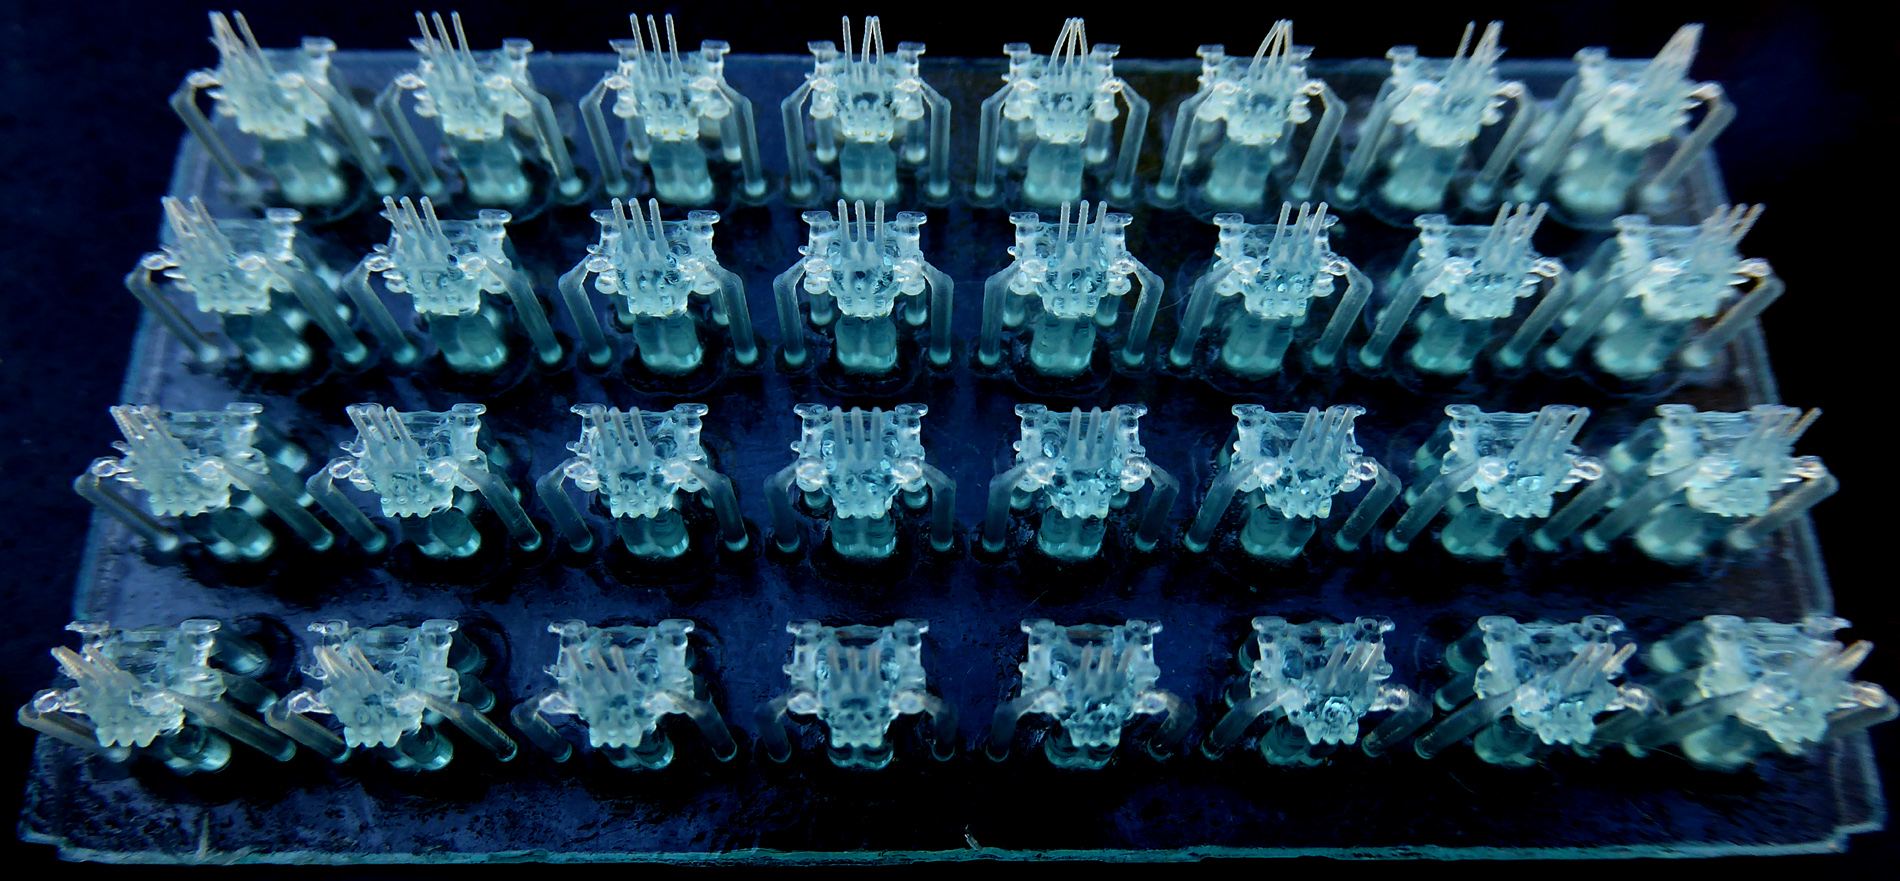
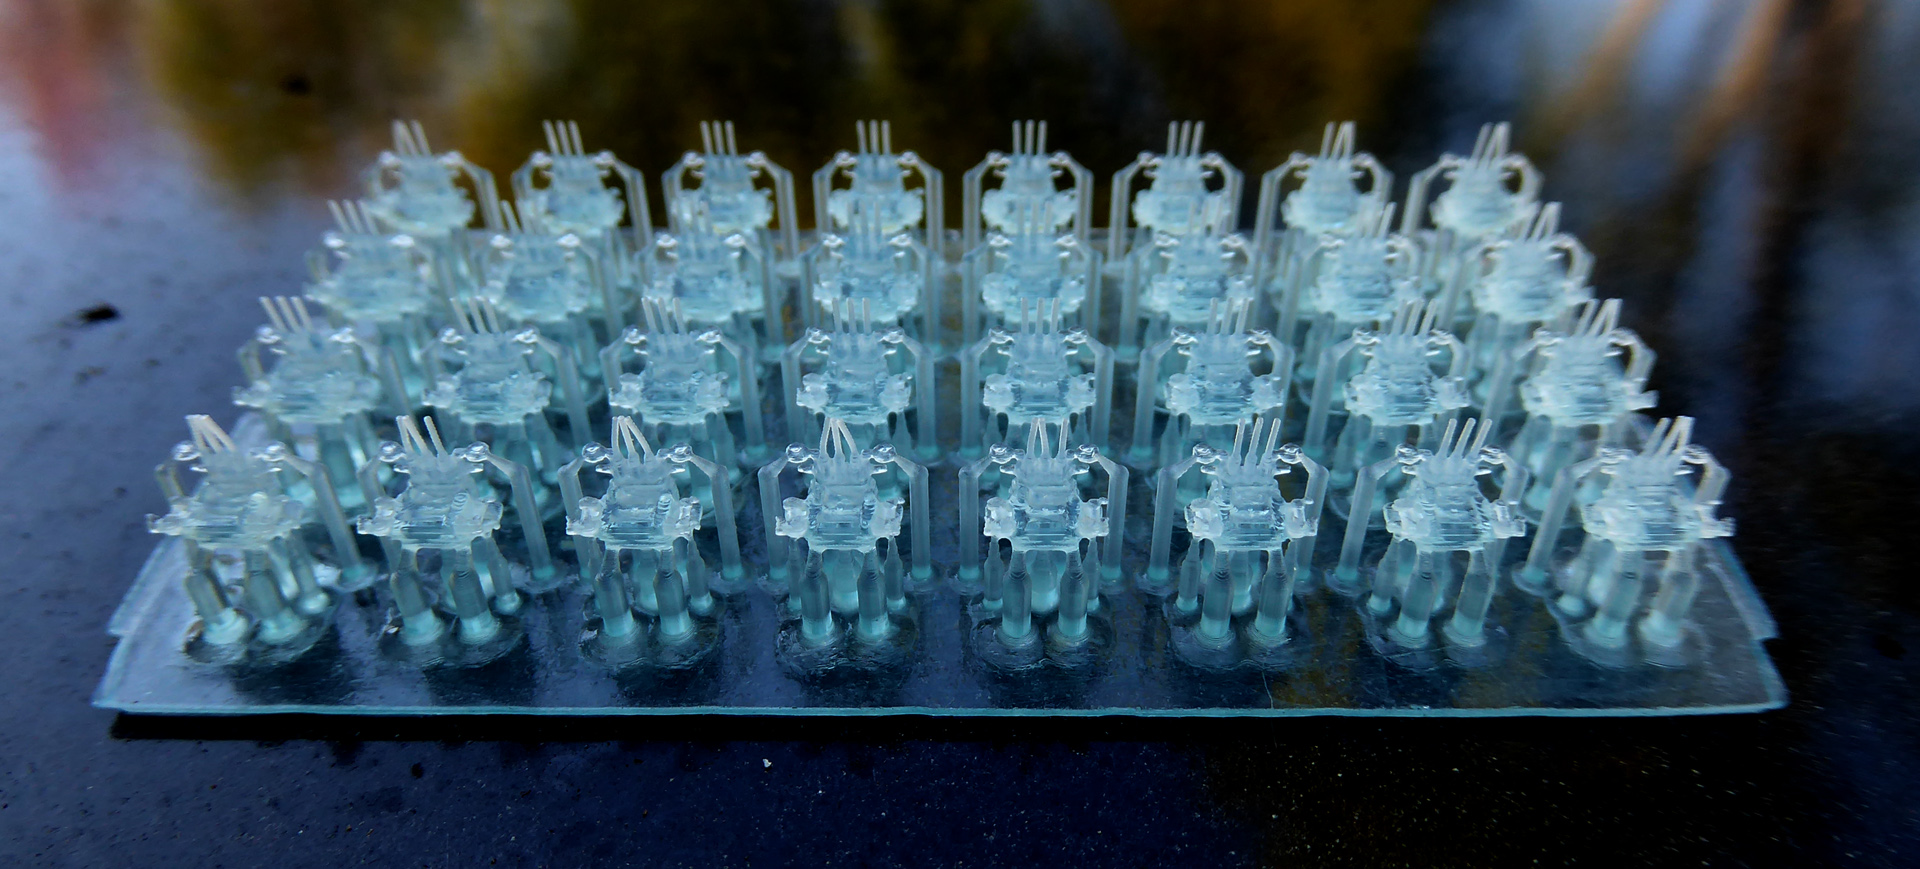
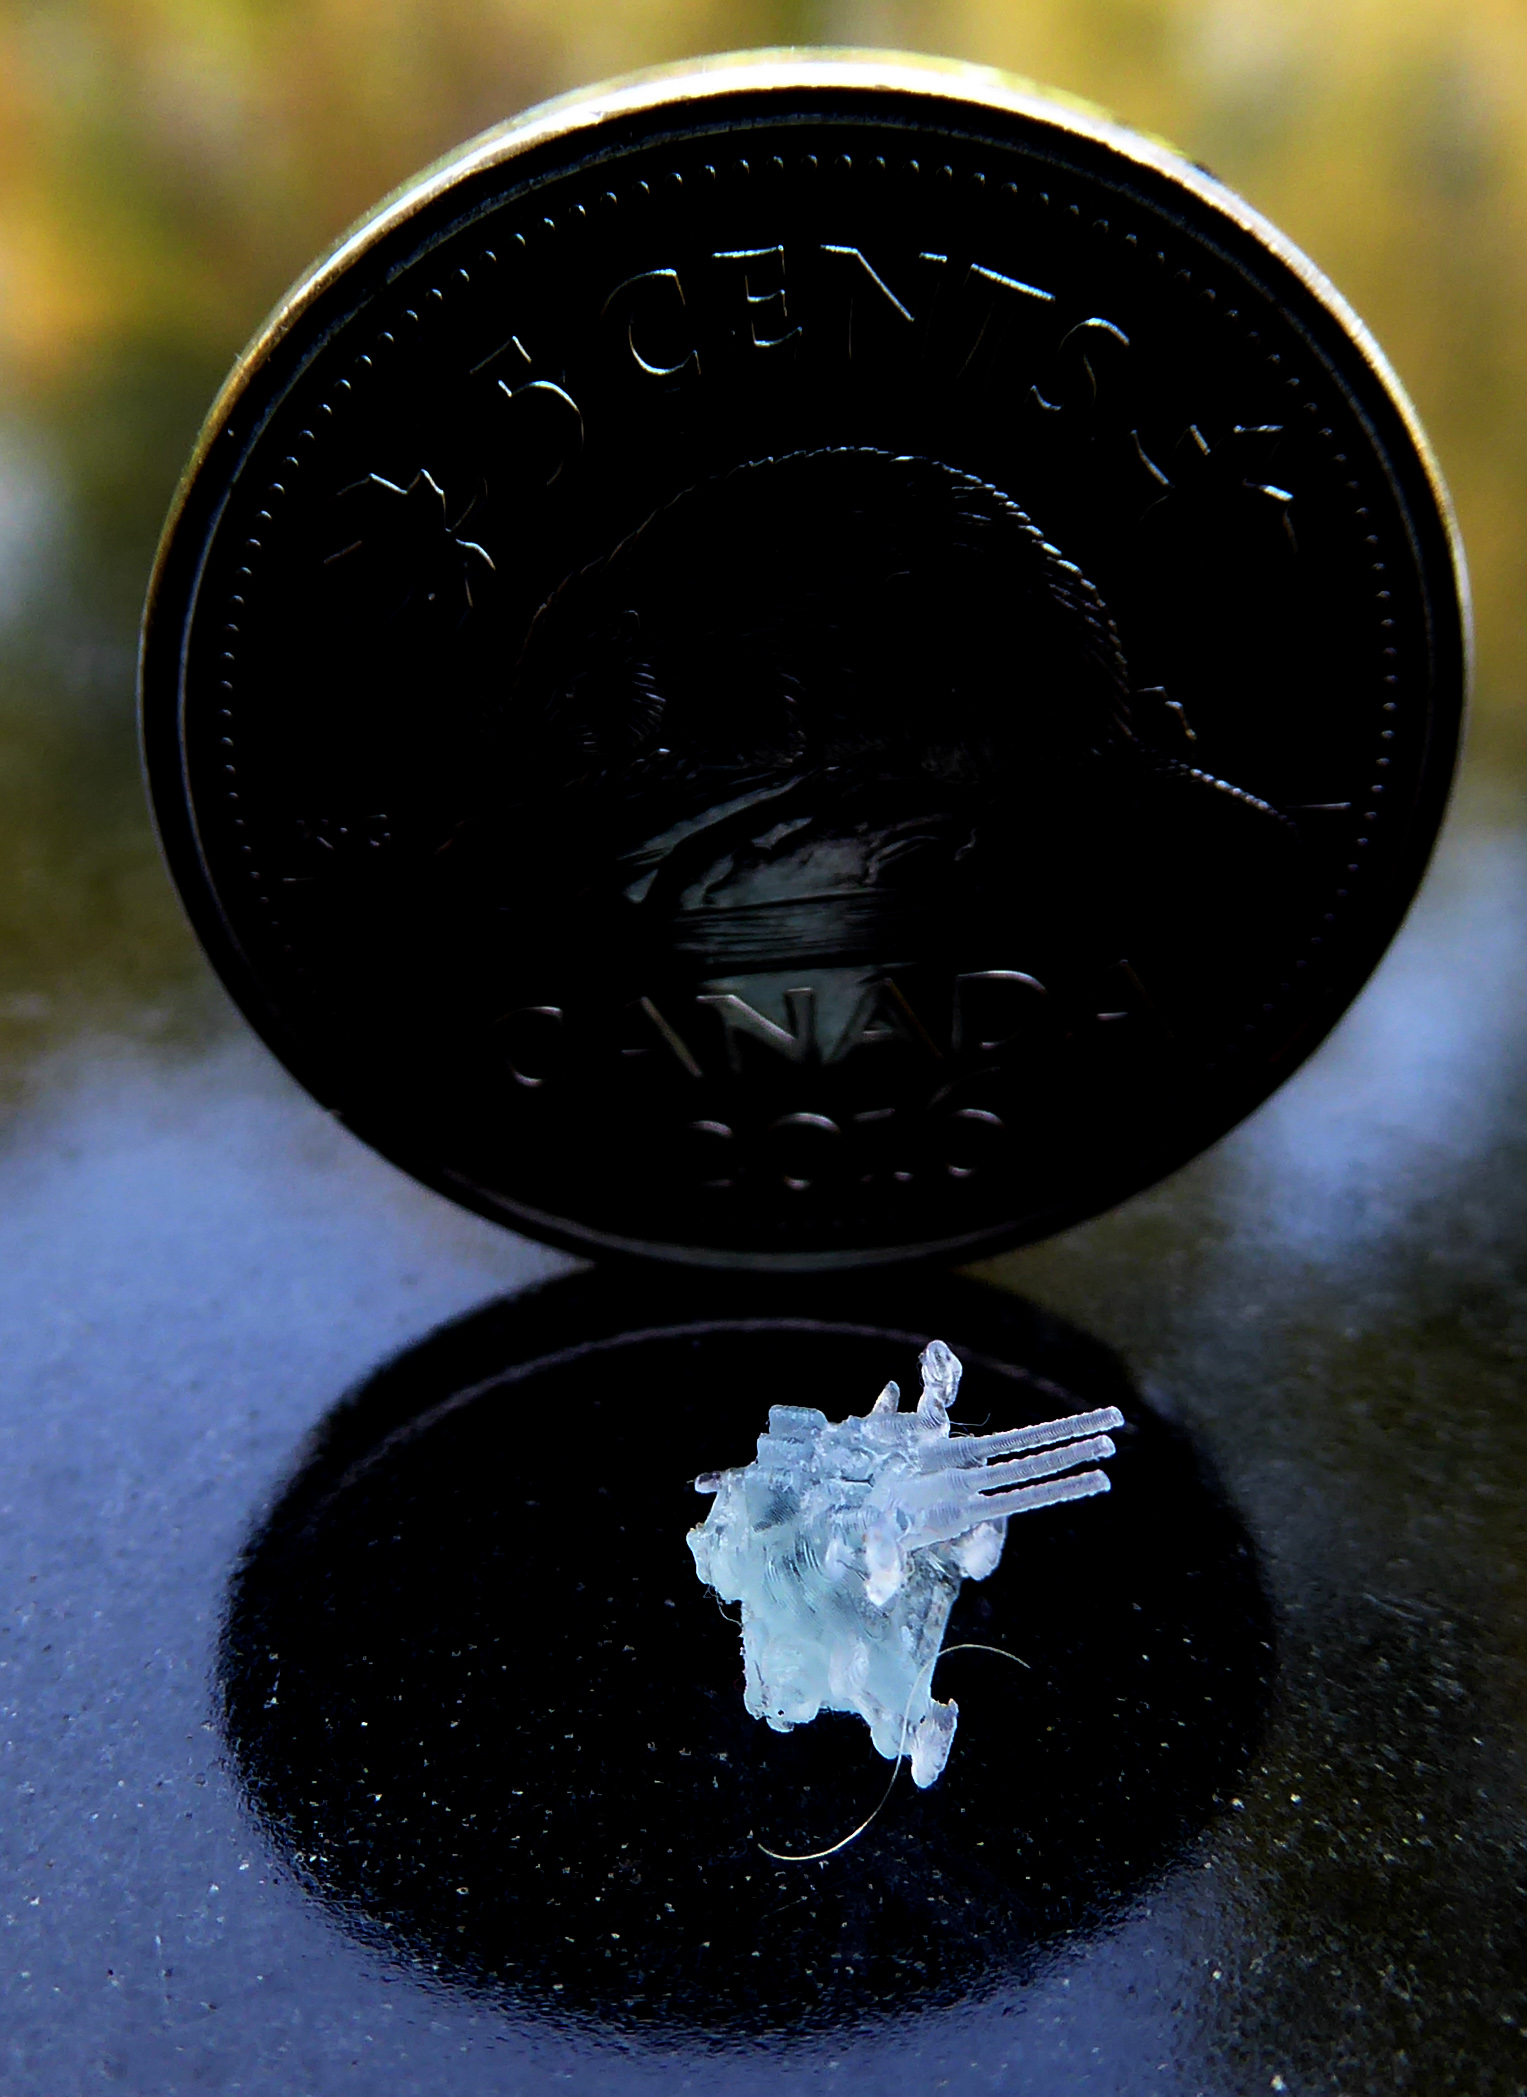
I’ve found on small to medium sized objects, I’m far better off using fewer medium supports mixed with a few heavies all strategically placed by hand and with larger objects, using primarily heavy supports augmented with medium works best. In all cases I’ll only add light supports if the object feature being supported is truly tiny, like a prop tip on a 1/450 scale plane or the sight on a Type 96 triple AA mount. Since I started doing this exclusively I haven’t had to clean my vat or had a badly failed print in well over a dozen prints. I’ve been able to up the detail with incredible success as shown above with the Type 96×3 Japanese AA mounts in 1/450 scale. The coin is a five cent piece included to show scale. For these tiny mounts I used one heavy support under the center of mass on a leading edge (edge of AA mount closest to build plate) then a few medium supports, only using light supports to hold the two targeting sights on either side of the mount.
I’ve just added a new IJN Mogami project page, it features many stunning LD-002r print examples, far exceeding my original expectations for this inexpensive printer, each created in the manner described above and I was extremely pleased with all of them.
PS: feel free to keep reading but keep in mind most of the issues mentioned ultimately were my fault, except the dreaded slag build up problem – I’m still looking for ways to minimize this. Using fewer thicker supports on an object with a slight angle of about 35 degrees helps but is not the cure. I’ve read that the opaque resins may help – my order is in, we’ll see.
Original Post: 7/4/2020
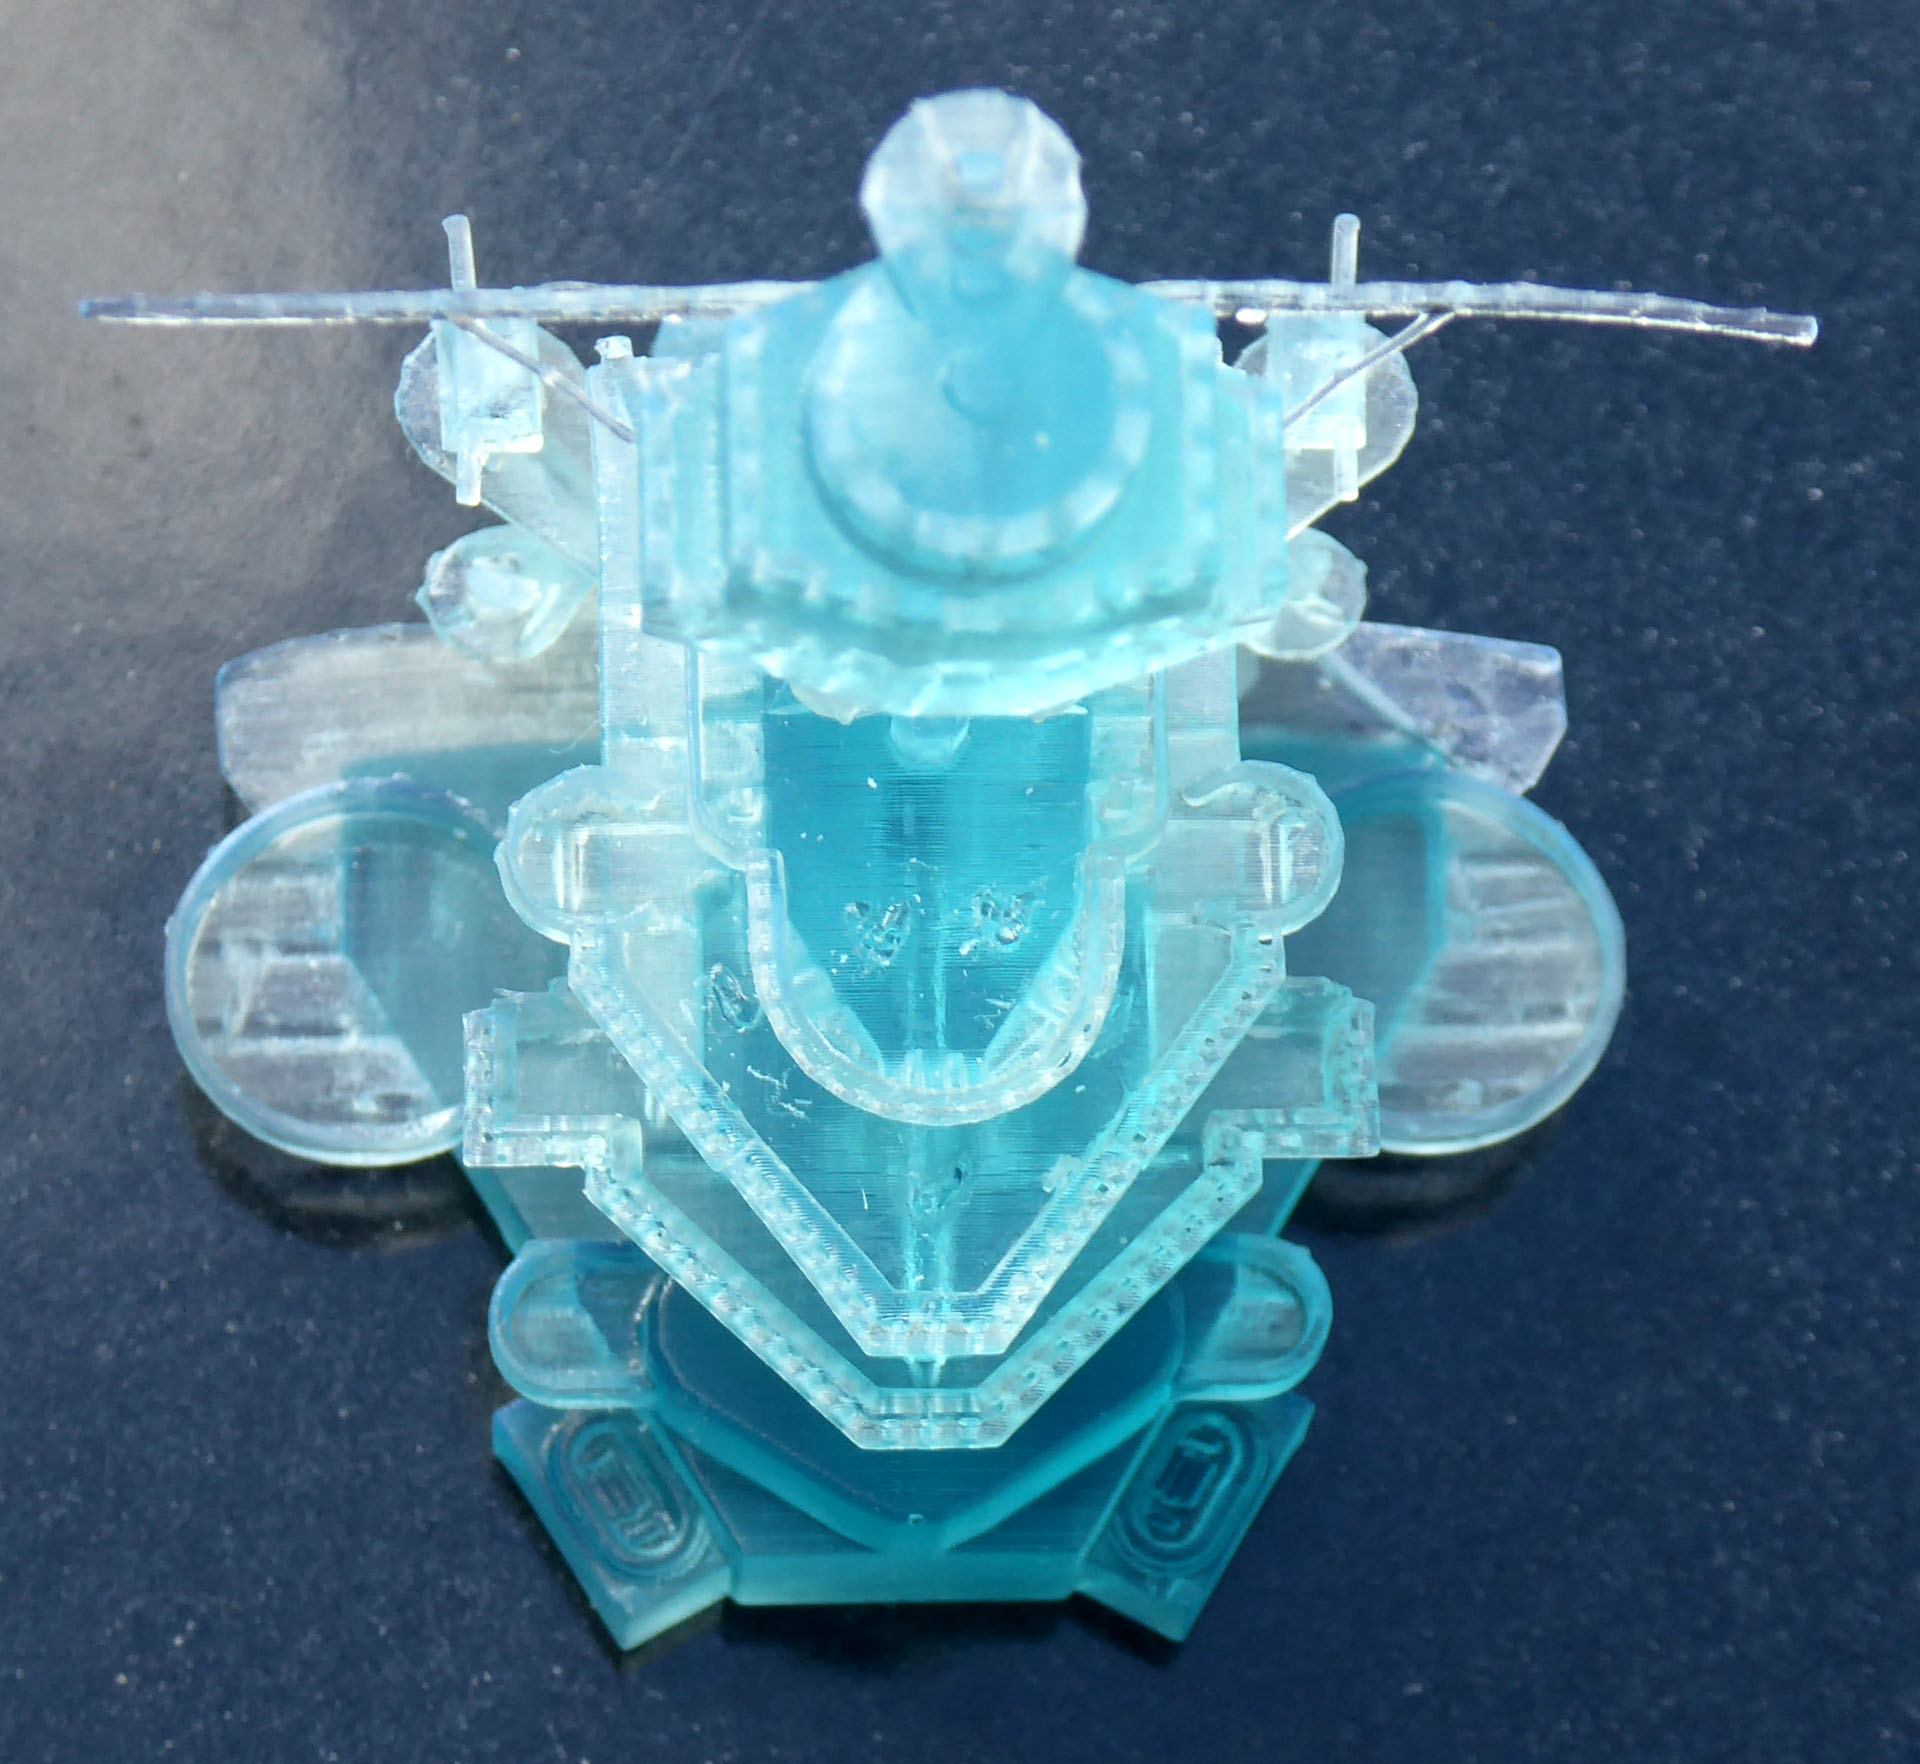
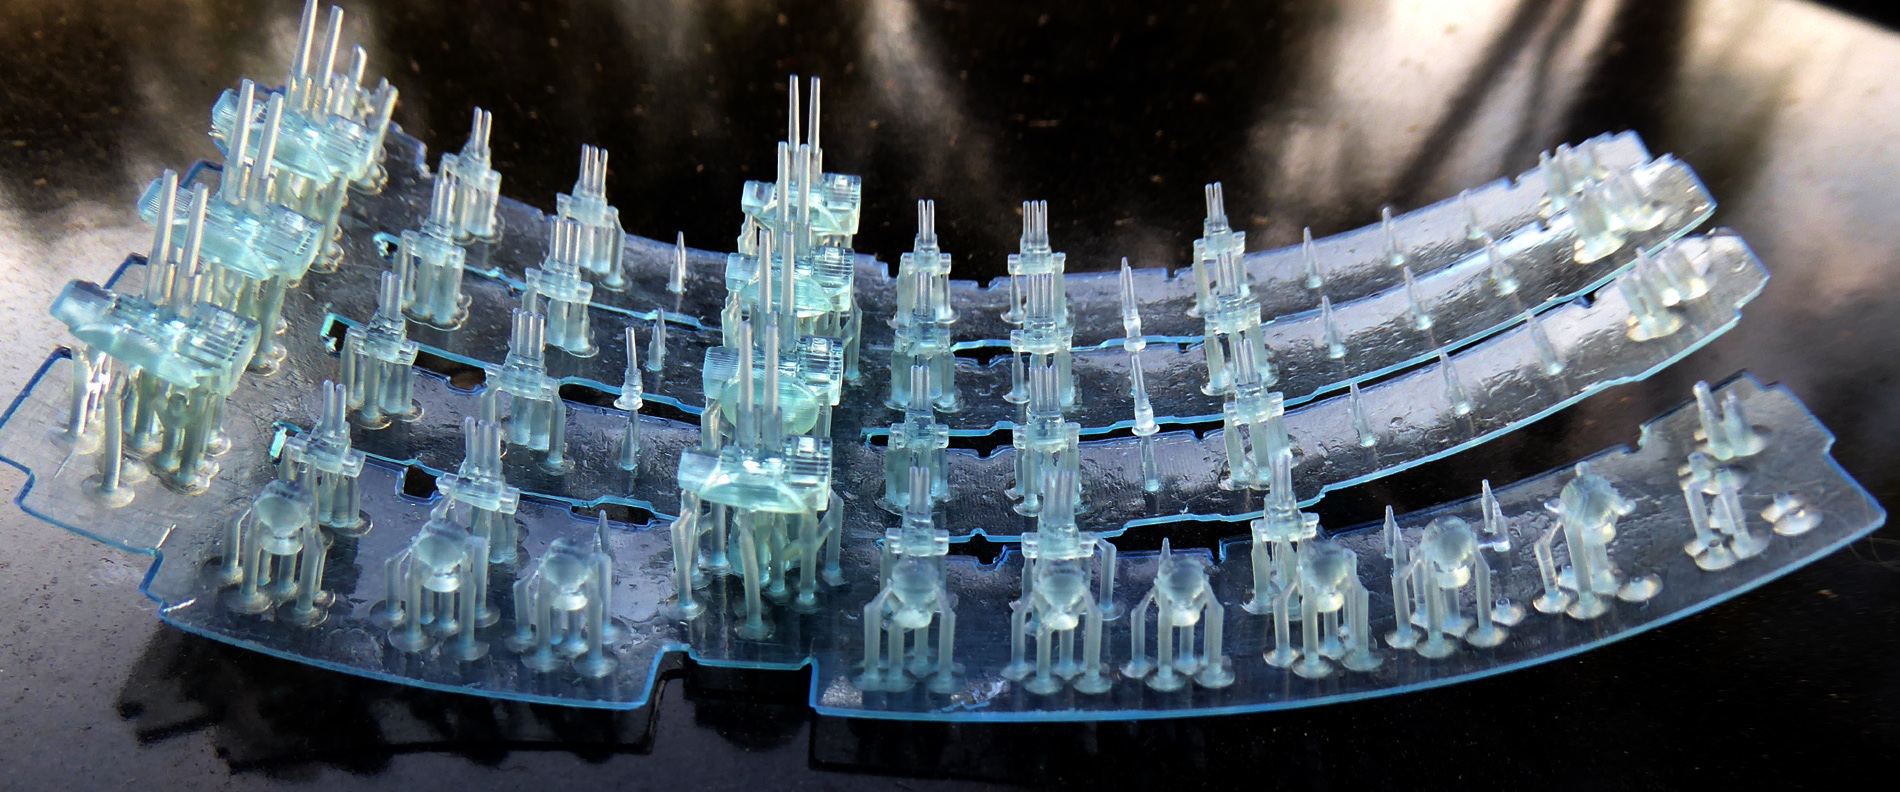
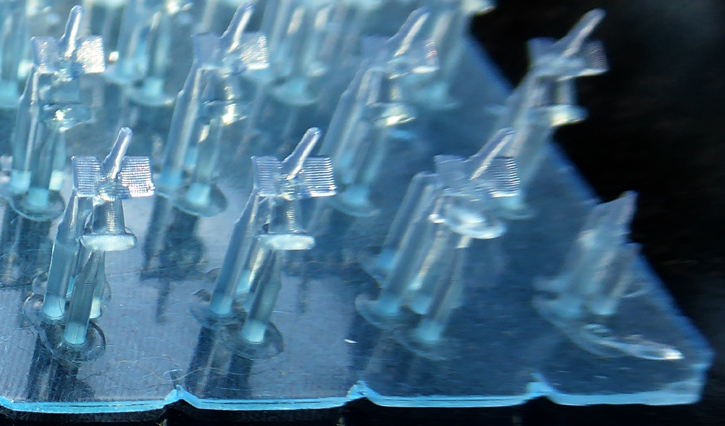
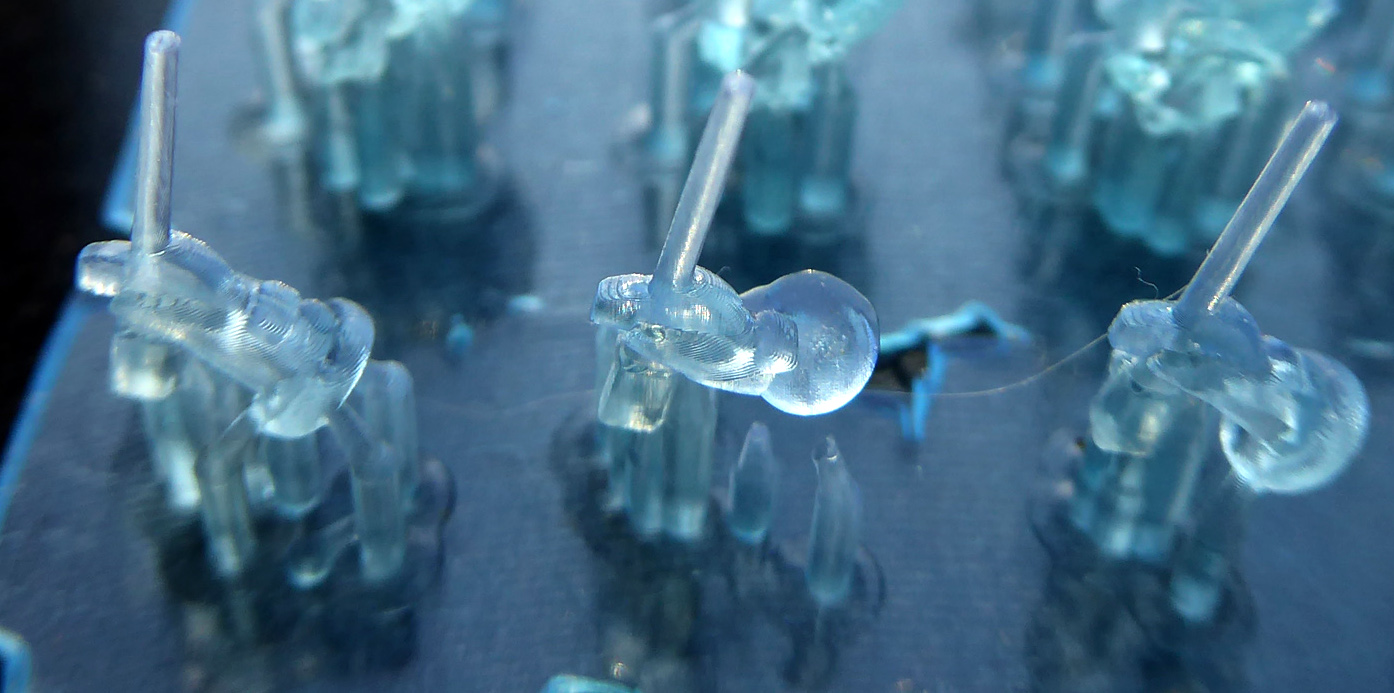
The above pictures are a few of my first print examples/attempts with my new Creality LD-002r LCD 3D printer. They are all parts for models I am either currently building or have built but could use some upgrades to their fine detail. All things considered they came out reasonably well. My expectations were high, so that I’m not totally disappointed with these first results is pretty remarkable. On casual inspection of the above pictures you’ll note supports holding nothing, I hadn’t removed anything, those are failed portions of the print. Each failed object was firmly stuck to the bottom of the LD-002r’s resin vat just waiting for me to grab a new pair of Nitrile gloves, put on my goggles, detach, drain and wash the vat so I could then carefully clean/scrape them off the delicate transparent film on the bottom. If it sounds like I didn’t enjoy the process you’re right, I knew I’d probably need to do this once in a while but not after every freakin’ print! Such is the fate of those who must learn by trial and error… Is the LD-002r printer at fault? Probably not. I think most of the blame should fall on the Chitu Box splicer and me for 100% trusting it. I auto generated the supports and assumed they were all good. I’m sure Chitu Box does a decent job supporting figurines and other more substantial print subjects but on my tiny, figgity 1/450 scale WWII naval arsenal, it seems to fall short. On closer inspection even some of the objects that weren’t totally stuck to the bottom of the resin vat had issues. You can see these, less than total fails, in the closeup pictures below.
In the first picture at left, look closely at the second gun mount from the bottom, you may notice a nicely formed circular base. That one mount is the only one to have actually printed correctly. Every other gun like it is missing over half of its base.
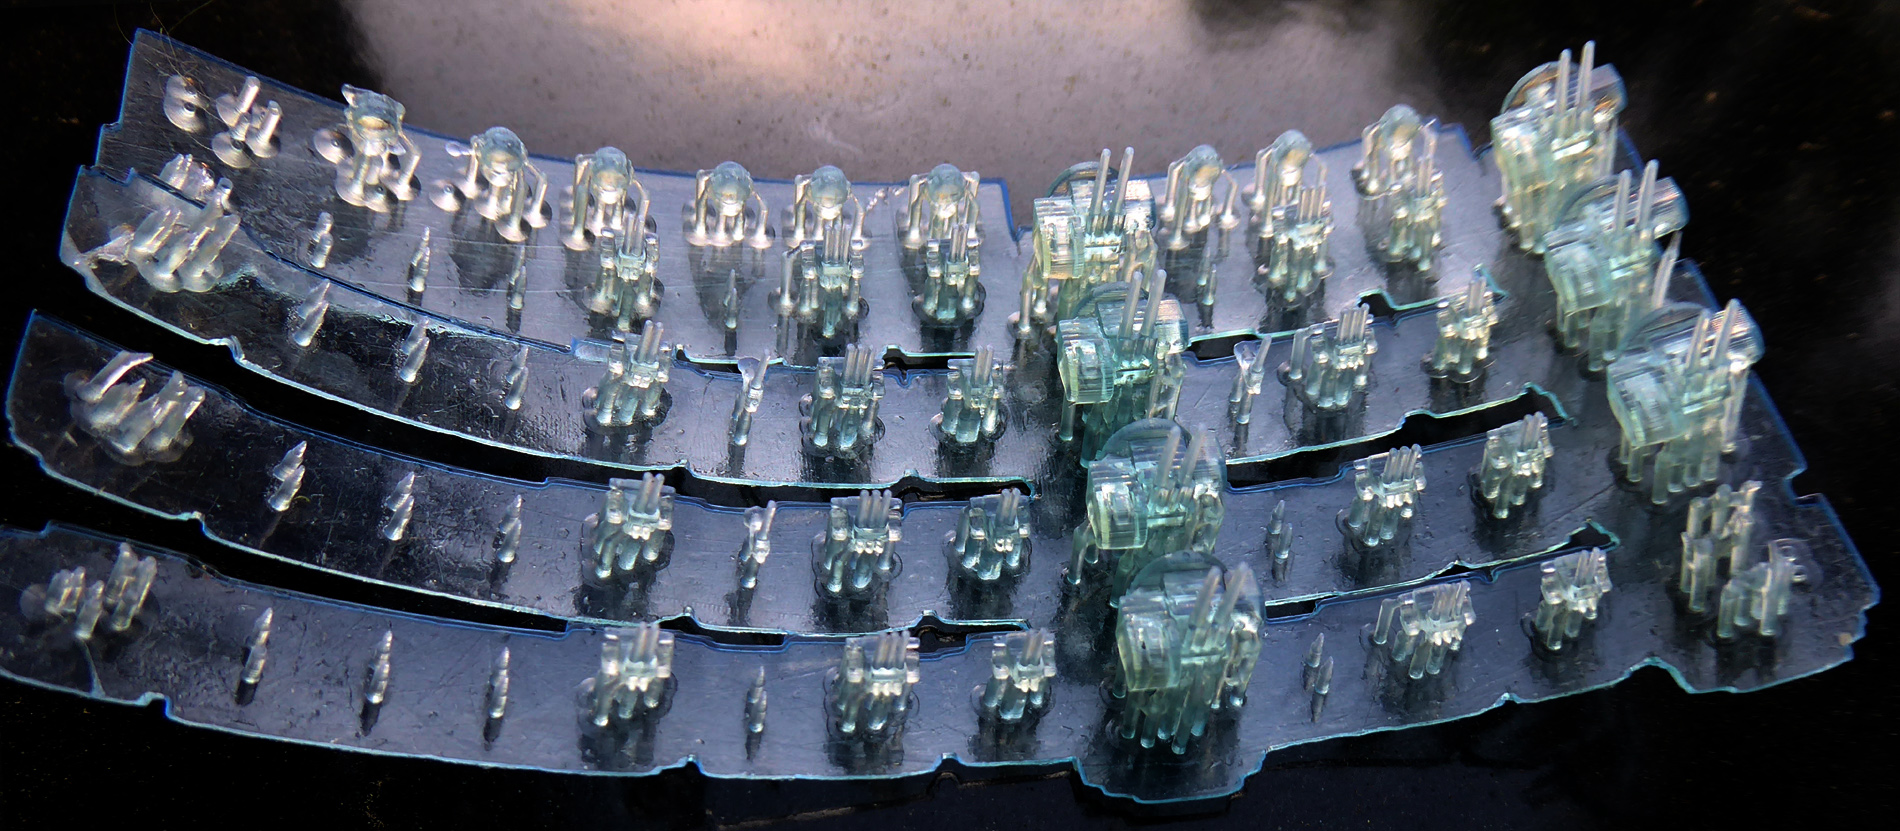
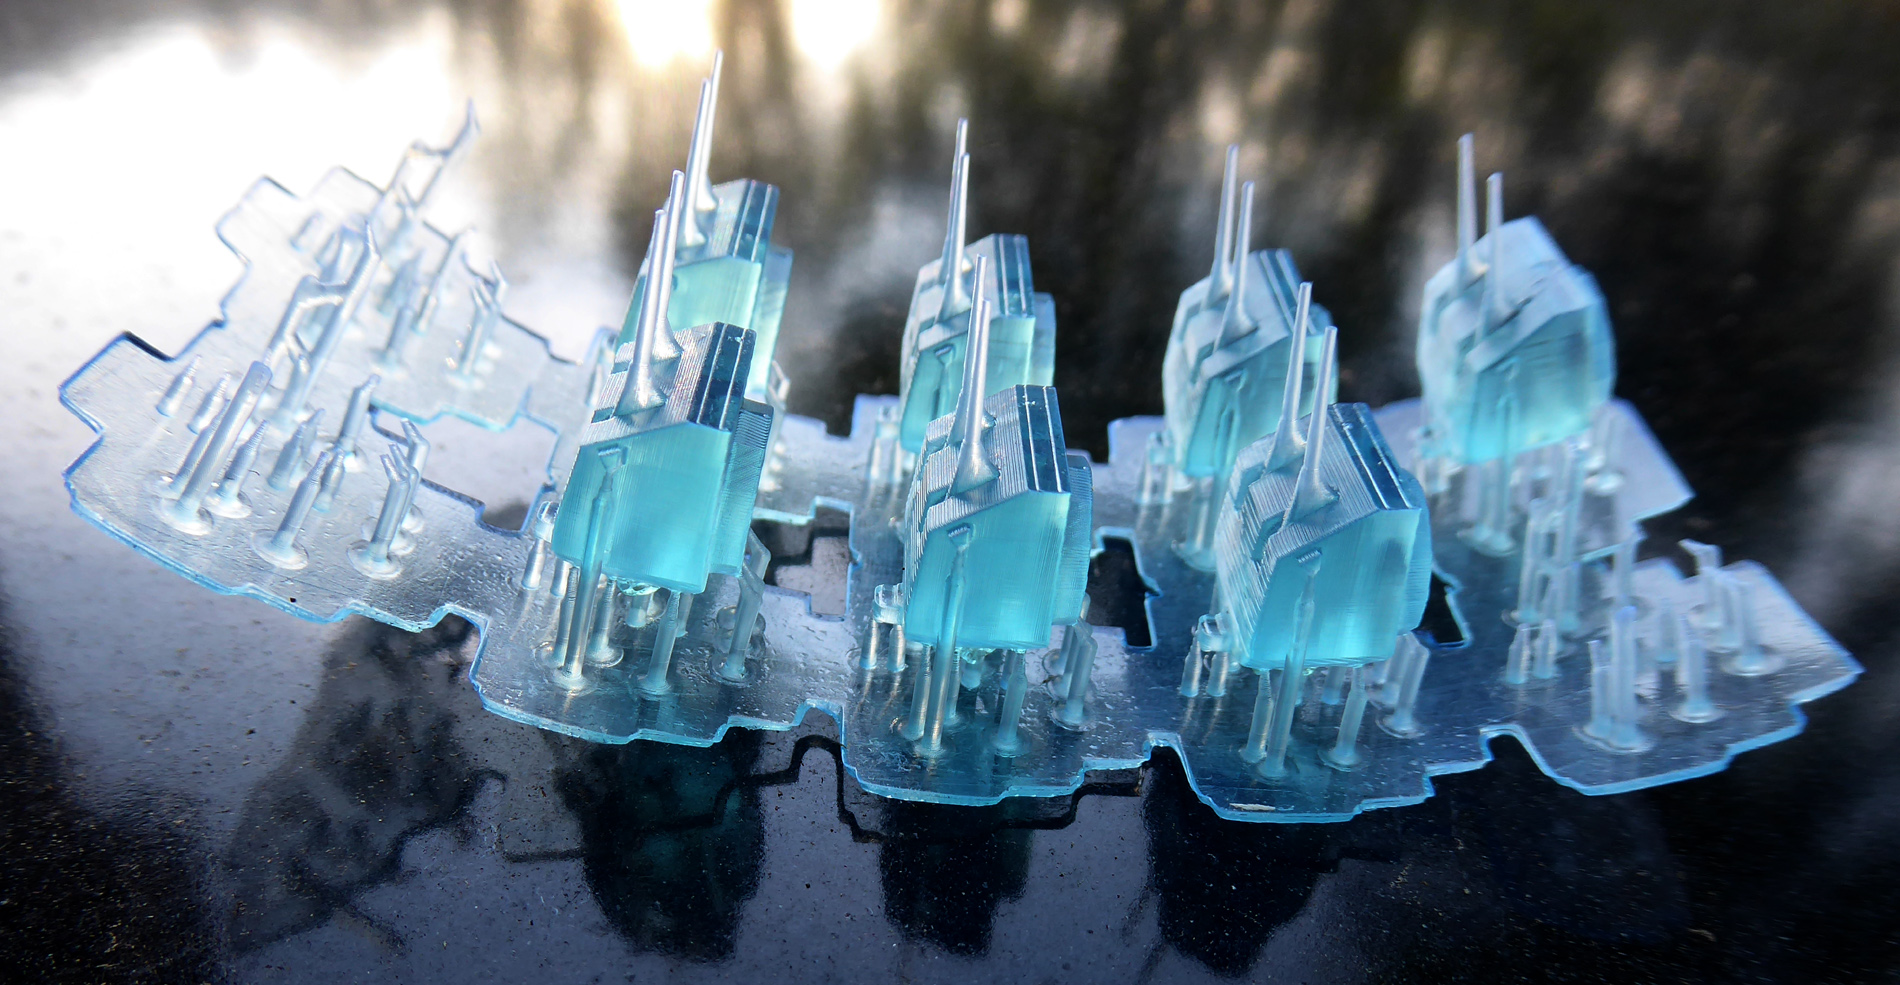
In the middle picture you can see the complete fail of the 20mm Oerlikon AA gun in the front row at right but if you look carefully you may notice the Oerlikon to its left is missing its base. In the last picture at right, the 3 inch US AA gun in the middle has a deformed base. Now if your lucky, these missing bits of your print will reattach themselves to their objects in undesirable ways (like with the 3 inch AA). If your unlucky, you’ll need to clean your vat again because tiny (and sometimes not so tiny) bits of cured resin are now stuck to it.
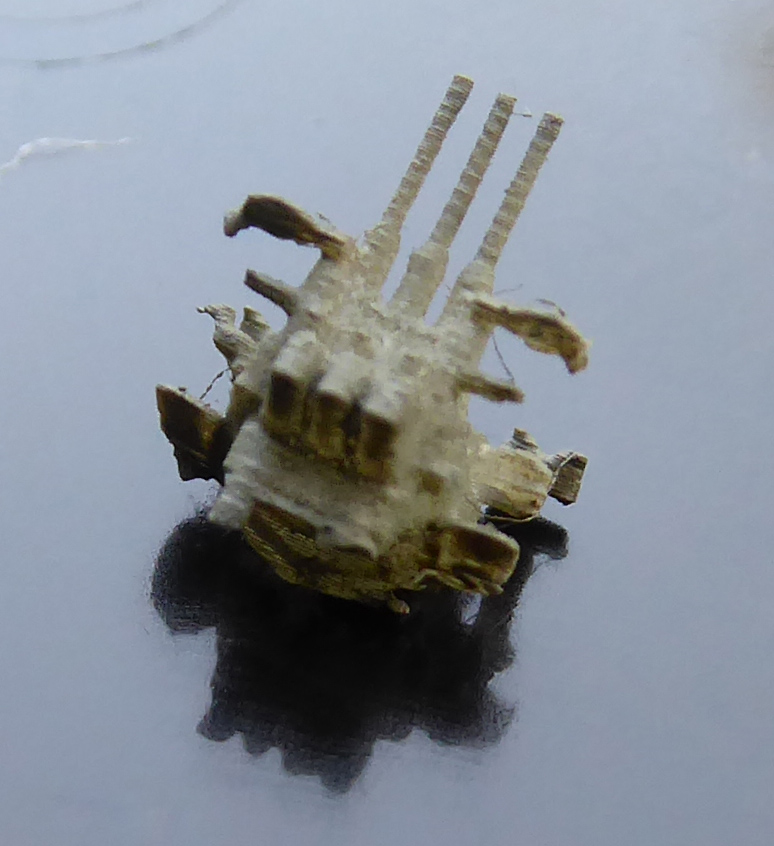
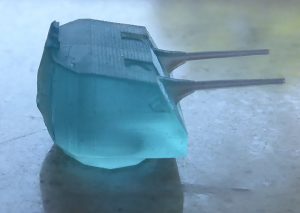
You may be thinking, “Well at least the dual 5 inch turrets (that printed) look great!” and that’s what I thought too, until I detached one from its supports and got a look at its back side.
Notice the irregular bulge on the back of the turret, there was a glob of cured resin attached to the backside of each turret. After continued use, I’ve come to learn that any surface that faces the build plate and is more or less parallel to it tends to accumulate a slag layer of resin.
Back to Chitu Box, again be careful with generating auto supports, it sometimes does so in an unnecessarily destructive manor.
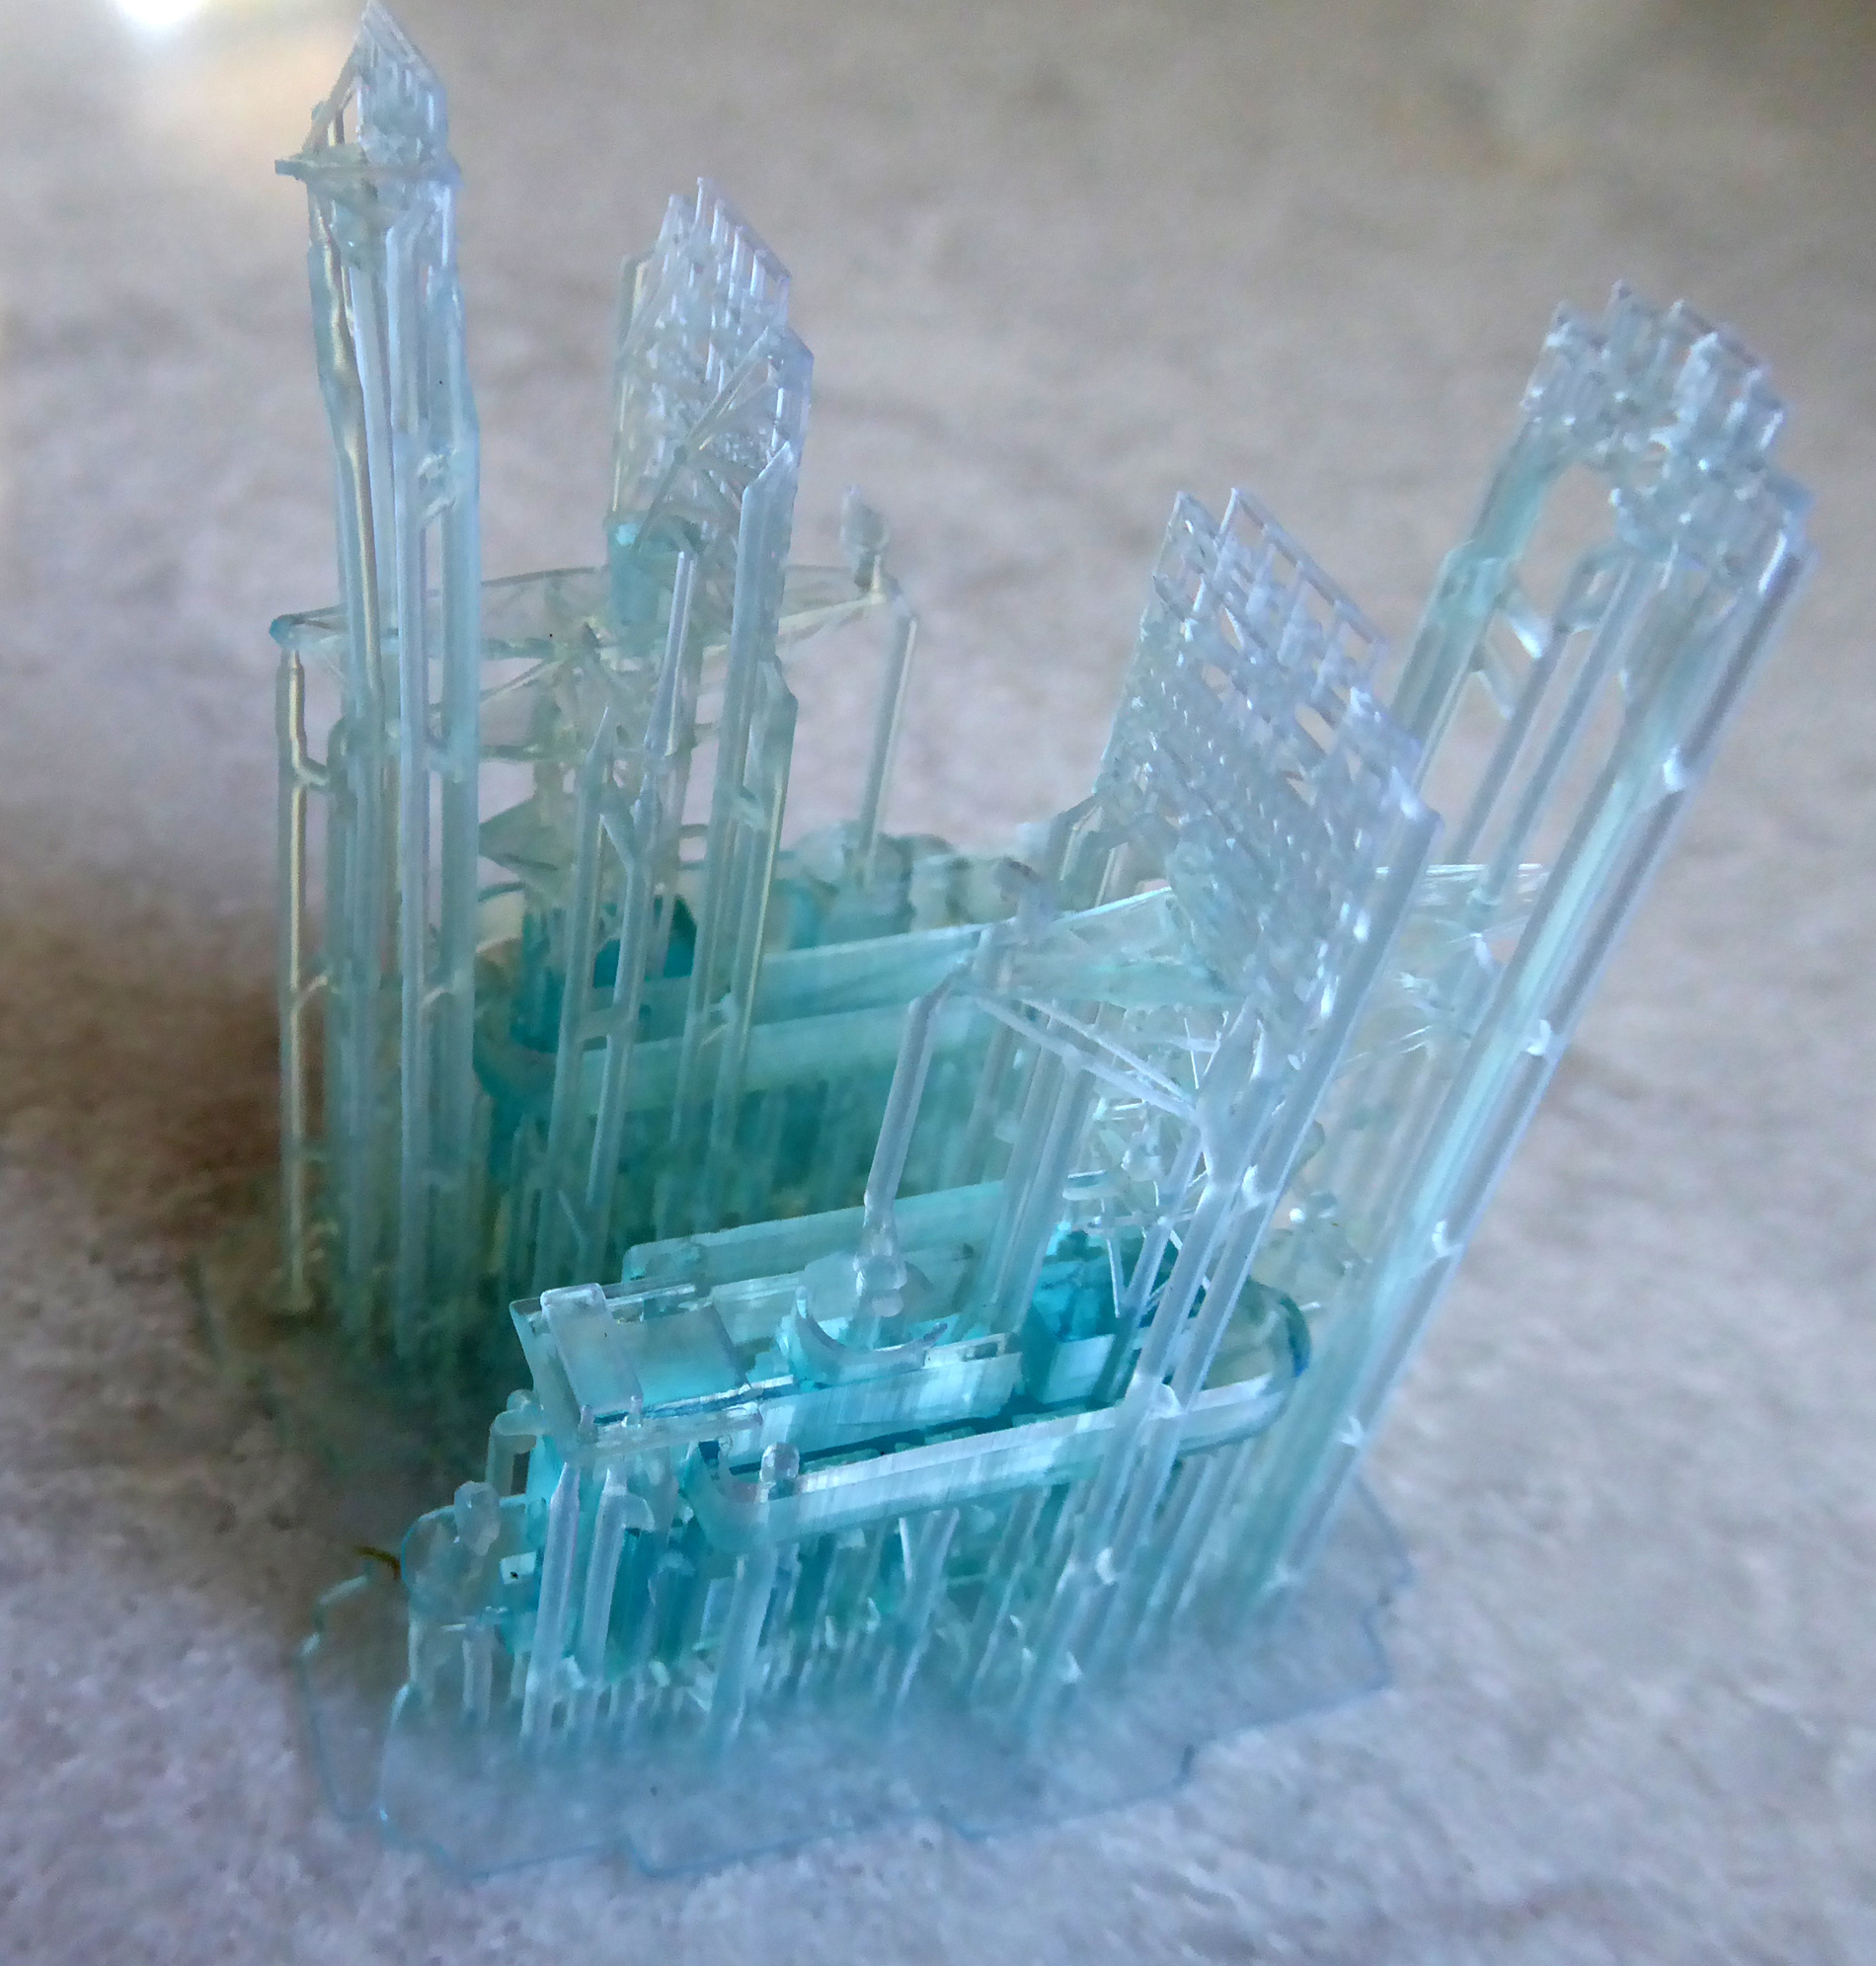
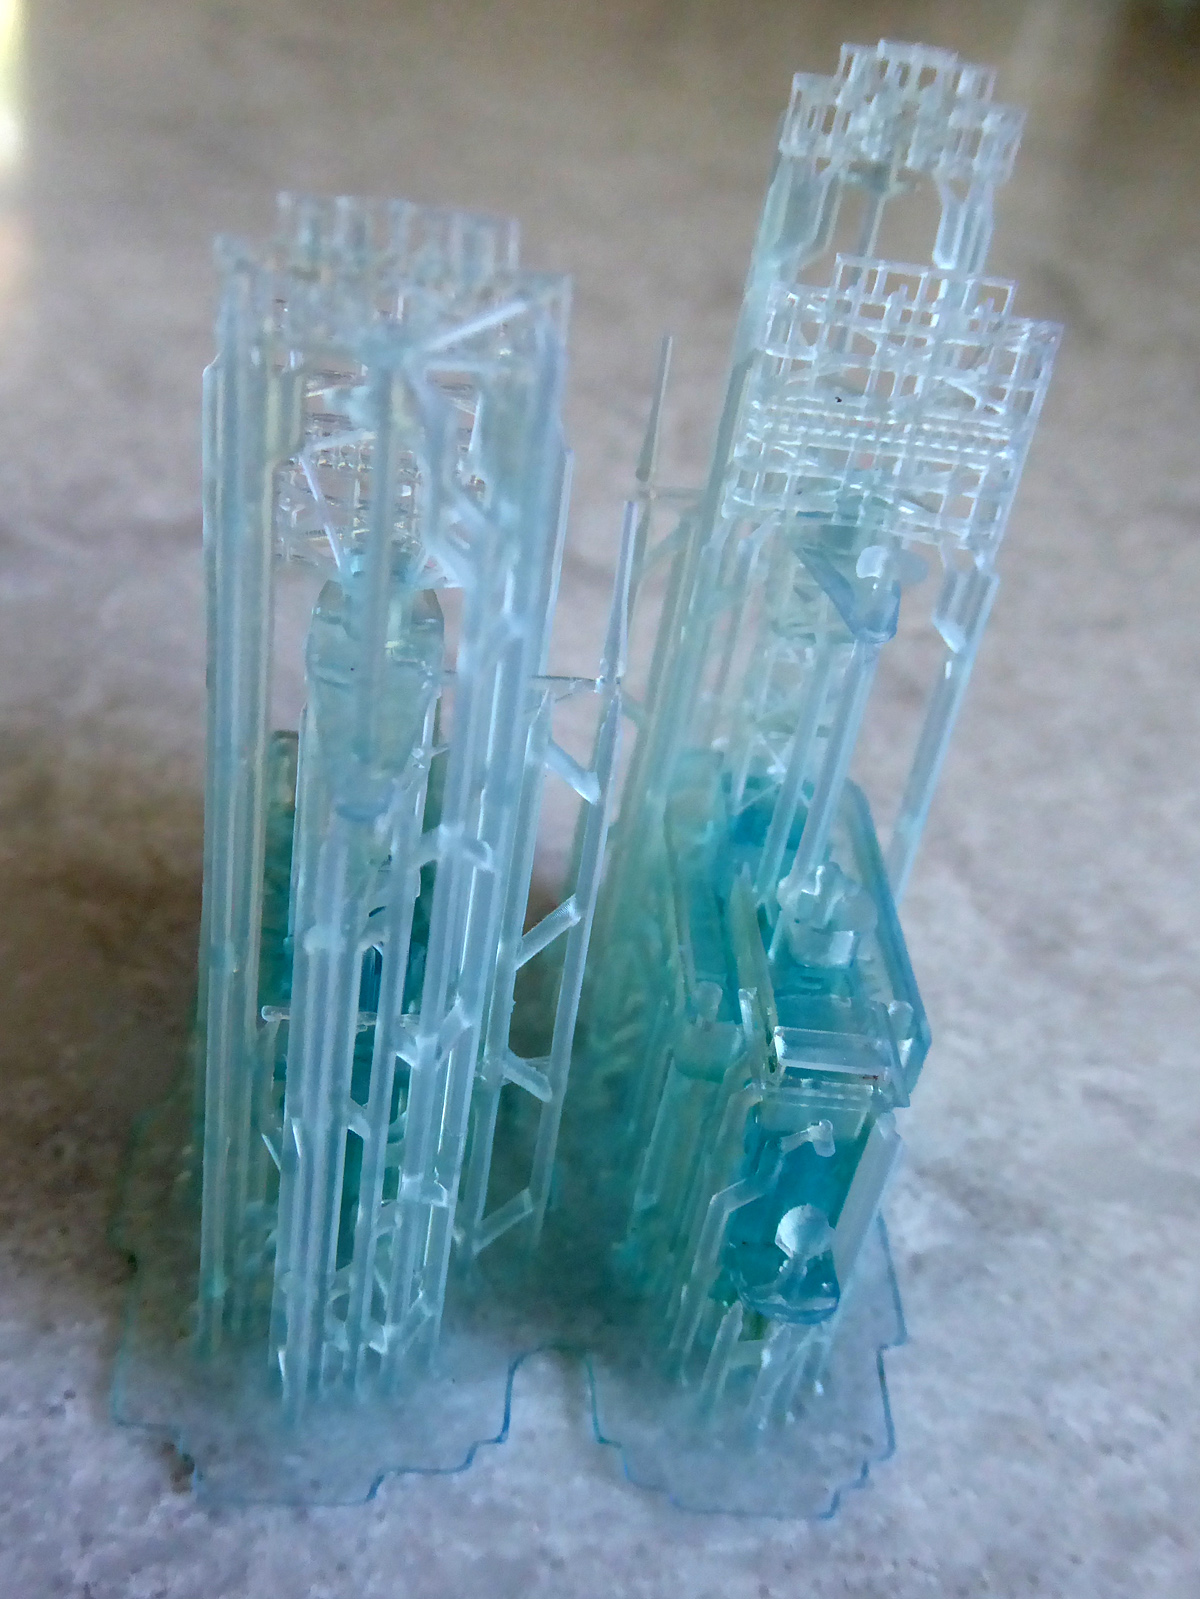
The print above is a replacement bridge and radar tower I redesigned and printed for my USS Bogue Escort Carrier model. I printed 2 in case one failed, as it’s a 4 hr print time whether I print one or more. I auto generated their supports and inspected and tweaked them before saving. What I didn’t account for was that some of the generated supports, the ones supporting the bridge’s wraparound catwalk, were placed right up against the outer walls of the bridge below, they didn’t need to be. When printed those supports fussed to the bridge’s walls, destroying the detail I had put into them as I needed to scrape and chisel the supports off. Surprisingly the parts I thought would fail – the lattice tower and radar arrays, came out perfectly! One last gripe, they both had a ridicules amount of resin build up on their bases.
Other miscellaneous bits of info I’ve learned while printing with my Creality LD-002r LCD printer:
The water washable resins from Elegoo seem to work perfectly with the LD-002r, unless of course all my support issues stem from it… With the current price of IPA due to Covid I highly recommend it.
The odder issues associated with resin printers are not 100% resolved by the LD-002r’s active charcoal filtering (or the Elegoo water washable resin). At least not according to my girlfriend and our cat. If you live alone this may not be a problem.
If your plan B for the above is to use the printer outside, on your deck or patio, only on nice days… Bwahaha! ha ha! ha! Good luck with that! It was my plan B and it failed so hard! It’s amazing how fast UV resin cures with even indirect sunlight. By the time I took the UV blocking hood off the printer and placed it down, unscrewed the build plate from the printer, placed it (and my print) into a vat of water and washed the resin from my hands and returned to pick up the hood to put it back over the printer, there would be a supper thin Saran-Wrap like film of cured resin over the vat… Not to mention anything you may have touched with stray resin on your gloved hands, almost instantly has cured resin on it and it’s a bear to remove. I ended up clearing out space in my tool shed and running an extension cord out to it. So like tanning and swimming, using my LD-002r will be a summer only activity.
When cleaning the cured resin stuck to the bottom of the resin vat due to a failed print. Always, remove the vat from the printer, pour the uncured resin back into its bottle, wash any remaining uncured resin out of the vat, place the vat on a perfectly clean and flat surface (I use plexiglass) and finally with a plastic putty knife (like the one included) carefully scrape the resin off the vat film. I realize “carefully scrape” sounds like an oxymoron but after screwing up your first vat film you’ll get the hang of it, I did.
If you do end up damaging the vat film and need to change it, make sure there isn’t a protective clear layer adhered to it before you install it. There was on my Creality supplied spare. I didn’t realize it until it started to peal off while I was scraping off more pieces of a failed print.
Final Verdict: You may be supersized to read this after wading through all the above but I really do like the LD-002r printer. When you finally get the print you’re after, it is a thing of beauty. It may not be for everyone, it’s a bit stinky, slightly toxic and definitely time consuming, you’ve been warned but I’ve a good idea what I’ll be doing with some of my spare time this summer.
Joe – the SMG
Update: 8/30/2020 I’ve solved many of the issues above, the answers to most were to be found in Chitu Box’s settings – but with greater ability comes greater ambition! My most detailed 1/450 scale model warship to date: USS Helena. Everything but the hull was LD-002r printed.
USS Helena CL50, LD-002r and Ender 3 Pro 3D Printed in 1/450 Scale
Update: 7/20/2020 I’m definitely getting better at printing with the LD-002r, check out the latest new parts post.
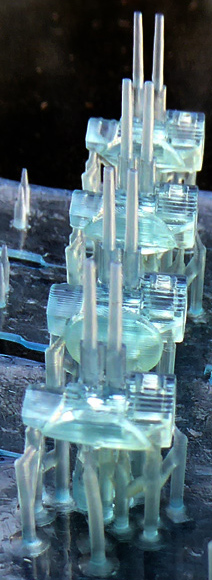
Creality LD-002r print example, Battleship USS Texas tower bridge in 1/450 scale