Original Post: 3/17/2018
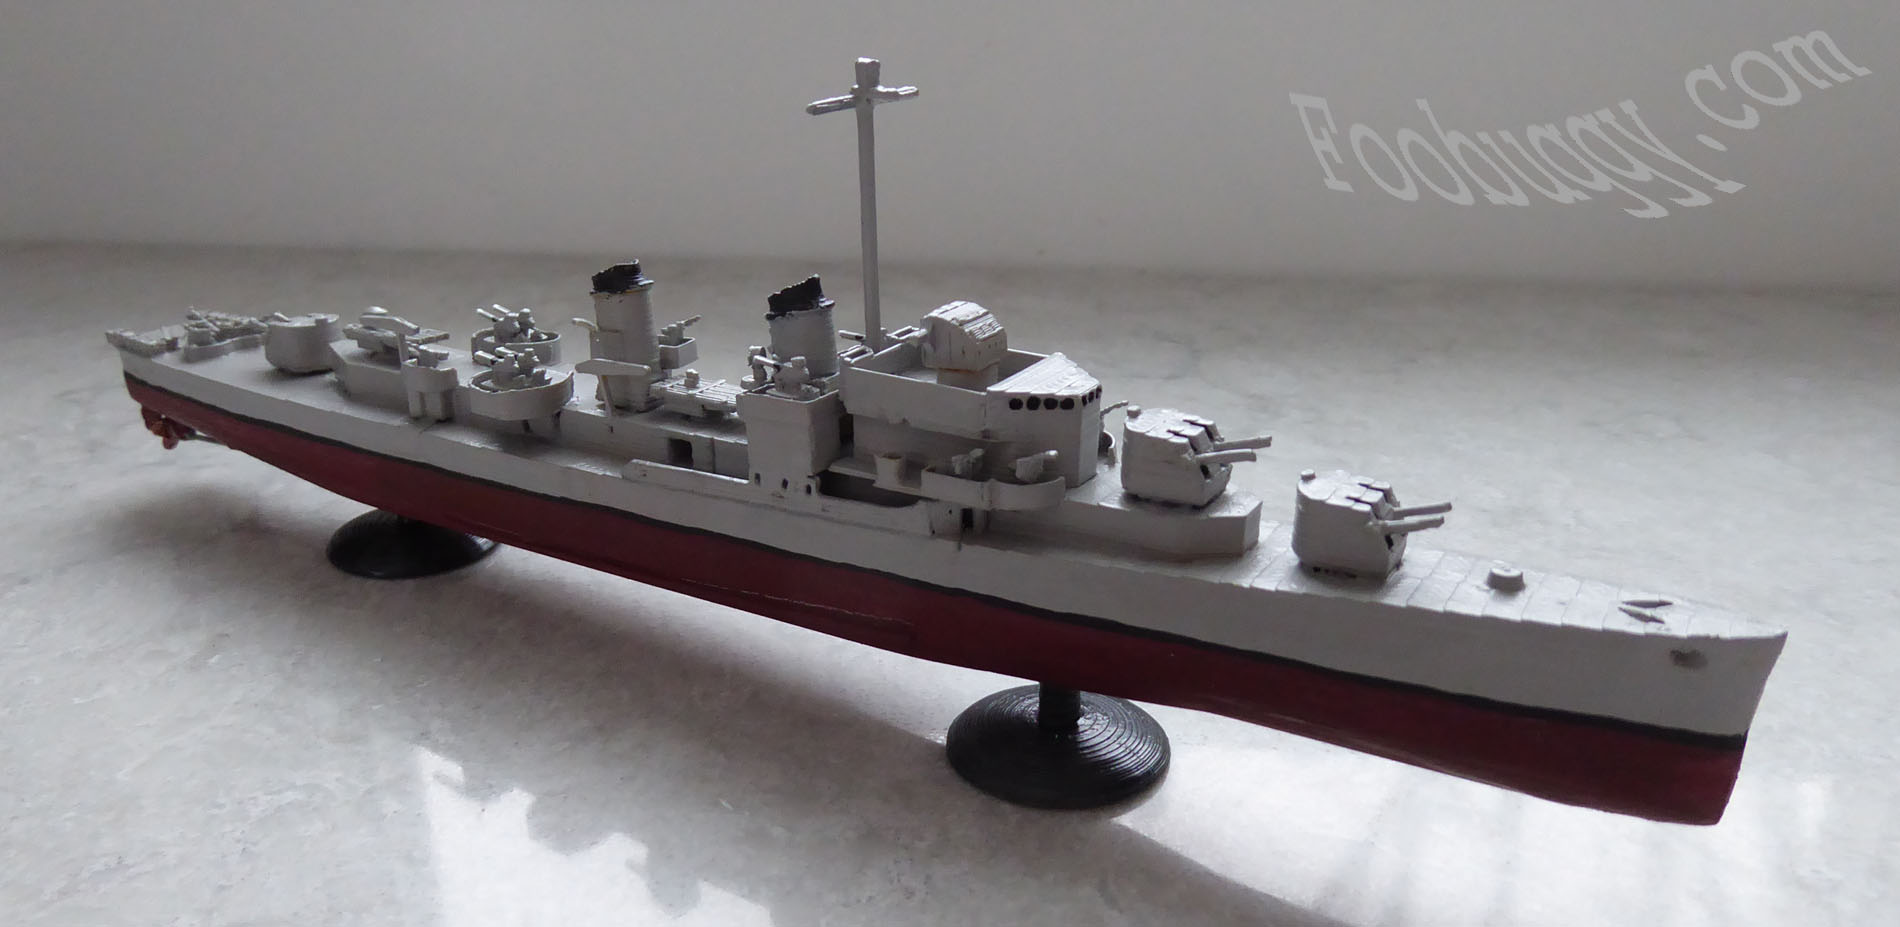
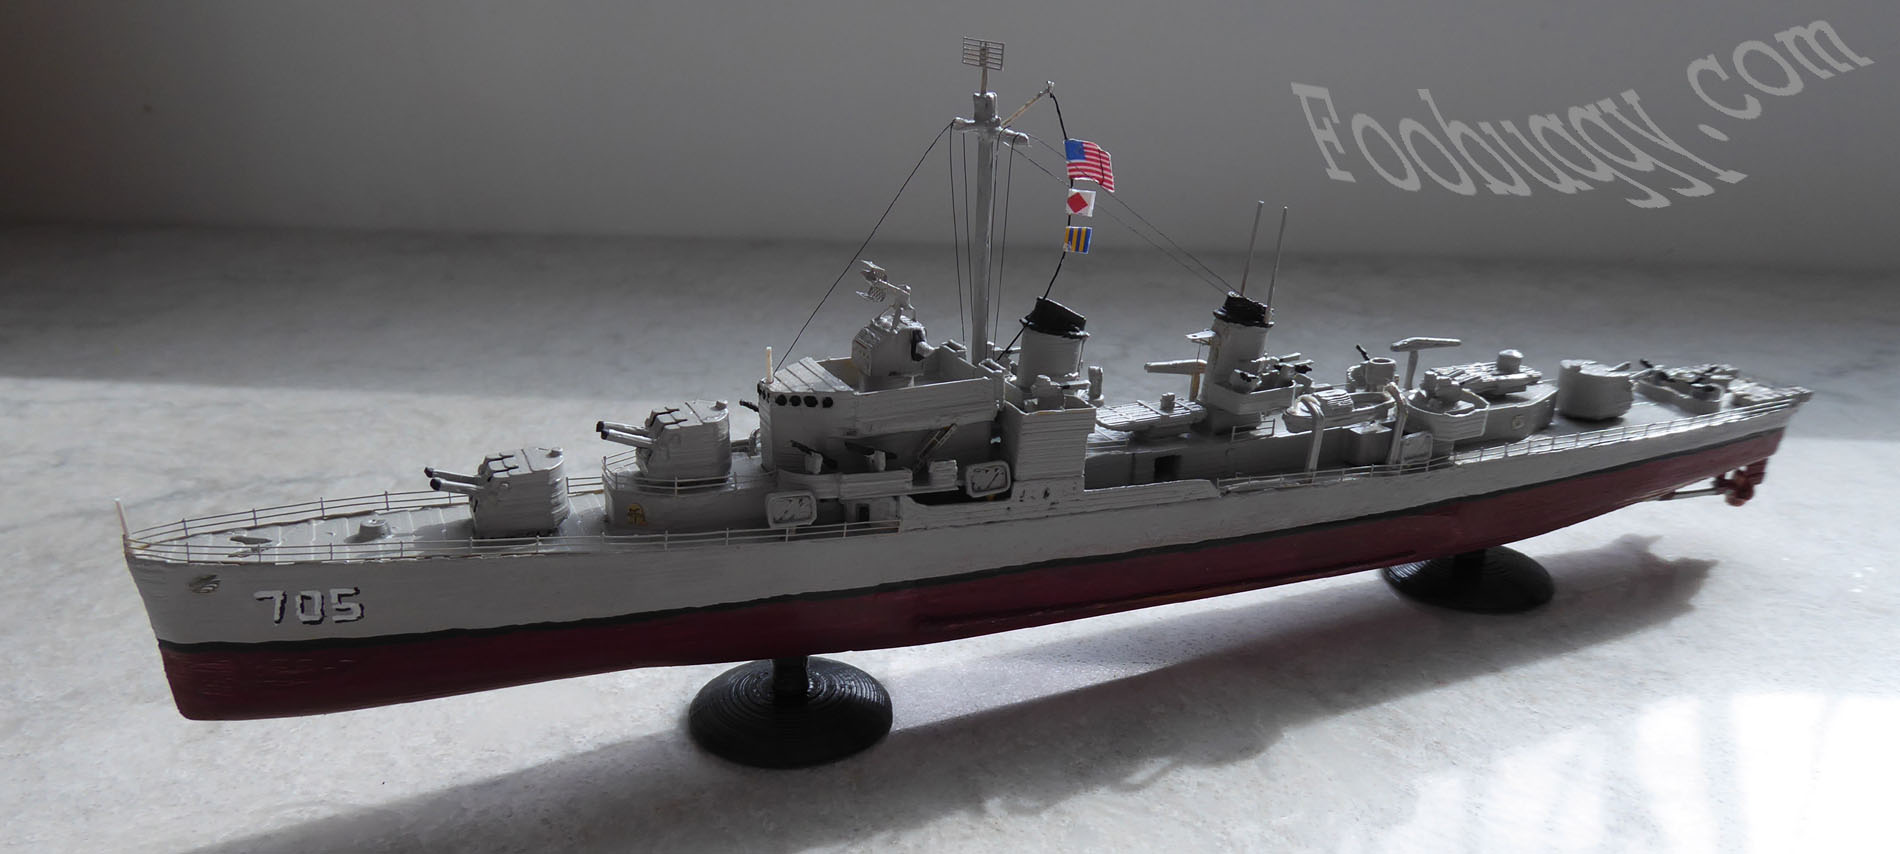
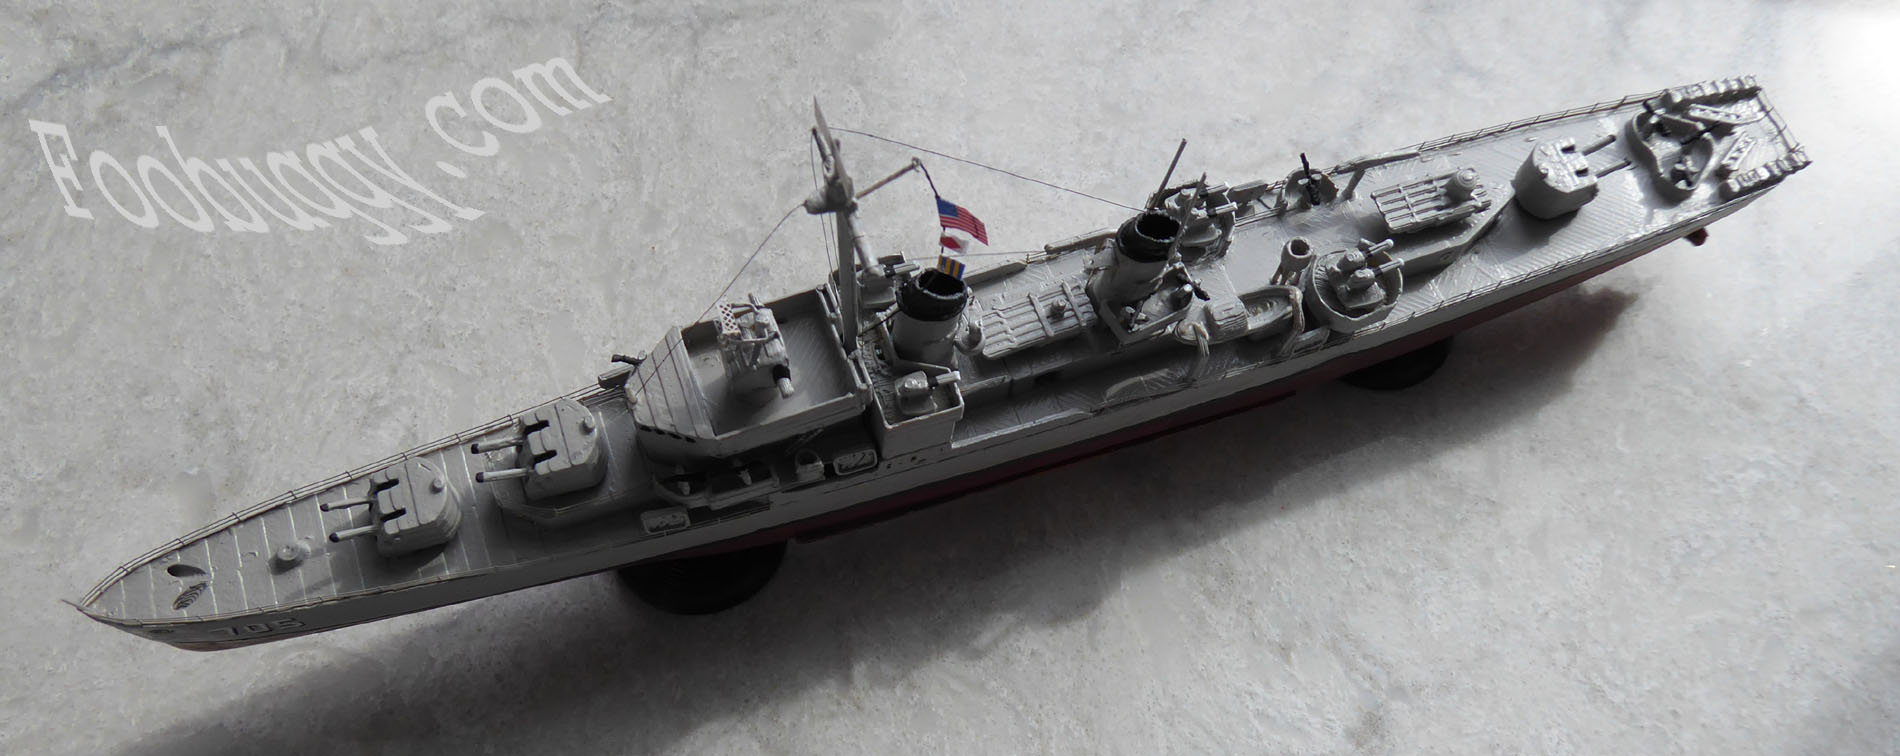
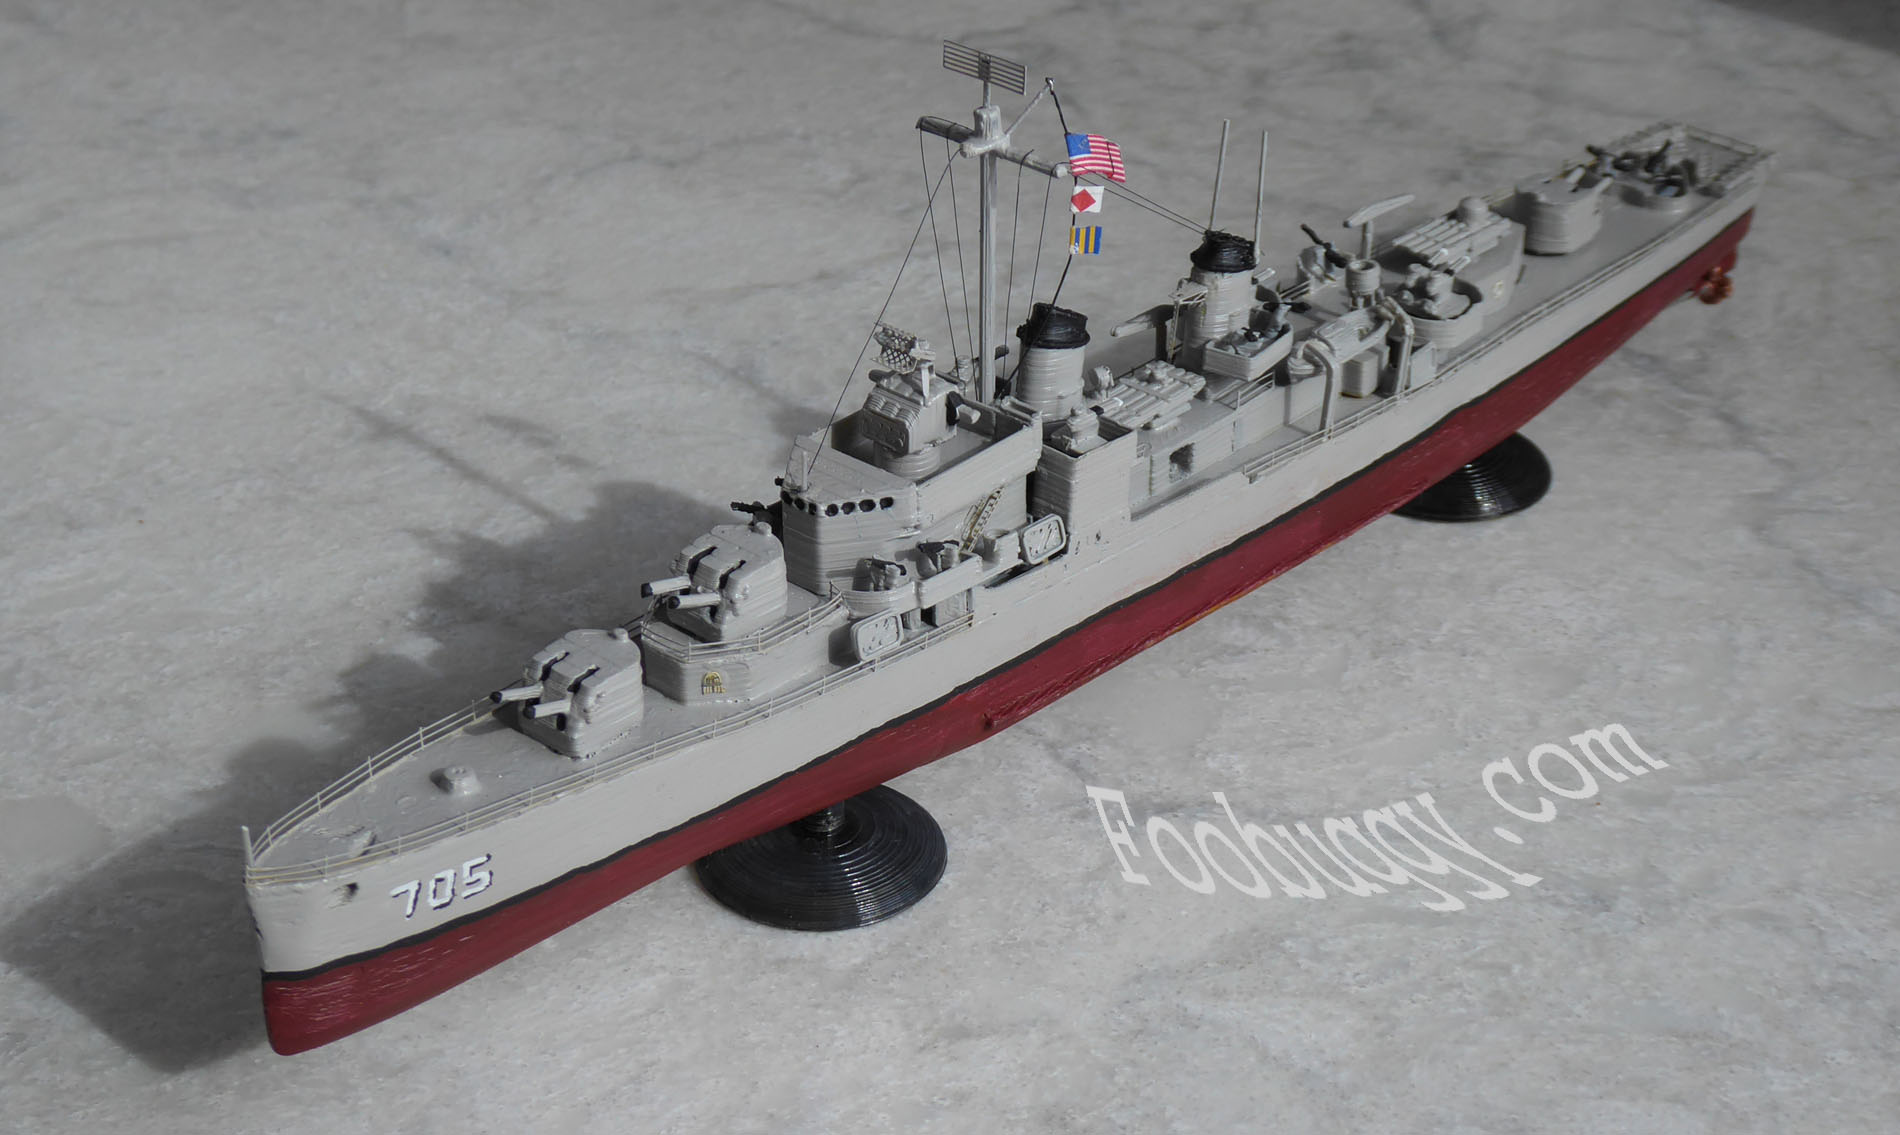
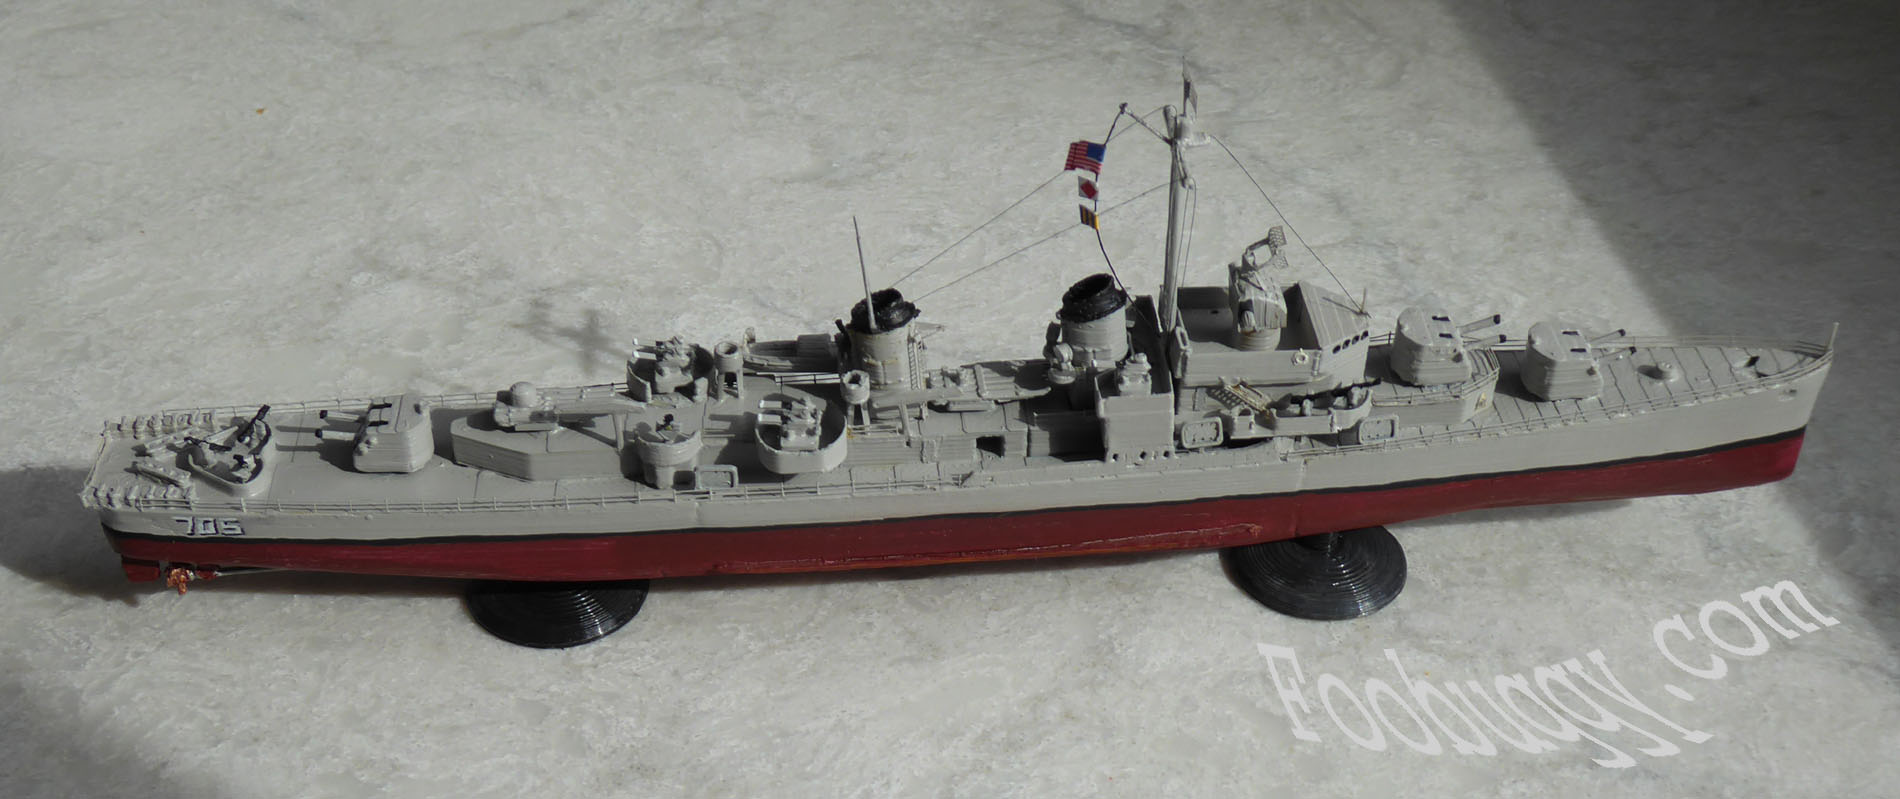
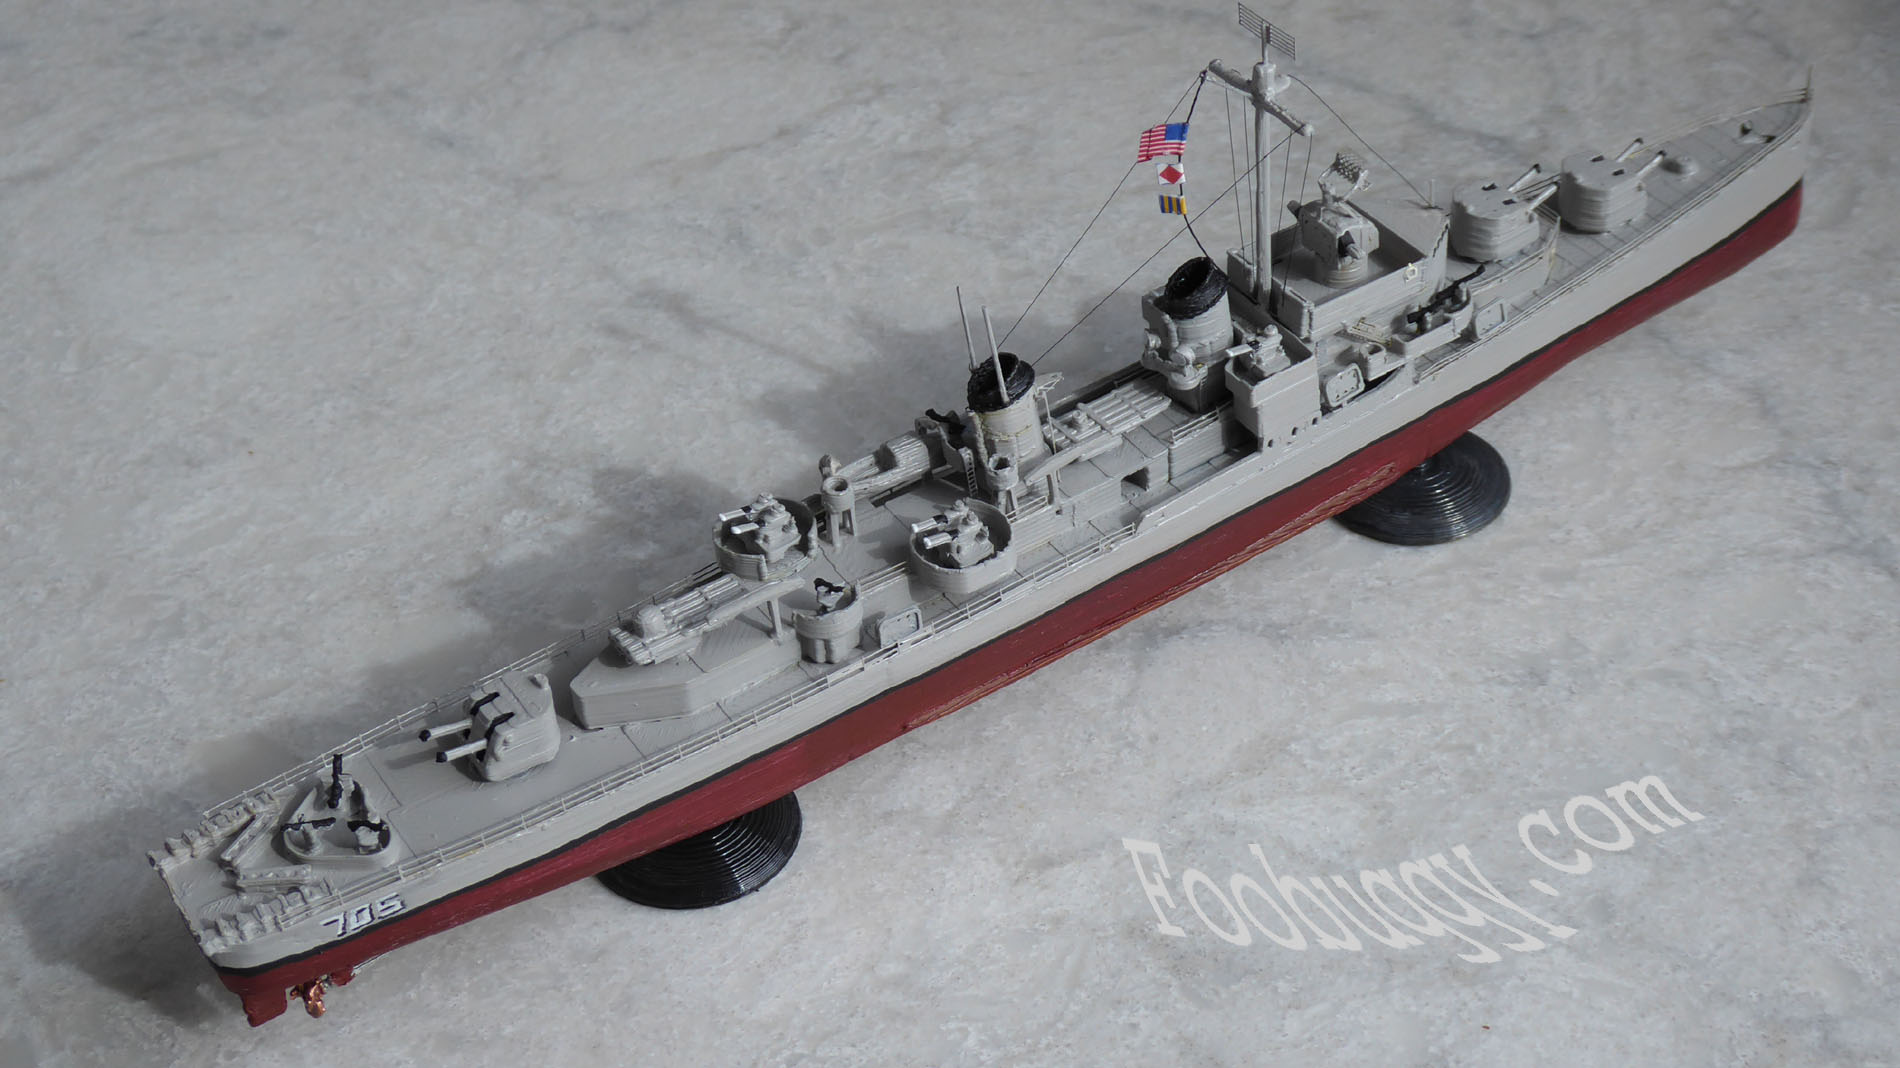
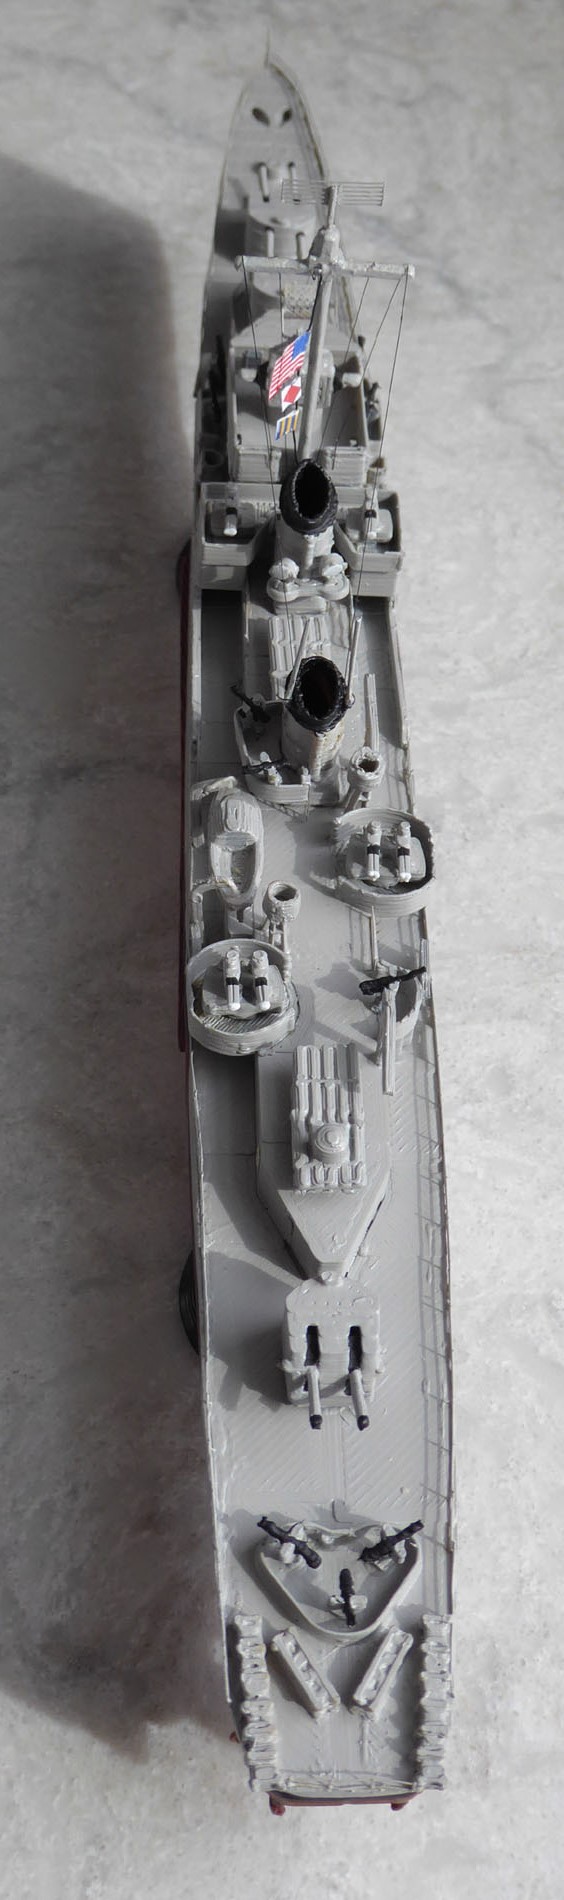
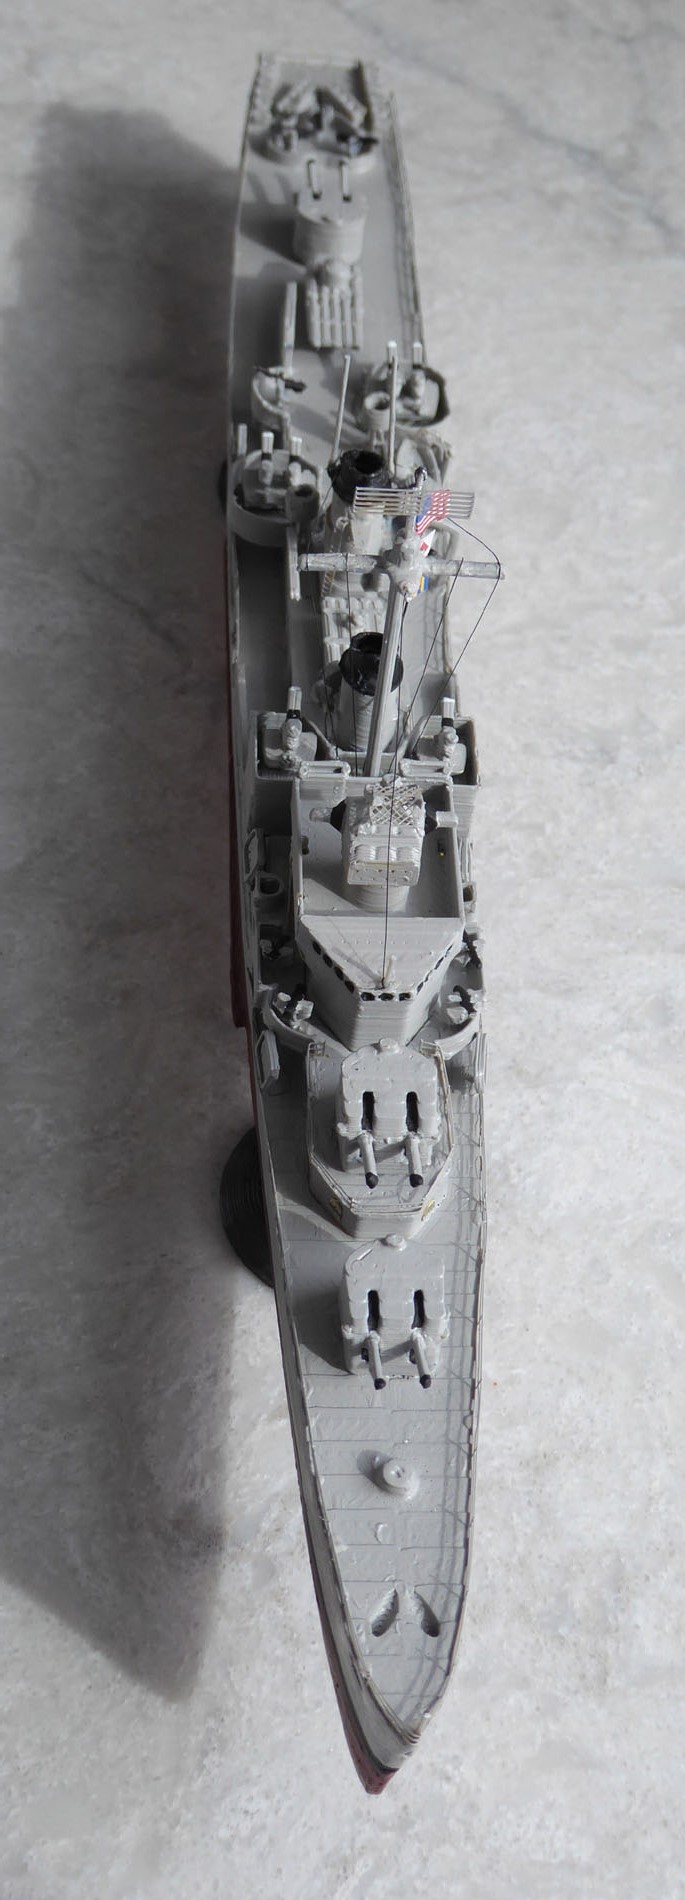
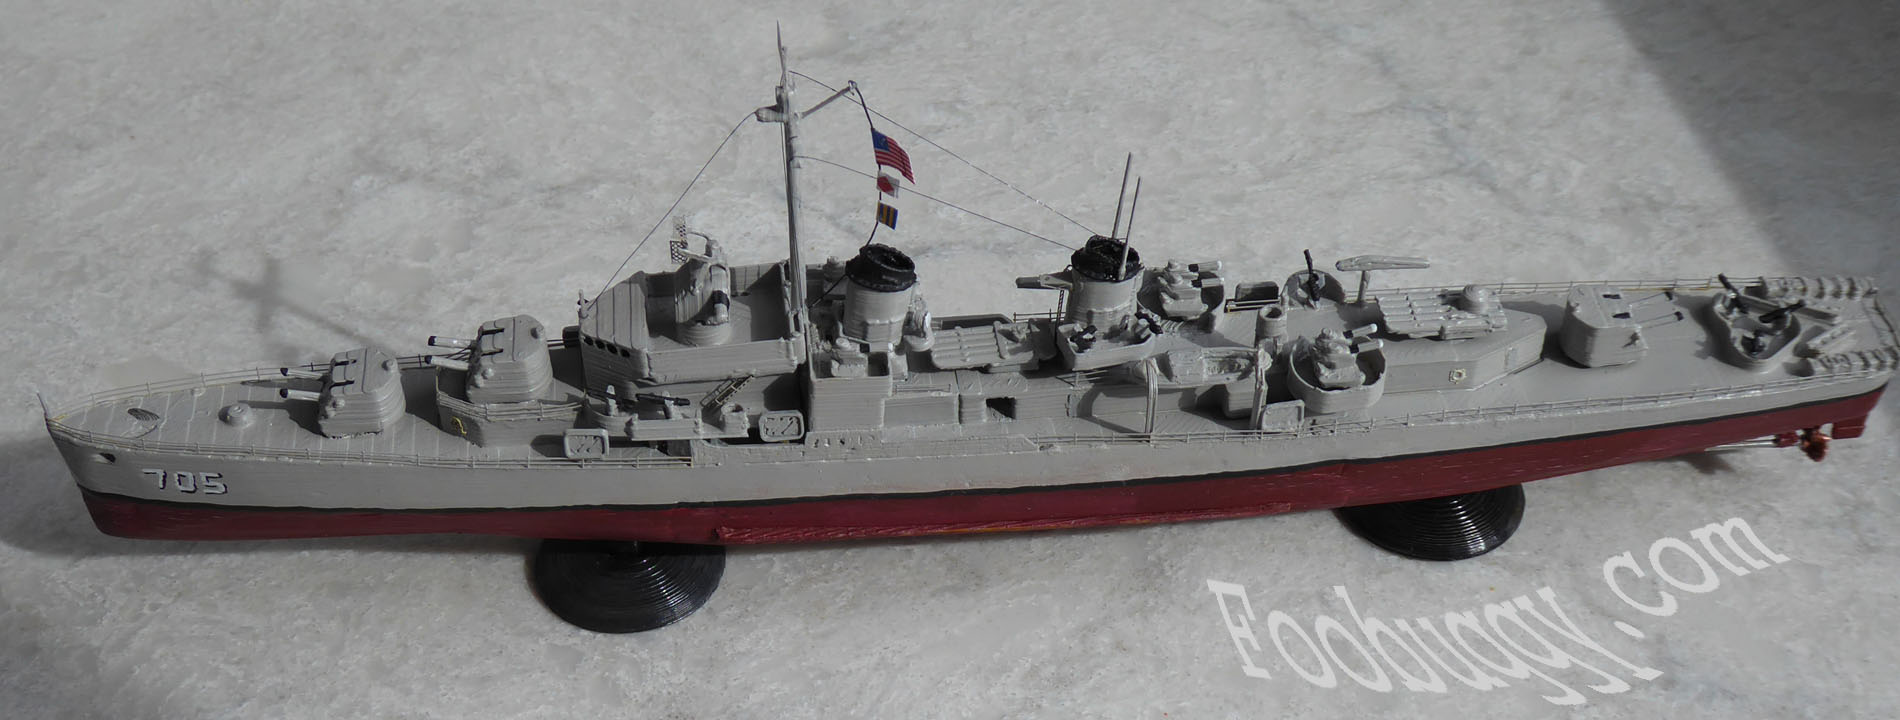
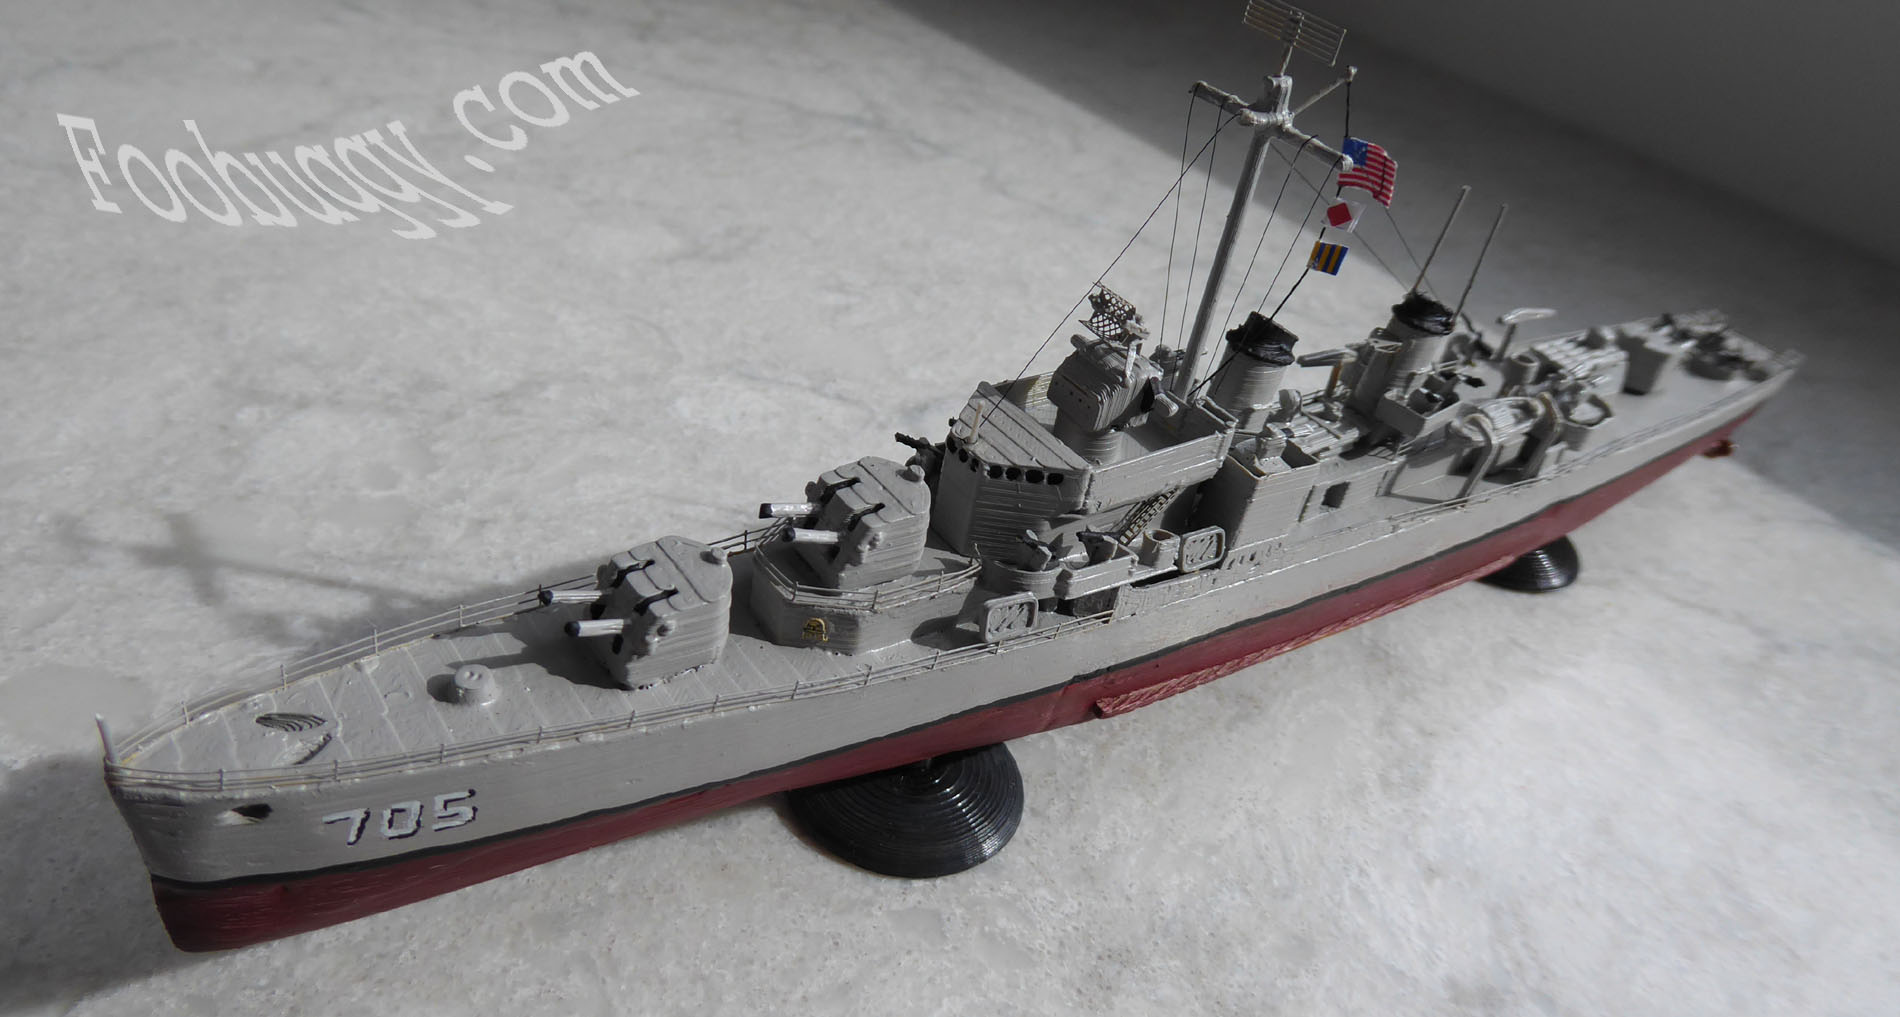
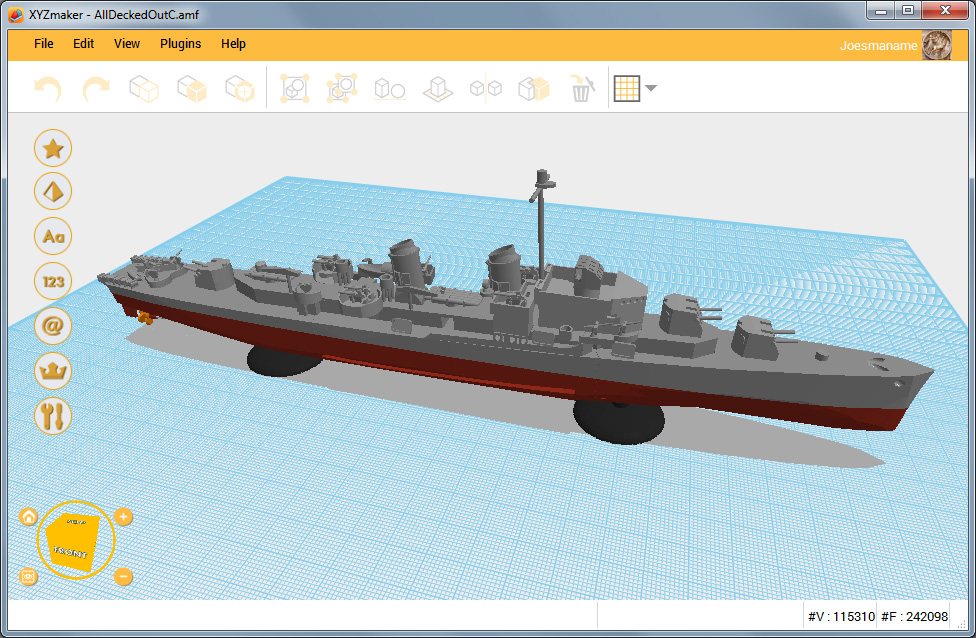
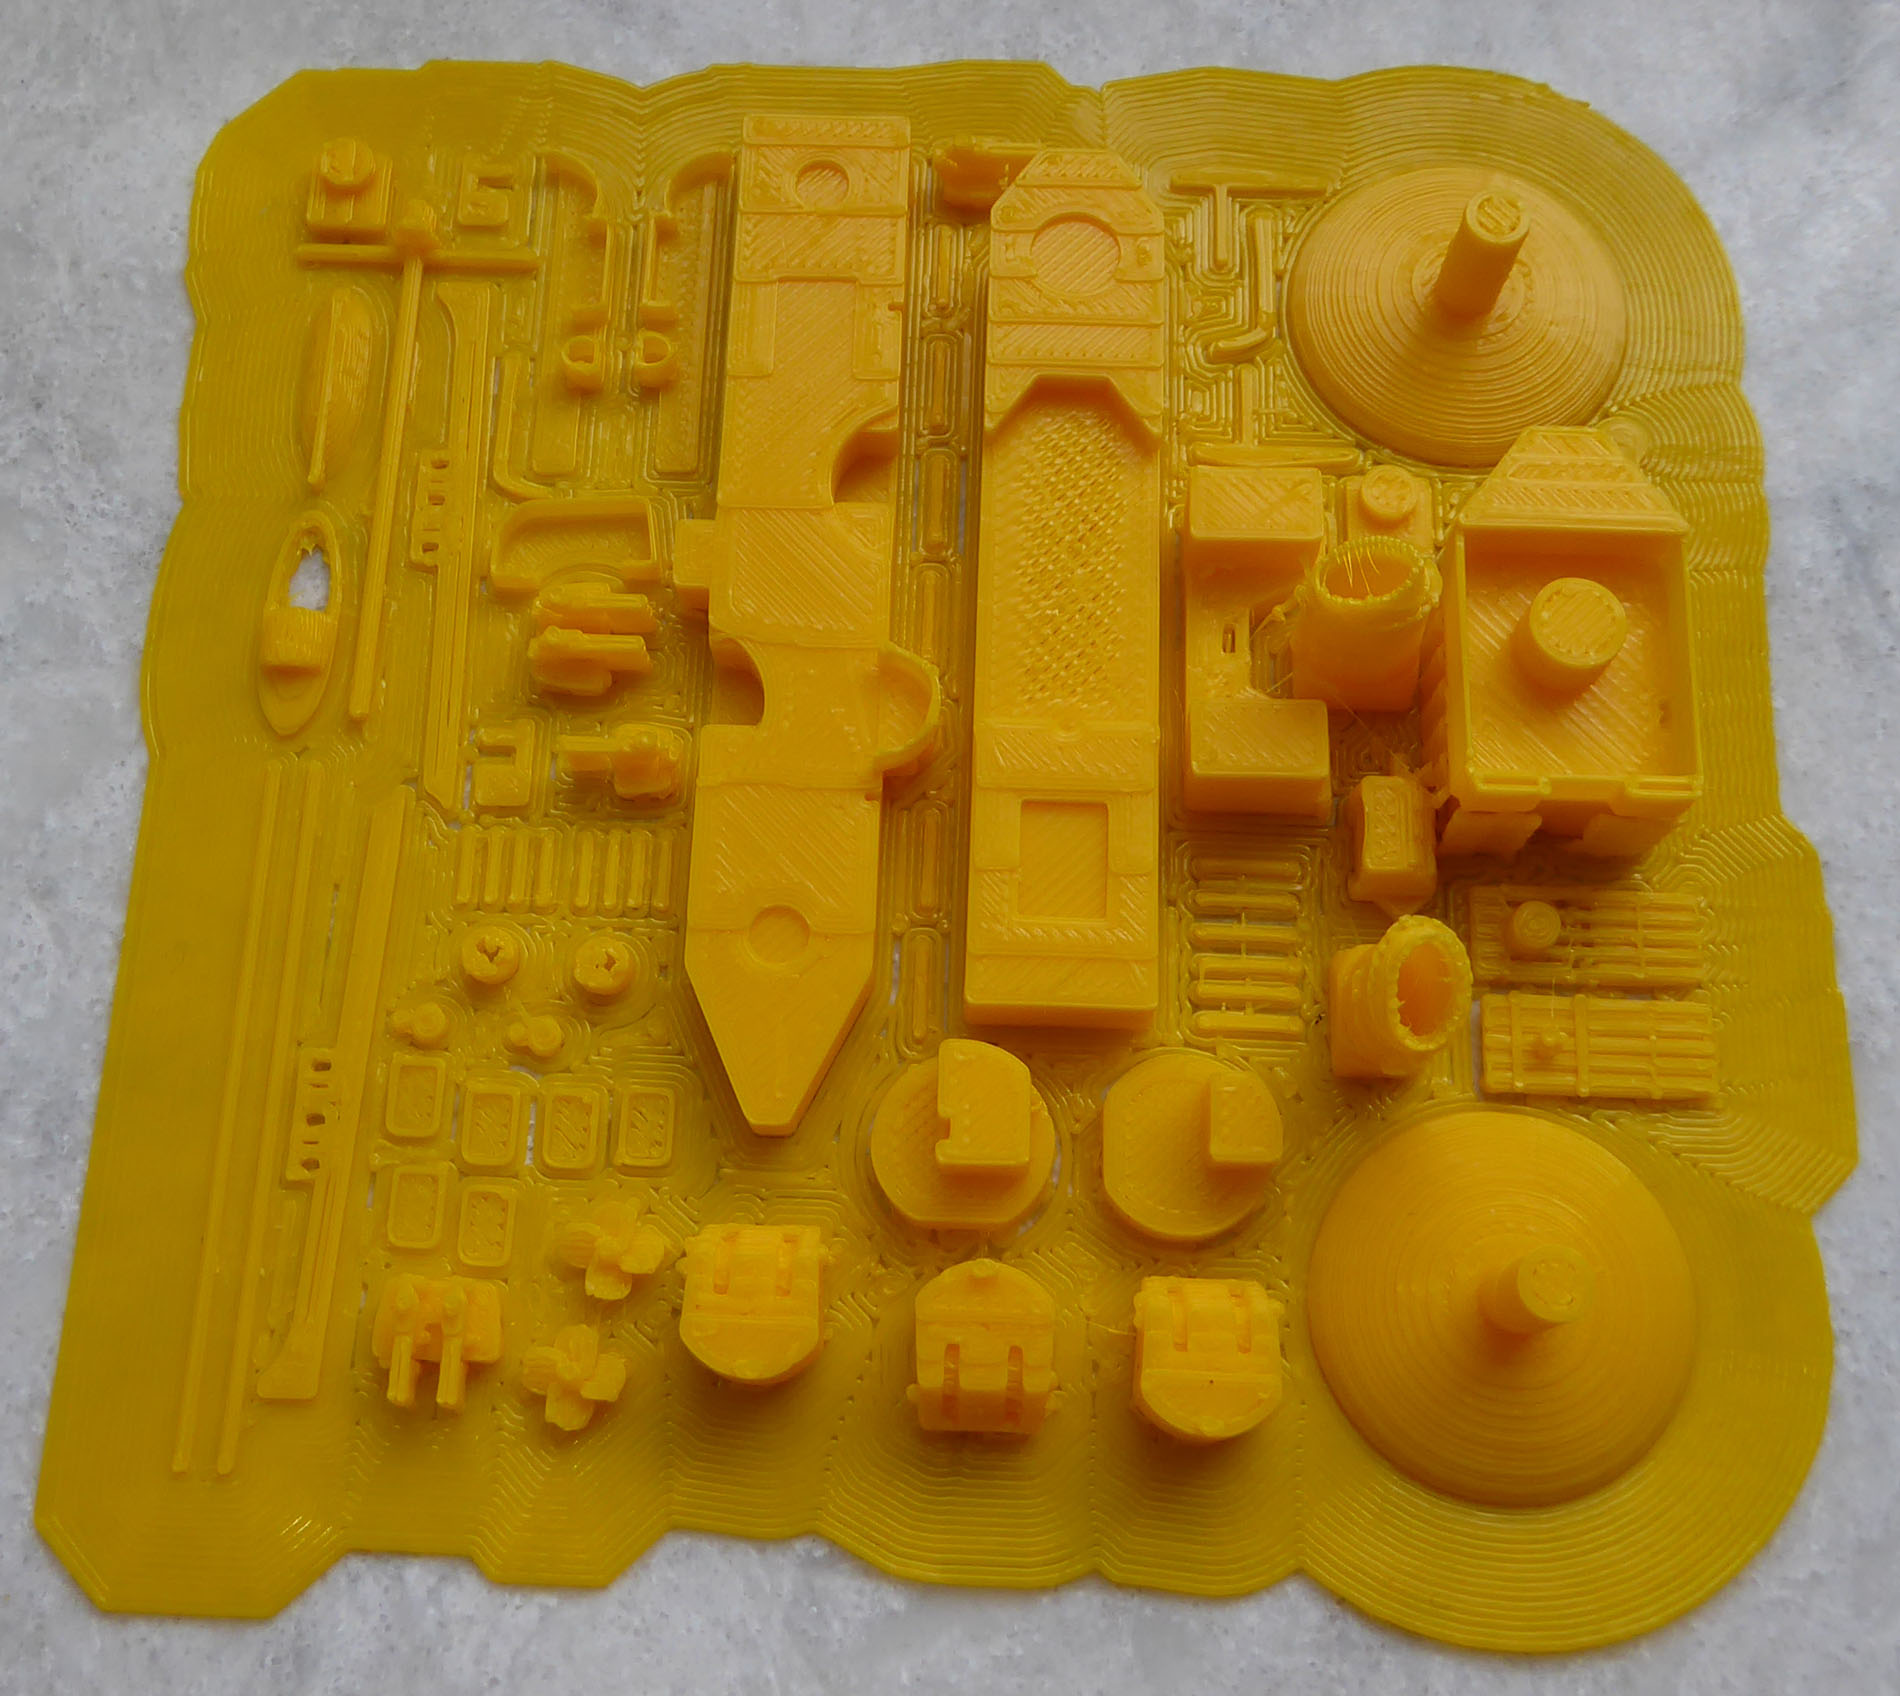
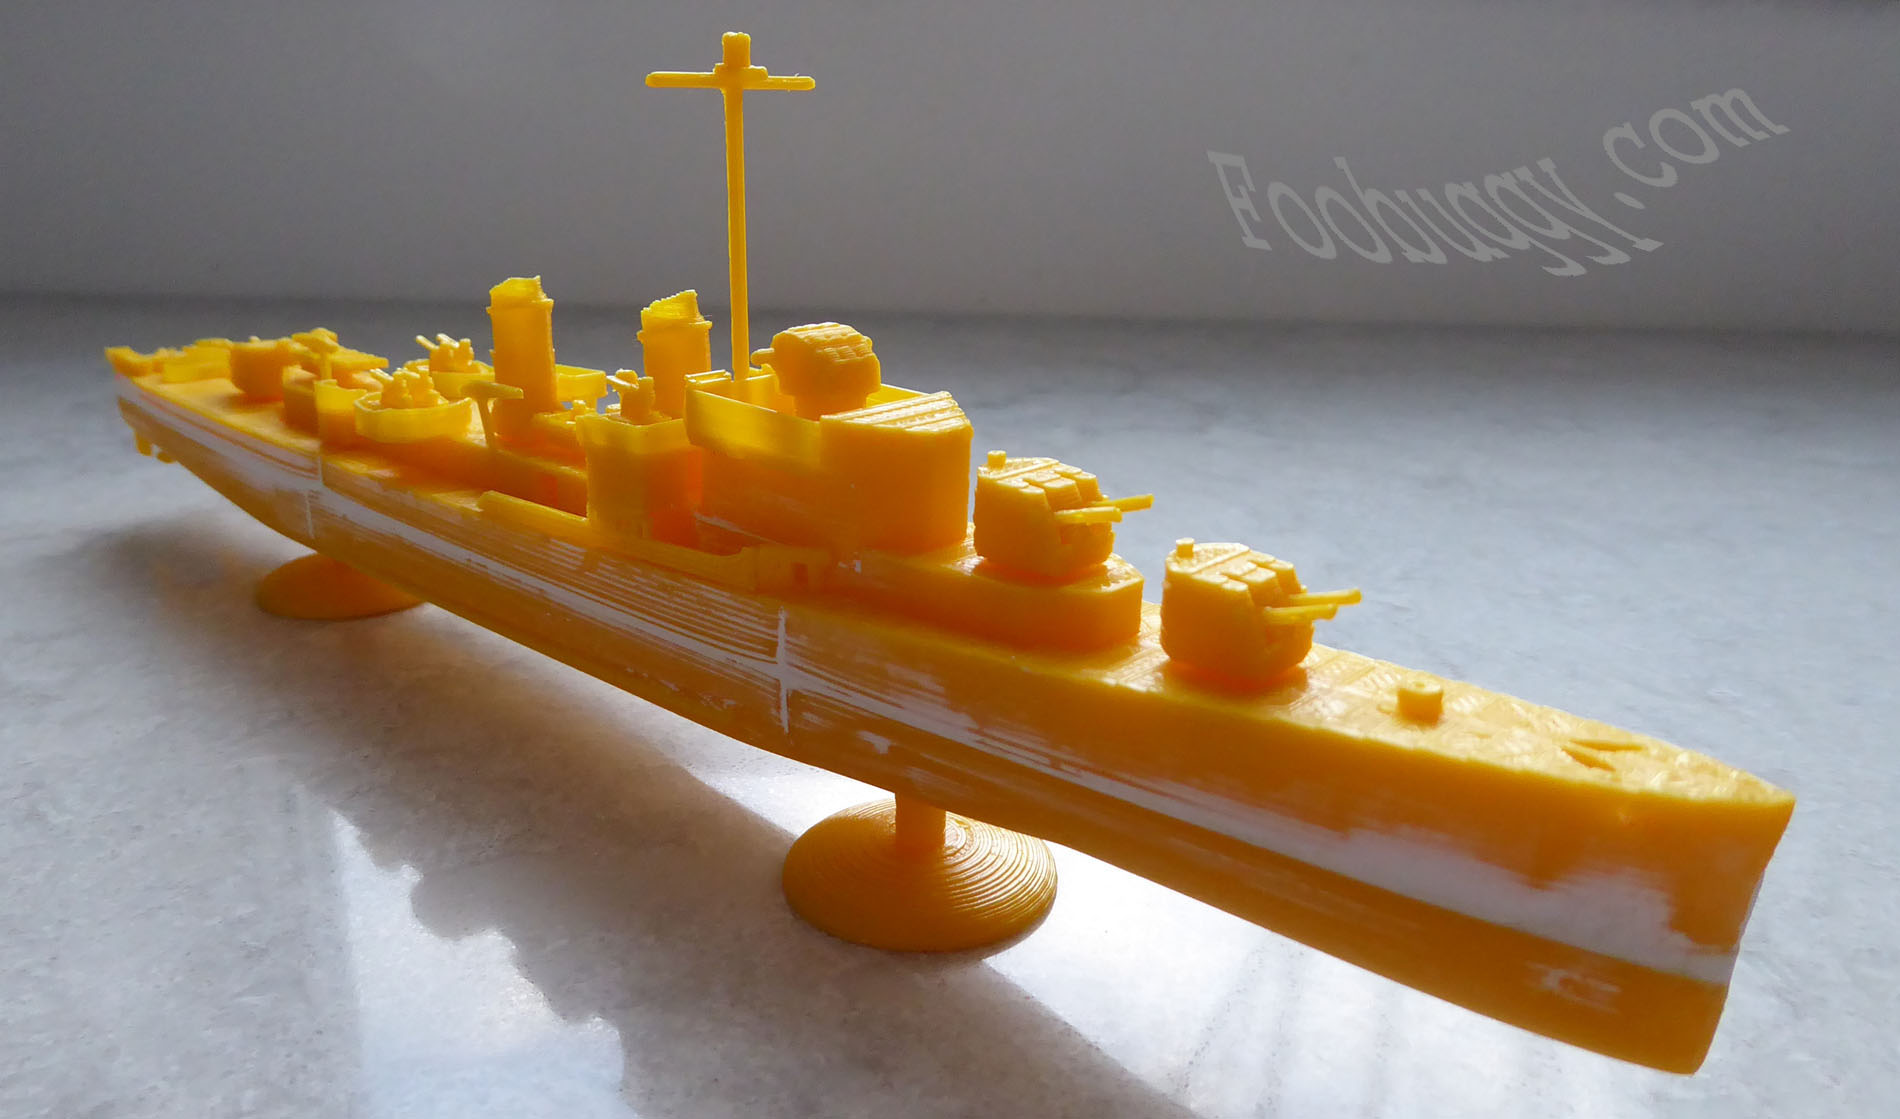
This is the Allen M. Sumner class destroyer USS Compton, DD 705, in 1/450 scale. It was designed and printed using XYZprinting’s Da Vinci Mini 3D printer & software. The printer was a Christmas 2017 gift from Christa’s mom Anne (Thank you Anne!).
The Compton is the first 3D printed project I’ve actually assembled and only my second serious 3D project printed. The first being a quad Bofors mount in 1/48 scale, the parts of which I still haven’t cut away from their brims. My first 3D printed projects were complete disasters but I did learn a lot about what I could and couldn’t print and how to increase my odds at pulling off marginally printable things.
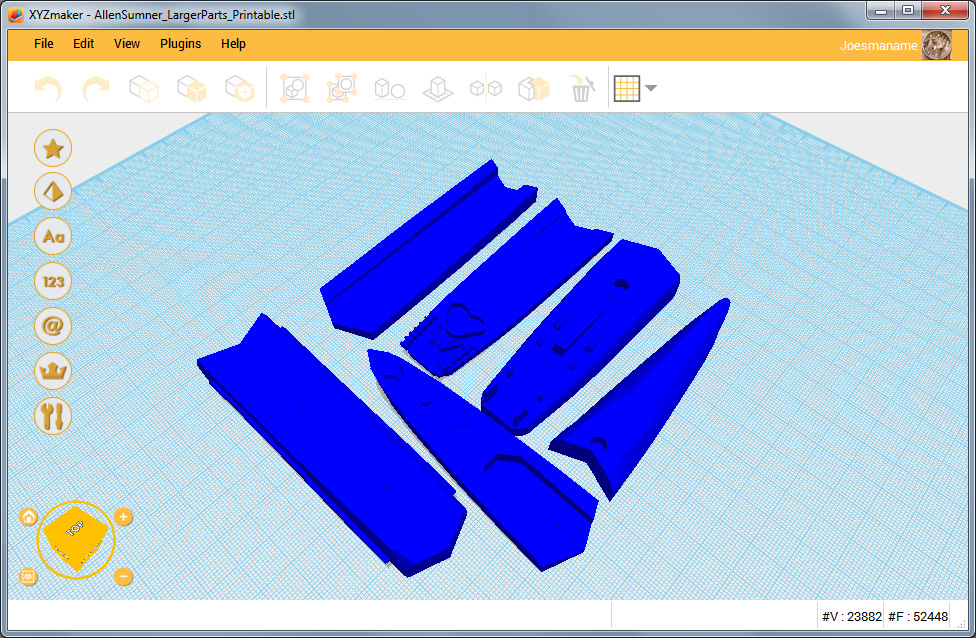
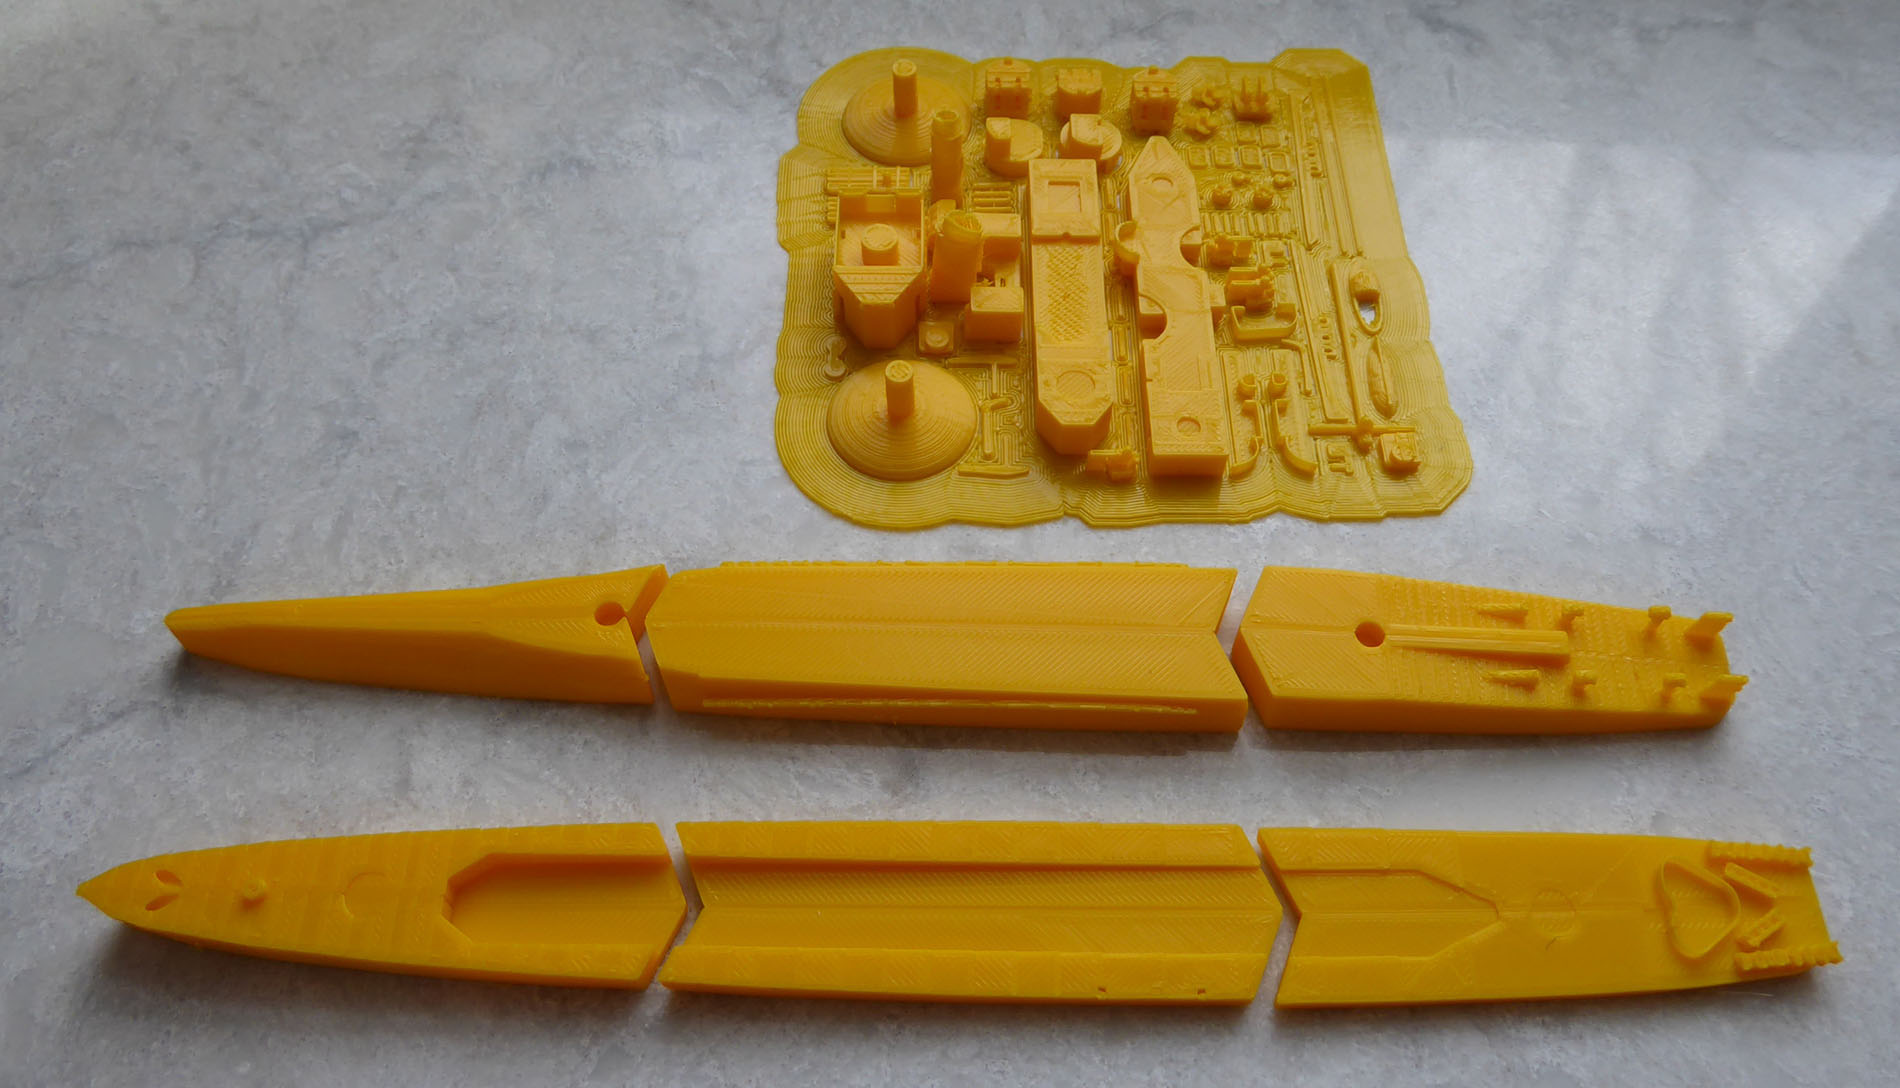
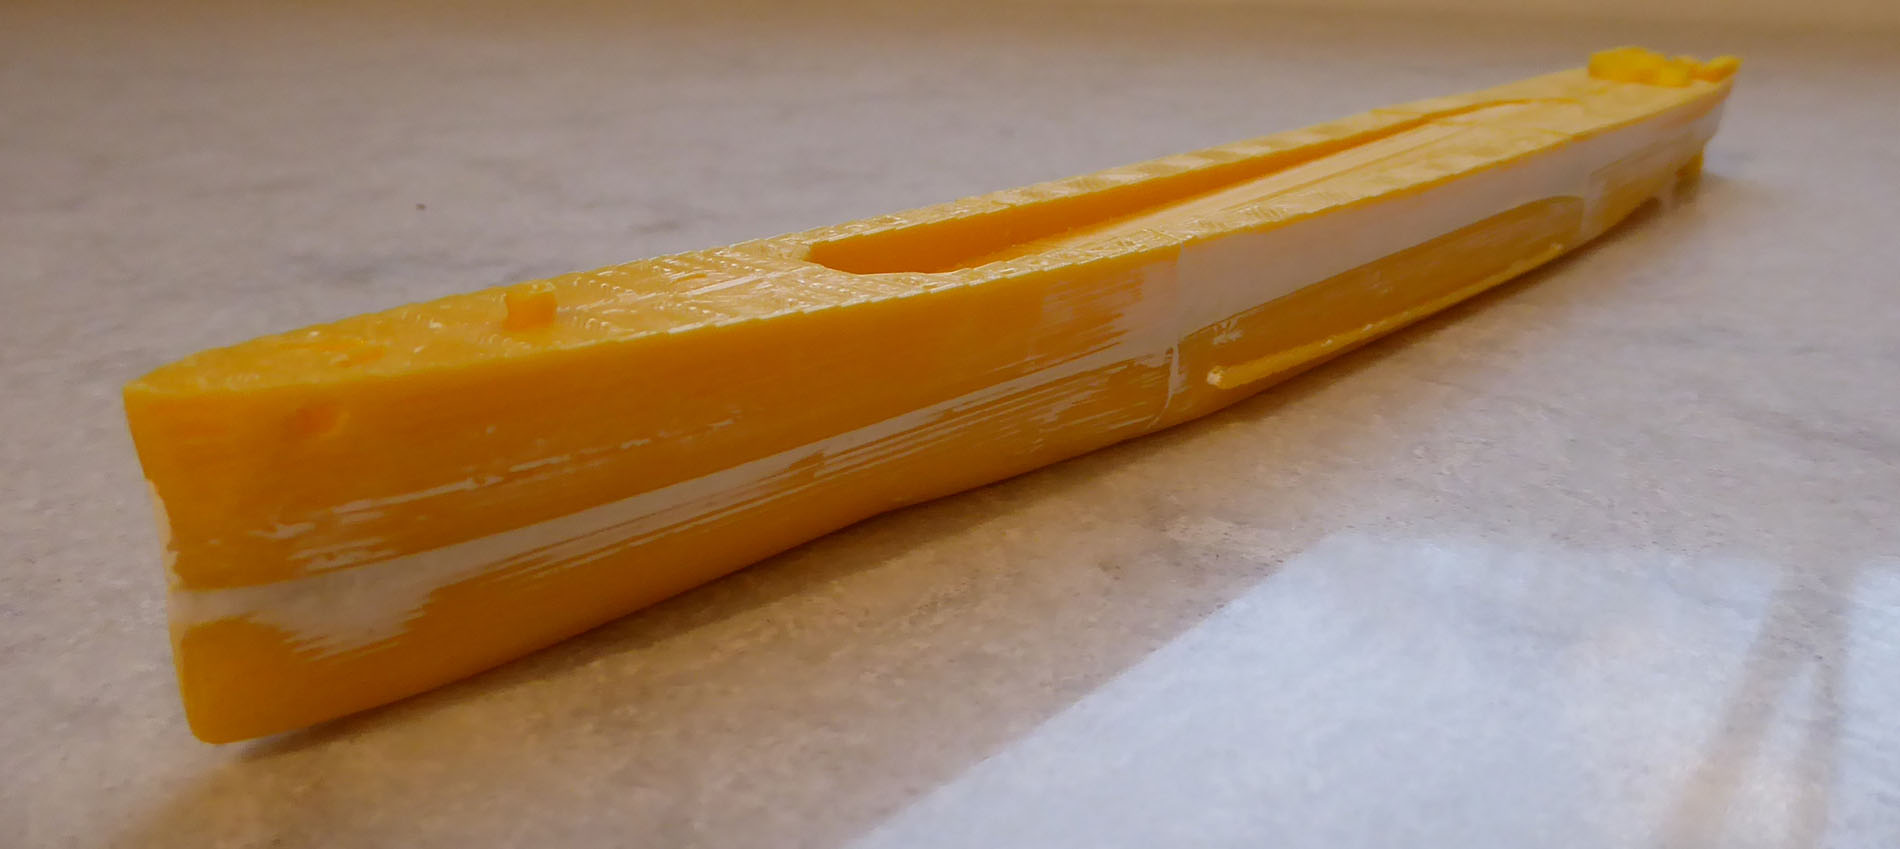
Not too many surprises with this print, except for unexpected warping of the larger, thicker hull sections. No brim was used on them as I didn’t need this for the large flat sections of my Bofors project. Perhaps the hull sections were too thick? In any event I’ll use a brim next time. The warping was bad enough that a filler was needed. A little research on-line for a good filler for PLA plastic showed Elmer’s Woodfiller rated highly by several posters. Unbelievably I had some on hand and tried it – I’m happy to report it worked perfectly, sticks well, reasonably tough yet easy to sand. I also researched what glue to use on PLA and ended up using Home Depot’s: Loctite Super Glue Ultragel Control, it too performed very well, though it does seem to take a few more seconds to set.
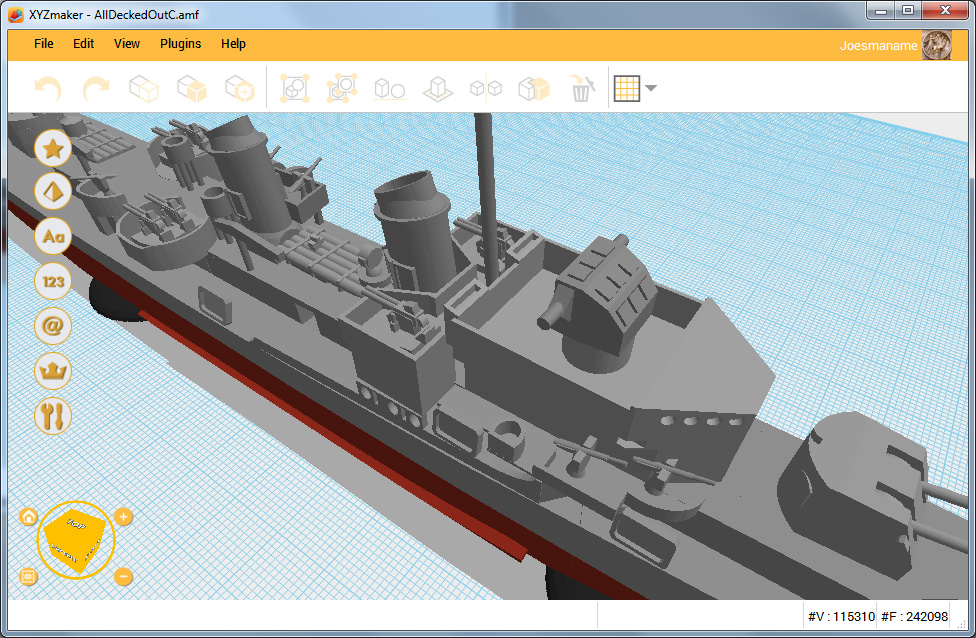
For this project I only used XYZprinting’s software: XYZmaker to design the model and XYZware to print it. After a few days using XYZmaker I’d gotten the hang of it, gradually discovering how to make complex objects easily using it’s simple, intuitive, interface and basic building blocks and features.
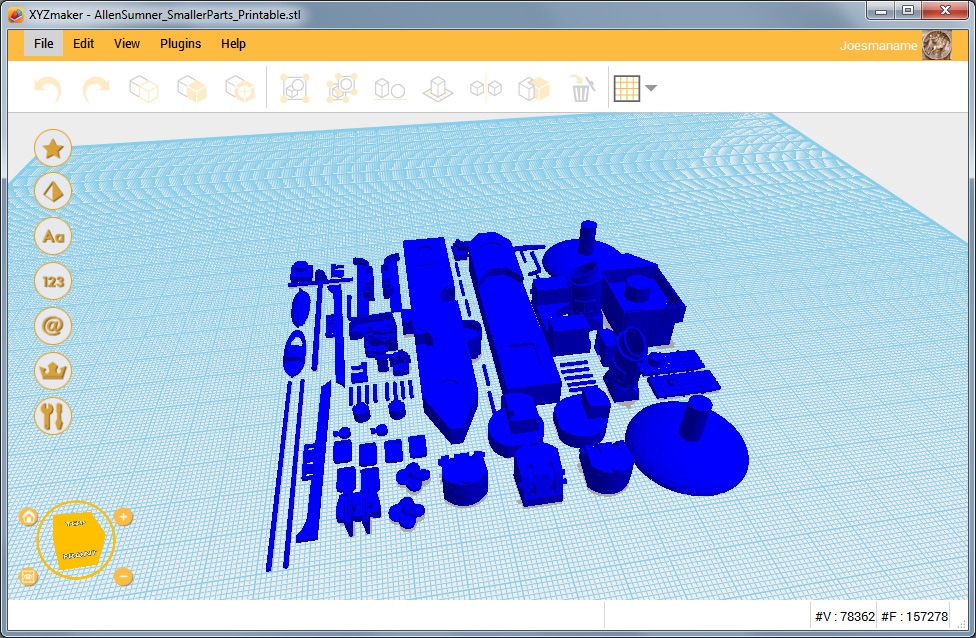
The part that took weeks to realize was that I wanted to be saving these complex objects in the .amf format, not the .obj or .stl formats also available. Eventually you’ll need to save your work in the .stl format in order to print it, but .stl files can’t be edited in any useful manner. Now .obj files seemed like the way to go, after all, “obj” clearly refers to objects and initially this format worked great. But as my projects got bigger and more complex with dozens or hundreds of simple objects combining to form the model, I started to notice undesirable behavior with my .obj formatted saves.
They stopped working…
At some point in an obj projects growing size and complexity I would save it and when that save was re-loaded back into XYZmaker I found I could no longer break the project down into its ungrouped components. Basically it became no more useful then the .stl format – only it waited until I had many hours into a project before it stopped working.
Important!: Long story short – in XYZmaker, save your projects in .amf format until you’re ready to print, then save in the .stl format and load that into XYZware and send your work to your printer. I’m guessing the .obj format is still useful if you want to import your work into another 3D editor that knows of the format, hopefully there it will be fully functional.
The da Vinci Mini at only $200 US is one of the least expensive 3D printers out there (even cheaper now), for that price I’m blown away by what it can do. That said it’s not perfect, especially for printing the tiny parts I needed for a 1/450 scale ship model. I spent some time learning what it could and couldn’t print though this would have been true of any 3D printer and of PLA printers in particular. I have to admit my expectations going in were unreasonable.
Some dis it for locking you into XYZ’s filaments and I’m usually not a fan of this business practice, you will pay almost twice as much (on Amazon) for XYZ’s filament but considering how the Da Vinci Mini holds your hand through the 3D design and printing learning curve, it may still be a bargain for beginners – it was for me.
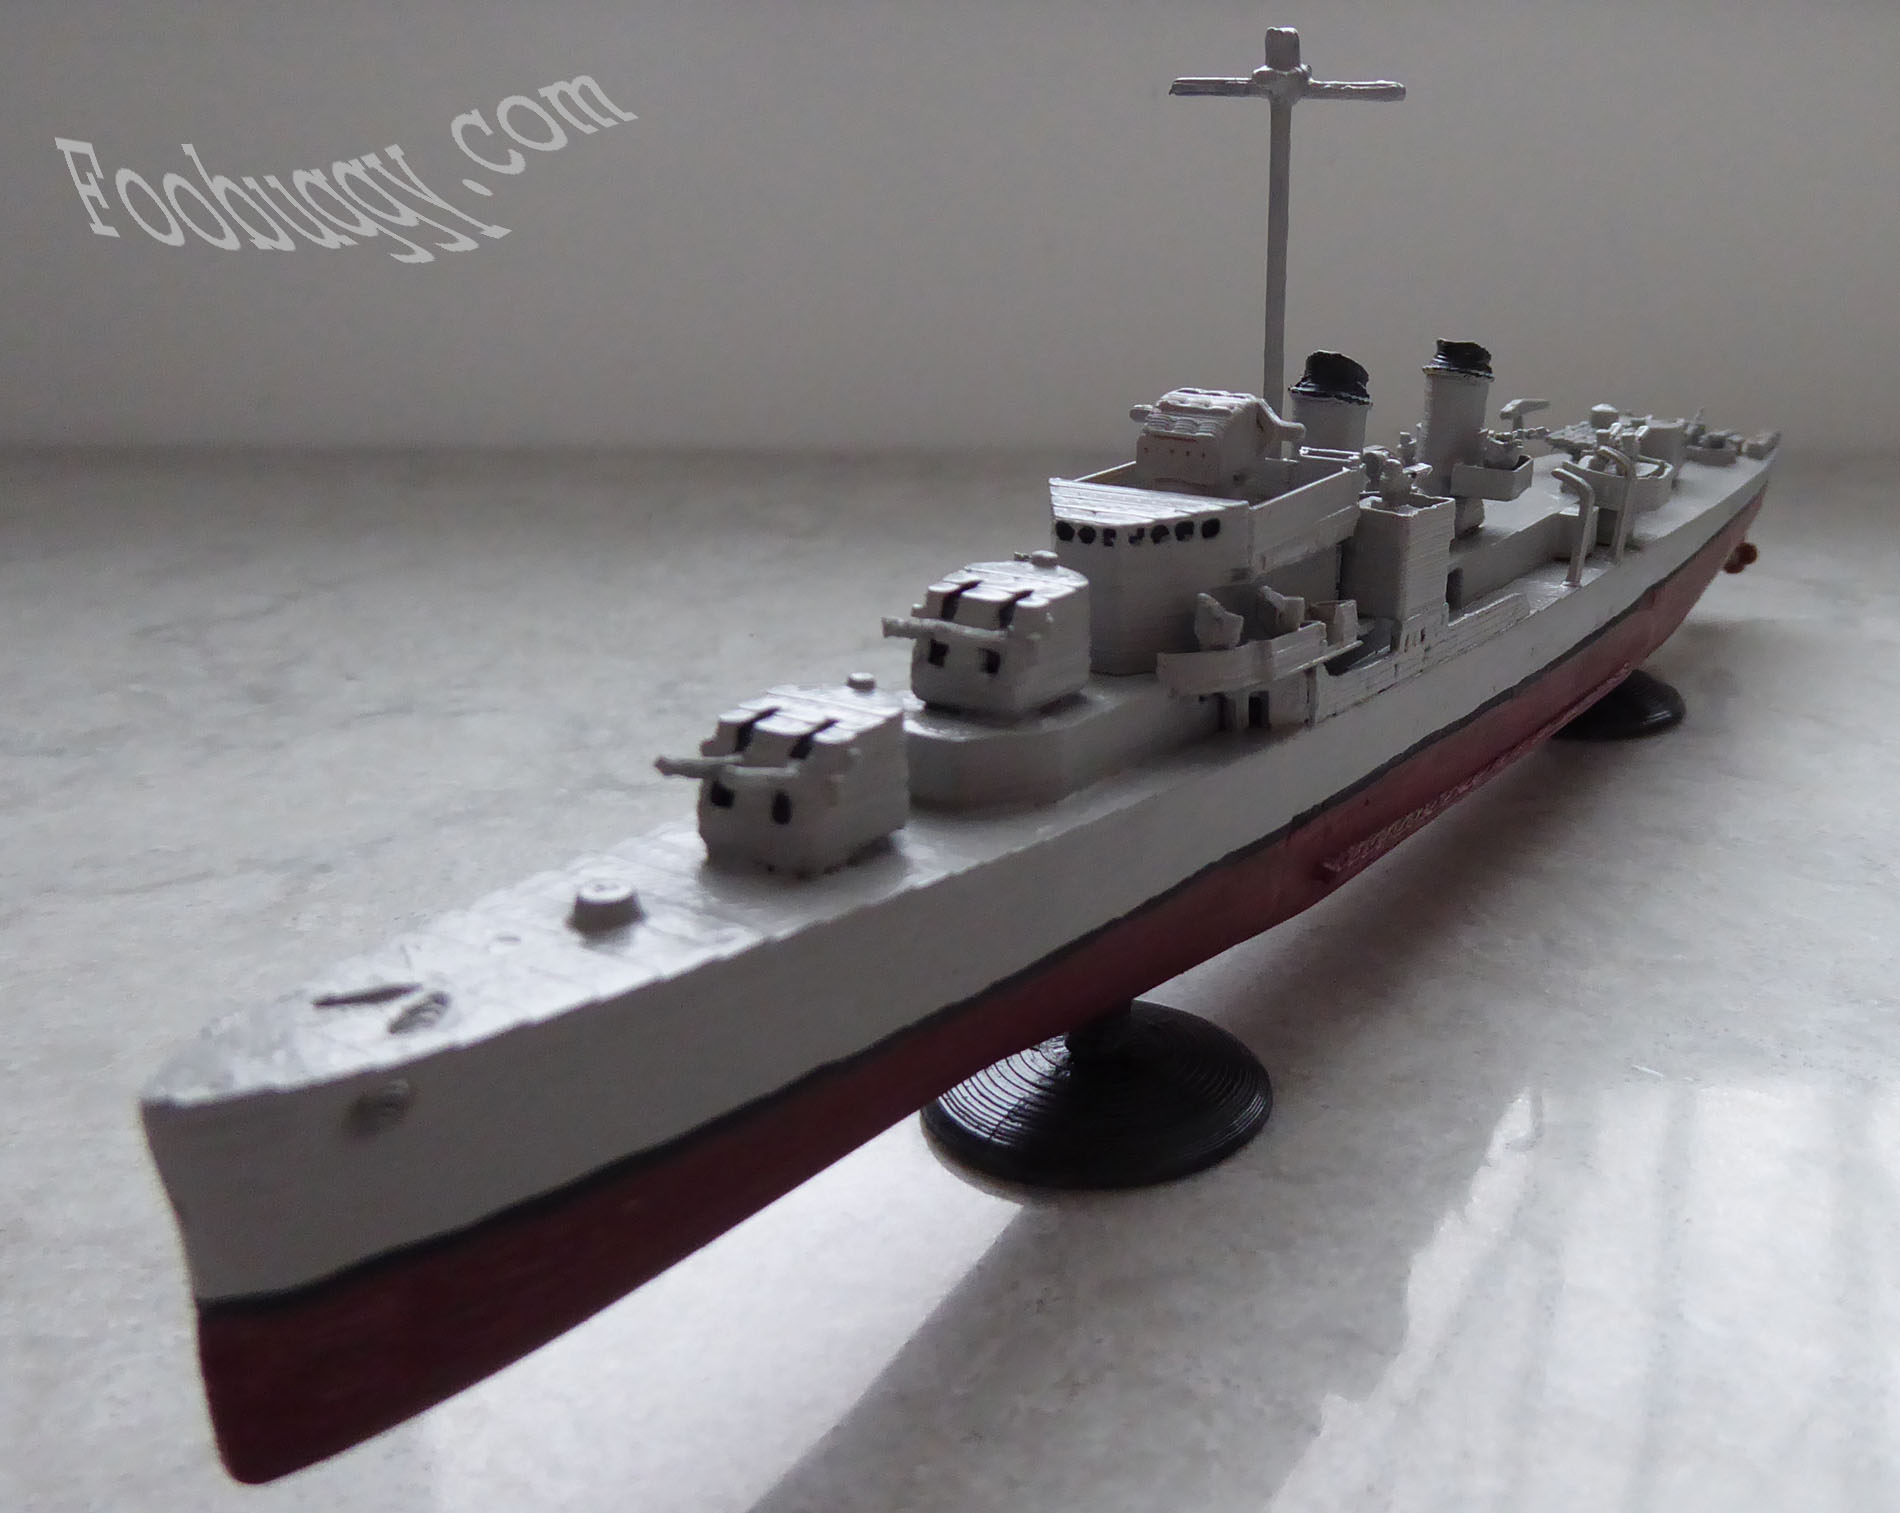
Considering the overall level of print quality, it may seem odd to some that I bothered with photo etch. I wanted to see just how good a model printed with this relatively inexpensive 3D printer could look. I’ve taken before and after photos, with and without the non printed parts – so you all can tell me what you think.
Do you prefer just the printed level of detail? Does the sharpness of the photo etch make the softness of the printed detail all the more apparent?
Or does the photo etch help make up for what the printer can’t render?
I’m still on the fence. I may need to leave out small details on my prints and add them through other media. Or maybe I’ve a good balance here. I’m guessing more projects and experimentation will help me with this, but one thing I’m sure of – I do love this printer!
Update: 6/5/2018
I ended up giving this model to a friend who’s Dad had served on the Compton. Like the Yugumo, I still wanted an example for my 1/450 US fleet and so I built her a sister too, the USS Allen M. Sumner V2
And no, I haven’t added PE rails or rigging!
Yet…
🙂
Anyway you can share your model for the Allen M. Sumner class ships? I have a friend who is a vet and would love to print him one of these.
Hello Donmoniquee,
I currently don’t give away or sell my work. But here is a link to a rather nice free Allen M Sumner on Scetchfab.com
Update 4/20/22: The linked model is now $15.