3d printed ship models


Original Post: 8/29/2020
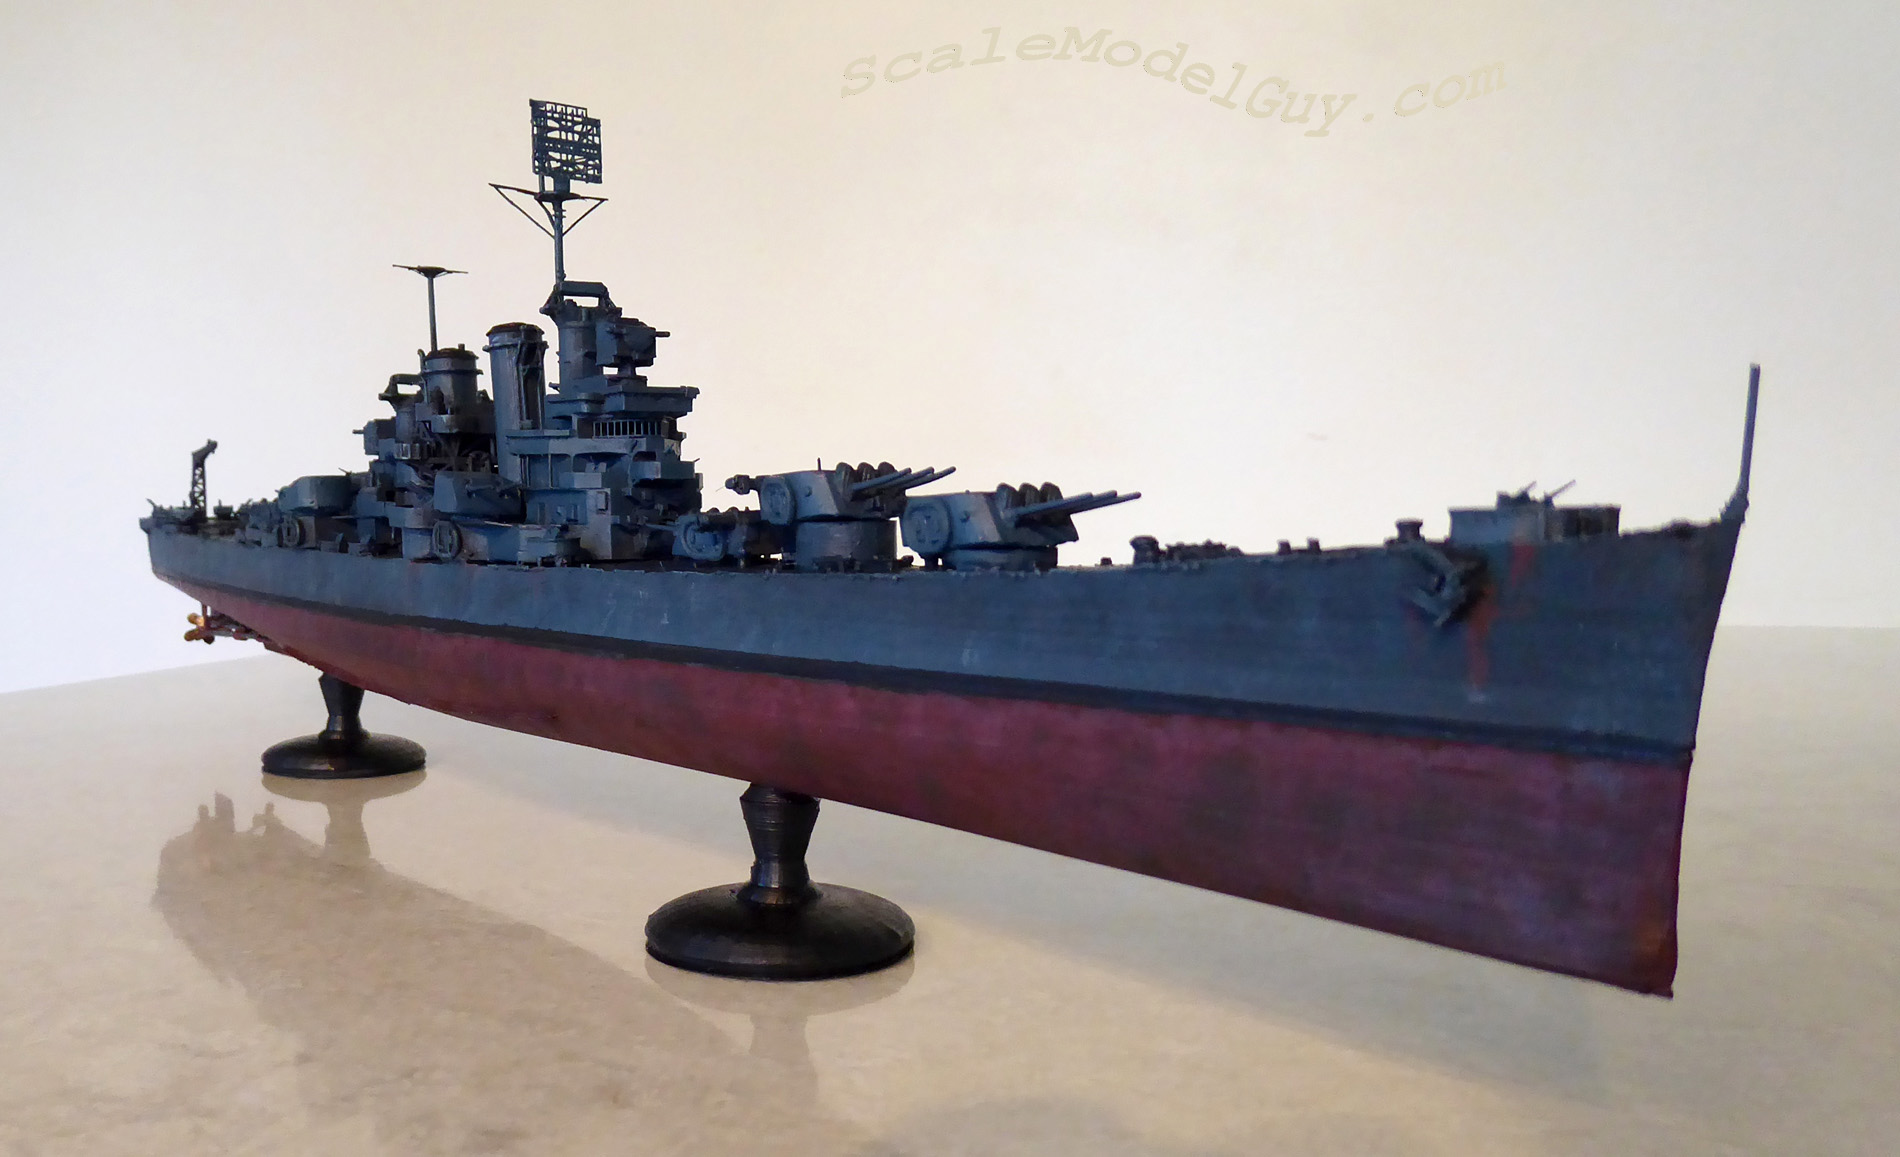
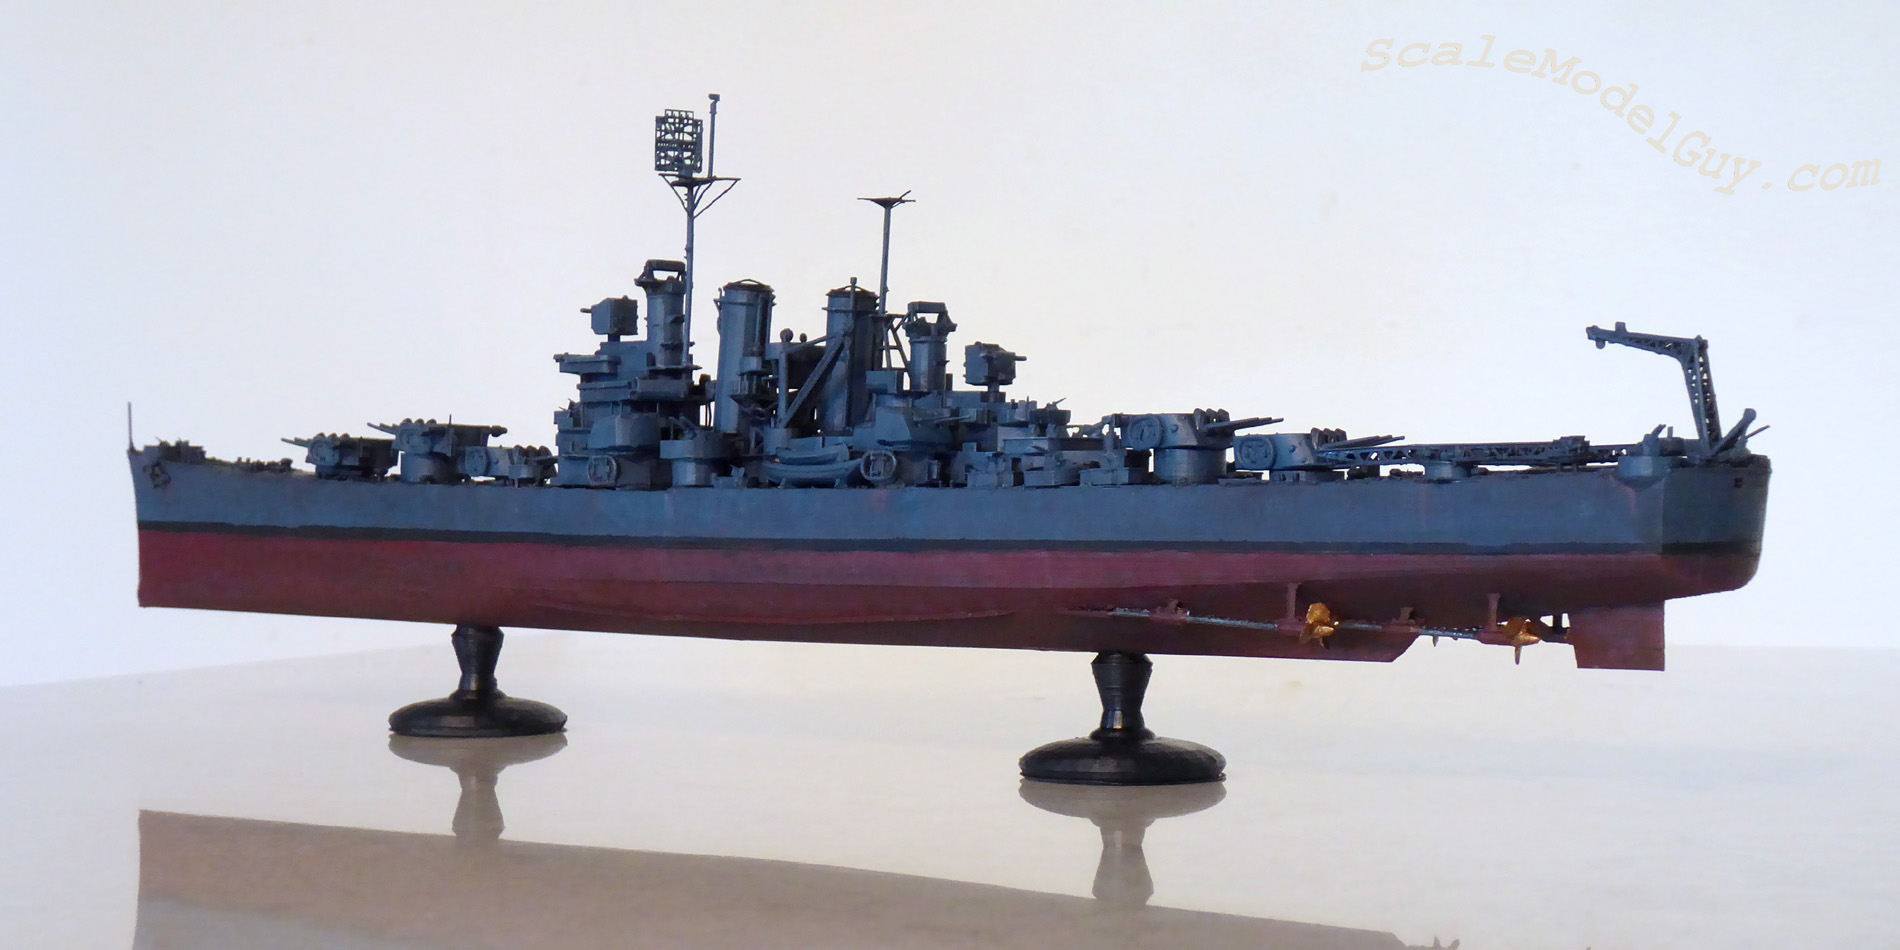
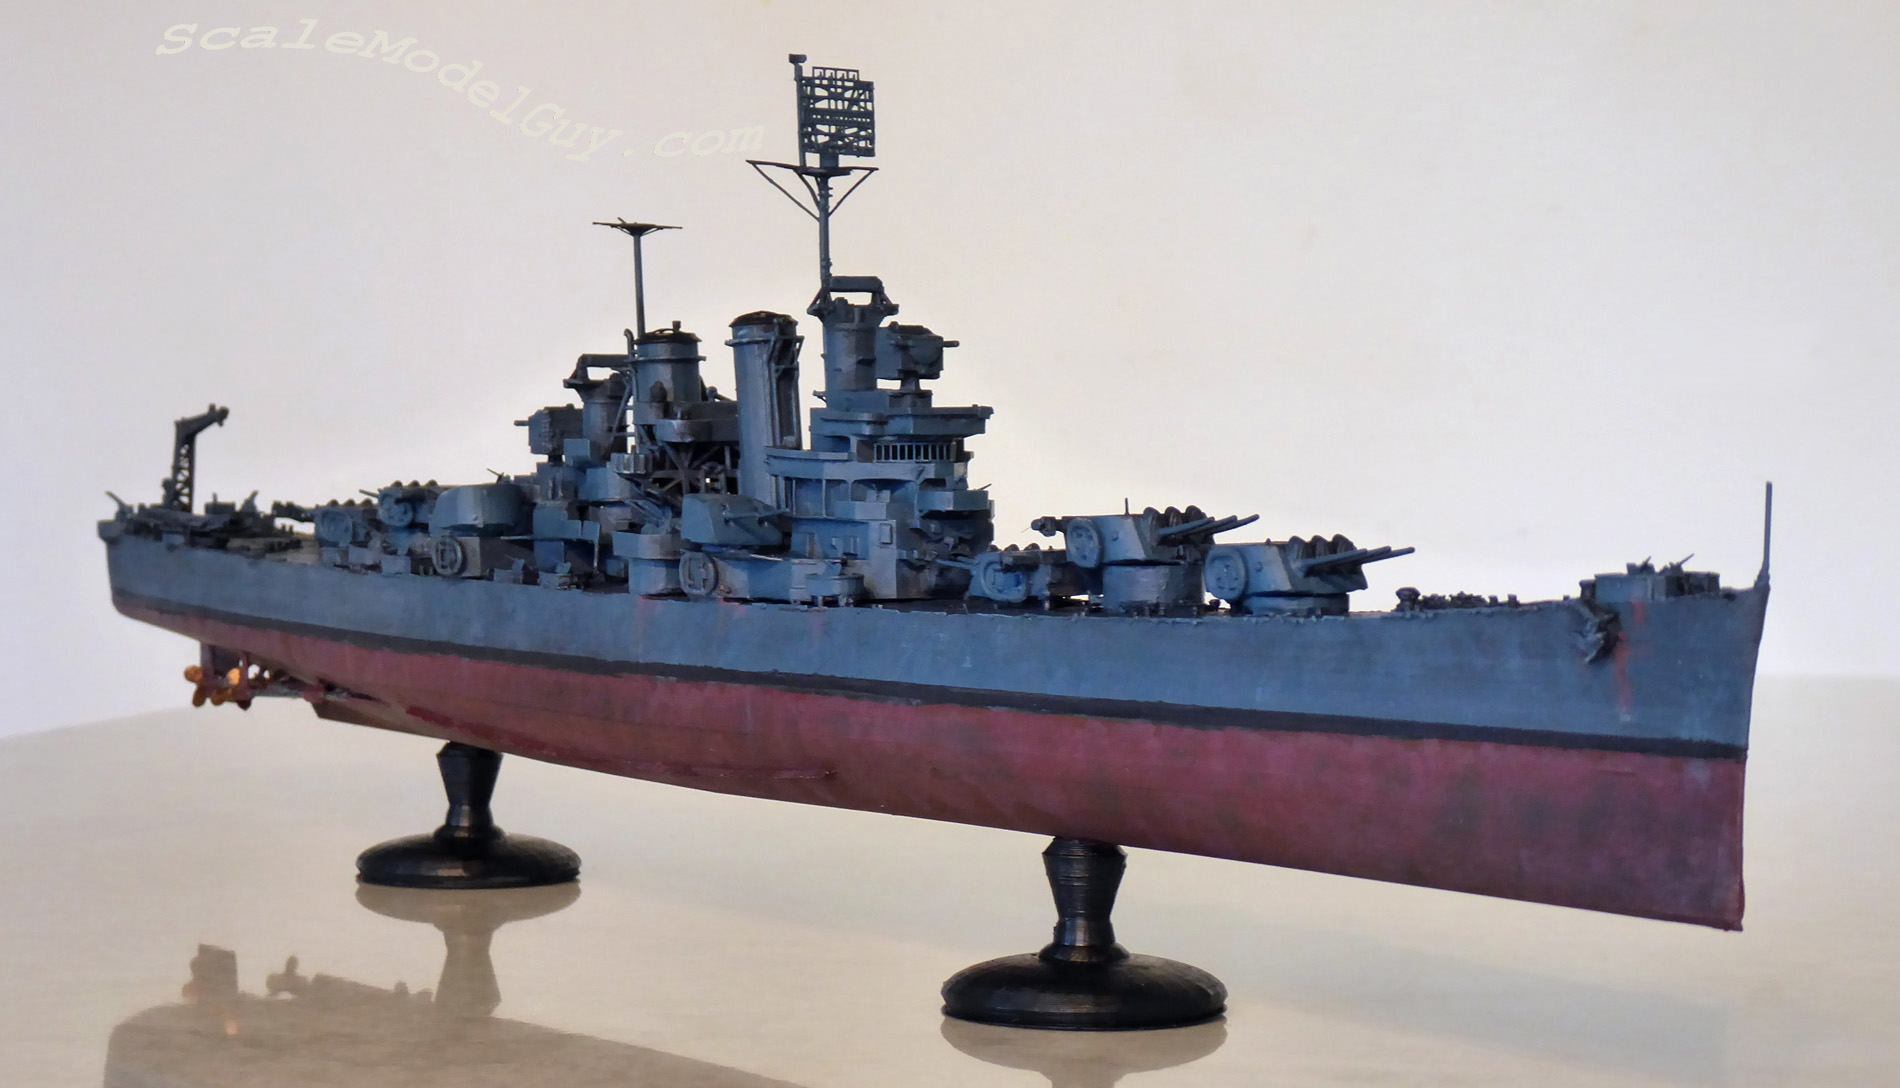
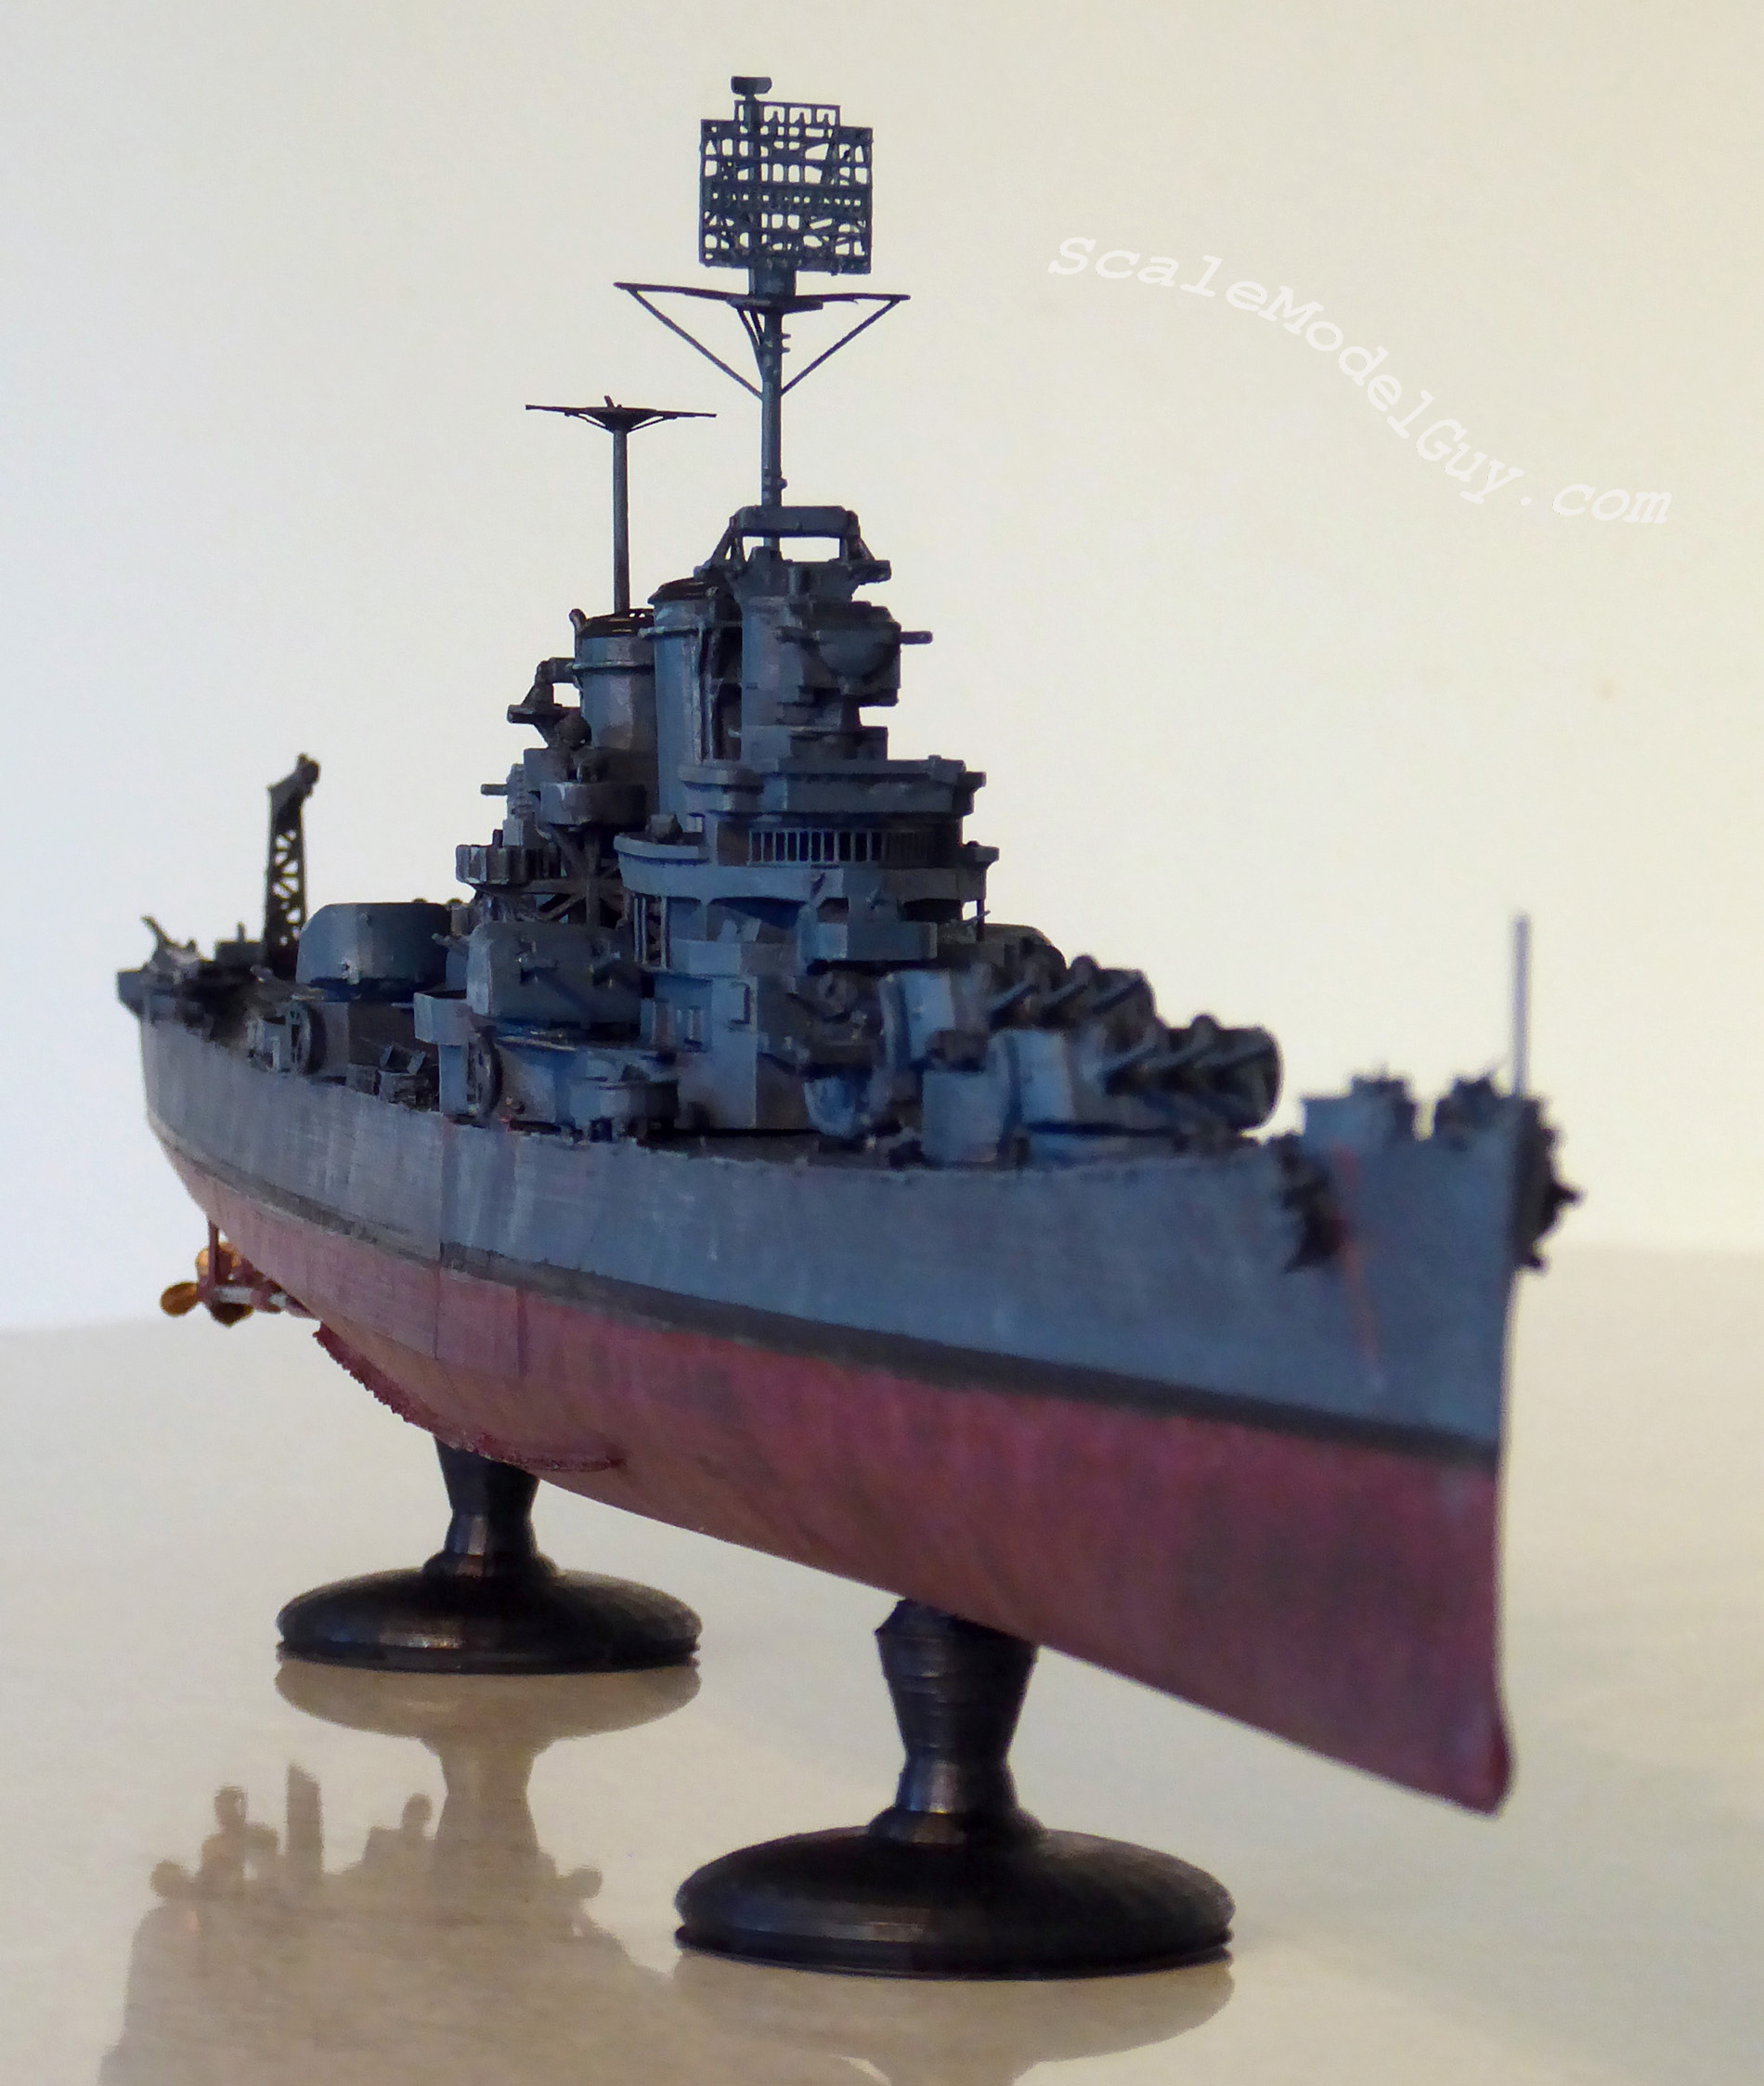
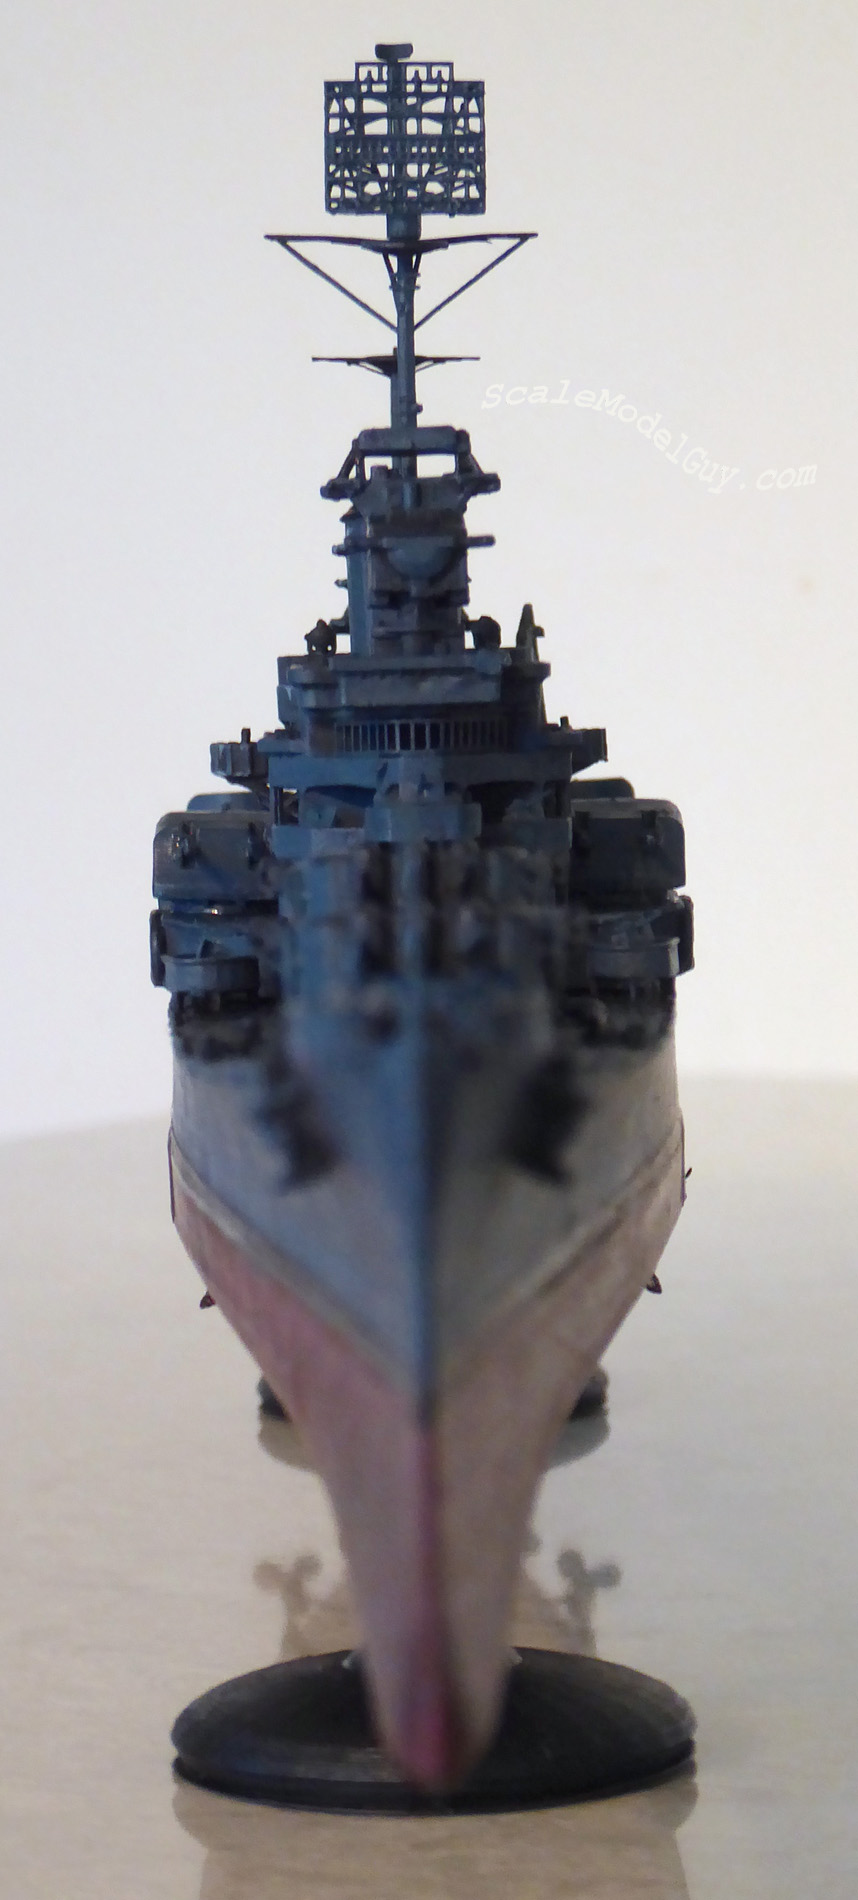
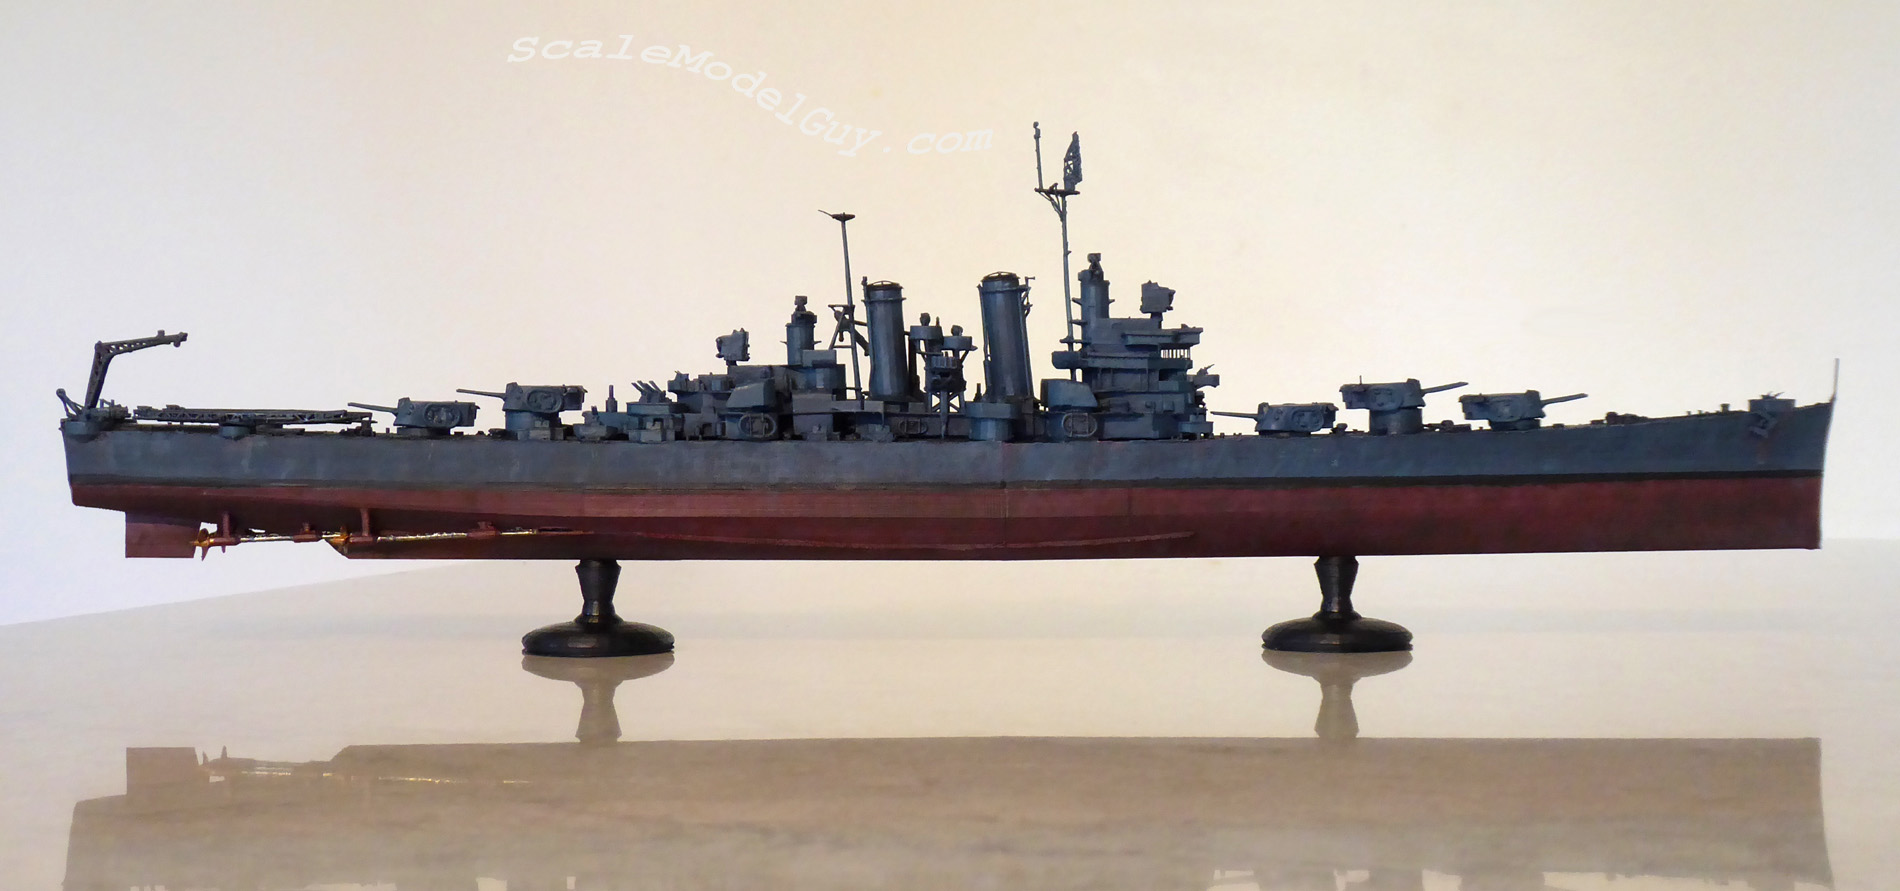
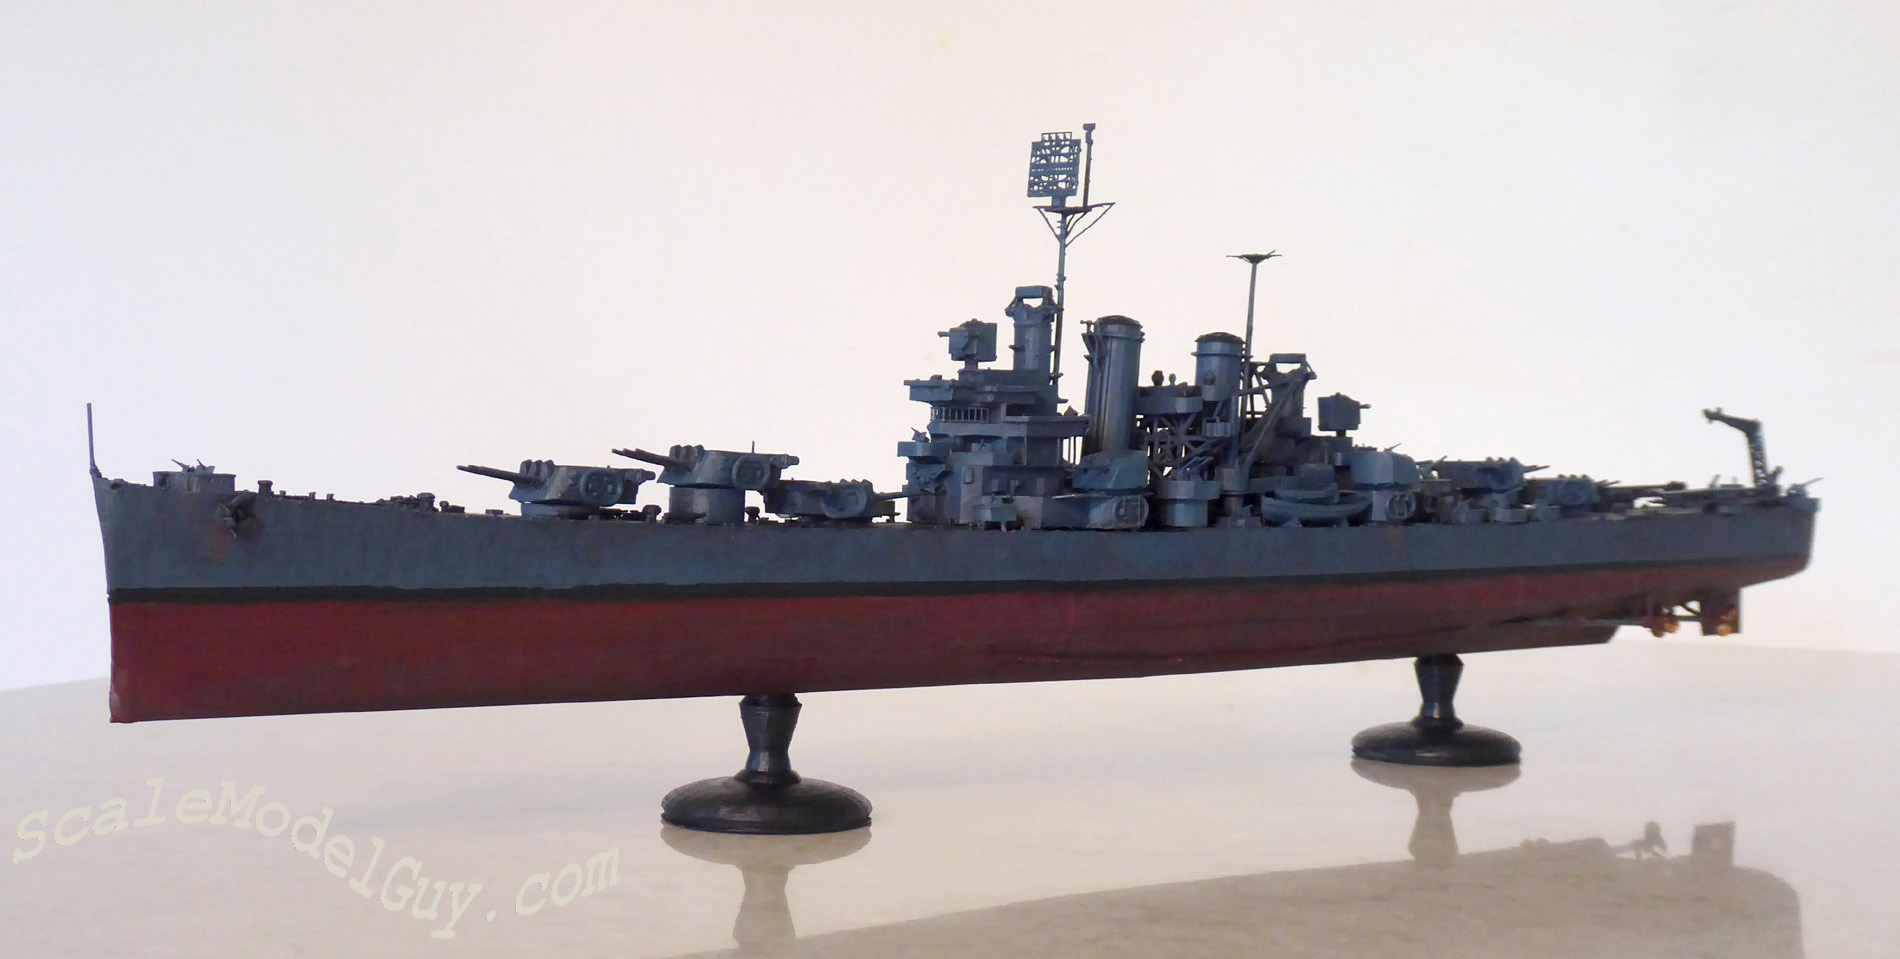
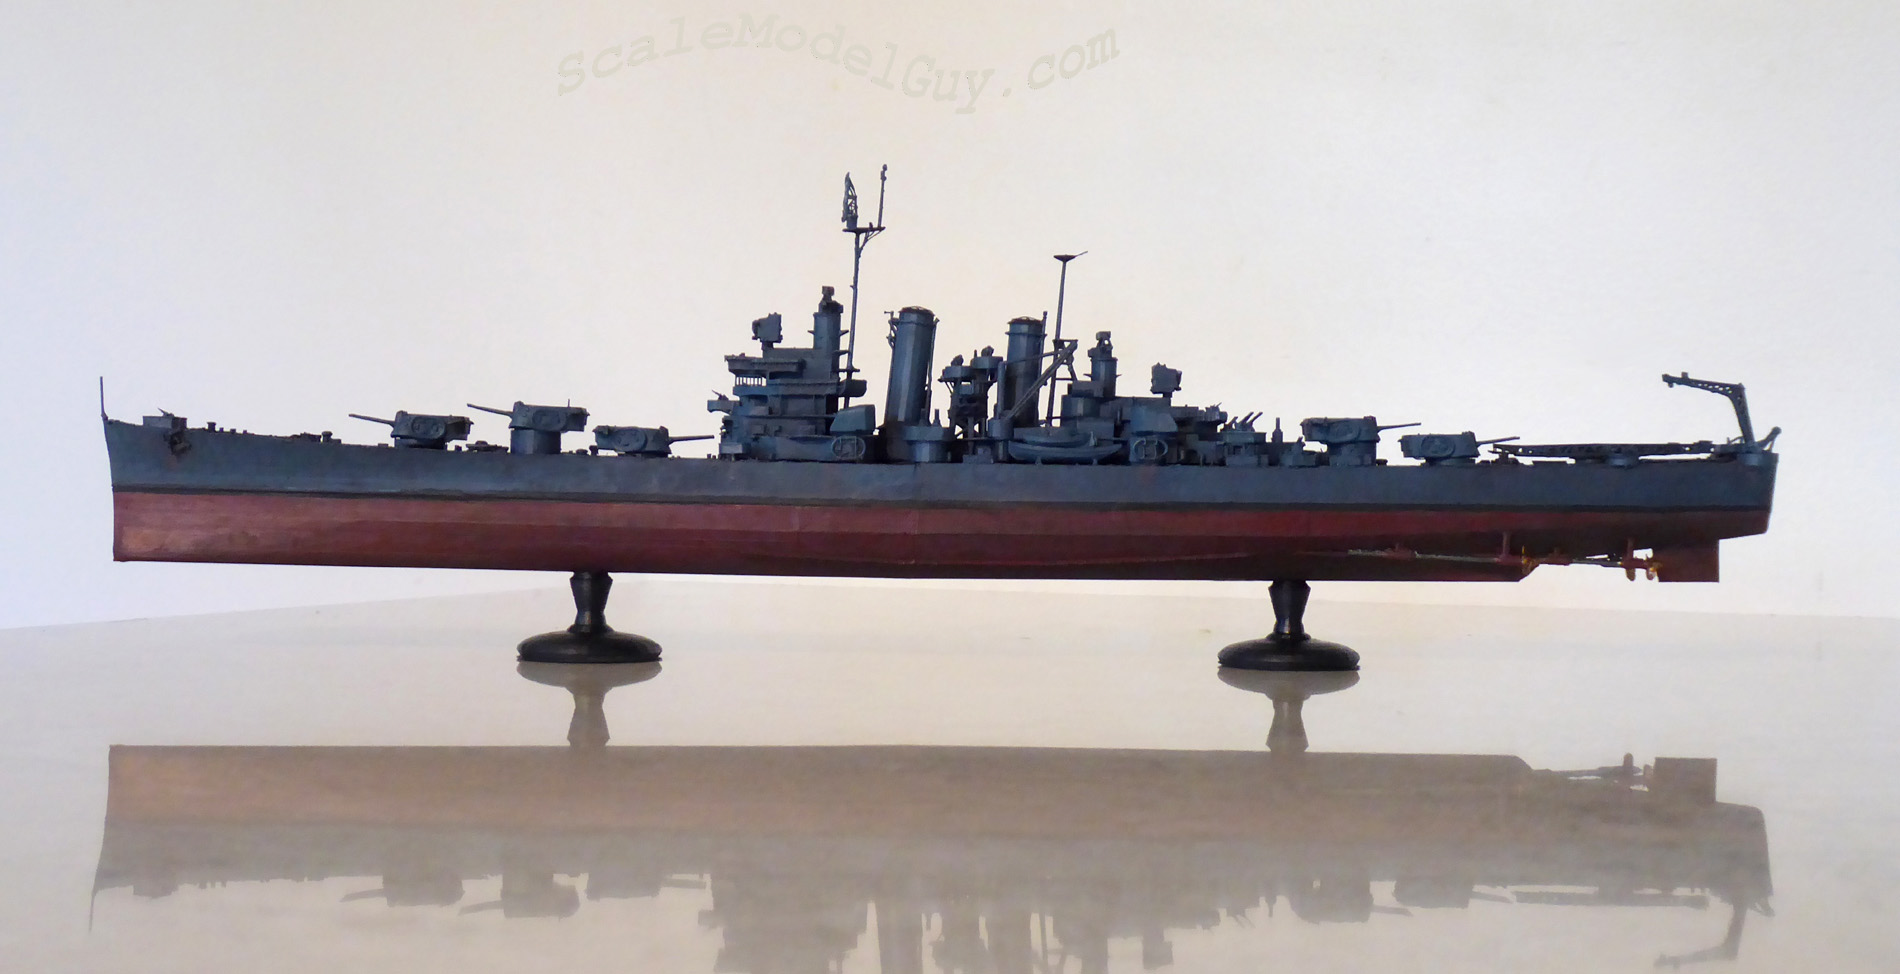
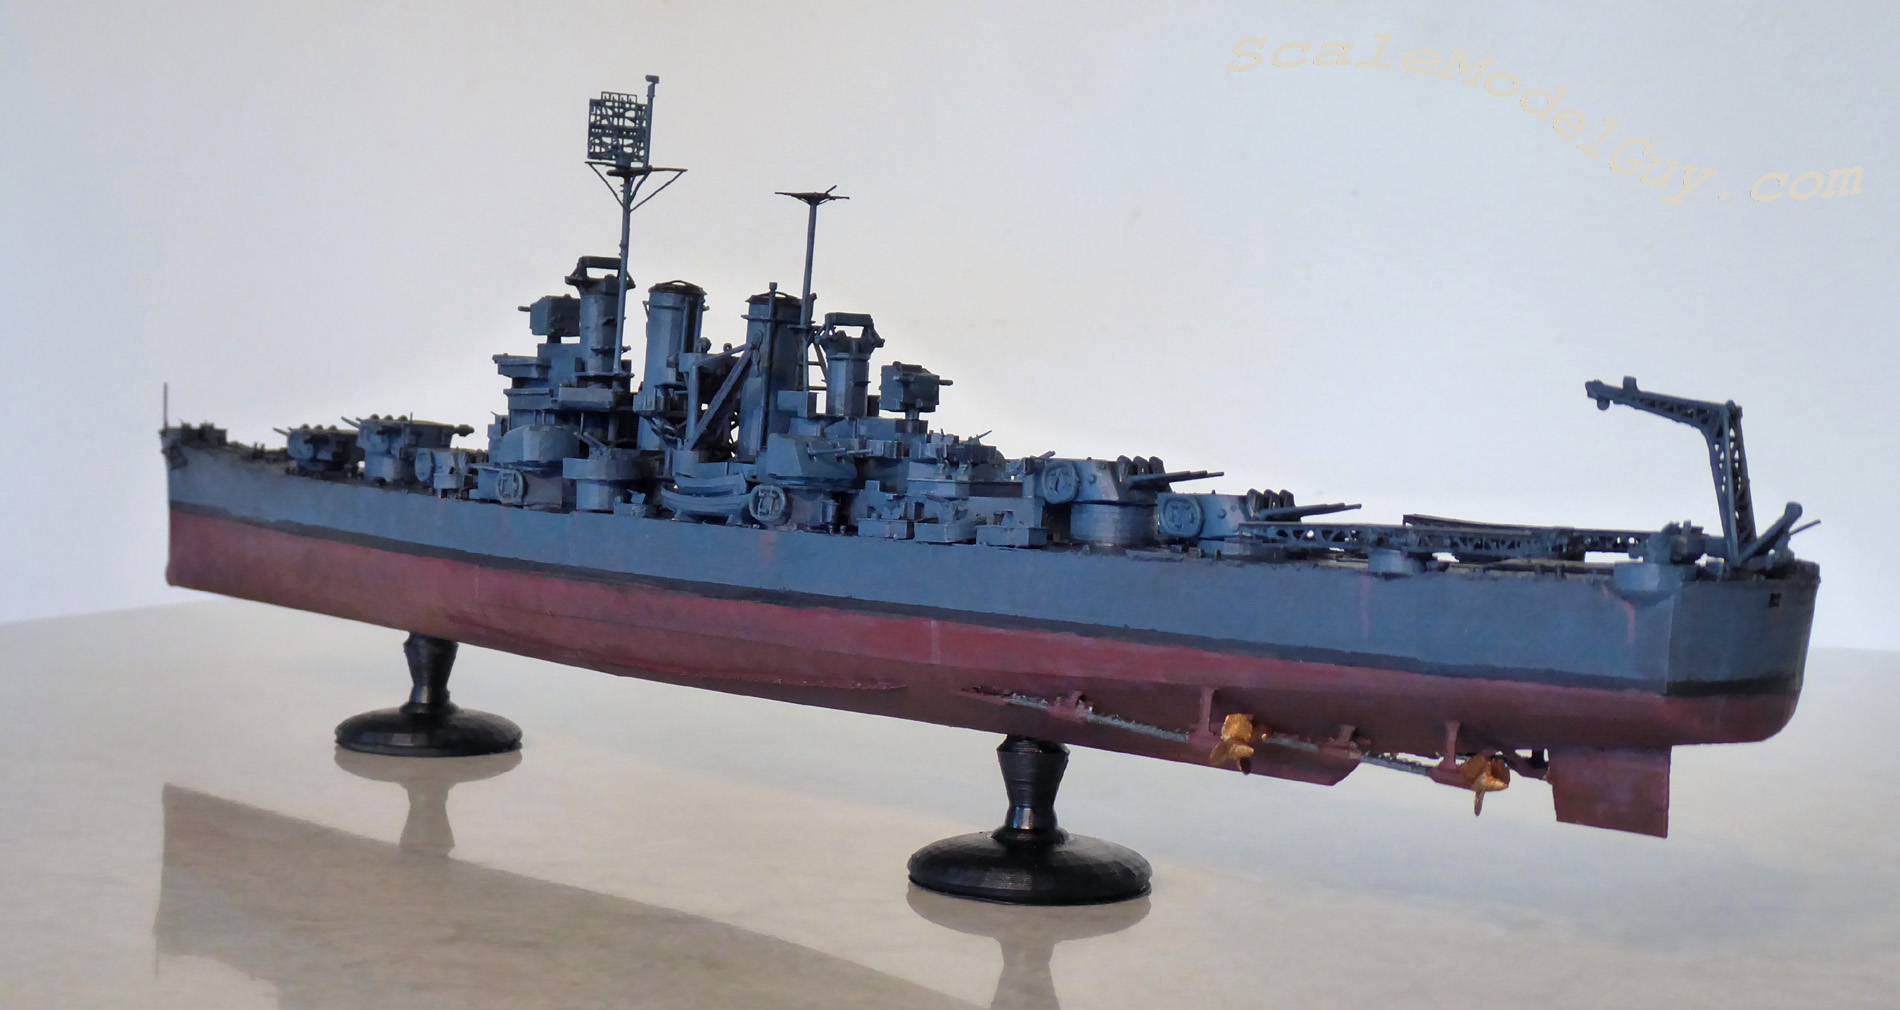
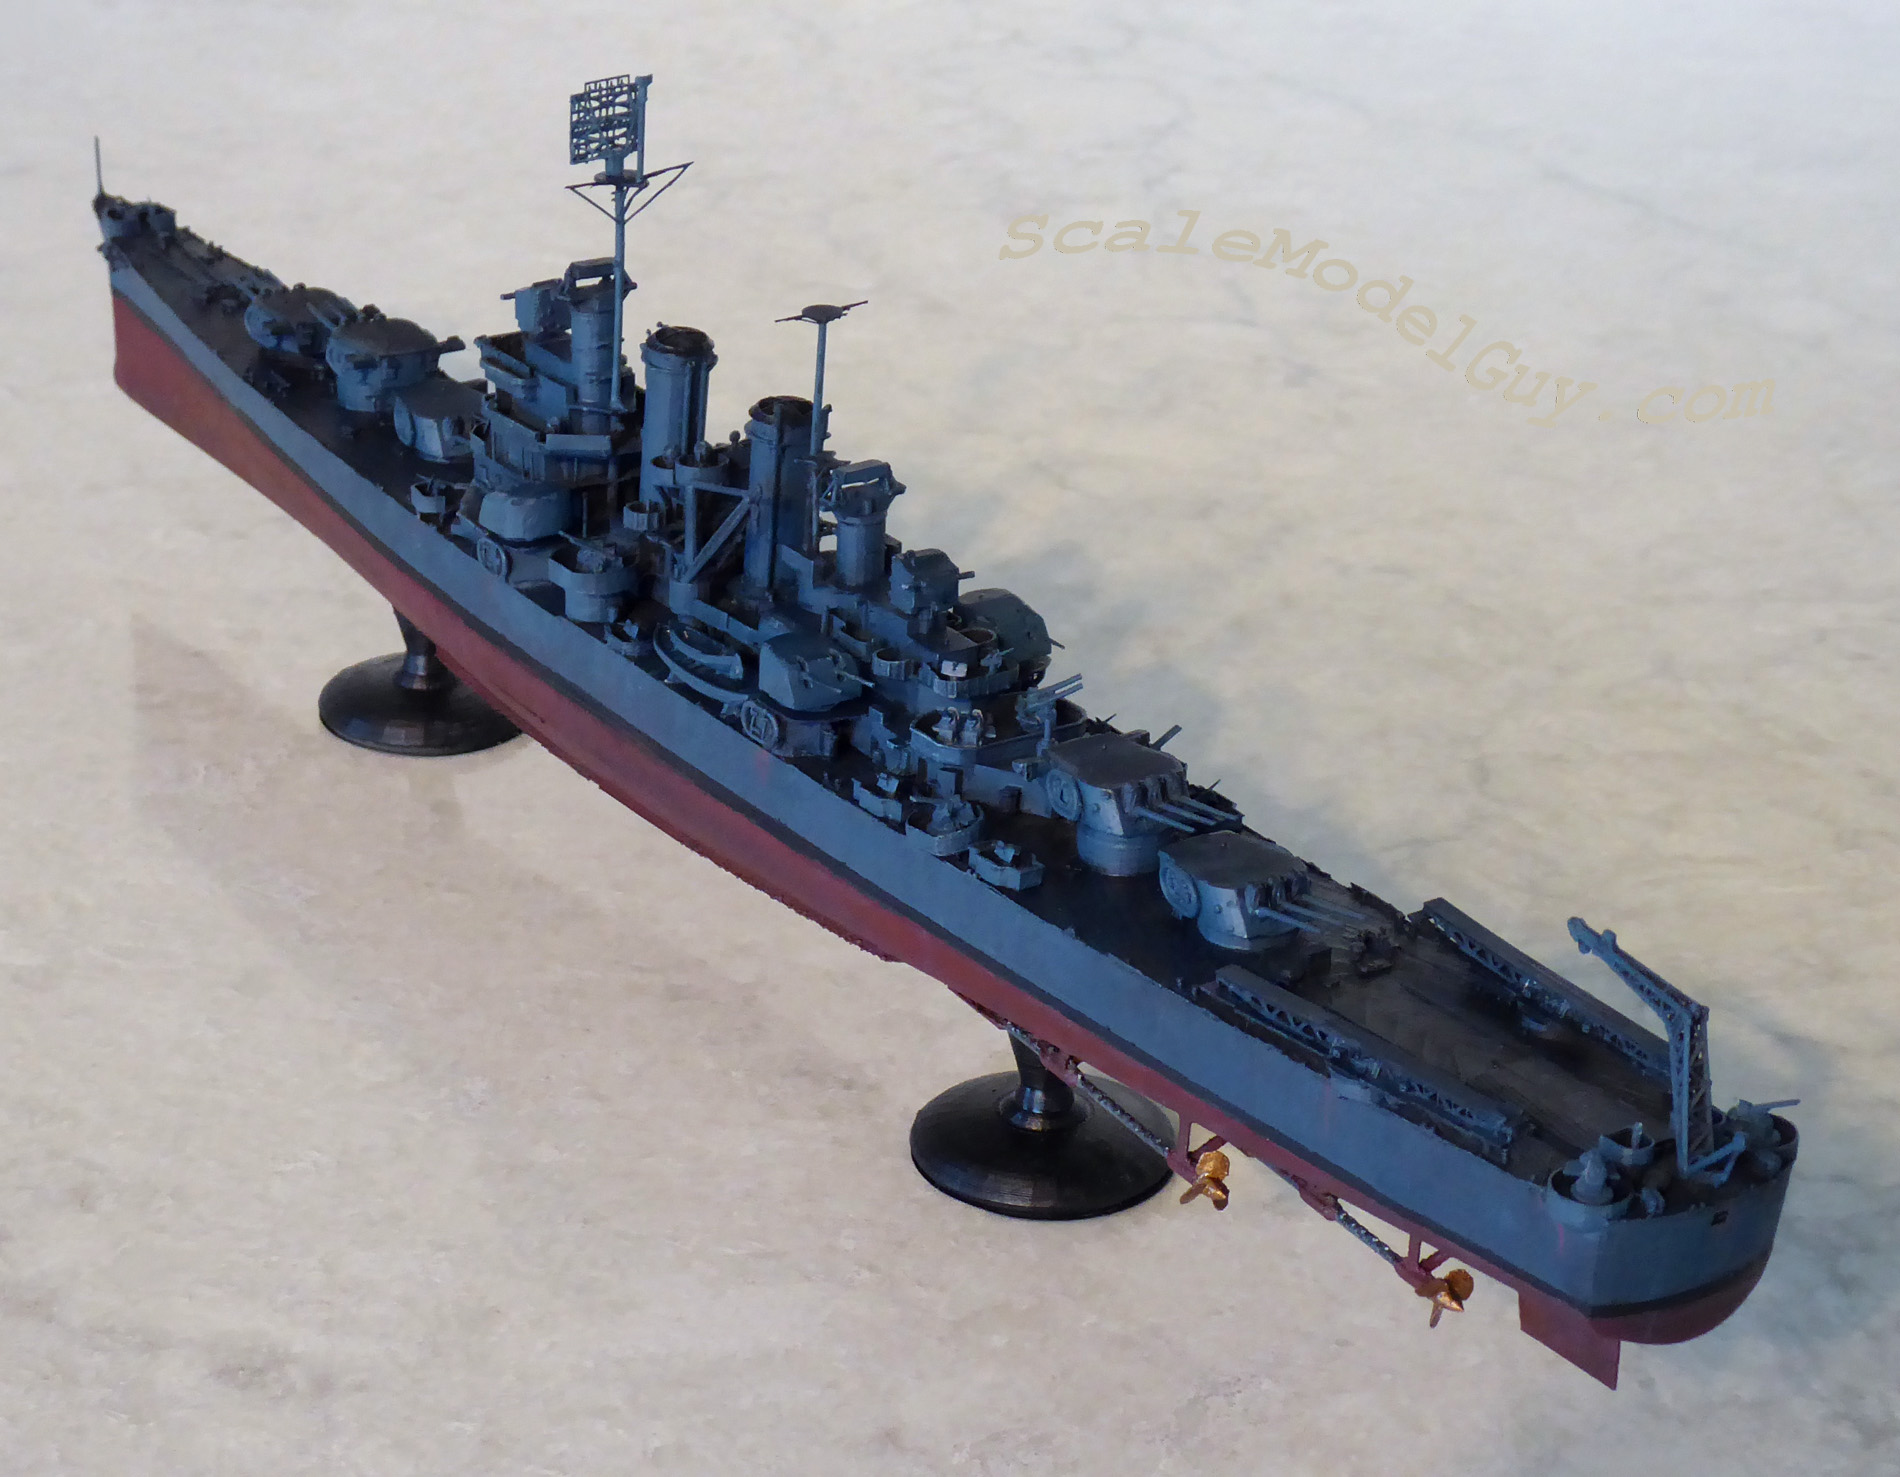
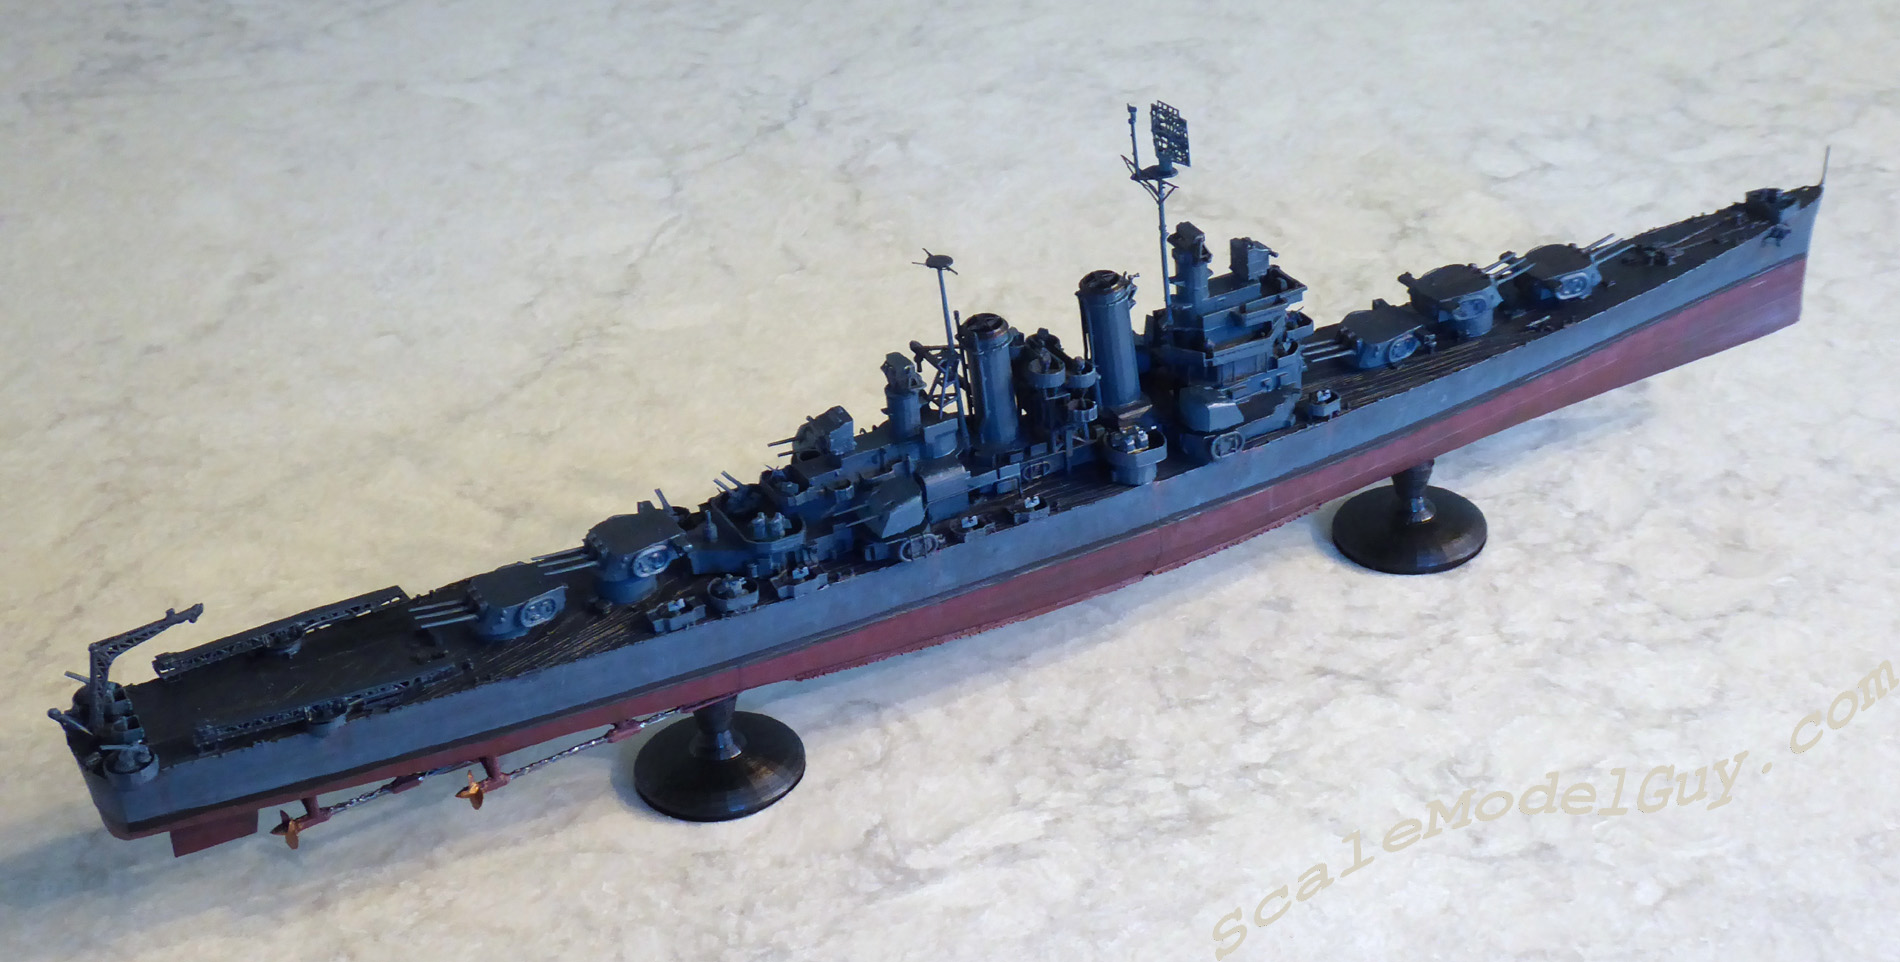
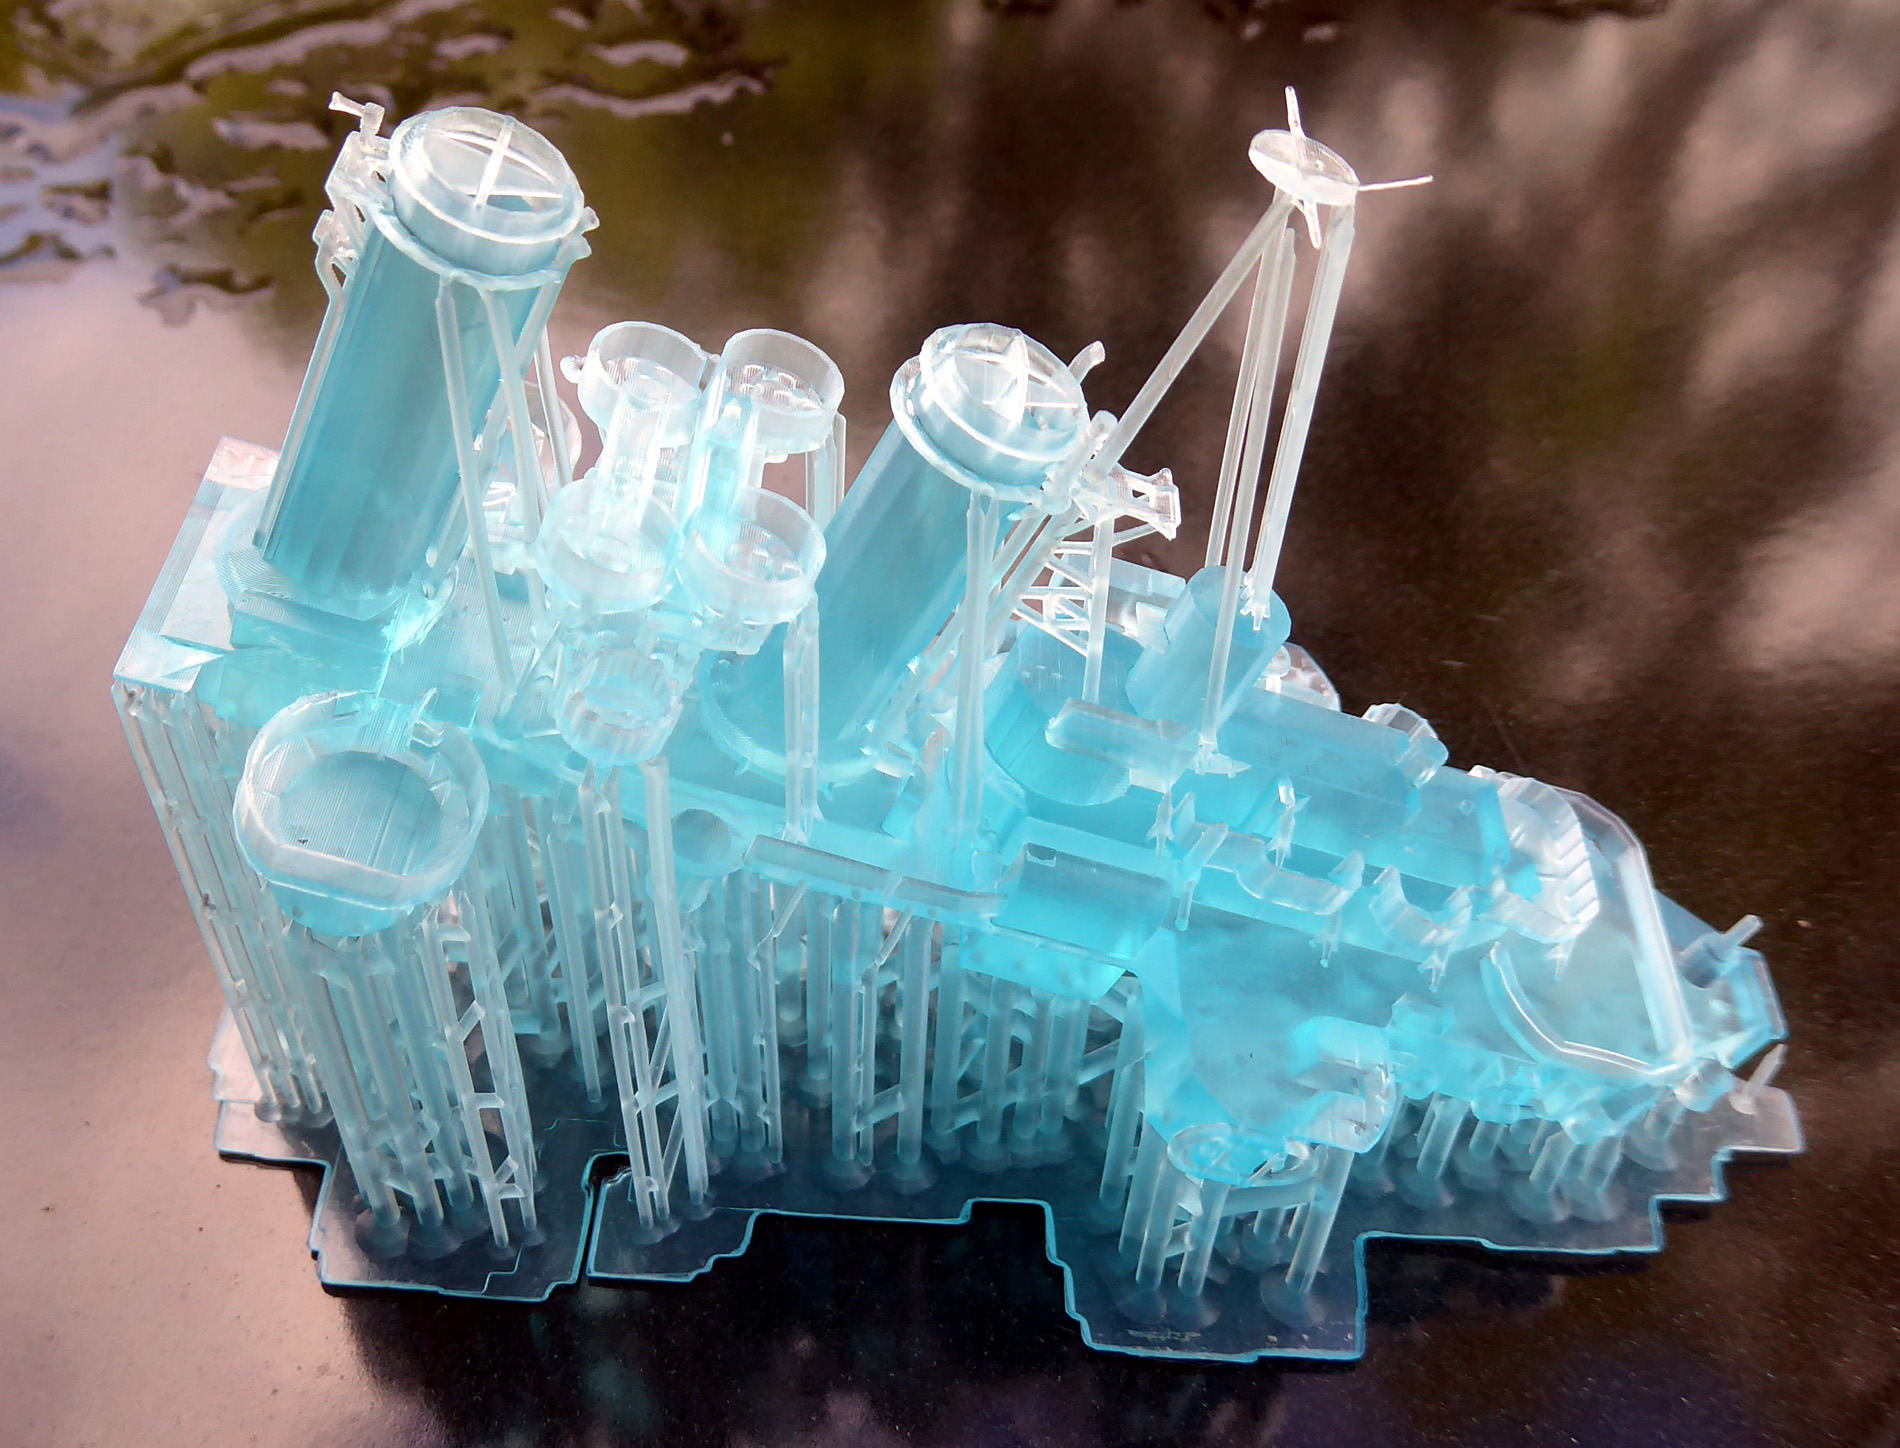
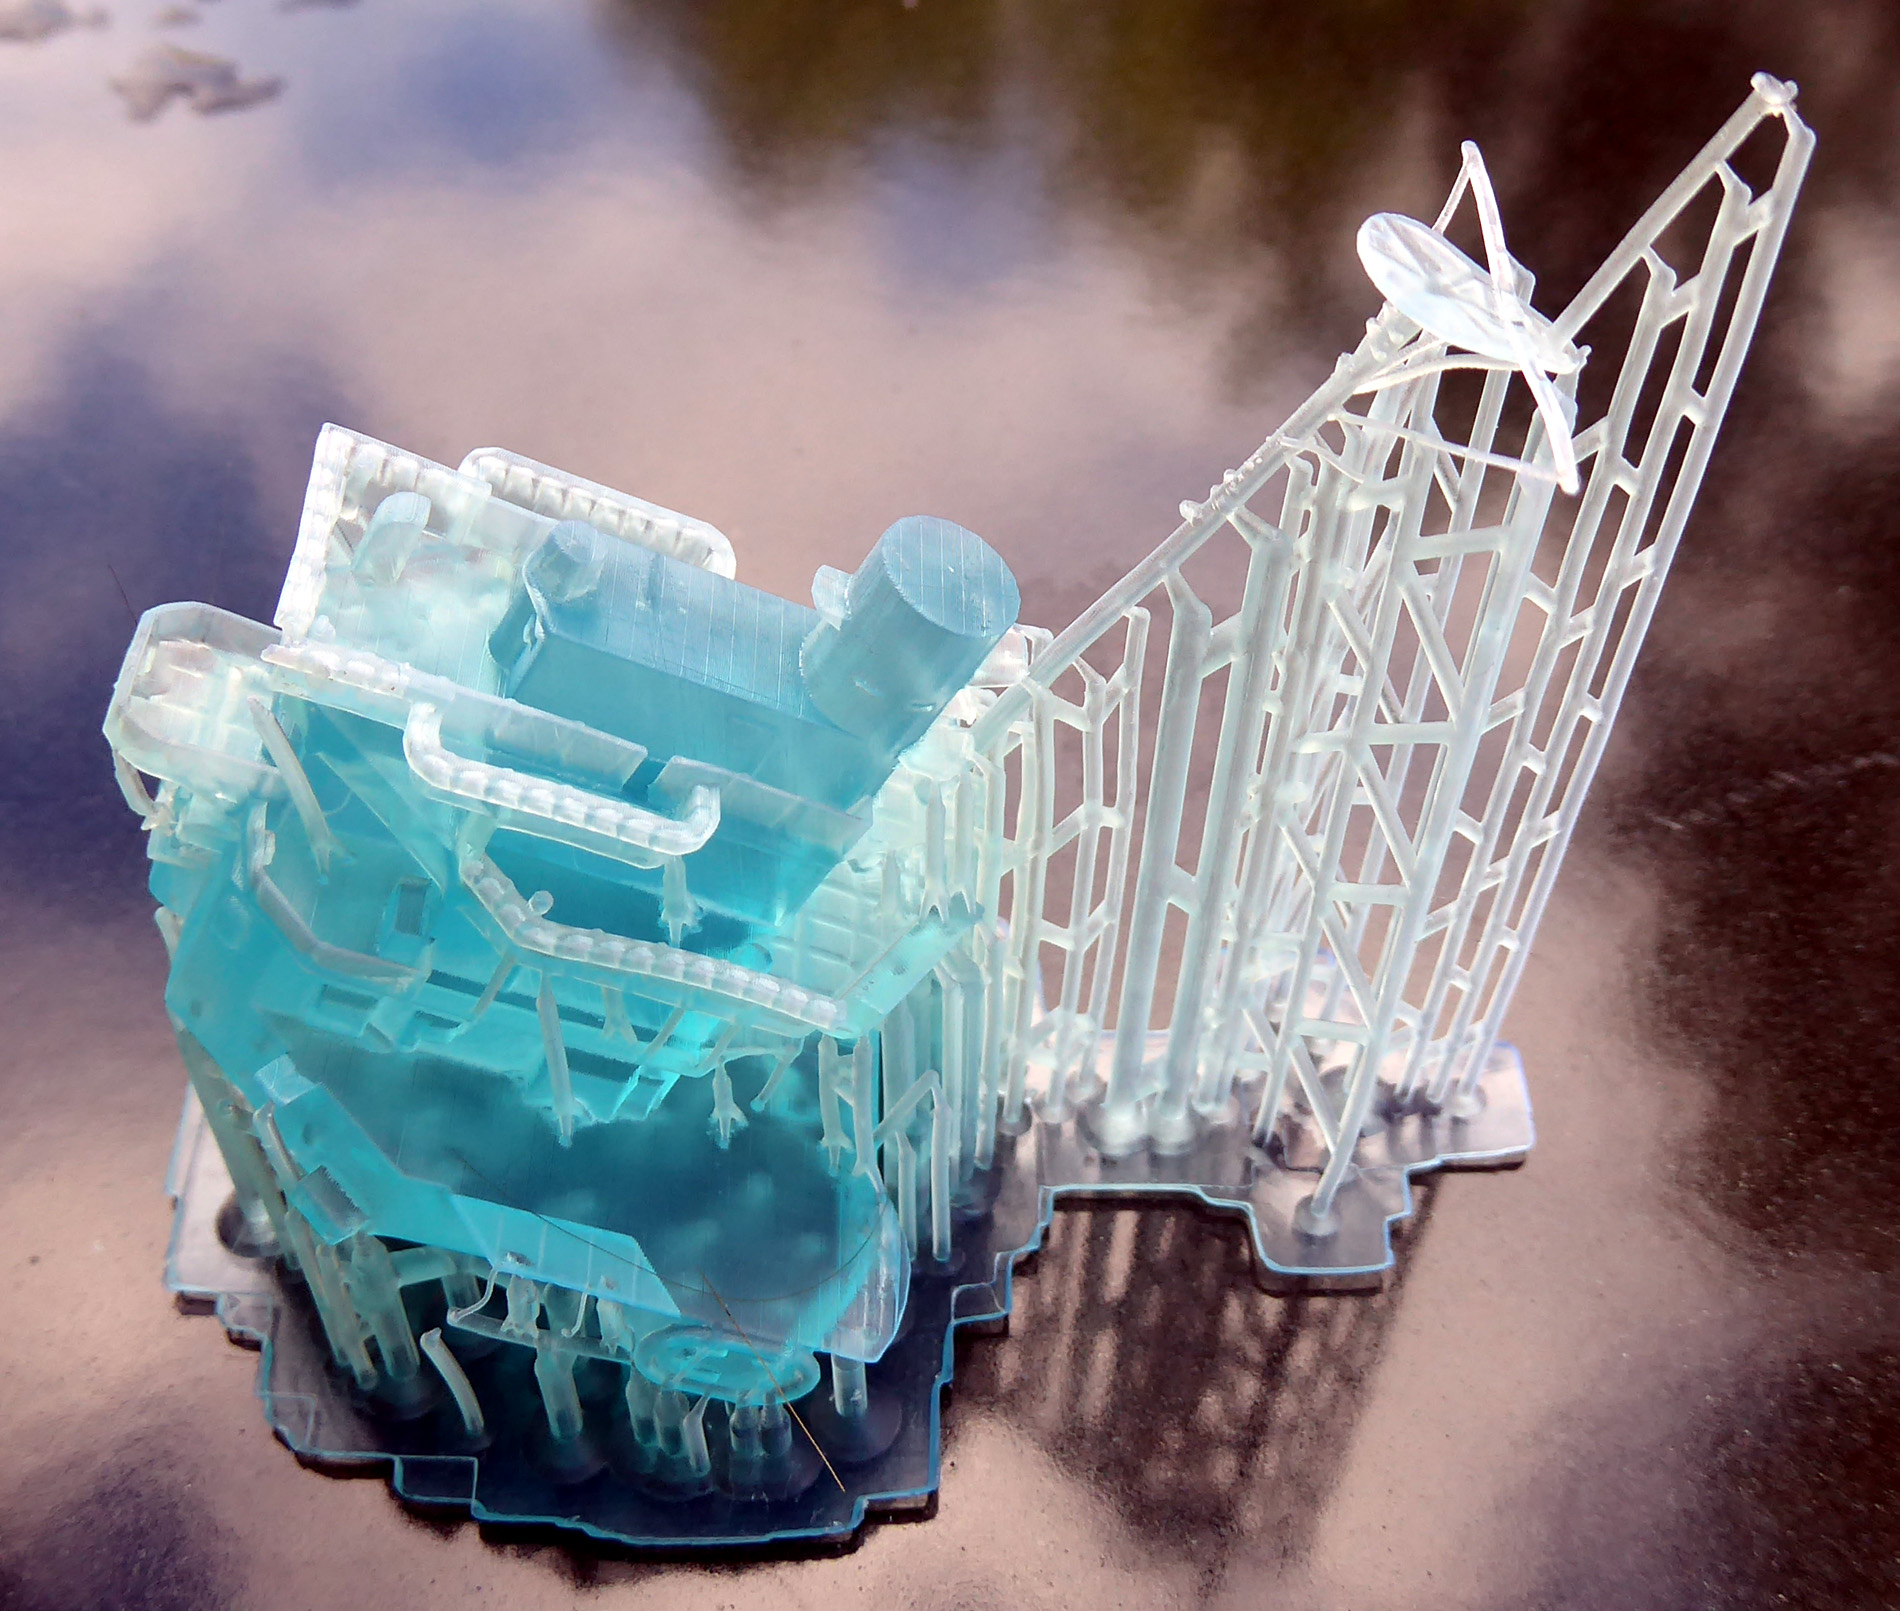
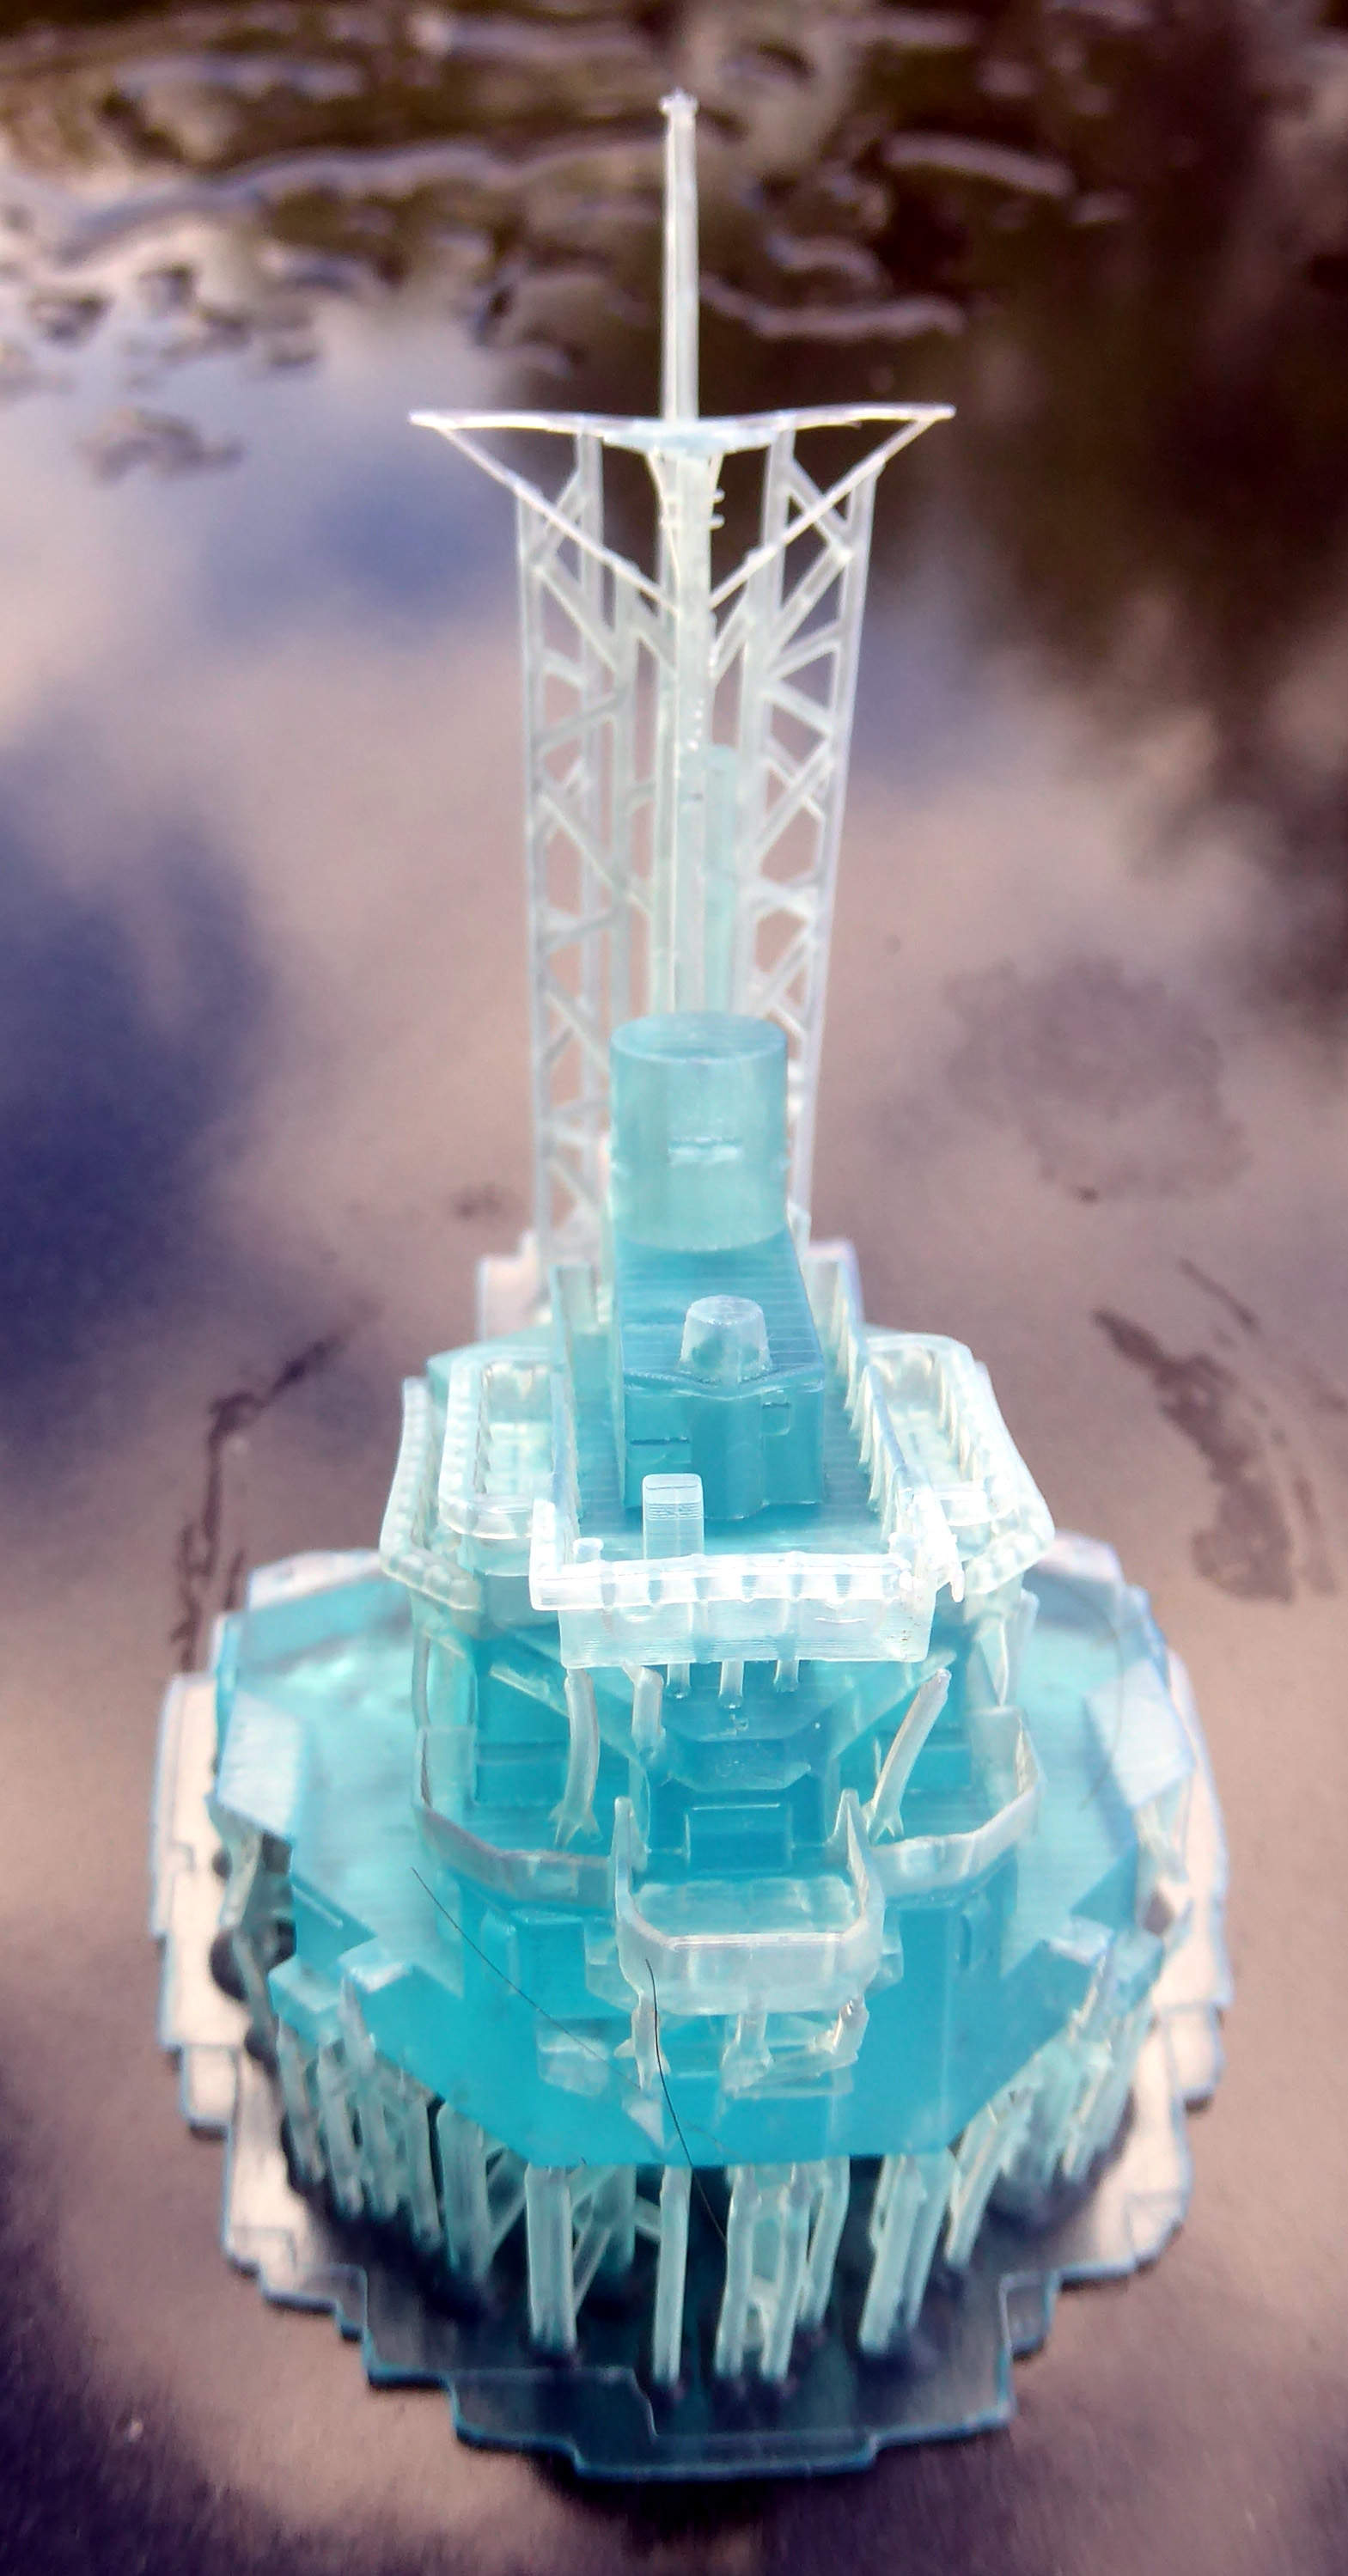
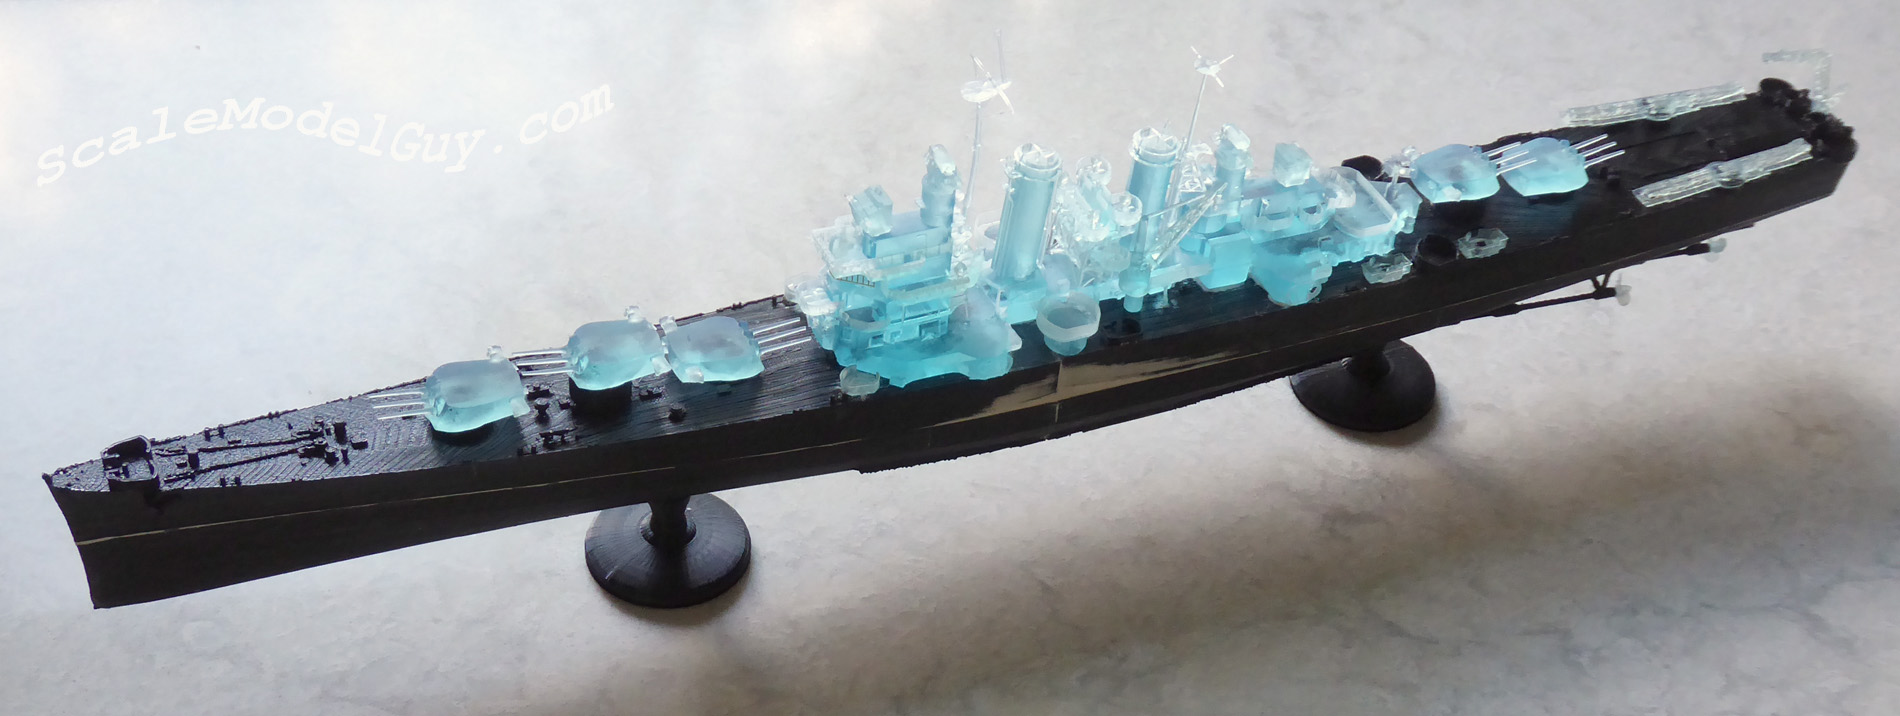
I’d worked intermittently on this design since I got my Ender 3 Pro, so about a year. I’ve always liked the Brooklyn Class, America’s answer to Japan’s Mogami class light cruises. And USS Helena, with her stellar and active carrier in the Pacific, capped with a heroic, if tragic end, is my favorite. But when I tried to print her, I had trouble with her fine details in 1/450 scale using my Ender. The searchlight tower and bridge structures in particular, either couldn’t be printed or the results look unimpressive at best. I knew I’d be getting a resin based printer eventually so decided to shelve my USS Helena project till then.
My first LD-002r prints were tiny detail parts, I started getting more ambitious (and successful) while making resin parts for my second USS Texas project. After being amazed by the results I had pulled off on Texas 2, I decided it was time to revisit my USS Helena project and here she is, done for now. I used the LD-002r to print everything except the main hull and stands. for those large parts I still used my Ender 3 pro.


Reprints & problems
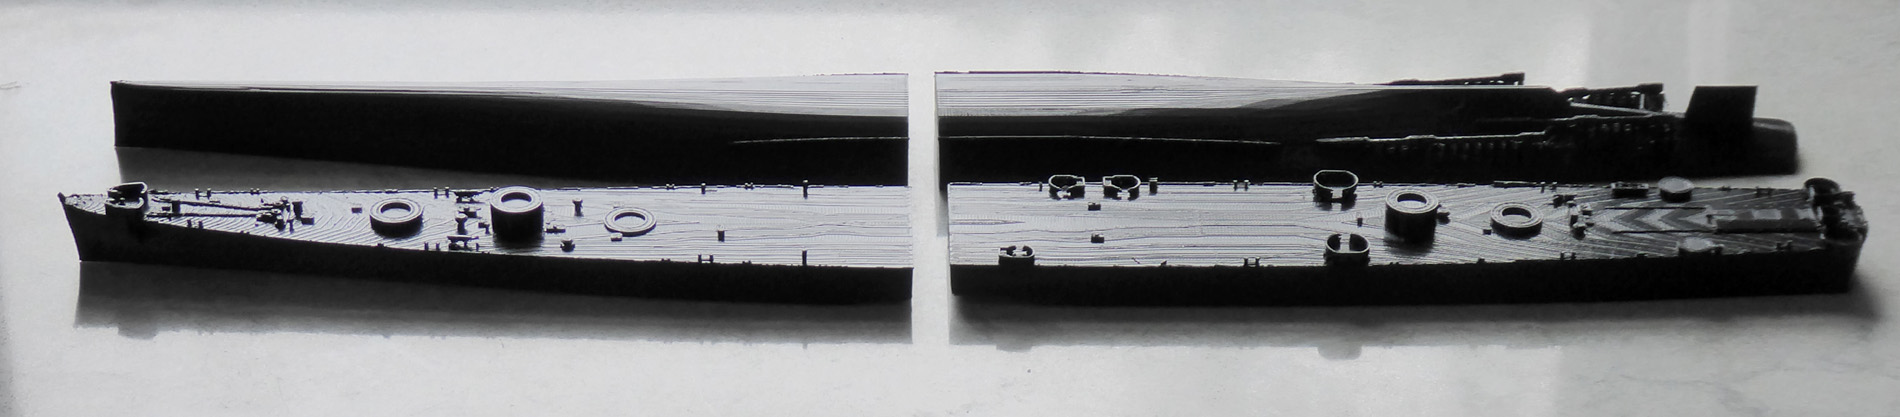
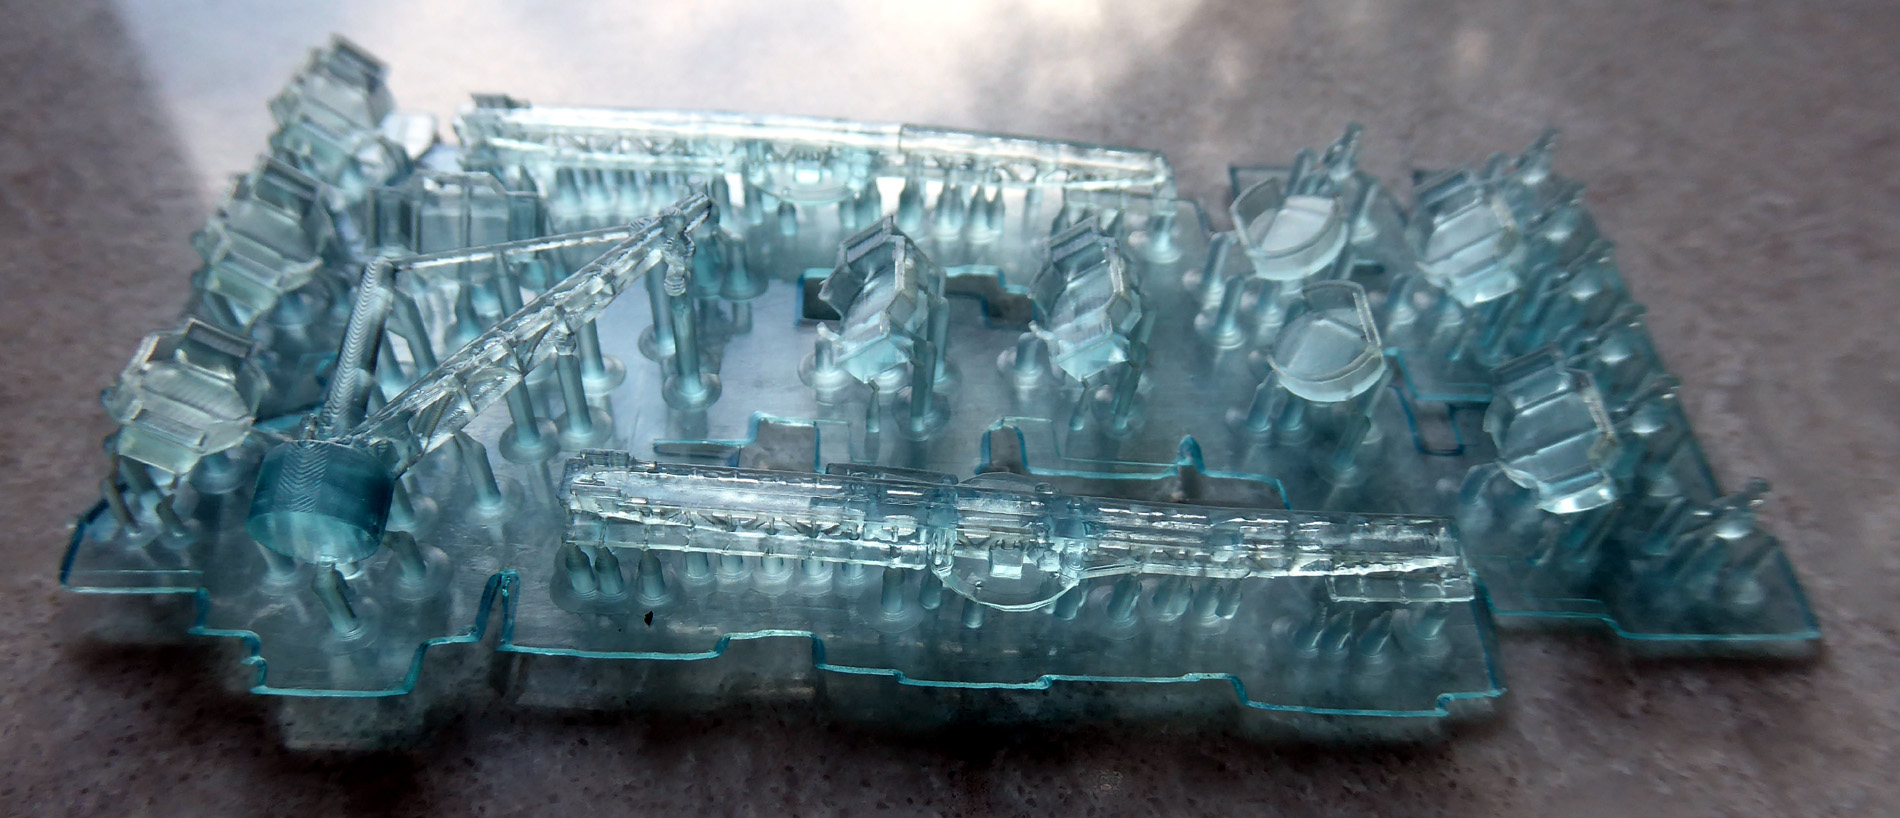
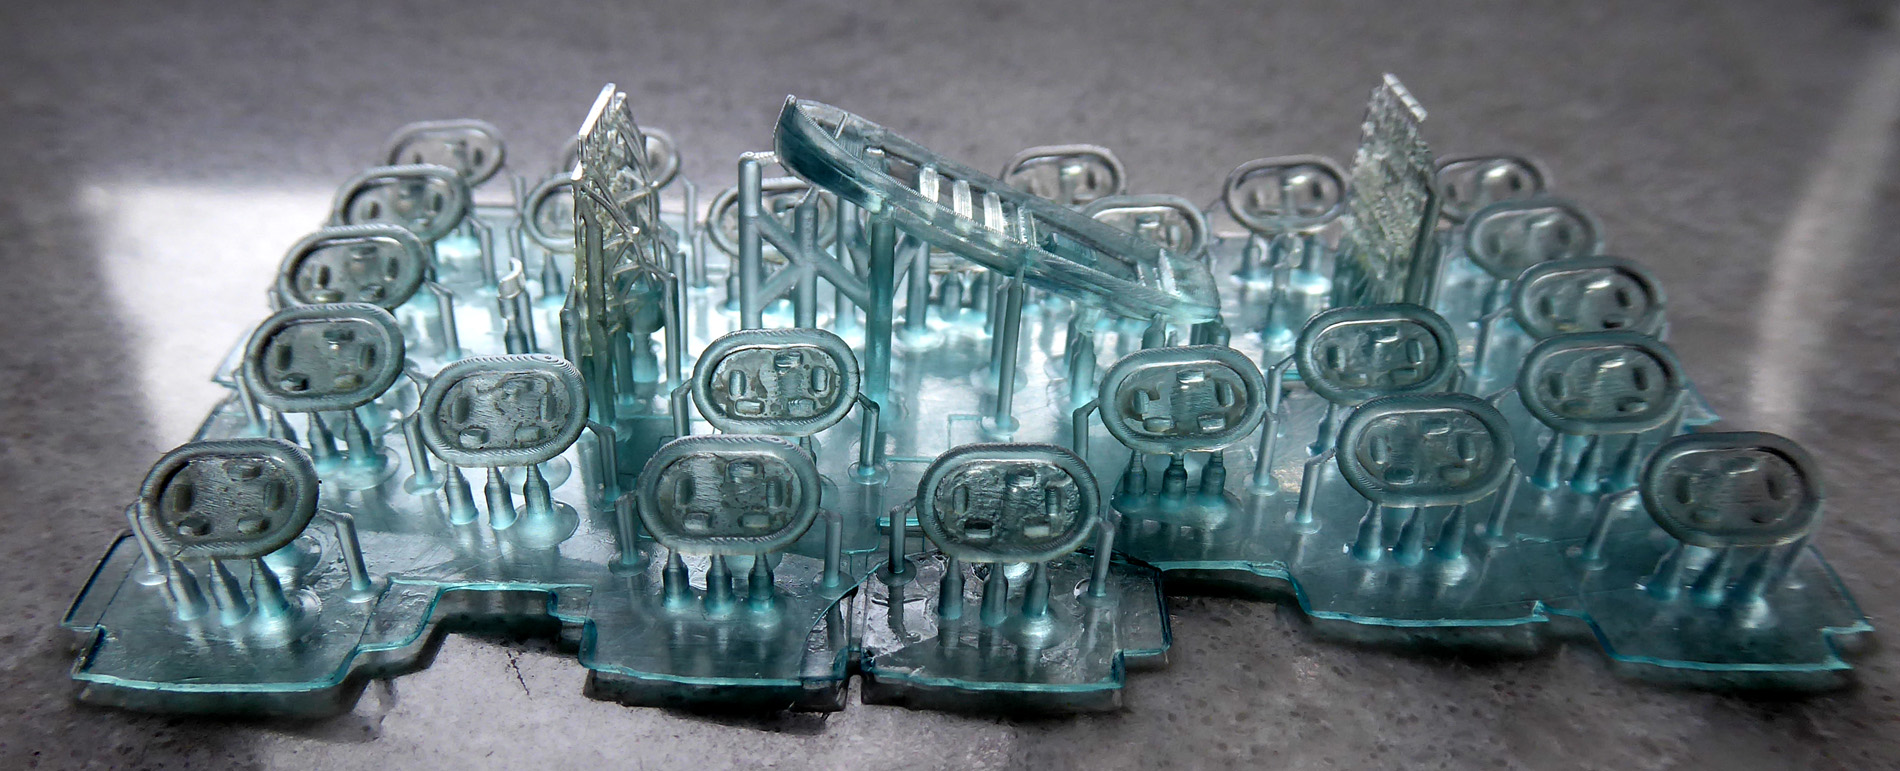
It’s odd that I don’t have a picture of Helena’s main guns hot off the printer to show. After all, I printed 4 sets of them before I had 5 decent turrets to use. For some reason they gave me a really hard time. Actually, I unfortunately had a lot of re-prints on this project. The 5 inch guns (also missing above) were printed three times and the aft superstructure twice… Below are some members of the reject parts collection.
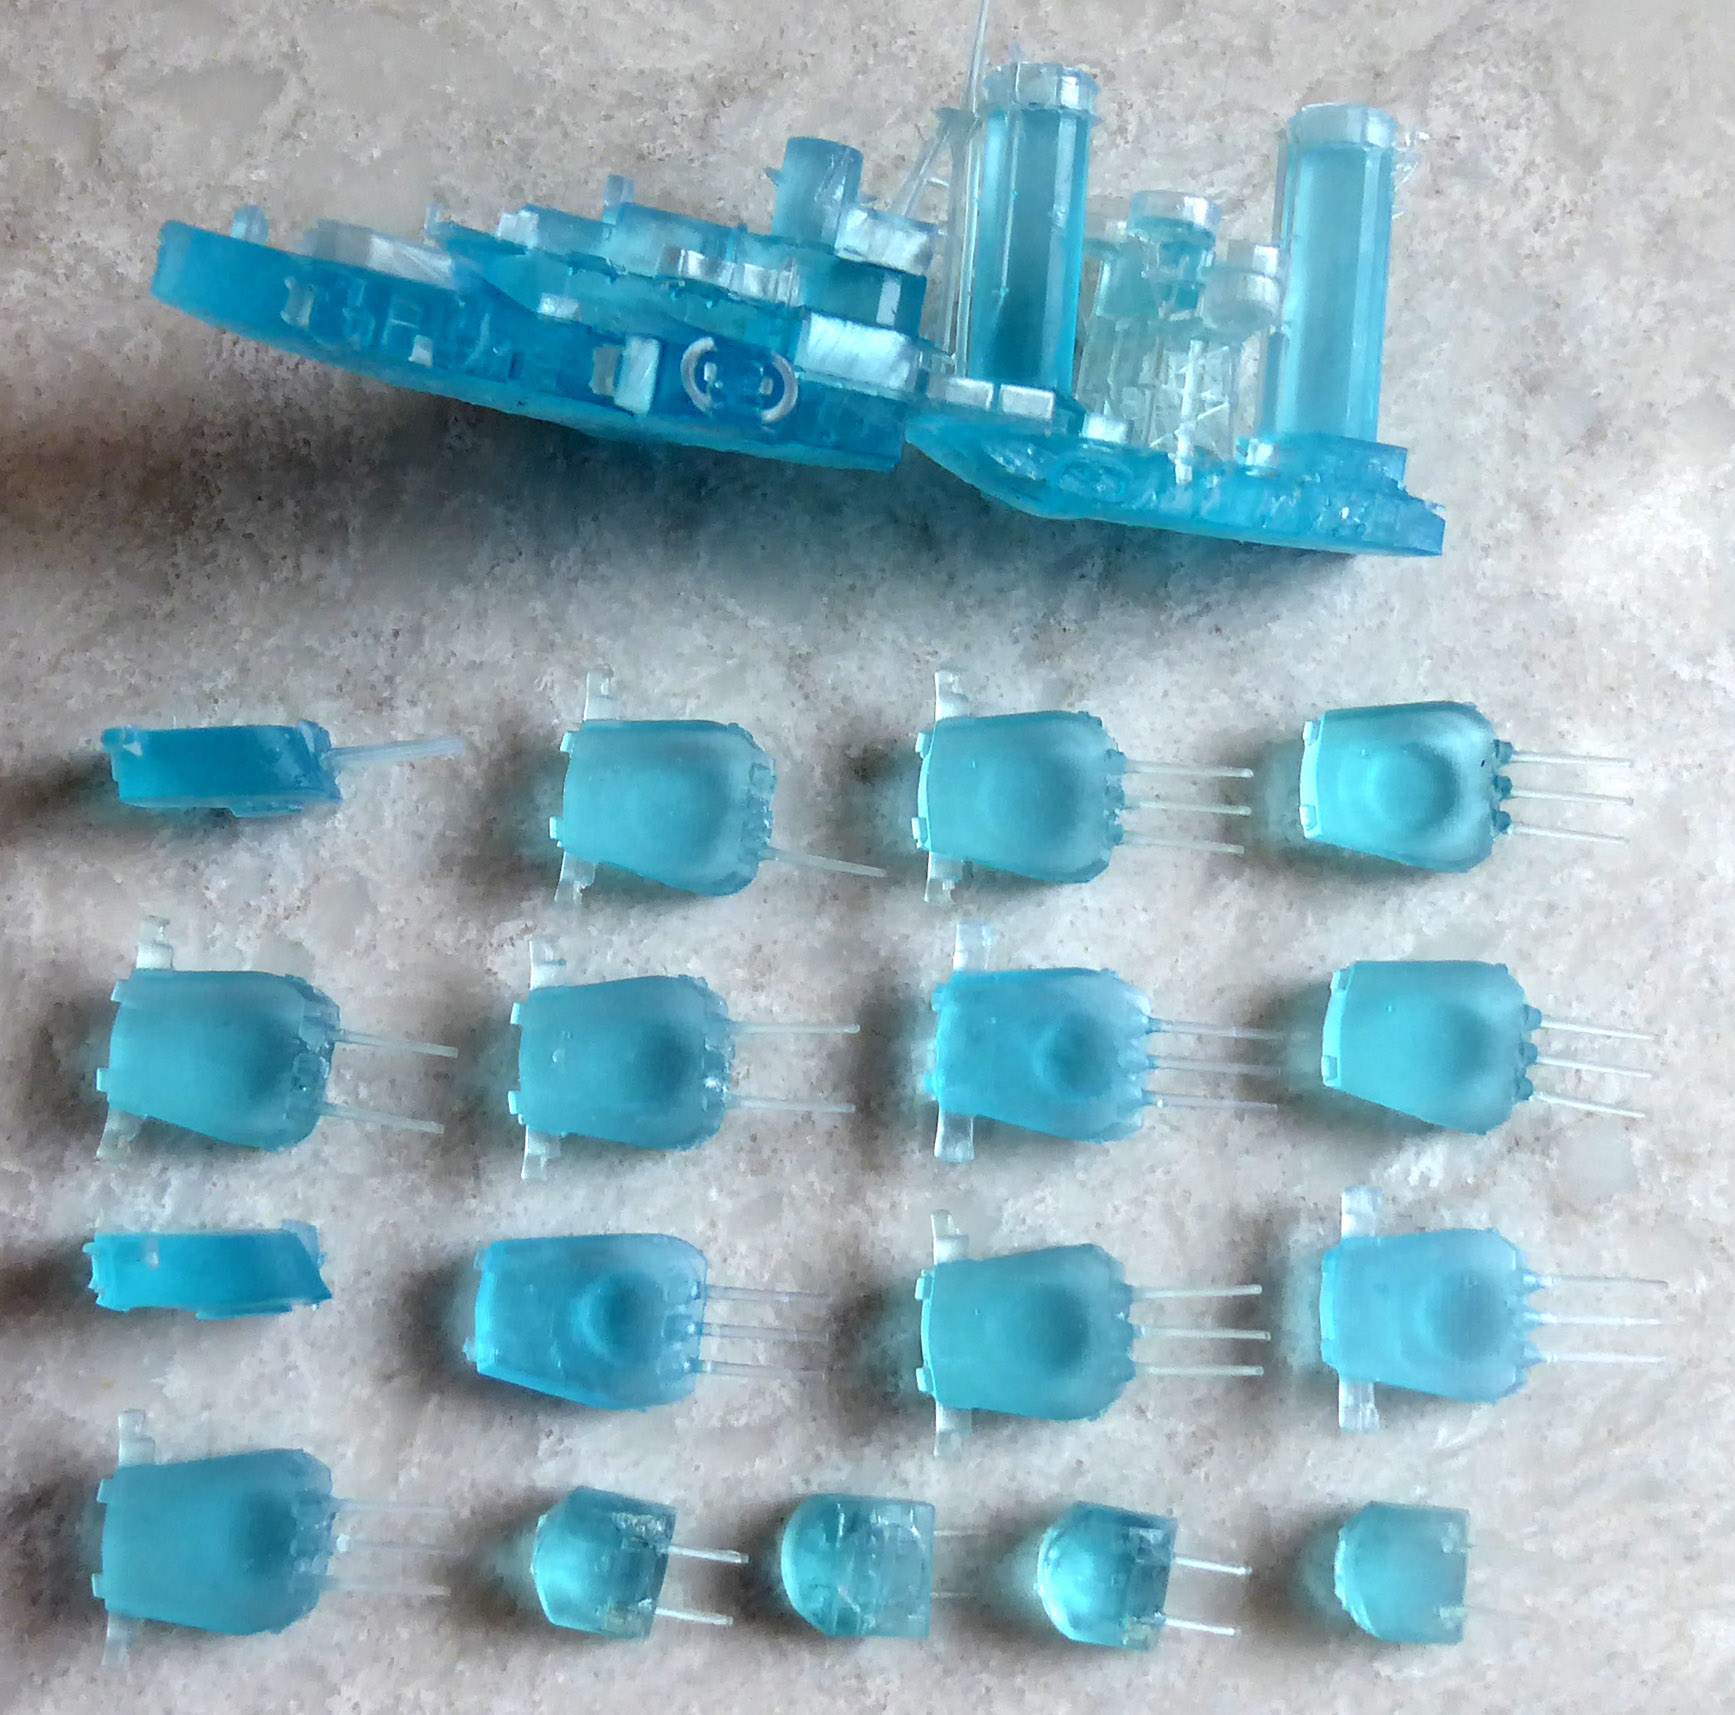
The semi cured resin build up problem I’ve written about in other posts, was the main culprit with the 8 and 5 inch turrets (though some parts lost bits during printing). The aft superstructure fail was my bad, I totally failed to adequately support a leading edge on the bottom with disastrous results. I usually have a feeling that I’m under-supporting objects when they fail but I find over supporting yields muddied results – there’s a fine line. Like Ive mentioned before, I find using the LD-002r and Chitubox requires a little finesse to get the perfect print. For me, it’s no where near as straight forward as using my FDM based Ender 3 Pro and Cura.
Chitubox experience is half the battle
Knowing what works and what doesn’t in Chitu Box is half the battle. When to use heavy supports, when to go light. When you need to manually place supports and where. How to angle your part to end up with the least resin build up. How long to set your cure time based on resin used and printer. One feature I wish Chitubox had is an equivalent to Cura’s Layer View. There is no way to see what your printer will actually print in Chitubox. Cura’s Layer view has saved me from trying to print beyond my Ender’s abilities sooo many times. Chitubox has no such safety net. You just need to know from experience what your SLA/DPL/LCD printer can pull off.
I am getting better…
Creality LD-002r printer, LS-002r print example sample, 3D print printed, 1/450 scale warship model, American US WWII light Cruiser, CL 50, Brooklyn class, USS Helena, Ender 3 Pro, Chitu Box supports settings
Hi I’ve been trying to find a model of this ship to print for me and my father
My grandfather was one of the AA gunner one that ship and was one of the survivors at the Battle of Kula Gulf the only thing he left with when the call was made to jump ship was his pocket bible which we still have
But any help you can give me on my own project would be greatly appreciated
Hi Chris,
First off, apologies if you know more about 3D printing than I do (not hard to pull off!) if so you can disregard most of what I’m about to say…
The Model on Sketchfab I’ve linked below, while no longer free (but still a bargain at $15) is really the way to go. Unfortunately like nearly all 3D models out there it’s not printer friendly, meaning you will need to work on it in Blender or the like, to make it’s components both manifold (closed, very important! – Google it if not familiar) and thick enough for your printer to render. Next you’ll need to break it into sections that will fit in your printer or will print well. This work can be frustrating and tedious, especially if you’re not familiar with your 3d design software (remember Blender is free and youTube your friend). But once you get the hang of it the world of 3D models is yours to print. I still test my STL files in Cura even if I’ll be printing them on my resin printer sliced with Chitubox to expose any none manifold parts using Cura’s preview mode. I think what you’re trying to do with your dad is awesome and will assist, if possible, with technical questions. I do have a couple for you, what printer(s) are you using and what is your level of Blender (or equivalent software) knowledge?
Joe
Ty sorry for the late reply I work at a high school and you can just imagine my free time
but thank you for the information I will start the process of all of that I have been working on 3D printing for the last year and a half so I know my fair share
Just finished a 4-ft long super Star destroyer so I know what you’re talking about as far as cutting into multiple pieces
Wow! 4ft!! That’s a lot of slicing & dicing.
I hope you take on a Brooklyn-class and that you post it somewhere when done. I’d love to see it.