Update May 7, 2023
Build Complete!
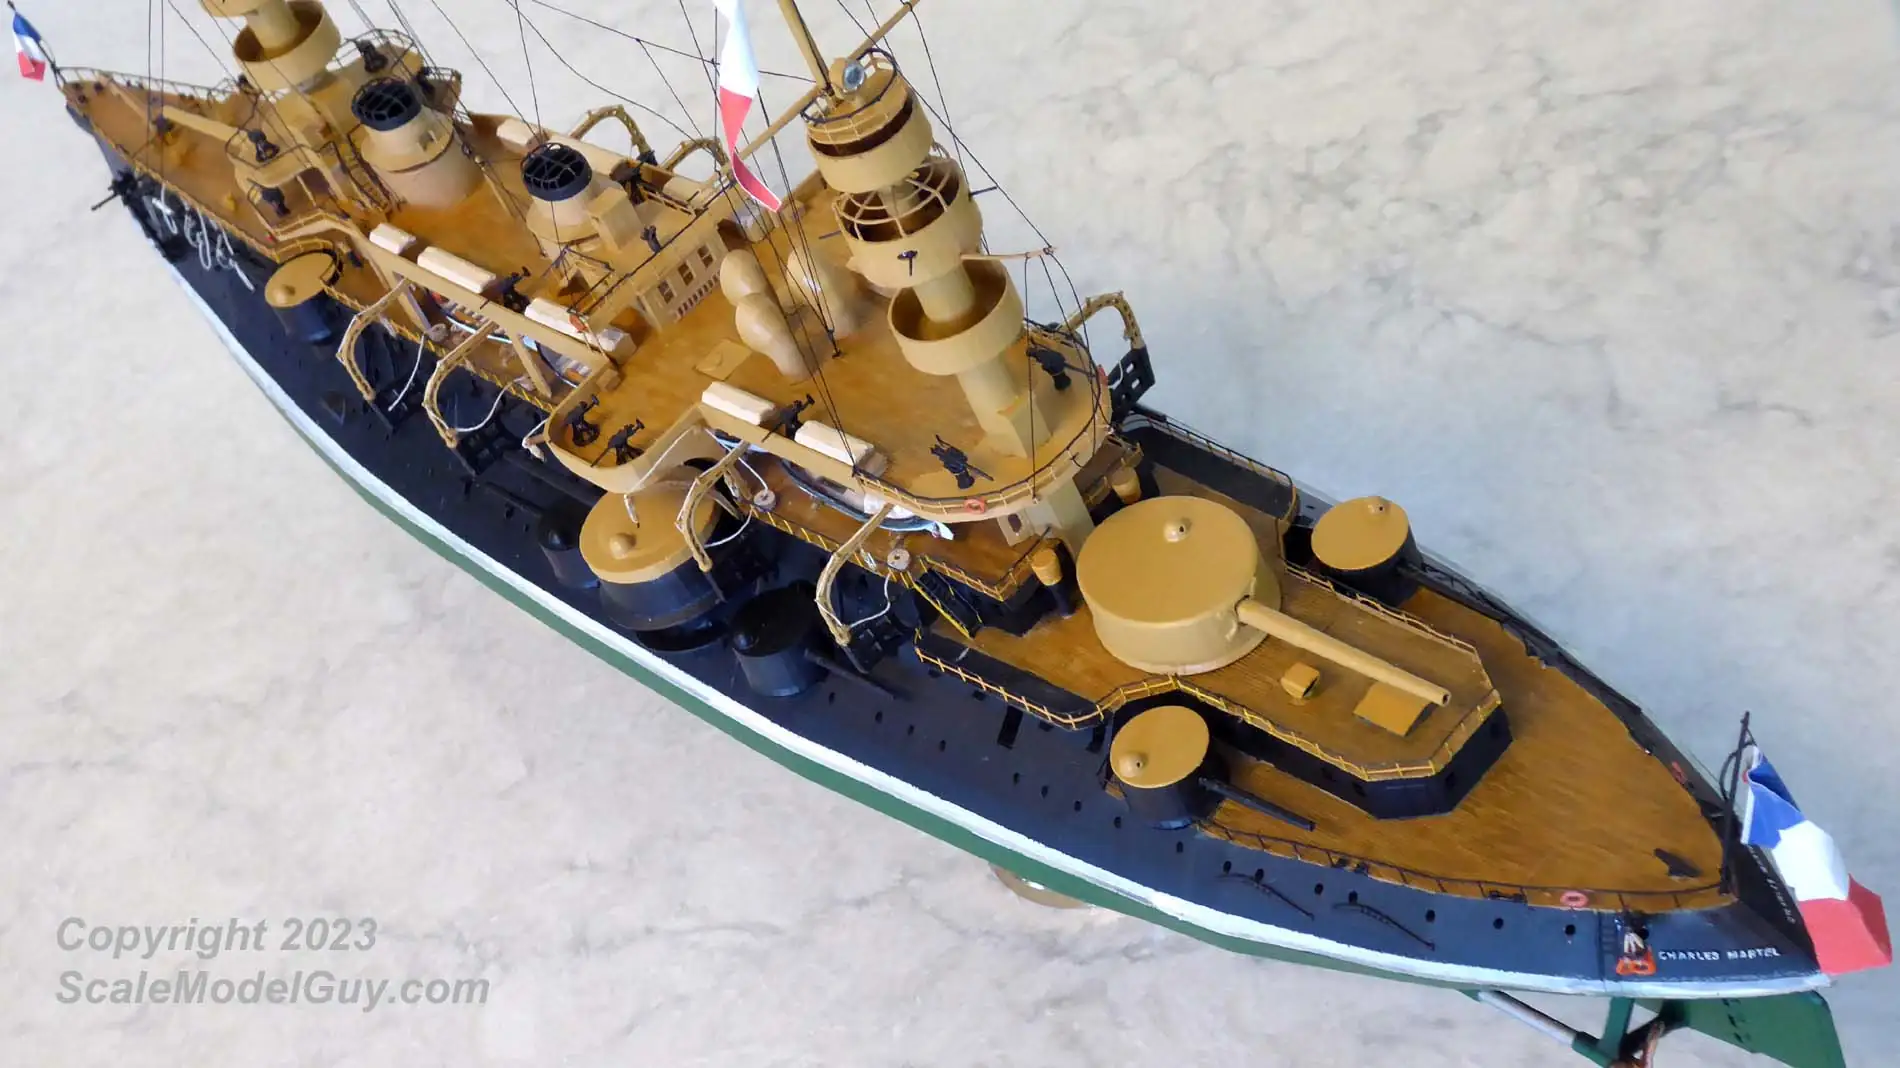
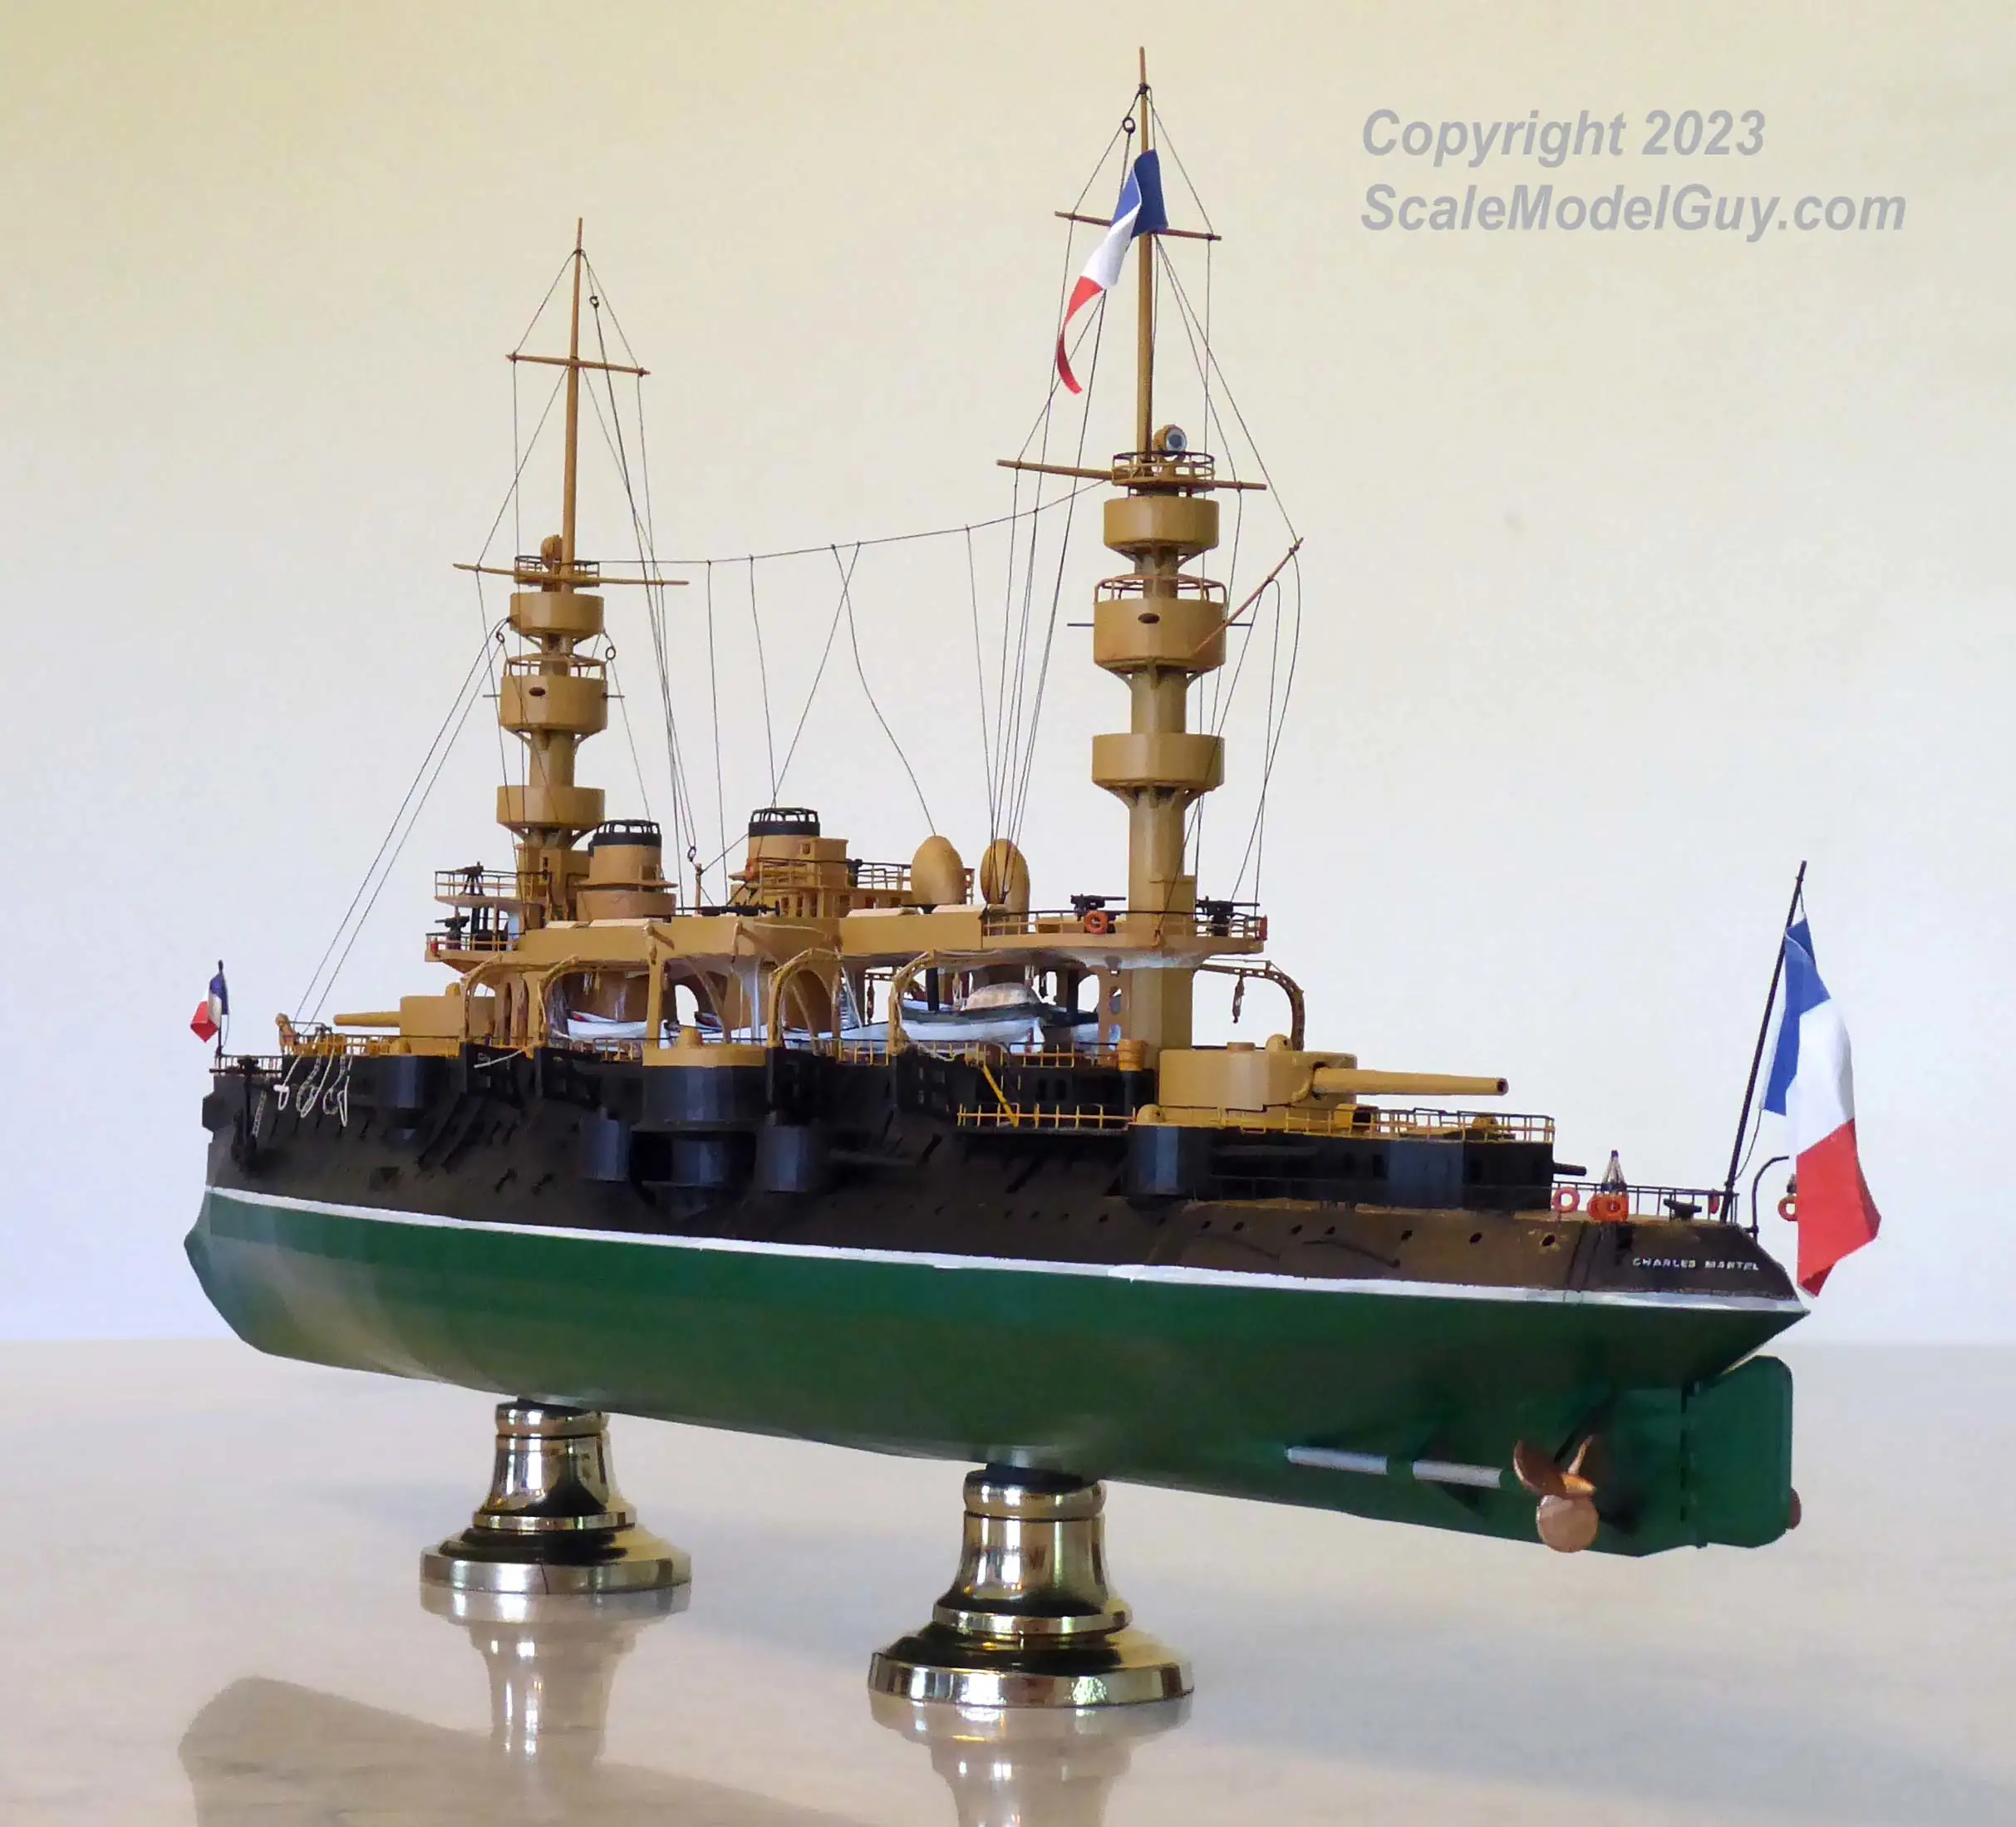
I placed the finished project post and gallery at the top of the page to allow Google a ghost of a chance of finding them…
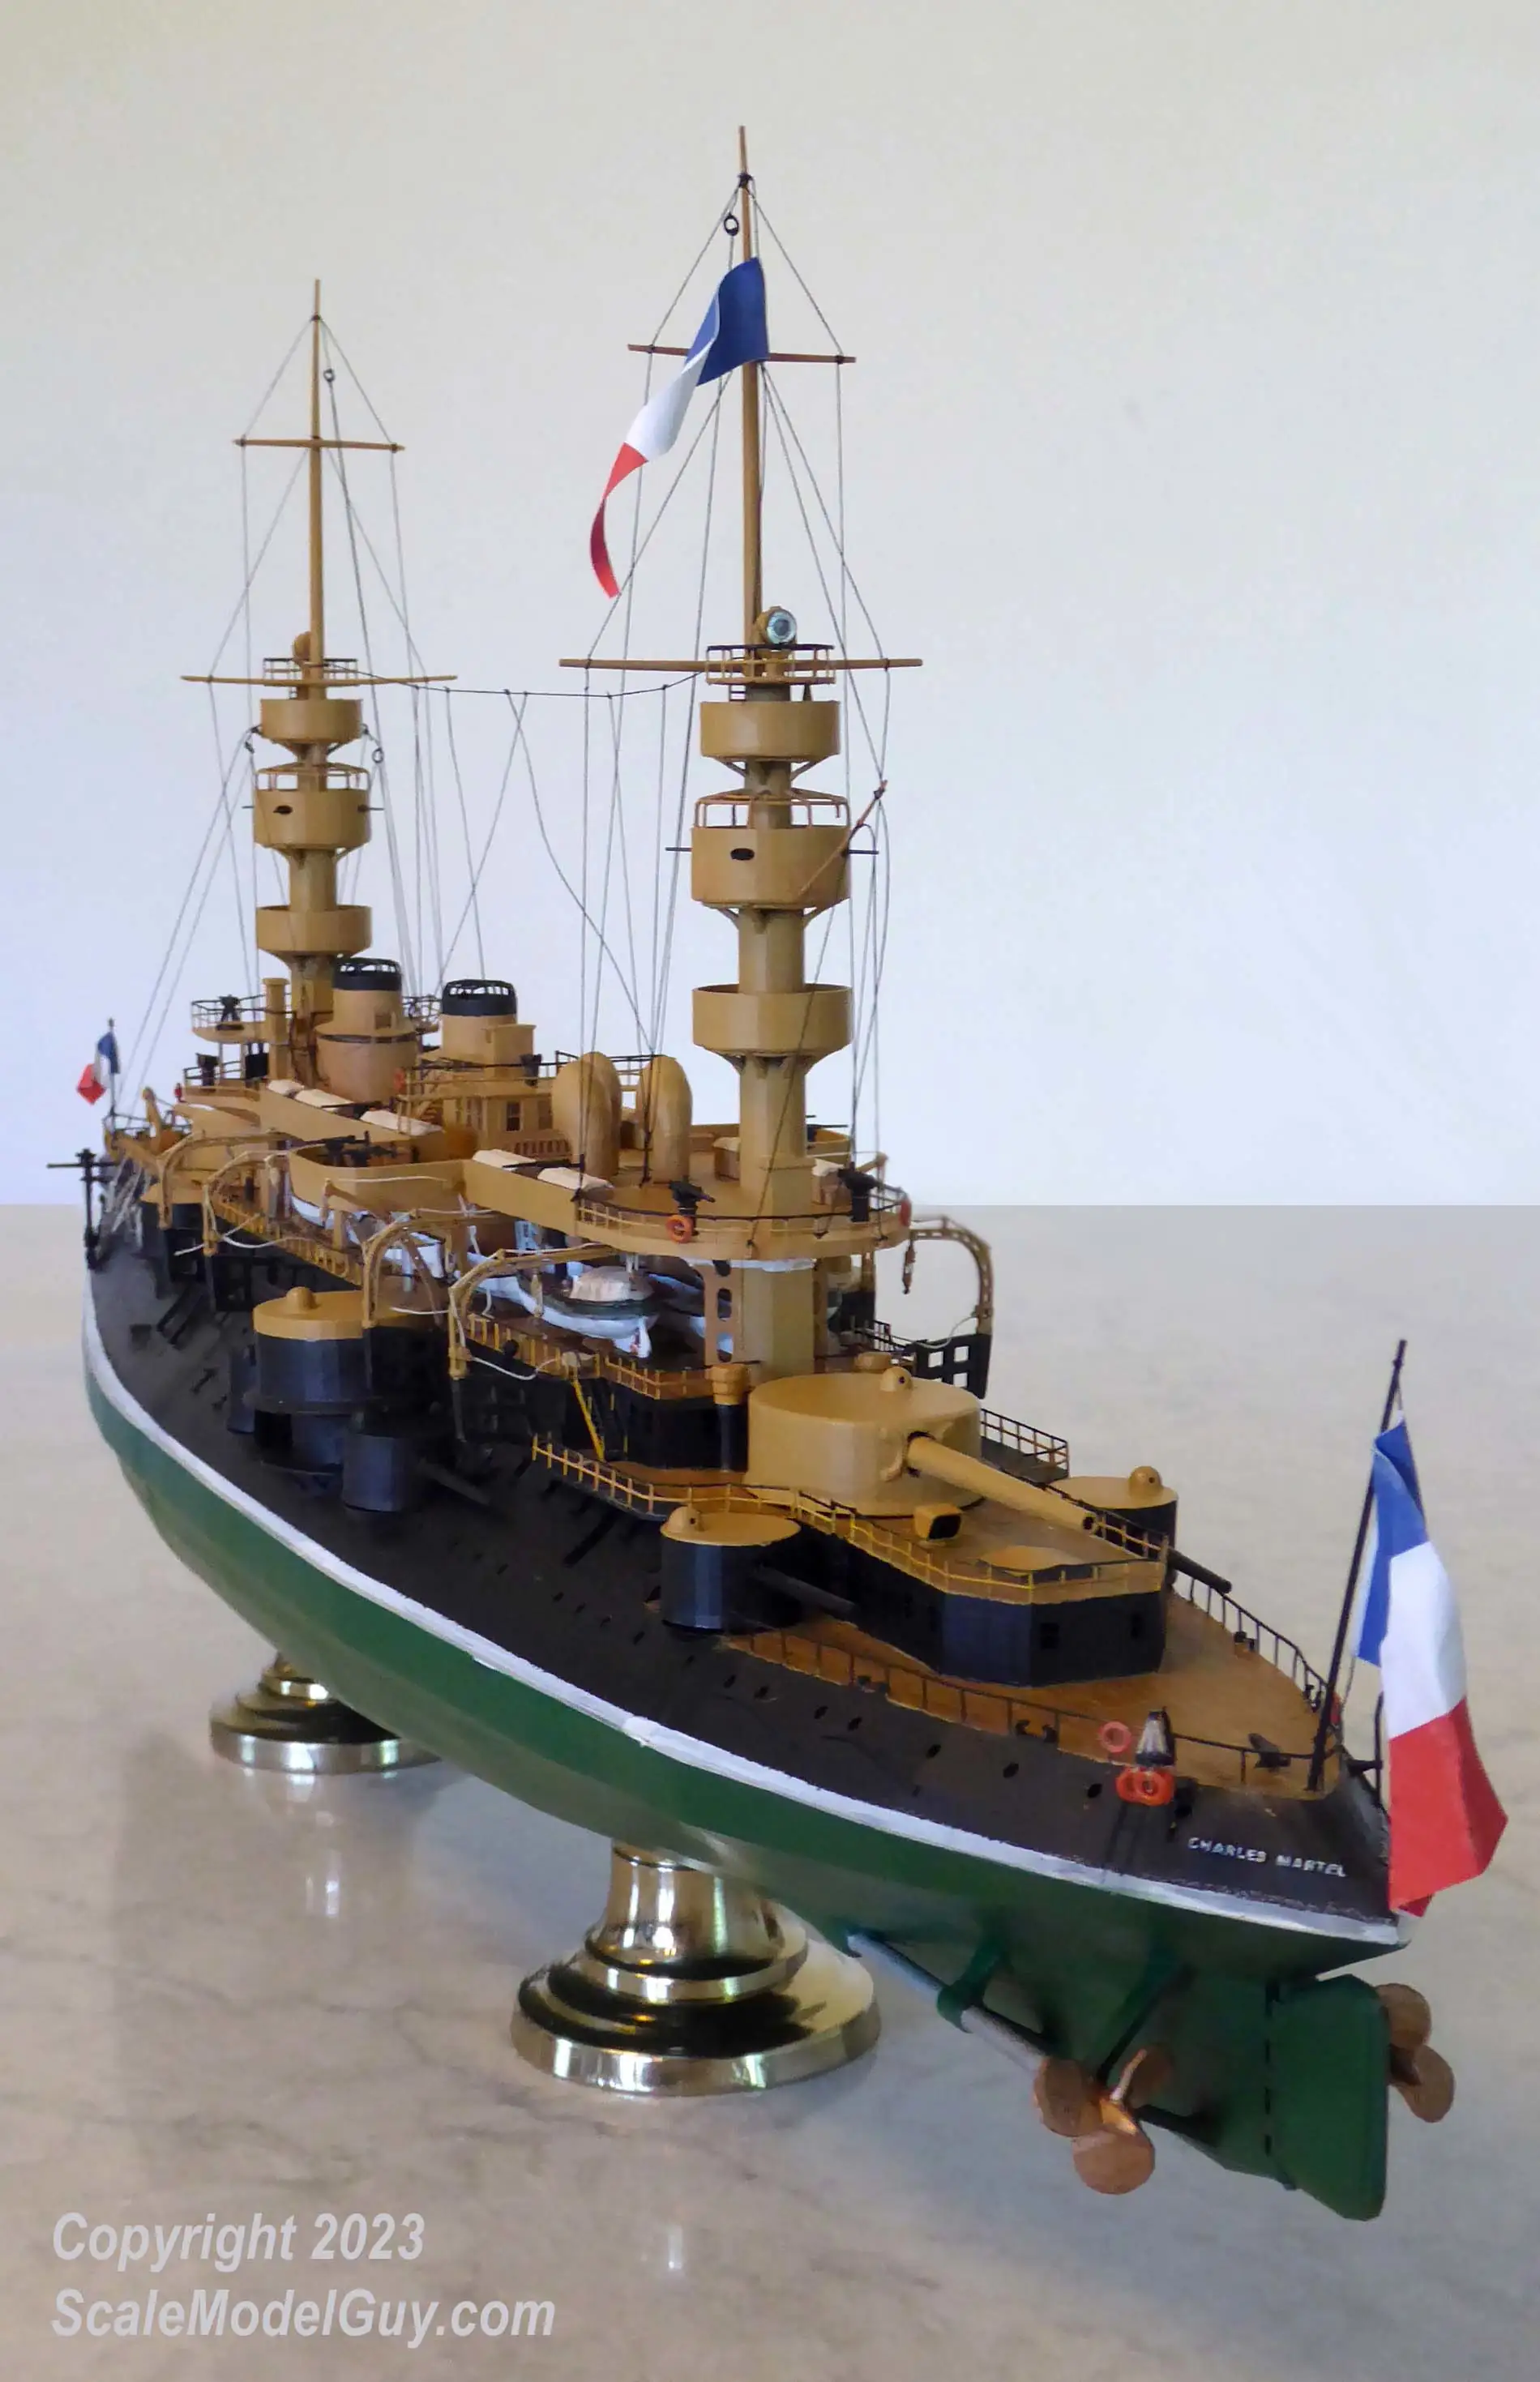
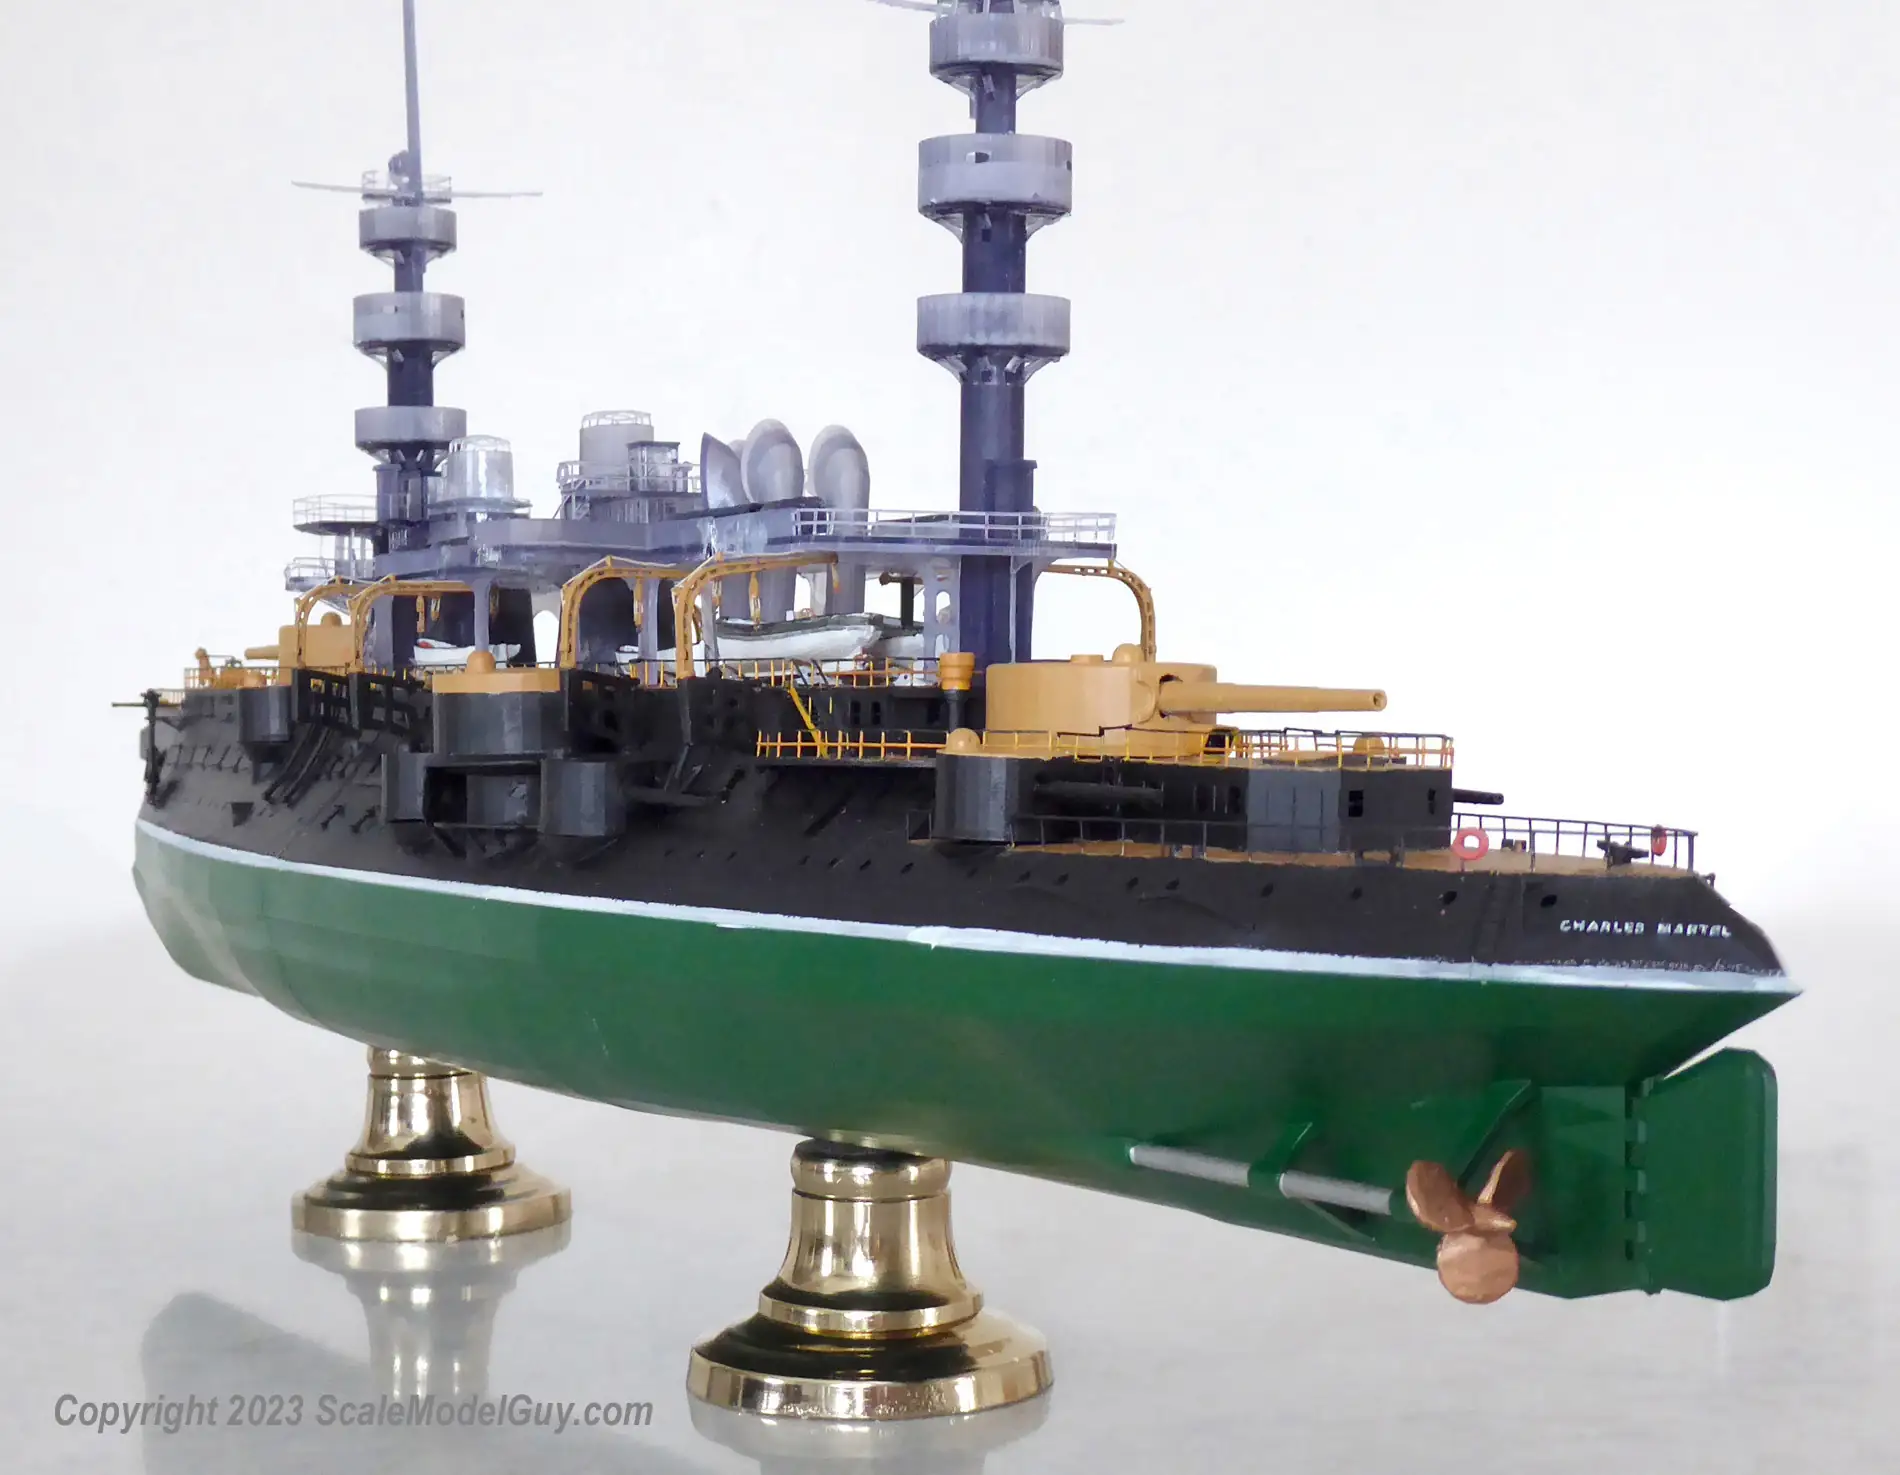
While I’d still like to make a display case for Charles Martel, the model is finally done! This project, from the design to the printing, assembly, painting and finish work is probably the coolest thing I’ve ever created. It’s amazing to think 20 years ago it couldn’t have been done (Not by me anyway!) I really do love the ability to create that 3D printers give us.
Oct 29, 2022
Original Post
Challenge Accepted
I’m a sucker for late 1800’s French pre-dreadnoughts, they just look so darn cool with their tumble-home hulls and elaborate tophamper. For me, no ship exemplifies this period of French warship design better than the Charles Martel, she screams STEAM PUNK!! yet has an elegance about her, Steam Punk chic if you will.
I started this bytes to battleship project well over a year ago after stumbling onto some online photos of Charles Martel and instantly knew I wanted one. After a brief search I realized none were to be had.
What to do?
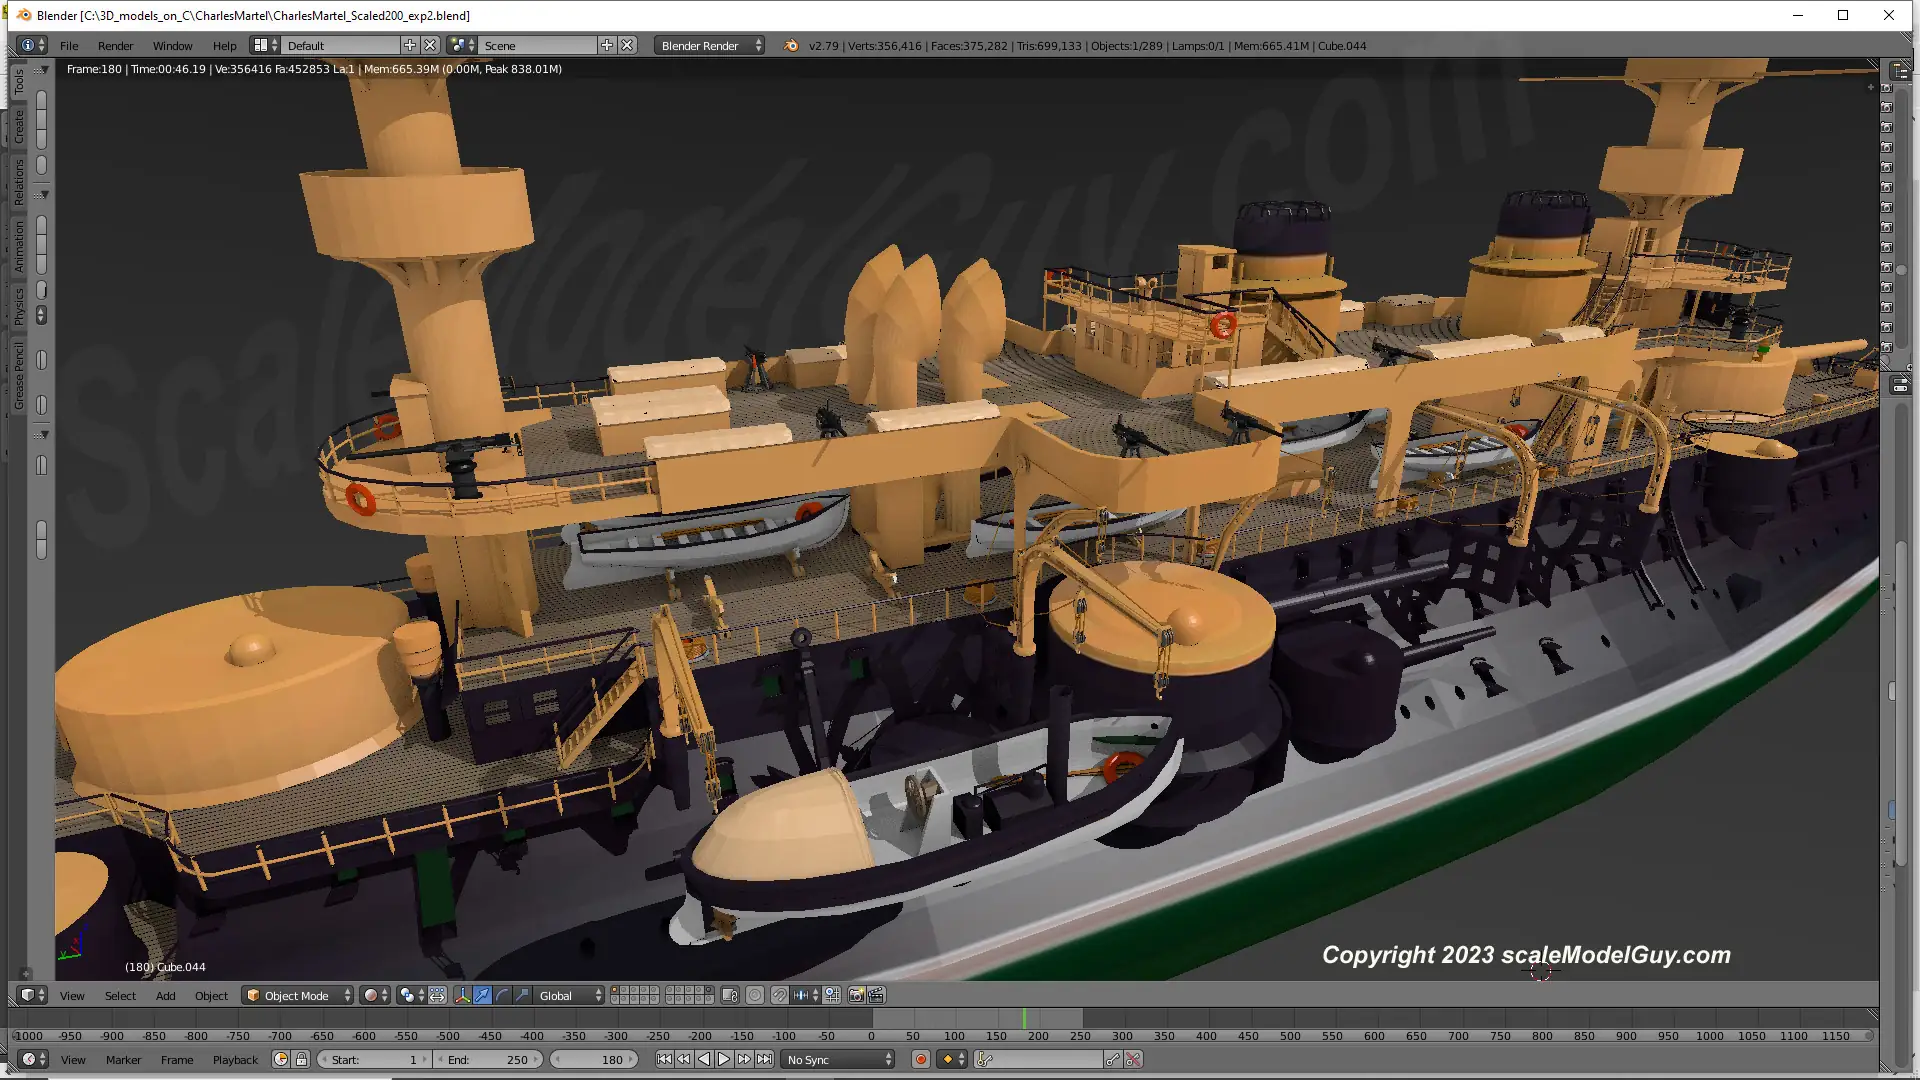
Blender design
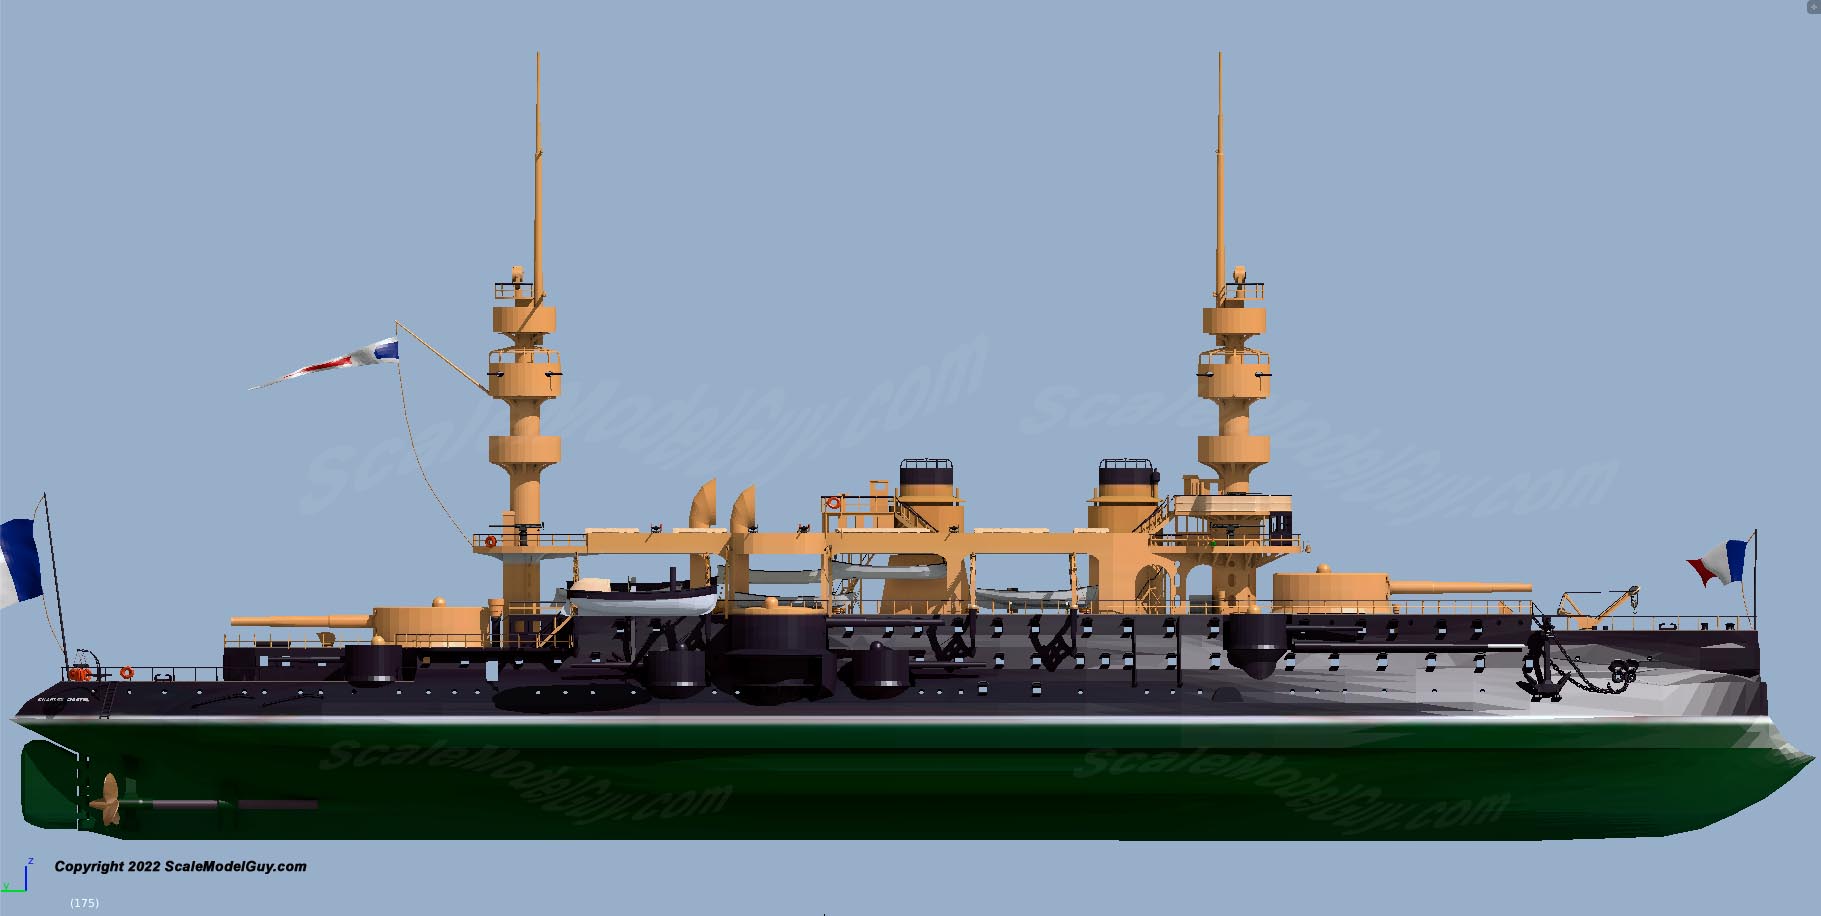
I was just getting dangerous at Blender and wanted a challenging “from scratch” project to sink my new 3D design fangs into and Charles Martel is my most ambitious Blender project yet. The work on the design took over a year of my “free time”. Good pictures were hard to come by and when I did find one, it often caused me to rework large areas I had previously guessed at. It’s a complex model, not only detail wise but it’s textures too. I found a way to painlessly change between Charles Martel’s three major looks: gold/white/black, light gray/black and battleship gray.
I could have futzed with this design forever but didn’t want to lose interest, I wanted to see this built. Realizing it would never be perfect, I begrudgingly called it “Done”. Her lovingly added fine details, would prevent me from printing her at my preferred scale of: 1/450. Charles Martel was going to be BIG! But I knew that going in, after all I had just picked up my shiny new Saturn. I toyed with the idea of printing her in 1/159, the same scale as my German V25 Torpedo boat but then she’d be TOO big (not for the Saturn, for my house!) I ended up re-scaling the Blender design to 1/200 and started the final work of carving her up into printable sections. This took a couple more months.
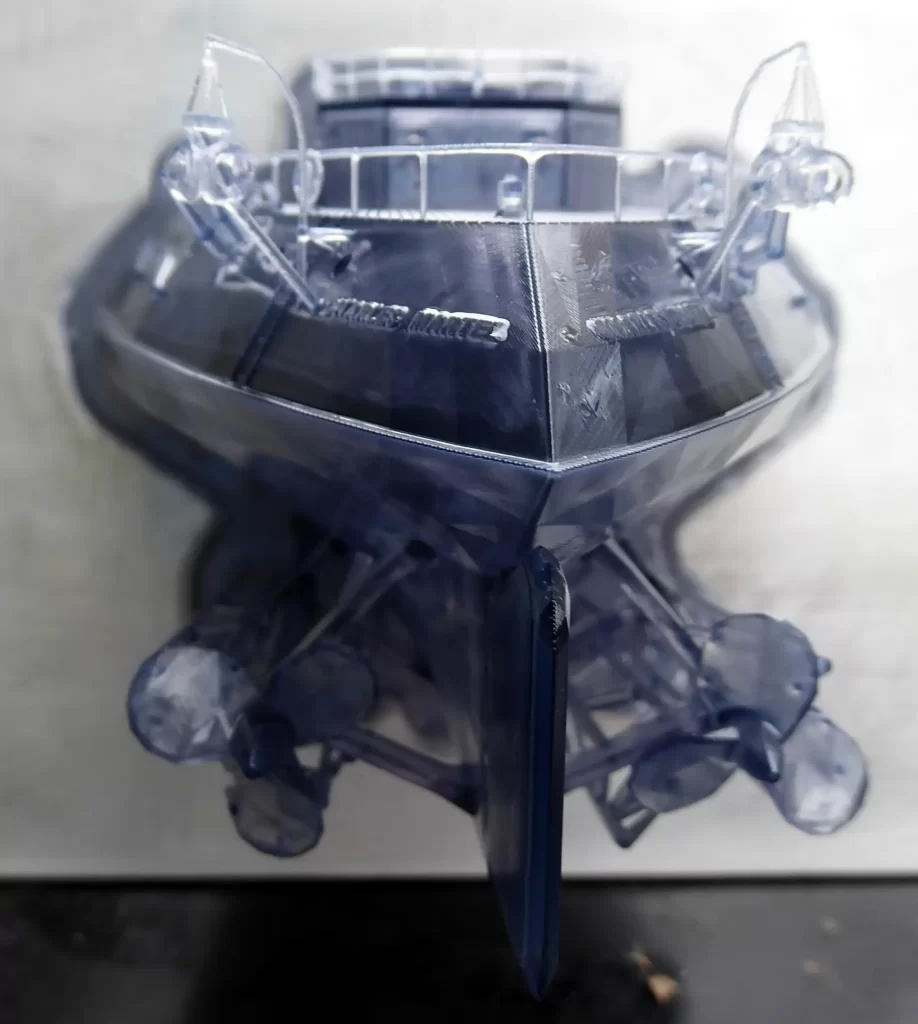
Elegoo Saturn
My first prints on the Elegoo Saturn were for the USS Tigrone project. It had more failed prints than I care to mention. I had researched chronic print failures for the Saturn online and came up with a plan.
I drastically changed my Chitubox print settings which totally trashed the performance gains I had seen with Tigrone. Layer exposure time was nearly doubled from 2.5 sec to 4.5, lifting speed was lowered from 80 mm/min to 50 and bottom layer exposure time was raised to 40 seconds. With cooler fall temps in the 50s and lower 60s (I print in an unheated shed) and using Elegoo’s Smoky (Dark) Grey water soluble resin, my thinking was that I needed to accept long print times and perhaps even slightly muddy details if I wanted to avoid failed prints. After just replacing my resin vat’s FEP film due to damage while removing the last failure, I was pretty feed up with the Elegoo. I just wanted my prints to reliably adhere to the darn build plate…
I got my wish and then some!
How do I love thee?
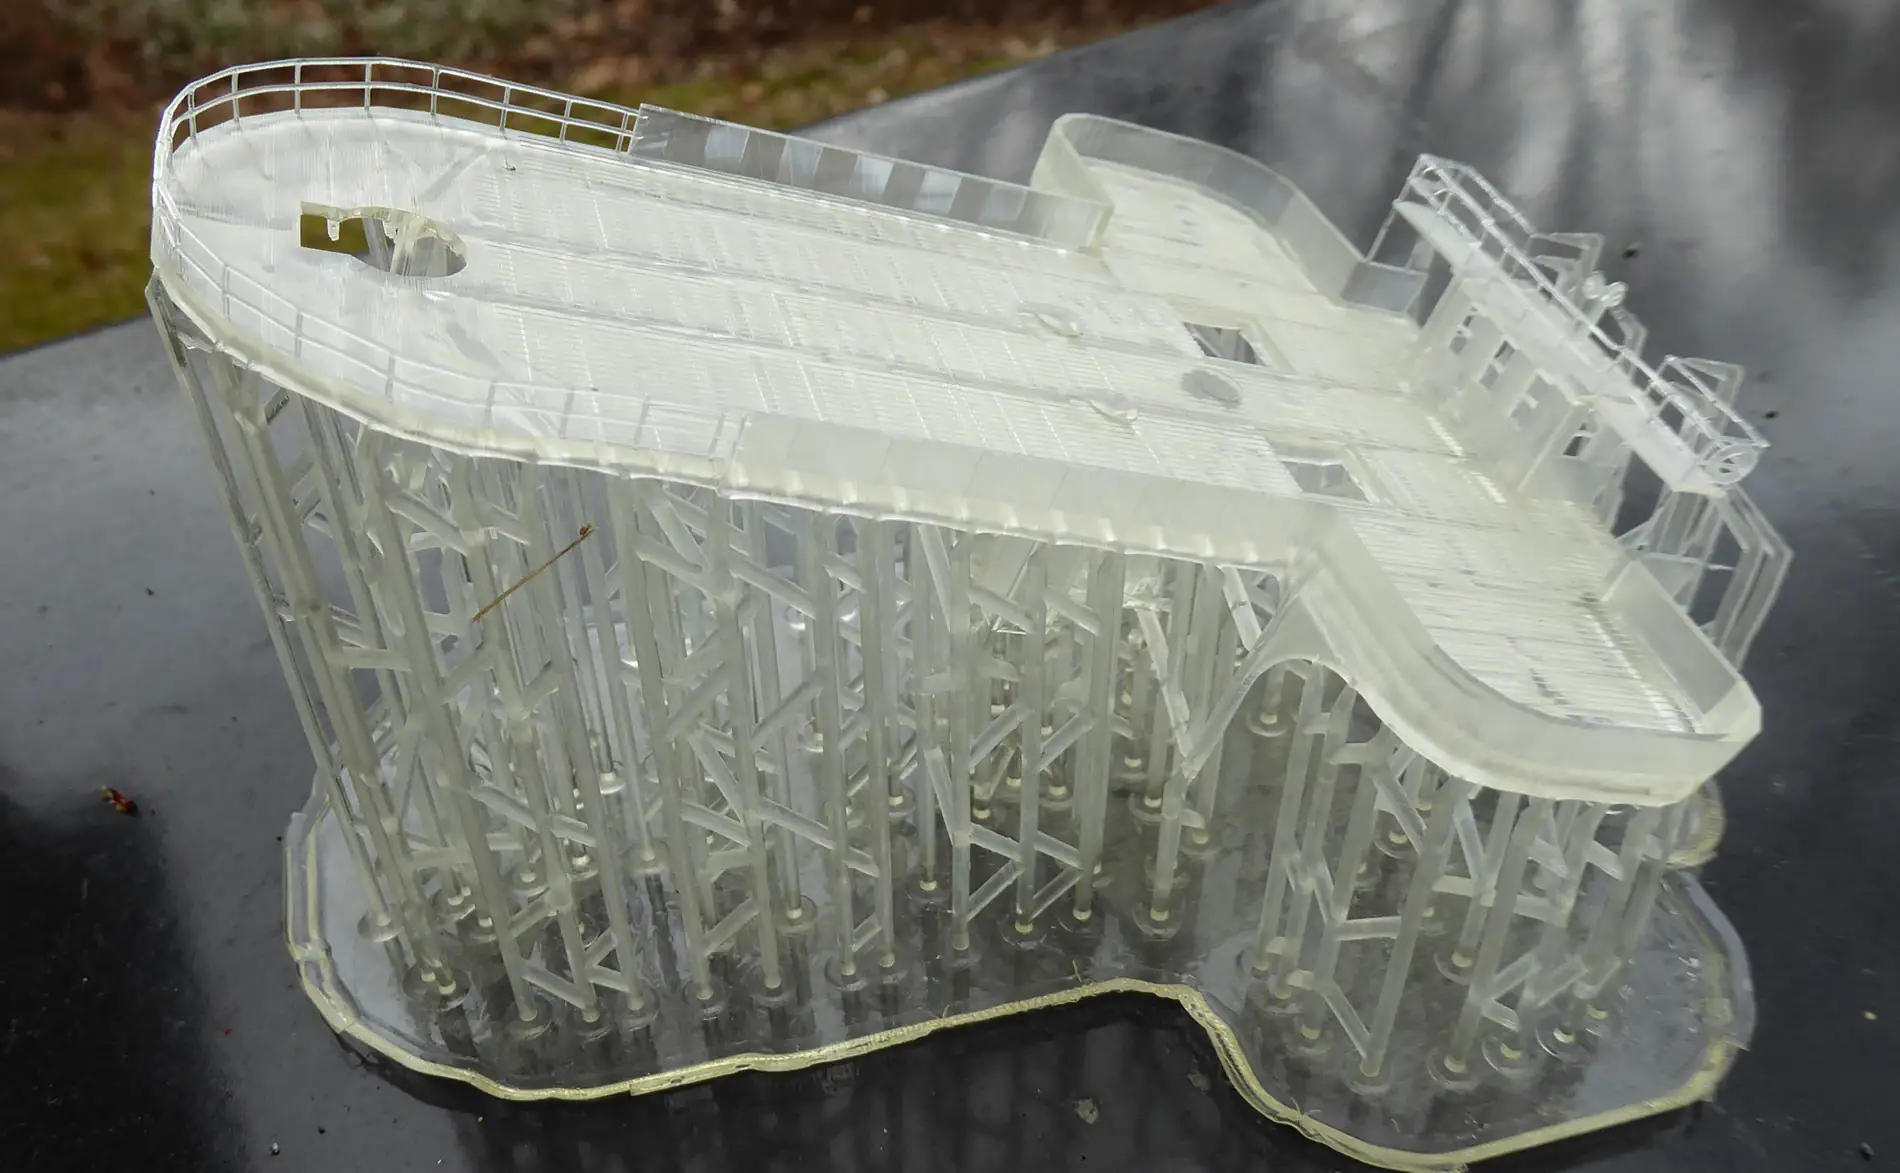
Yep, print times doubled, now taking 12-15hrs on the taller prints. But OMG the reliability difference is Night and Day and I have no issues with the print quality.
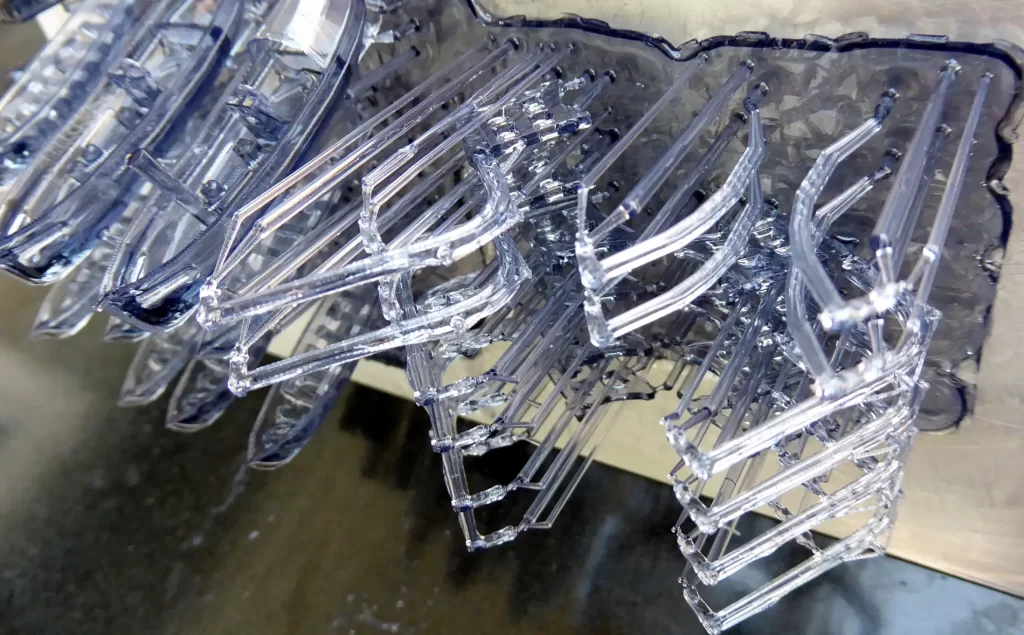
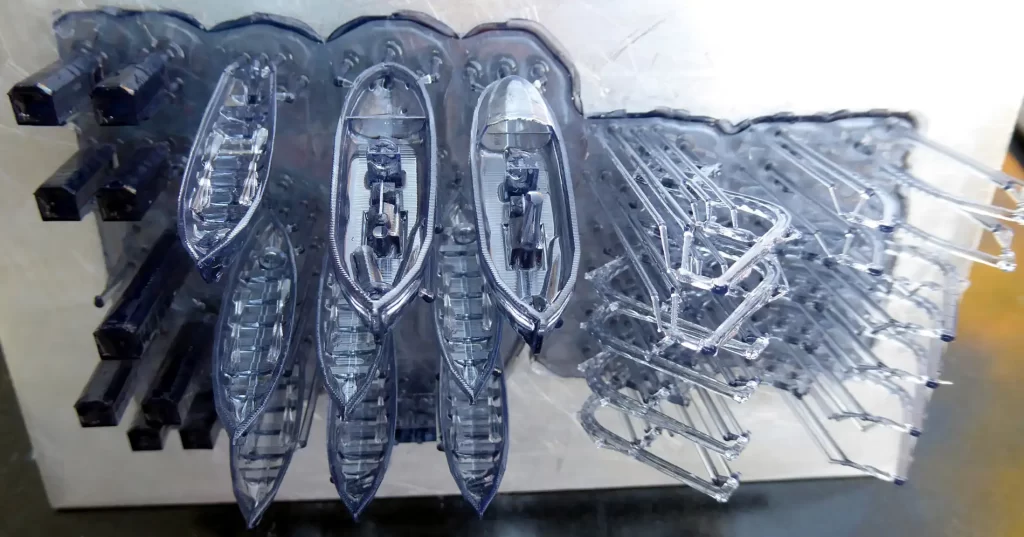

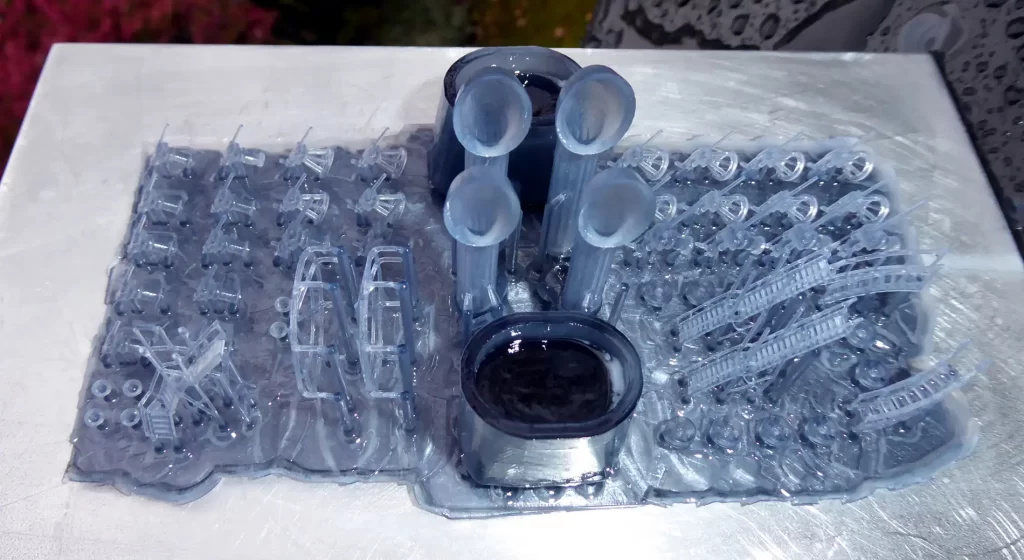
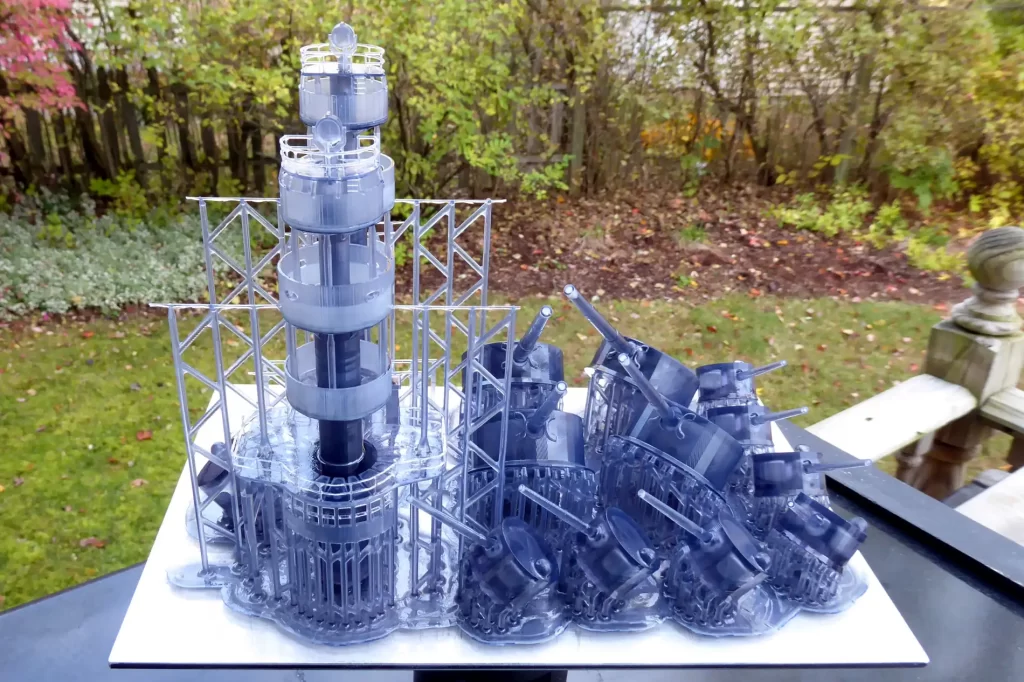
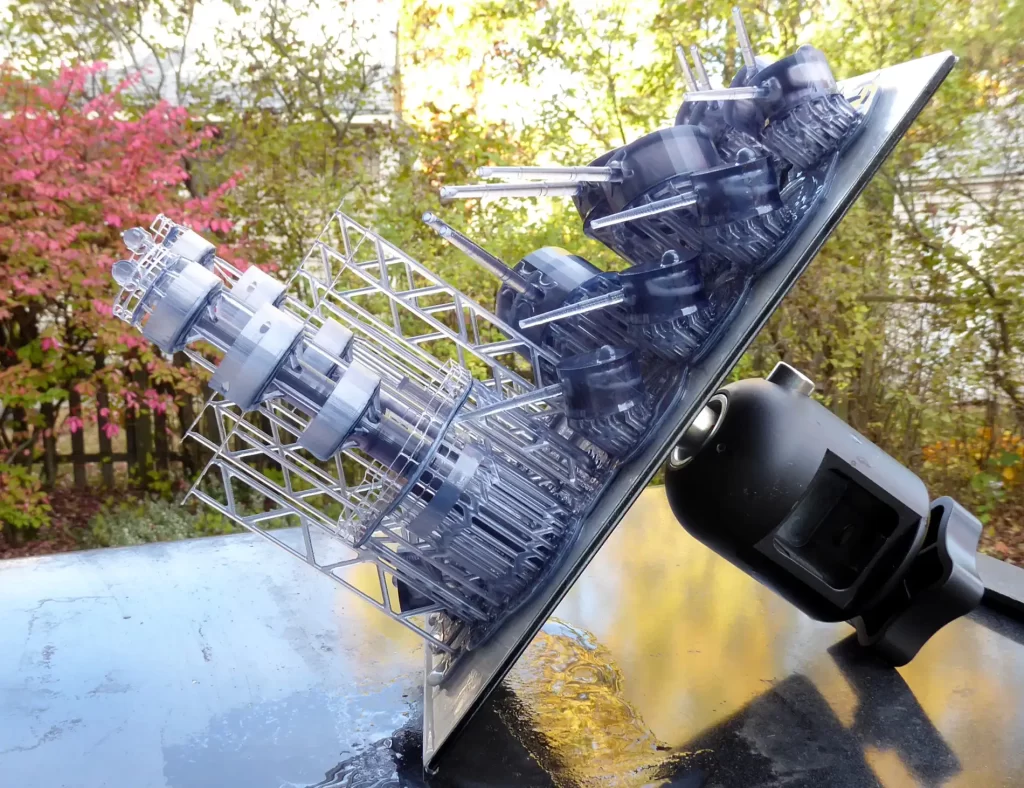
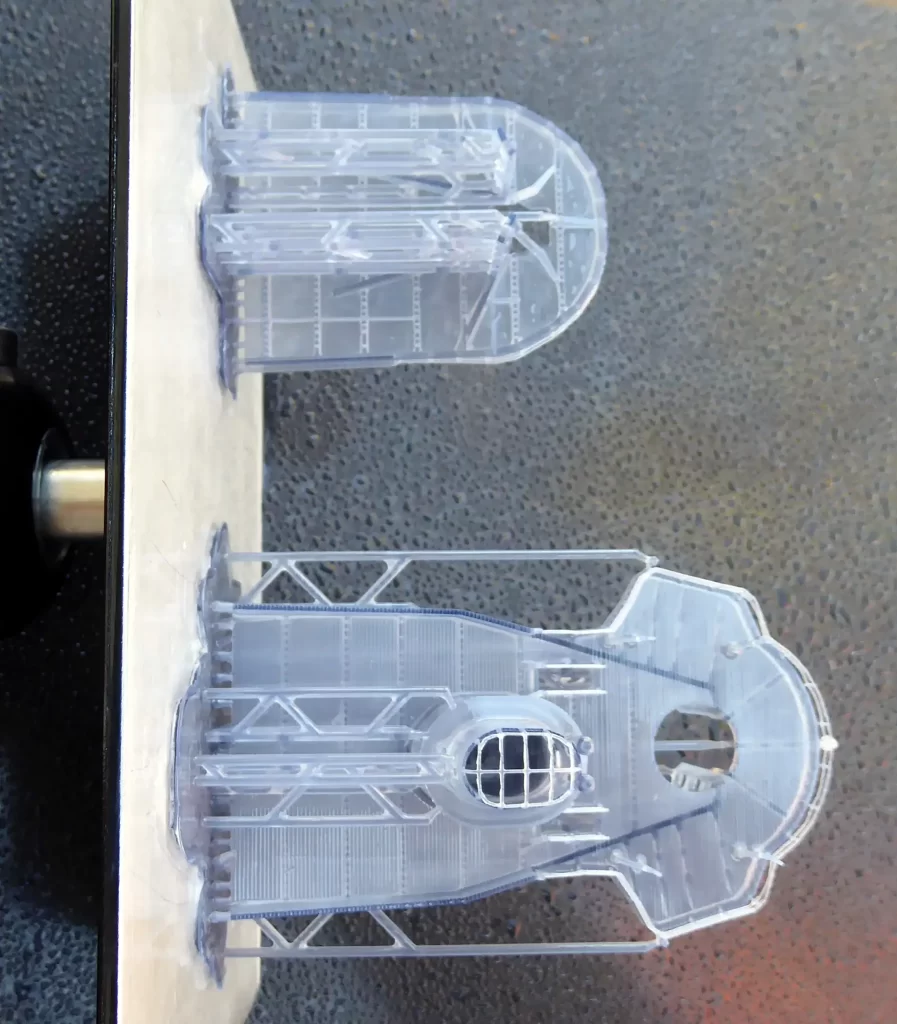
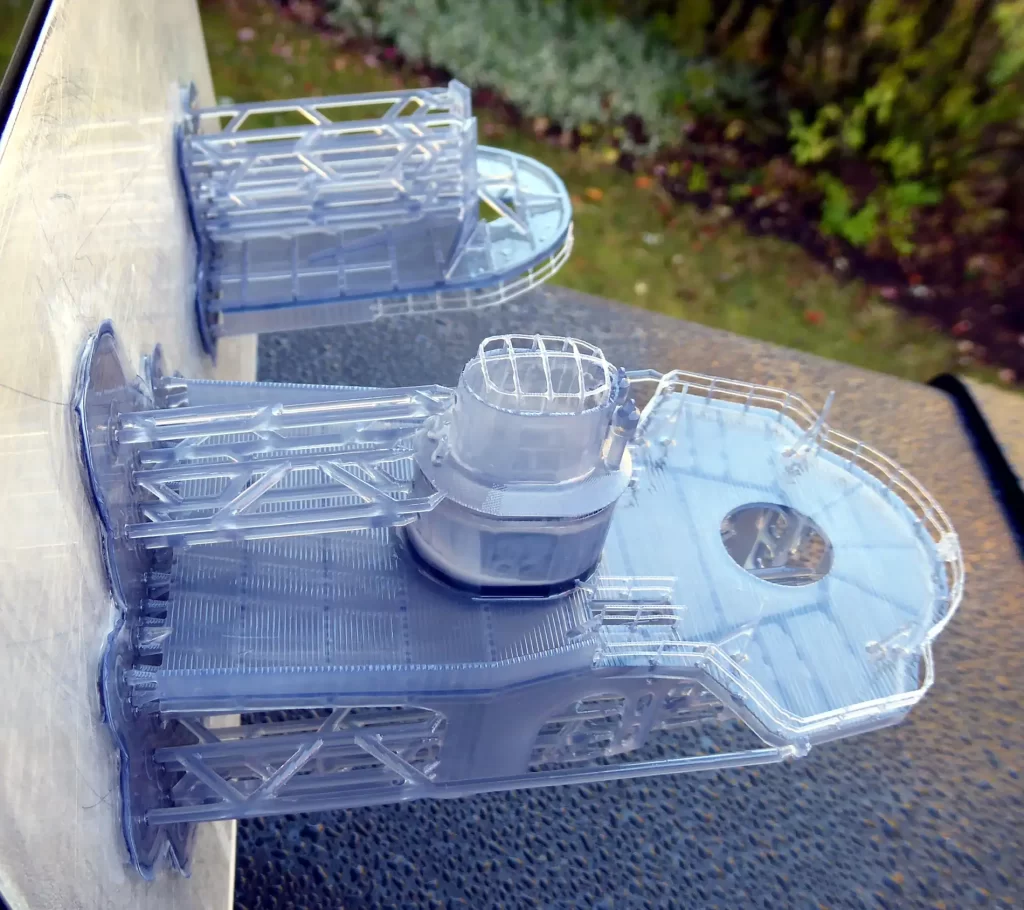
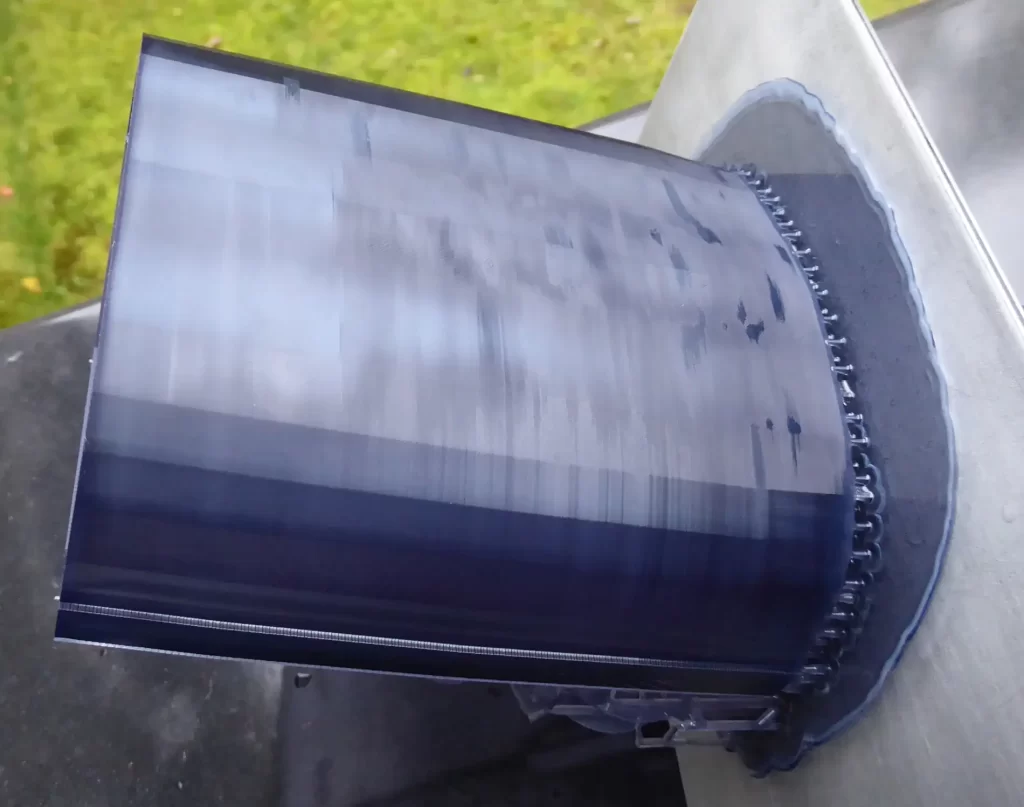


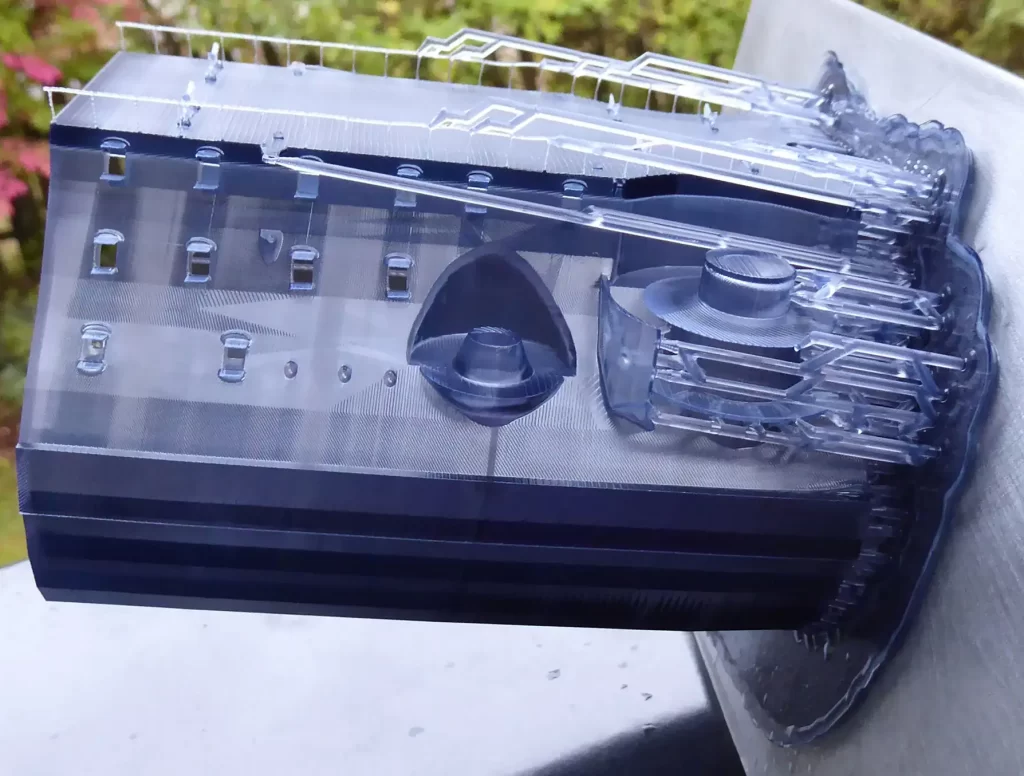
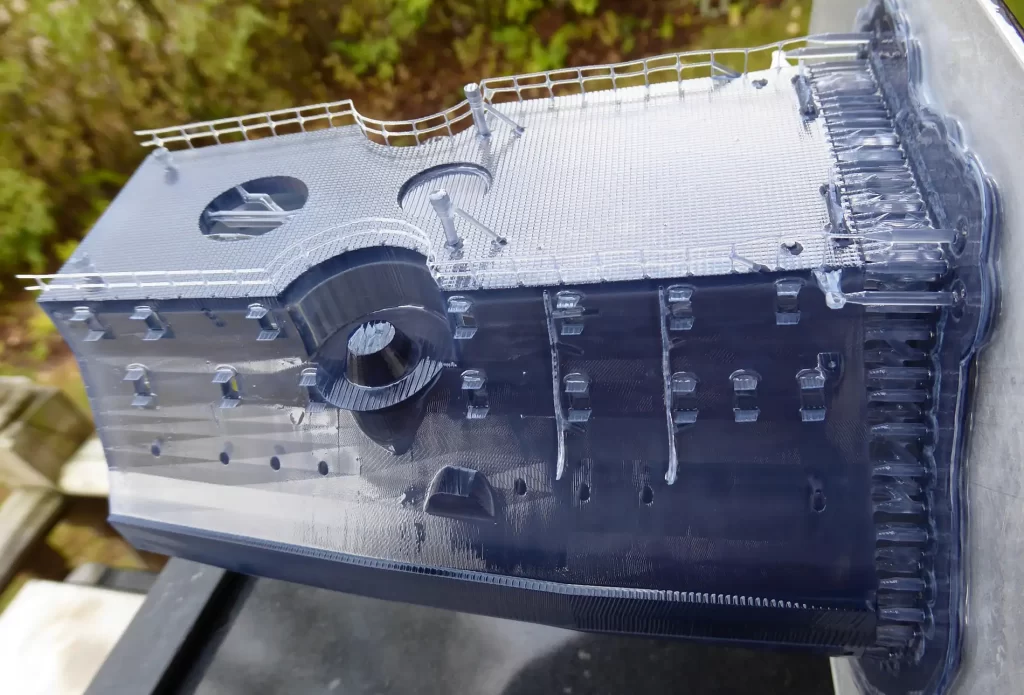
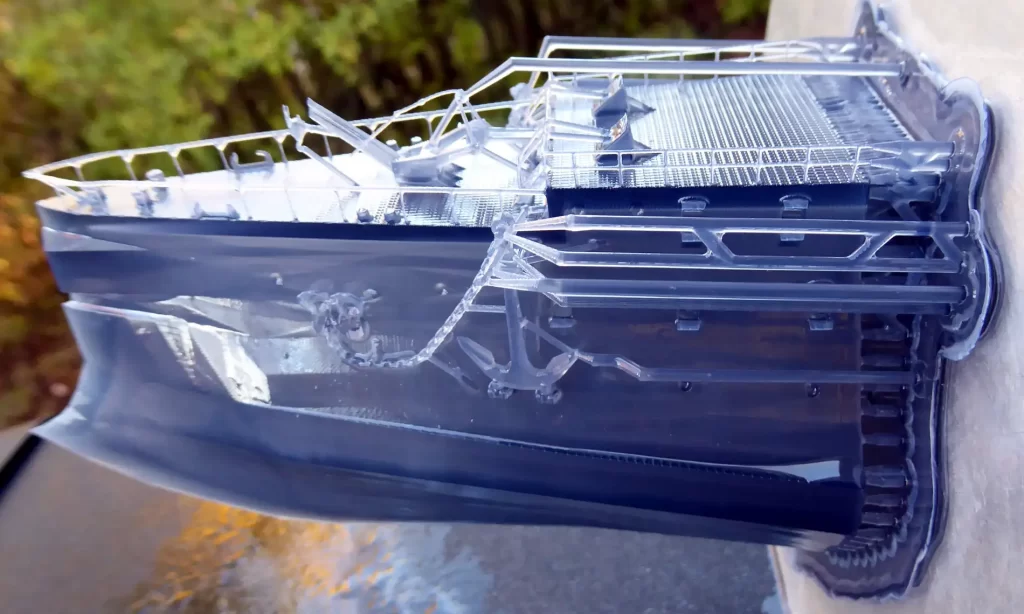
12 perfect prints in a row, zero failures. The bulk of Charles Martel’s printing is now done and I couldn’t be happier with the Elegoo Saturn. OK, that’s not 100% true. Sure, it could be faster but I’ll take slow perfection over speedy failure every time. And gazing at the size and detail on the largest pieces is pure 3D printing nirvana.
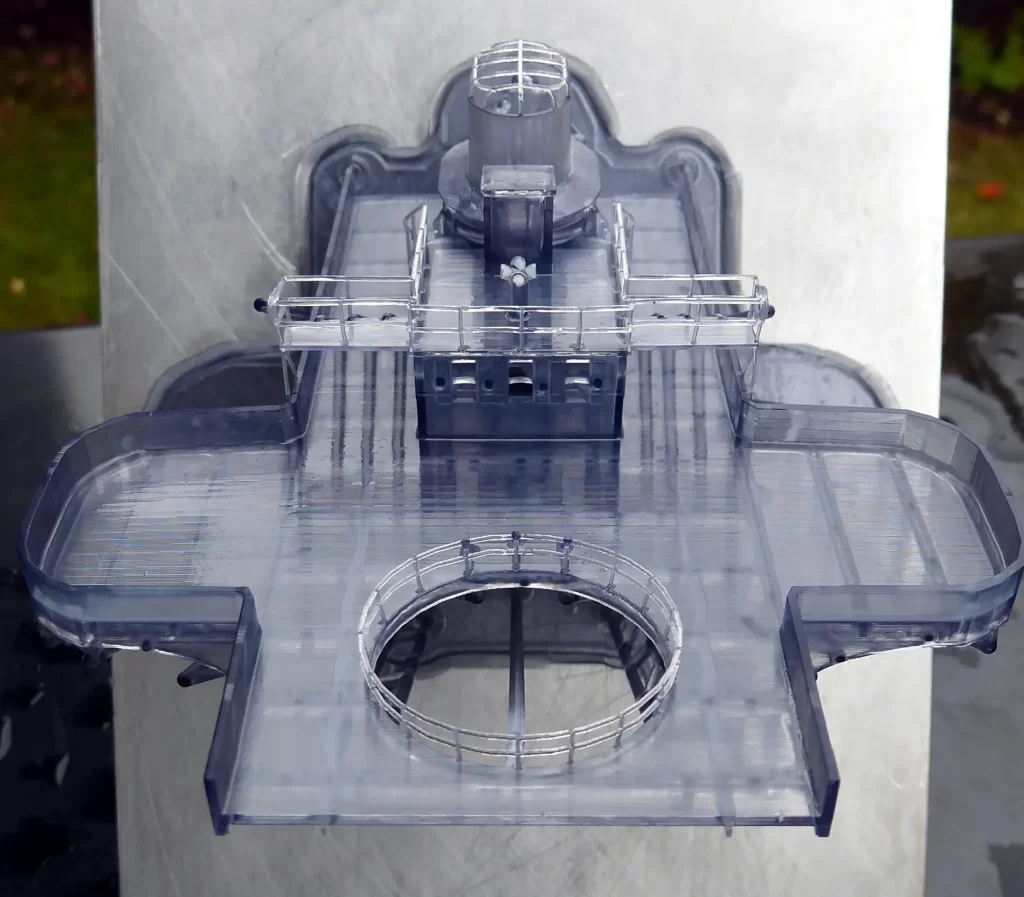
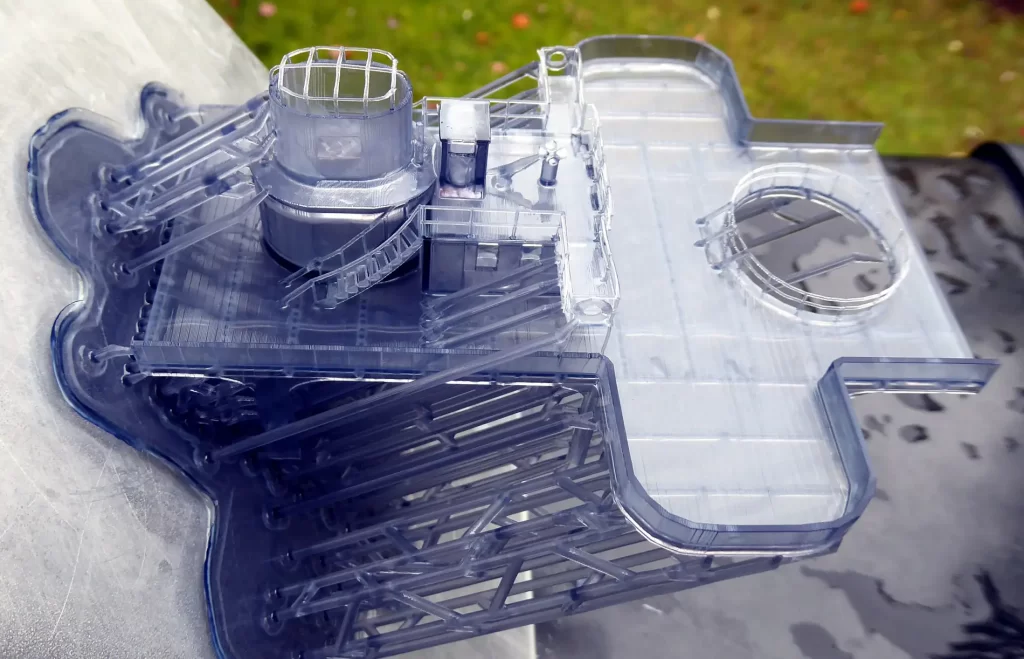
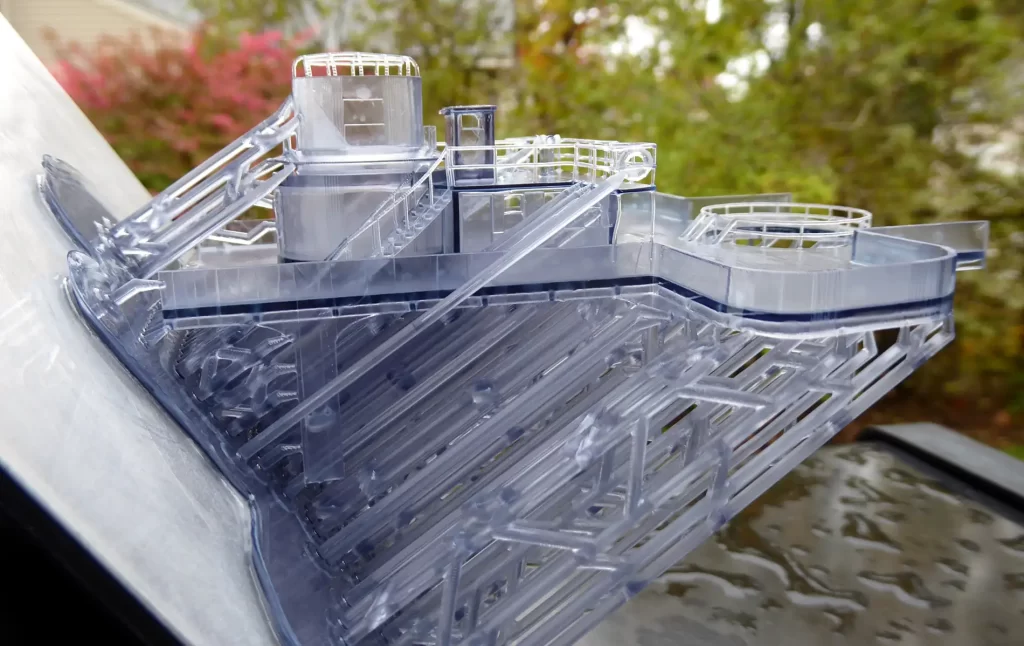
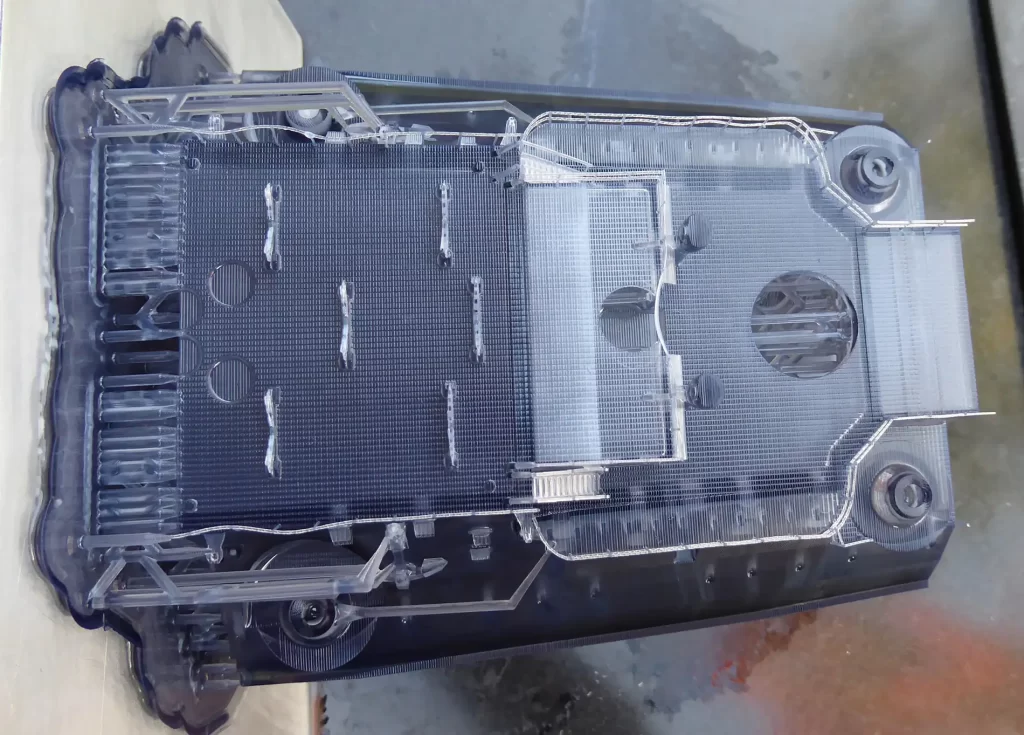
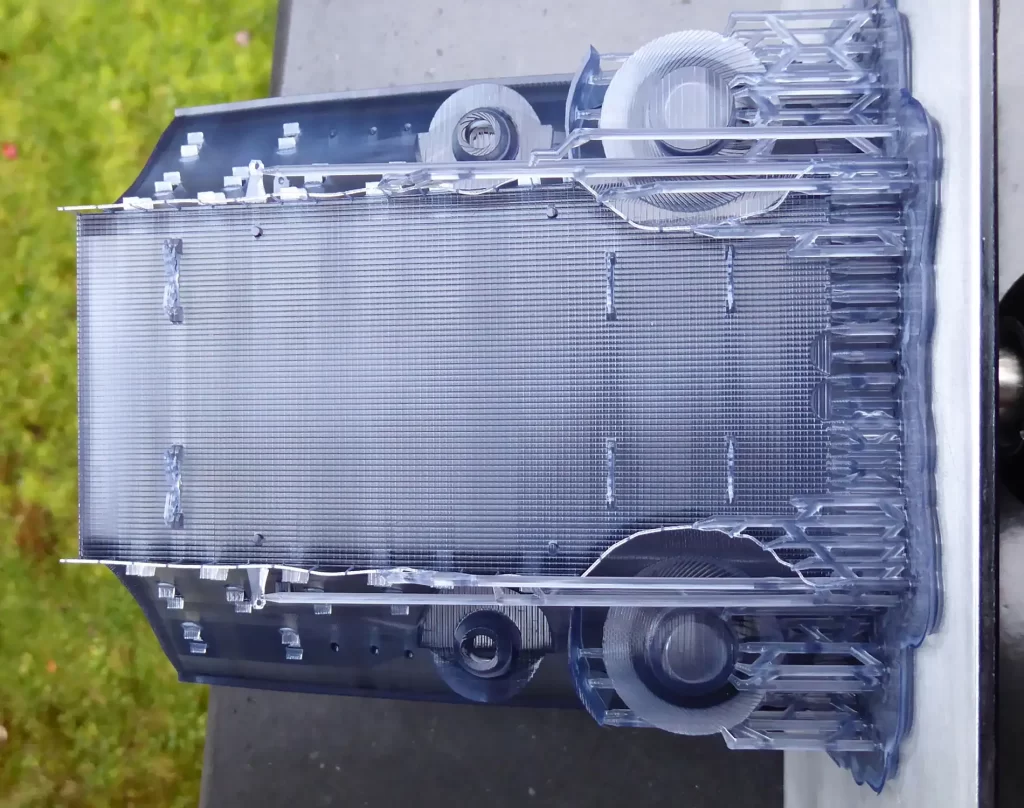
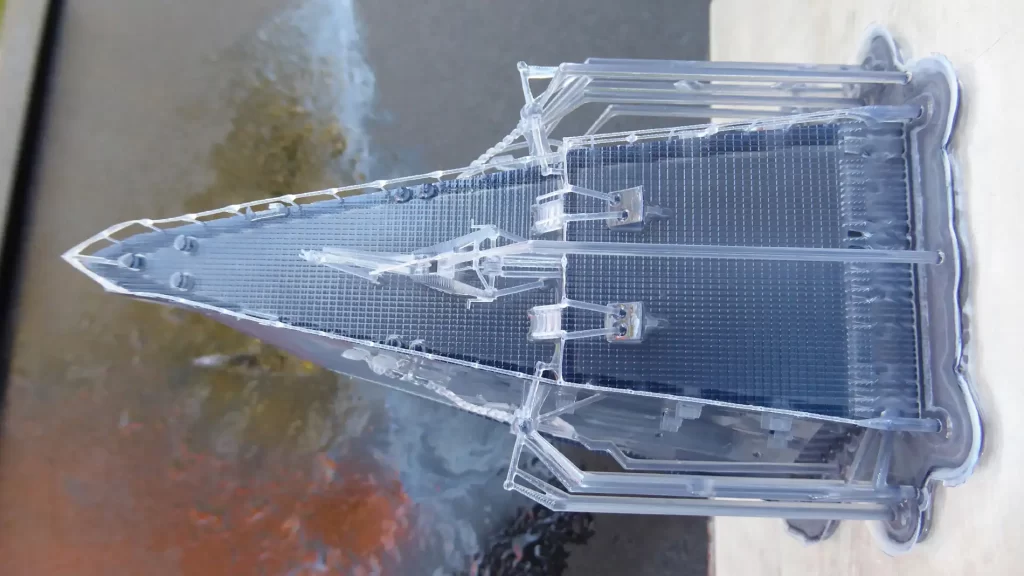
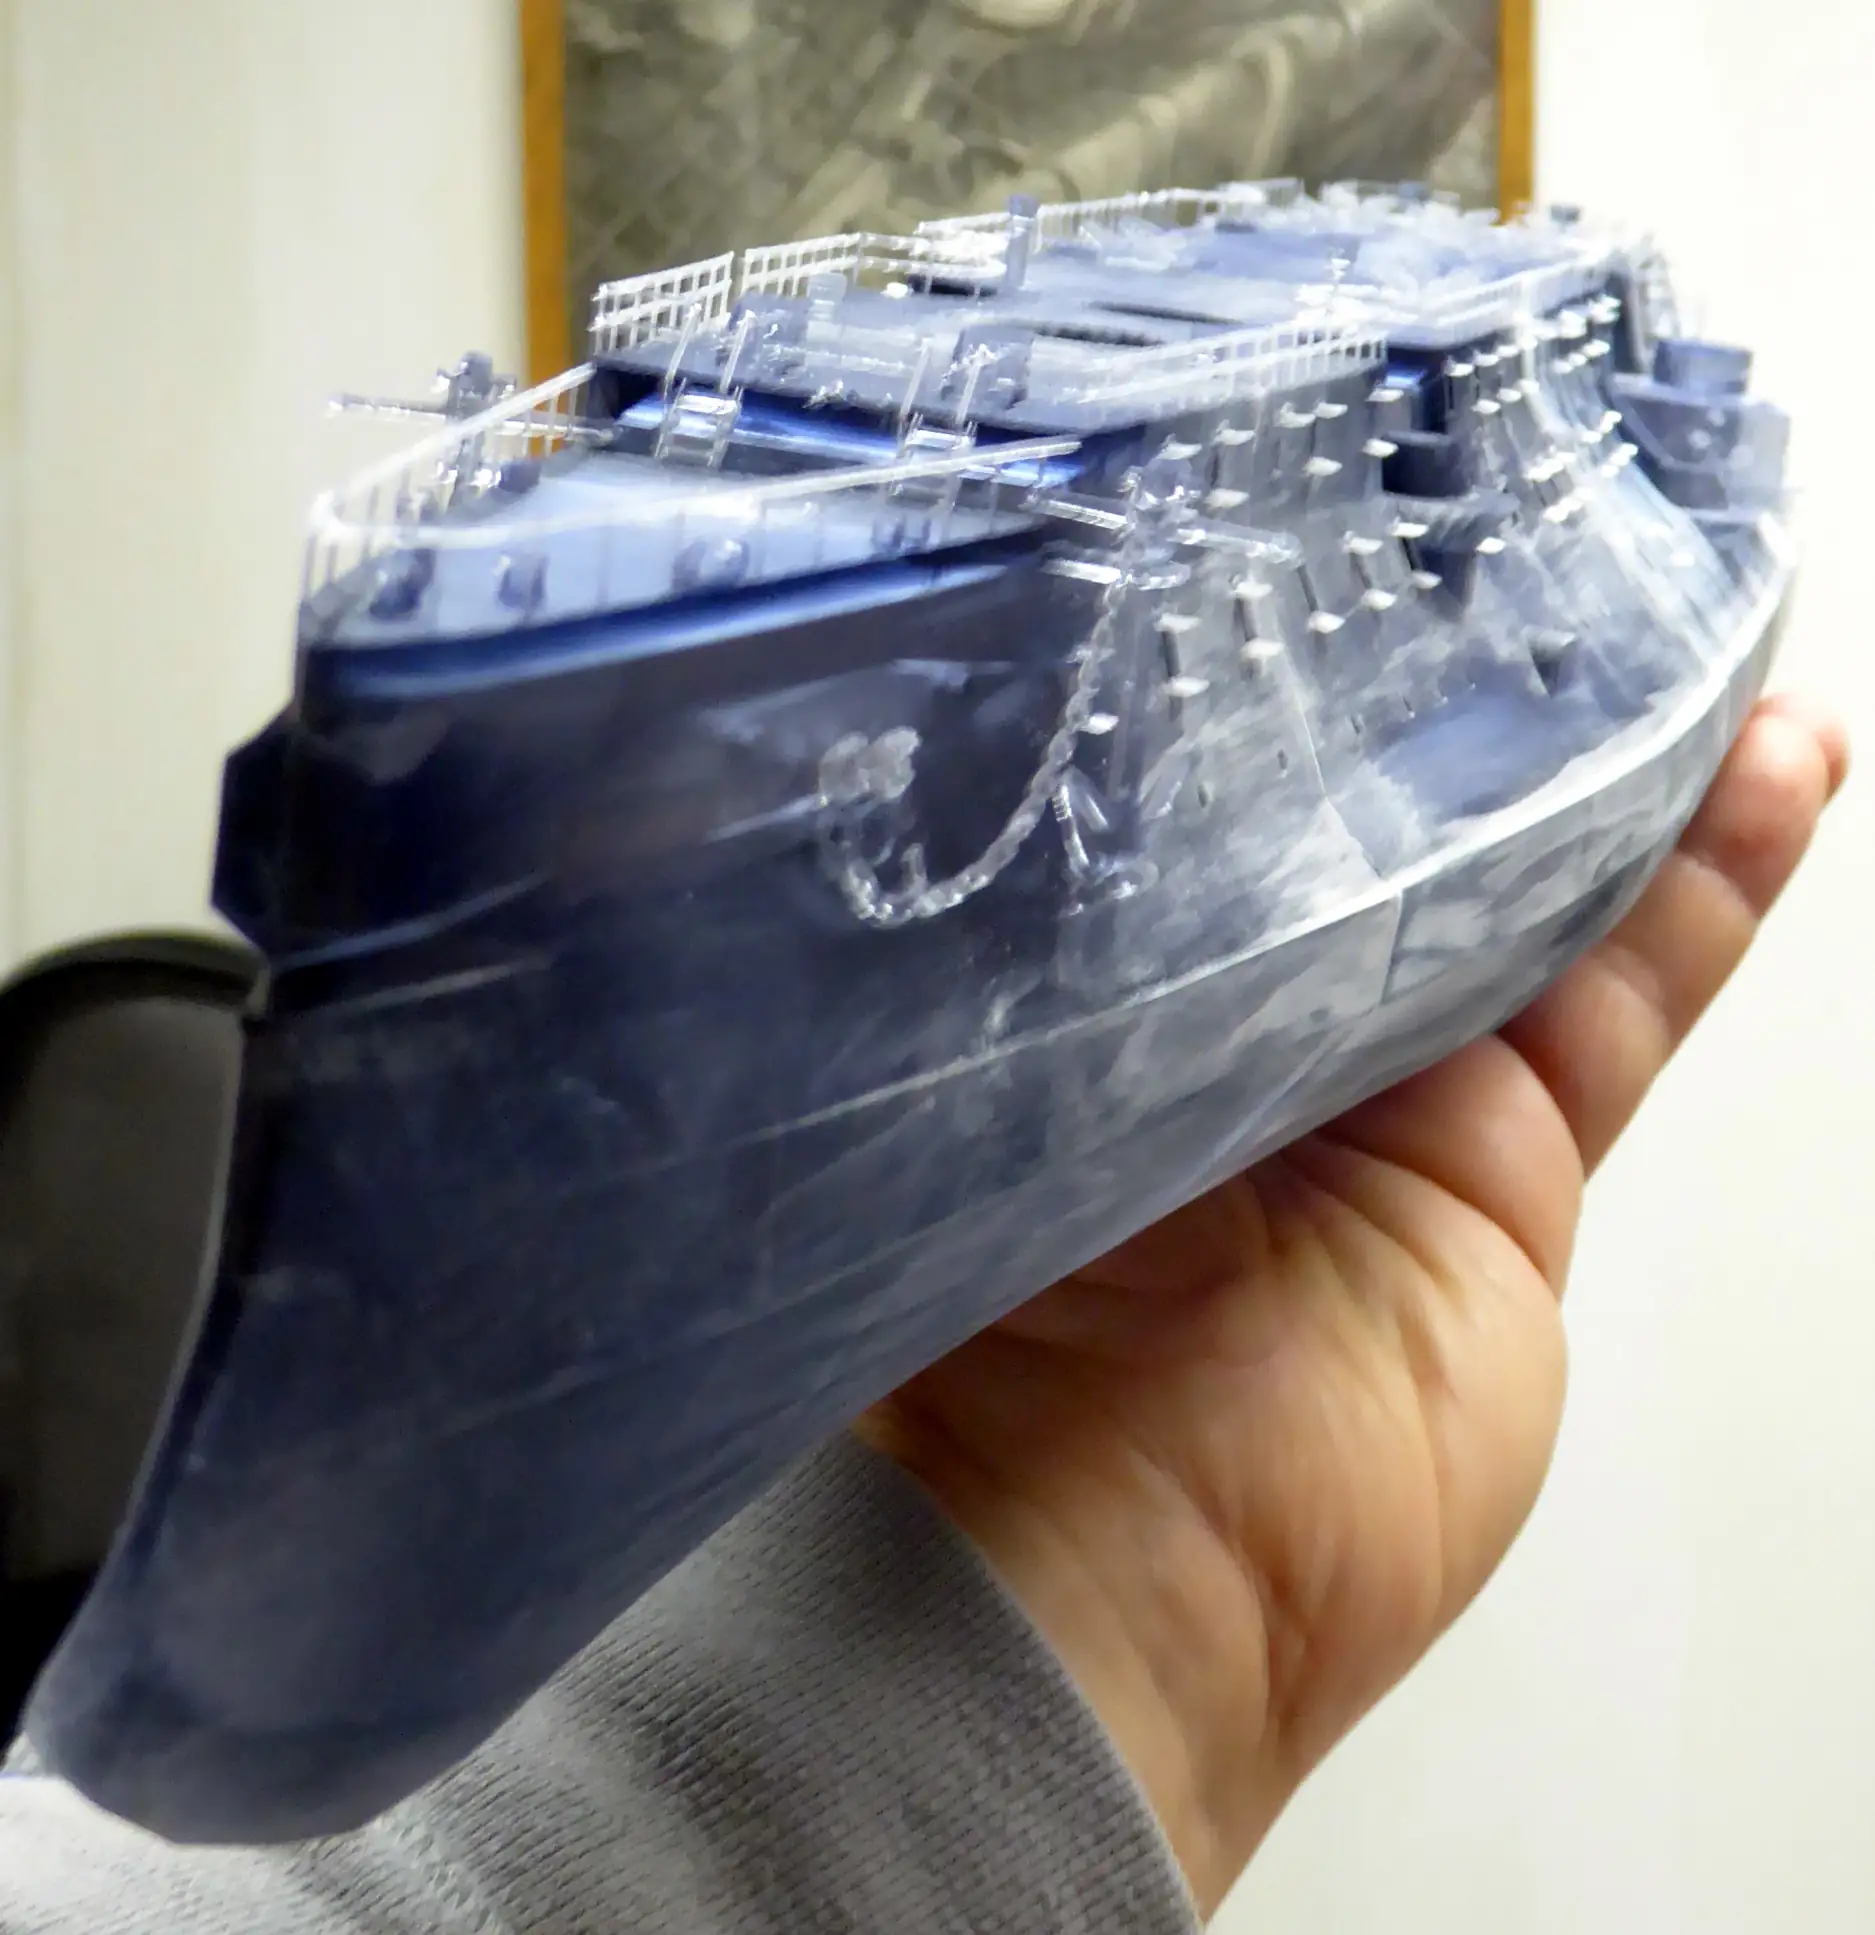
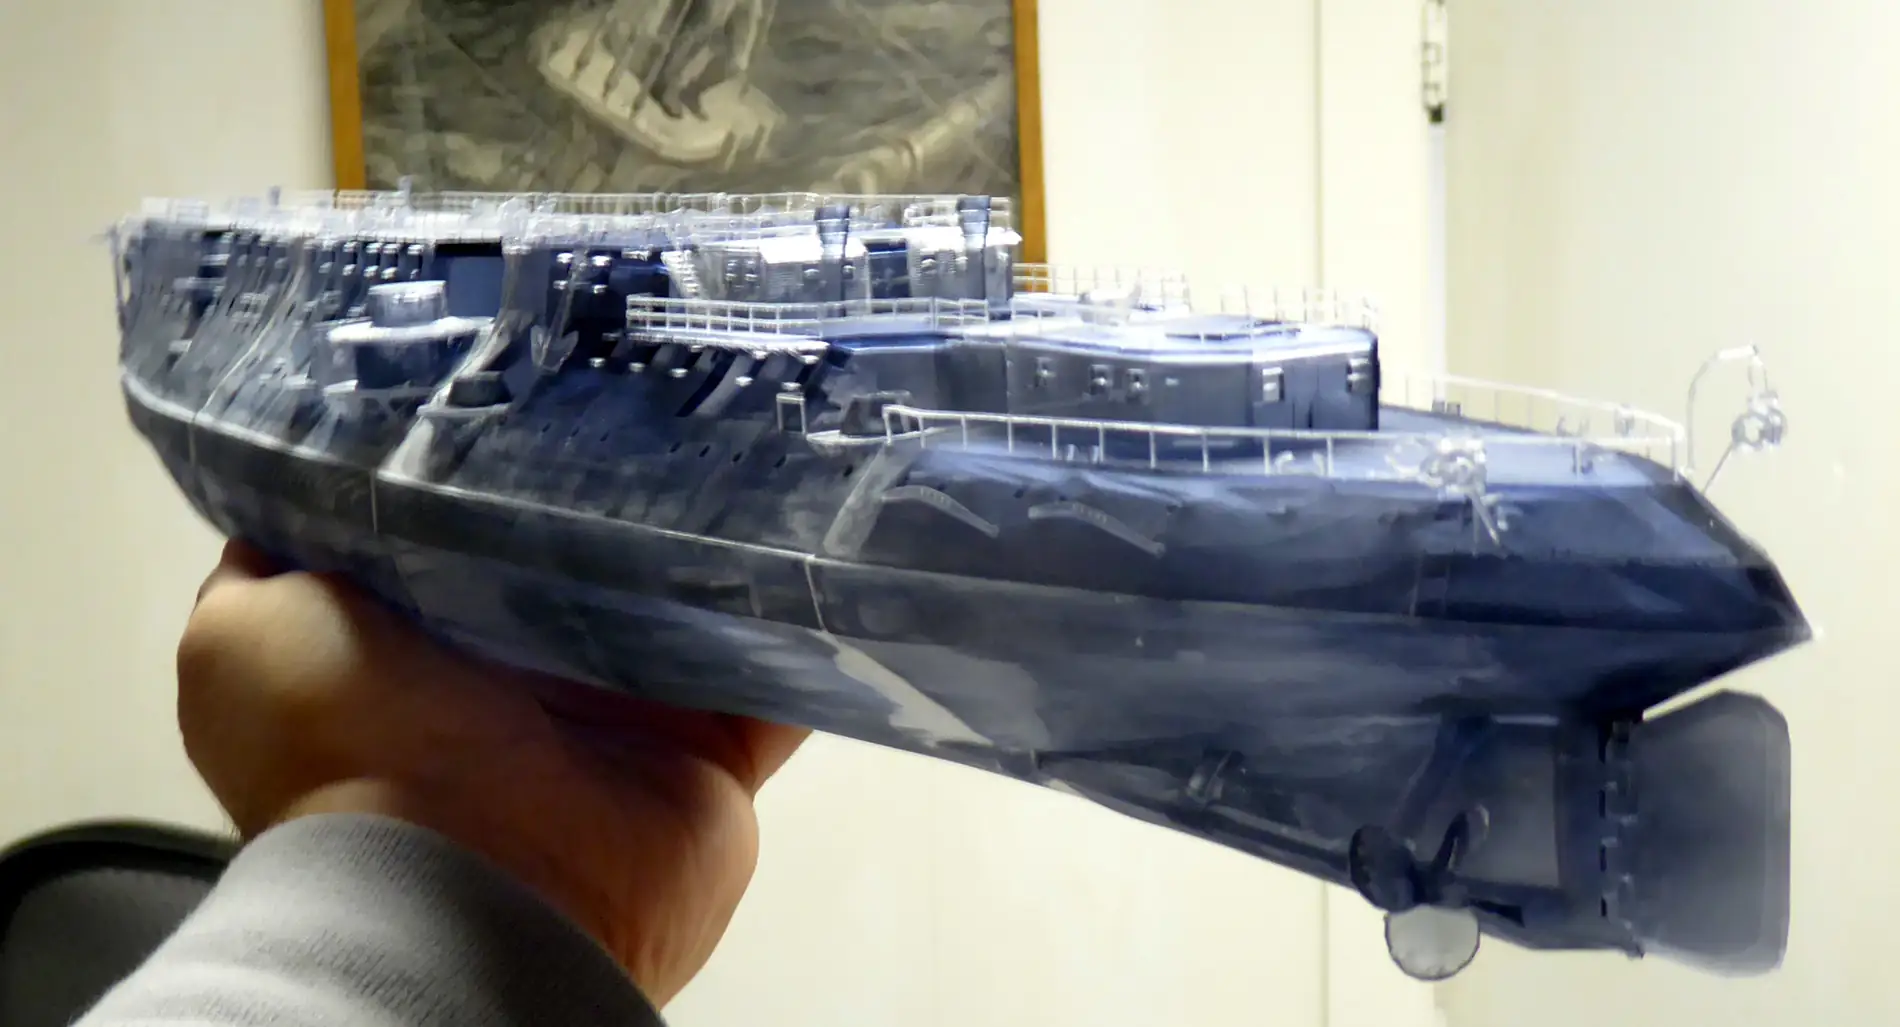
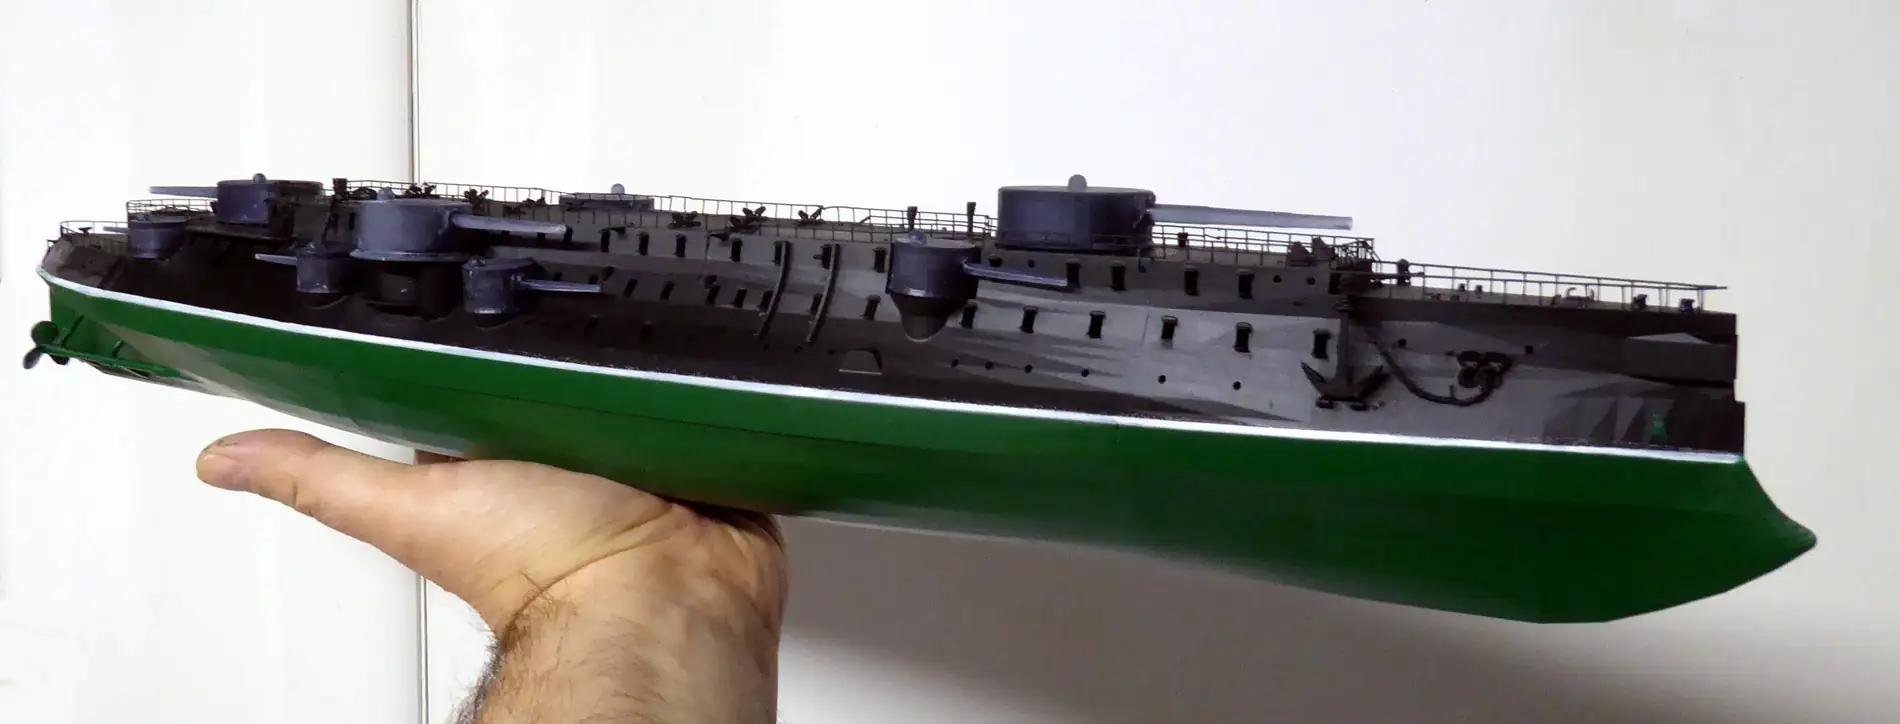
First Mock Up
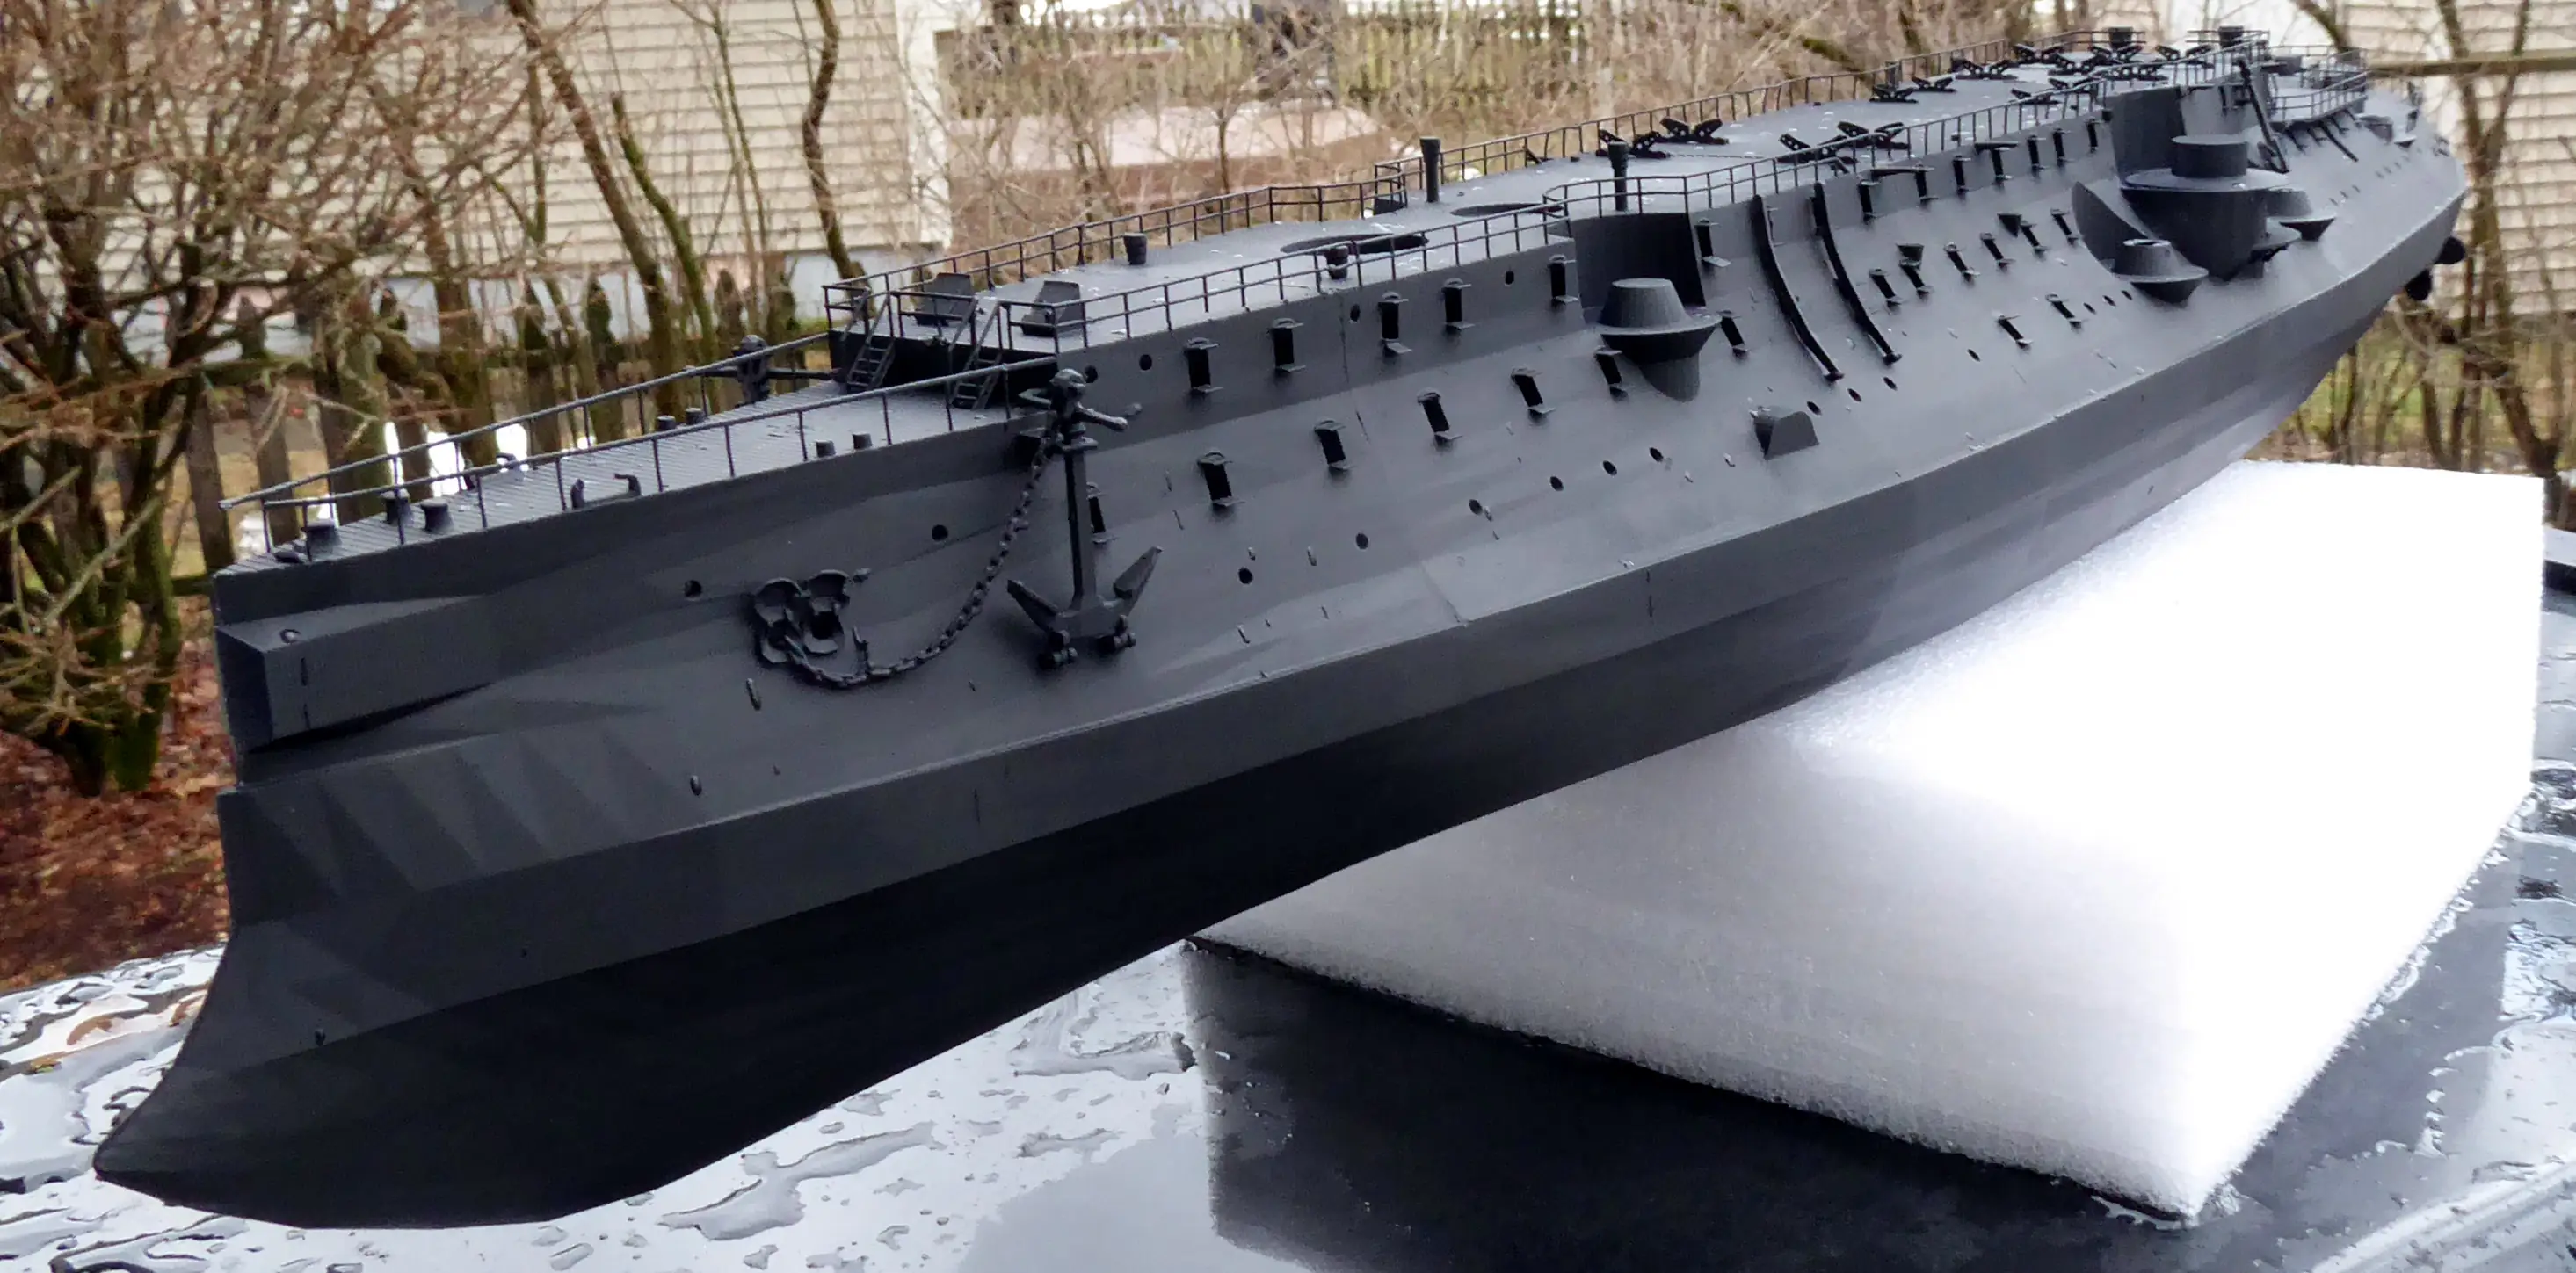
Below is the first mocked up shot of my French per-dreadnought Battleship Charles Martel in 1/200 scale. Only the three large center hull pieces are glued.
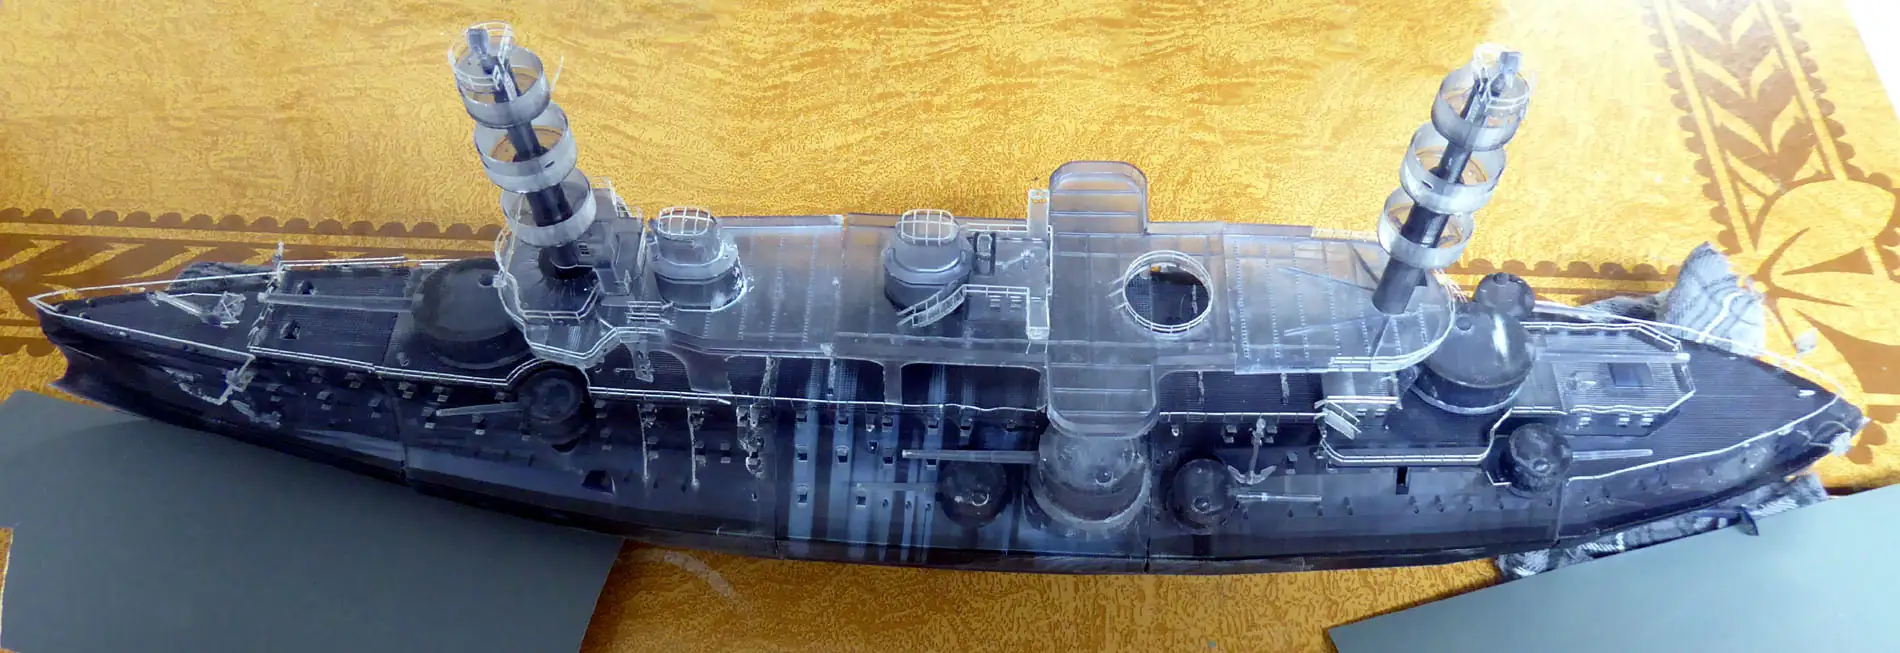
The hull will need a ton of of work before the upper deck can be attached. I feel things have gone pretty good to this point but the bulk of the work lies ahead. The Charles Martel is by far my most ambitious 3D printing project to date, resin or otherwise. She measures about two feet long and is plenty hefty.
I hope she doesn’t become my Great White Whale. Time will tell.
Thanks for looking and stay tuned!
Update Dec 24, 2022
Not a Hull of a lot of progress…
Hard to believe almost 2 months have gone by already! I haven’t had a lot of time to work on this project but the main hull sections were finally glued together, the joints filled and sanded and repair work done on bits that either didn’t print well, were broken while removing their print supports or broken while filling and sanding.
Once the repairs were finished I waited for a warmish day to lay down some flat black primer. The day was warm but rainy and the job was a bit rushed, snuck in between downpours and sprinkles.
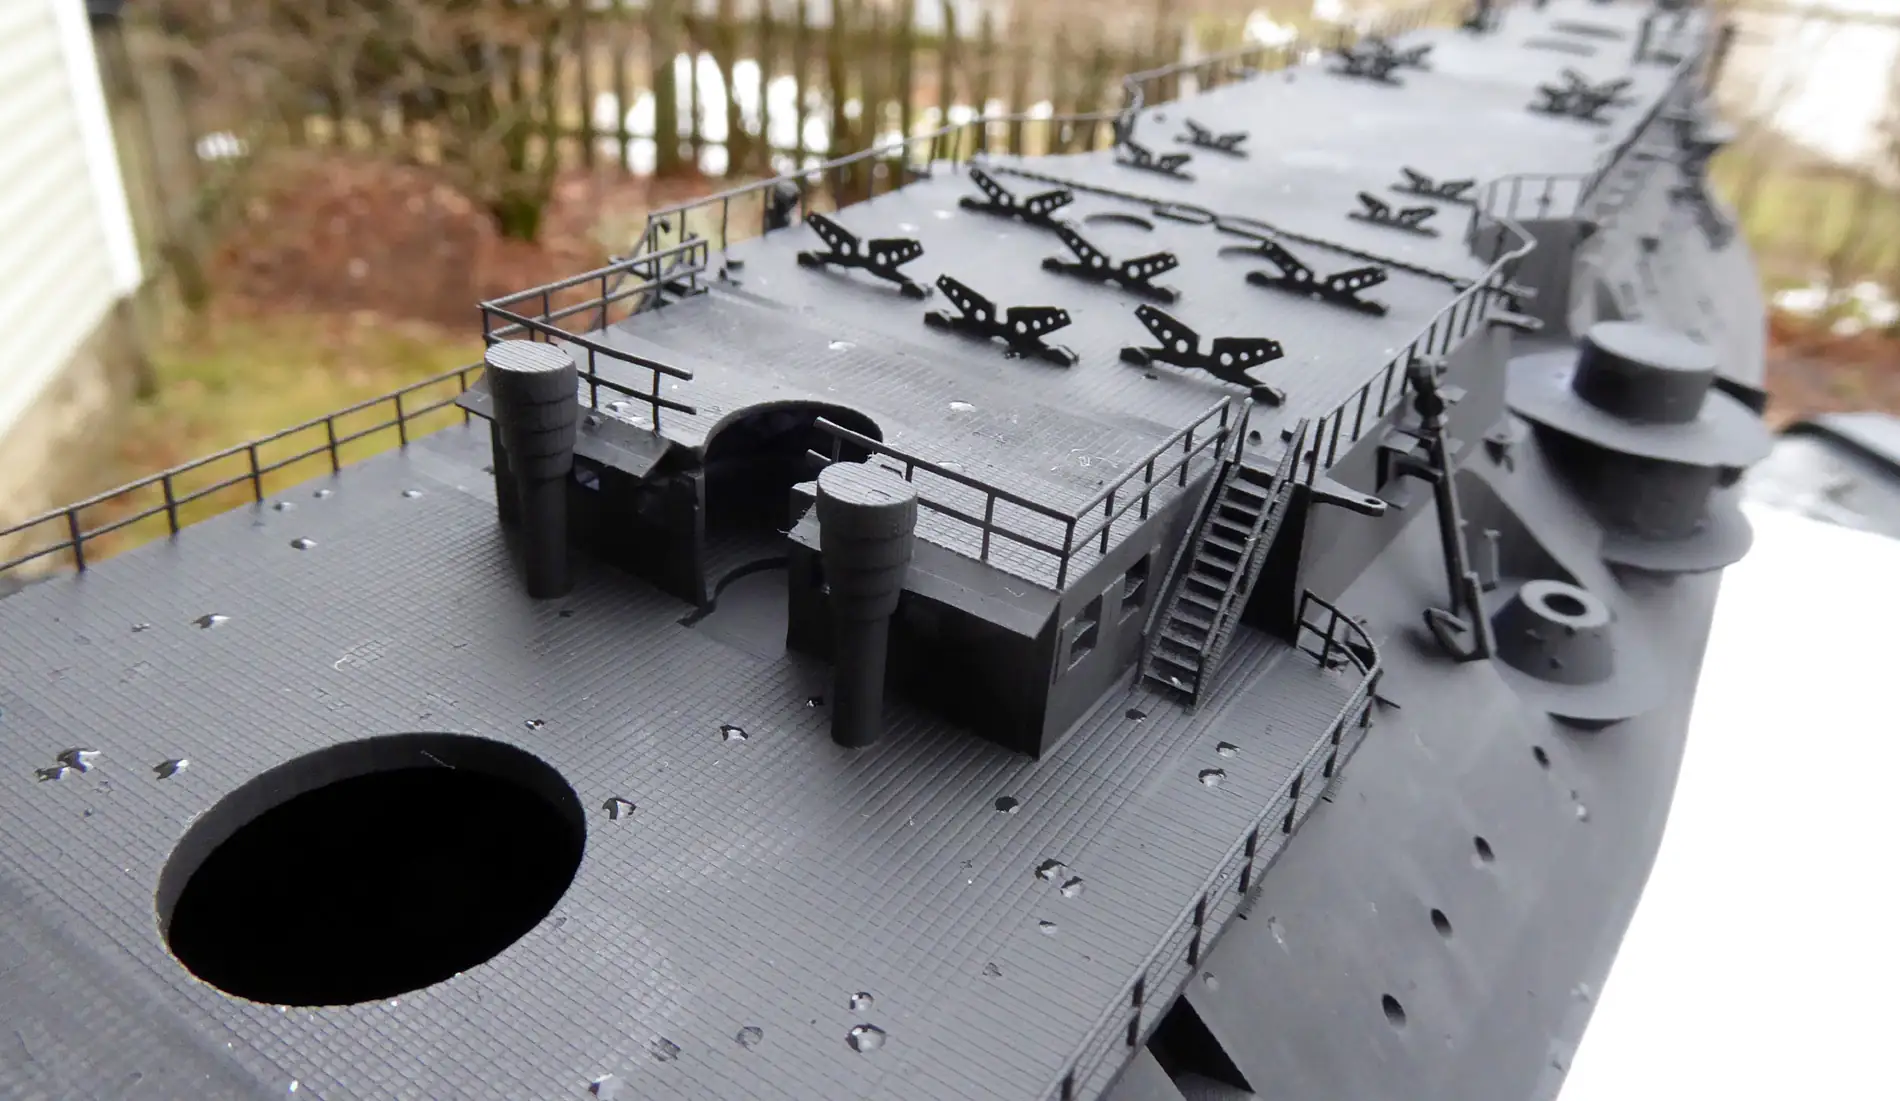
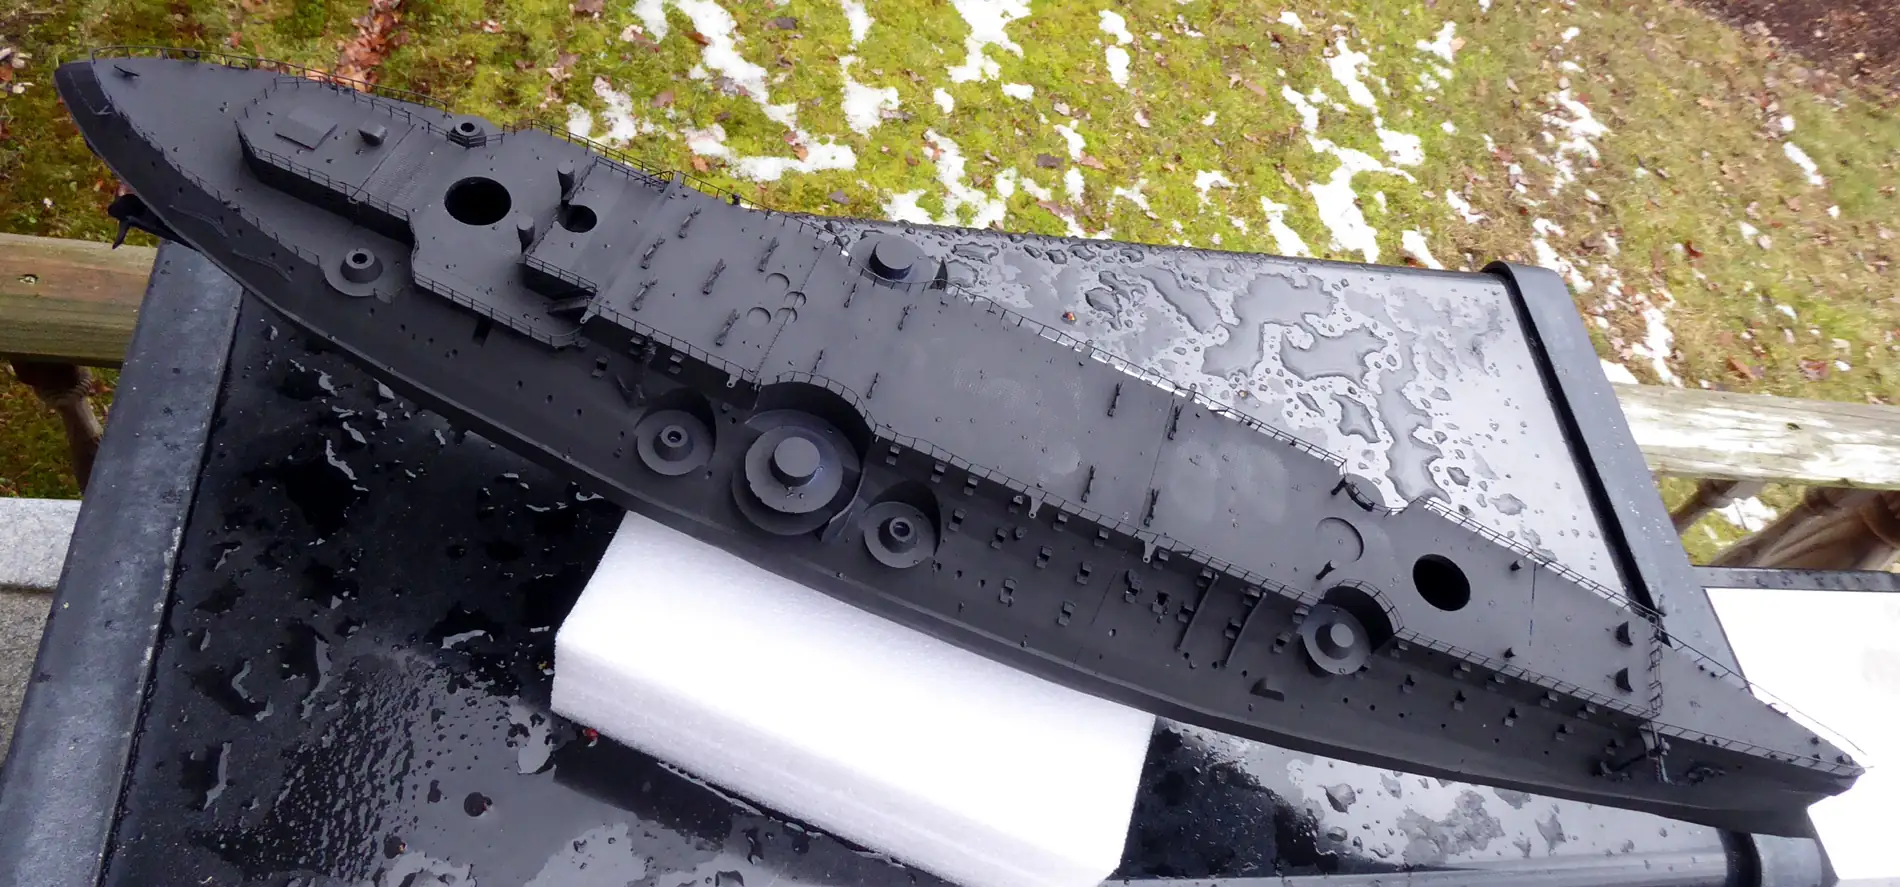

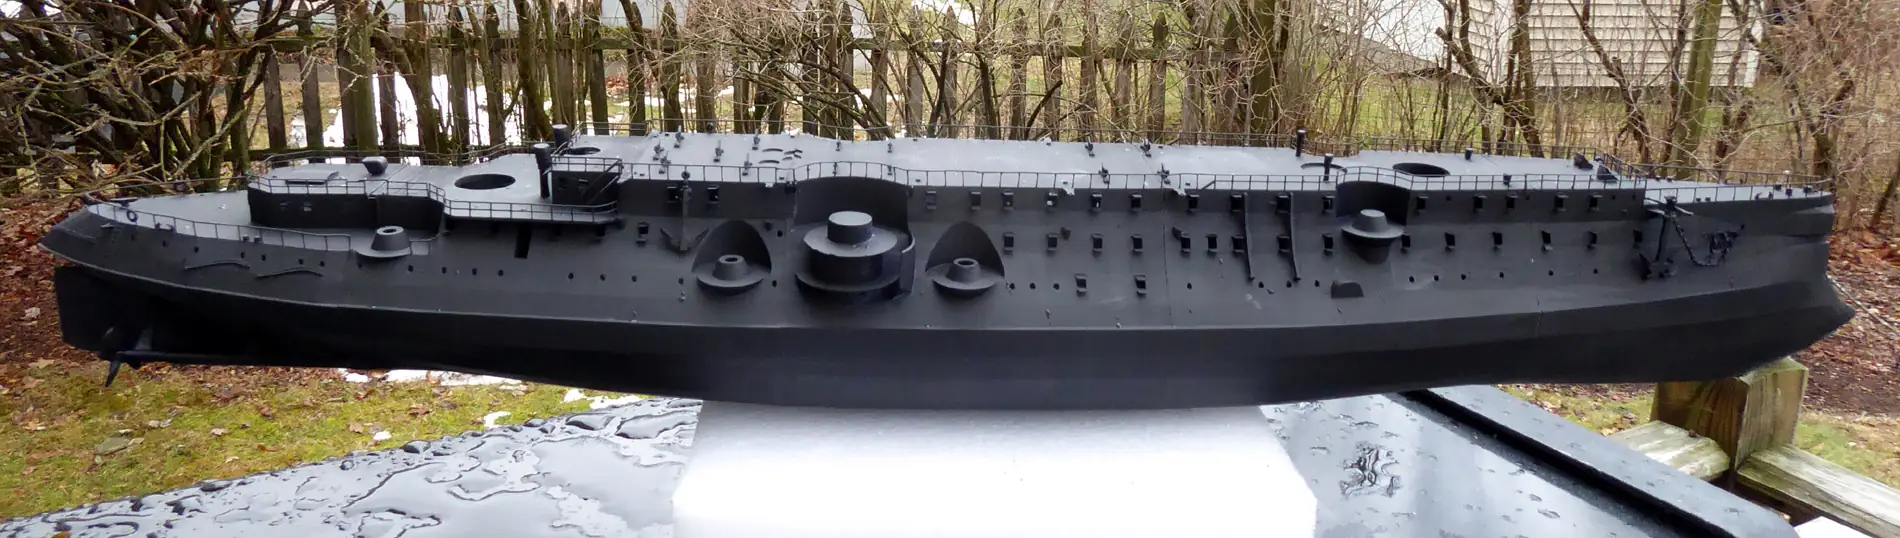
My fill work needs more work… Nothing like an even coat of primer to highlight rough areas that were missed. On the bright side some of these defects will be hidden by the upper works and utility boats.
I’m pretty happy with my Charles Martel so far.
Going forward I’ll likely concentrate on the hull this winter, I’ve found new pictures of Charles Martel that make me want to redesign and reprint her flying deck and that will need to wait till springtime. At this rate I should have plenty to keep me busy till then.
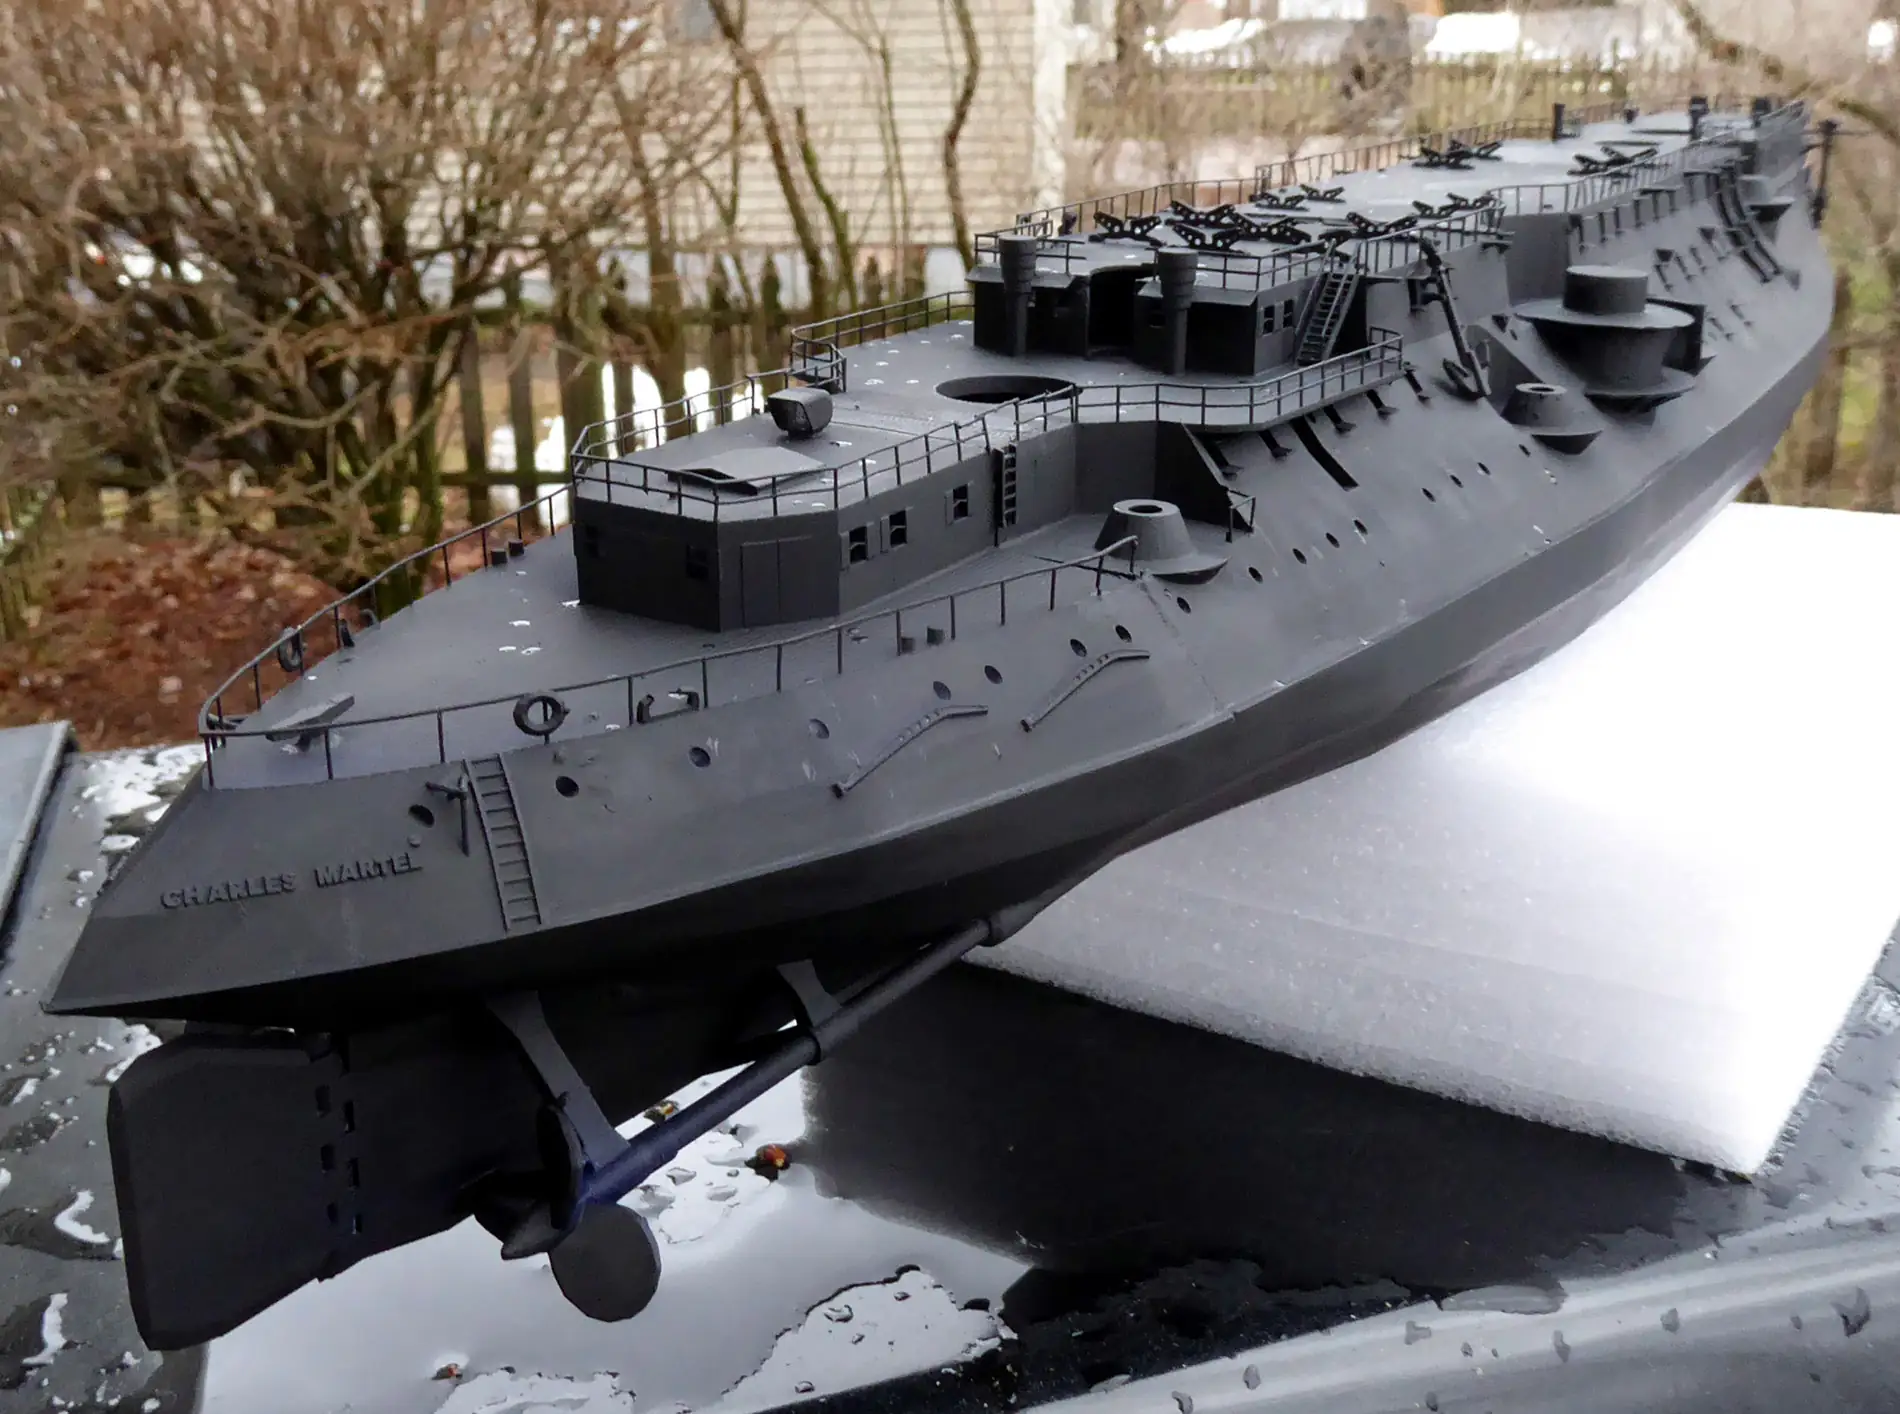
Update Dec 26, 2022
Bullet Dodged
Sometimes I’m my own worst enemy…
She shouldn’t have got it yet but I’m too darn impulsive. I had a marginal weather window for spray painting open up today and I took it and I didn’t first make the filler/smoothing corrections I wanted to. Oh well, ready or not, she got her first touch of color today.
From day 1 I worried that the waterline pin-striping would be the death of this project (Don’t laugh! it has been before! I hate them!) The bulging top edge of the armored belt is right on the lower edge of the stripe making the masking trickier than normal and normal with these stripes is plenty tricky for me.
I think I just wanted to get past it, if I’d totally messed it up I’d care less that I didn’t make the hull perfect first before doing so. Much to my relief, I pulled it off OK with only minor touch-ups required (bullet dodged).
So yeah, now I kind’a wish I’d done some filler repairs first…
PS: The unprepped and unpainted turrets are just on for looks!
Update Dec 30, 2022
Mock II
Had time to get the first coat of deck paint down and do a mock up using the flying deck parts I’ve already printed even though I’ll likely not use them on the finished model.
Still on the fence about the upper color: buff gold or light gray.
I think the buff might be harder to pull off, though I do find it aesthetically appealing and very Victorian.
Then again, light gray may go better in the room she’ll end up in…
Update Jan 26, 2023
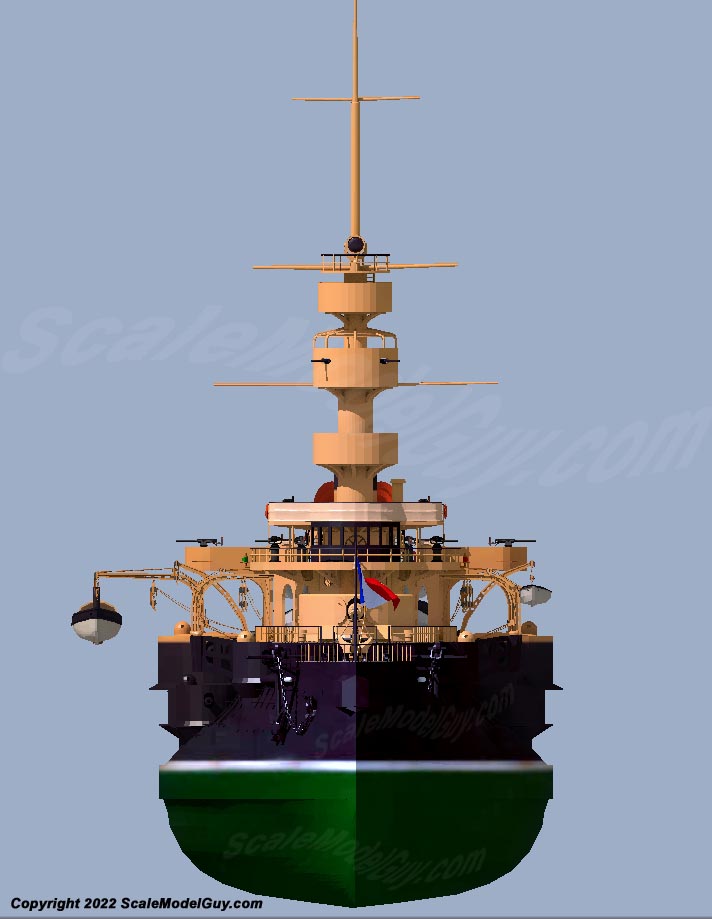
Digital Diorama
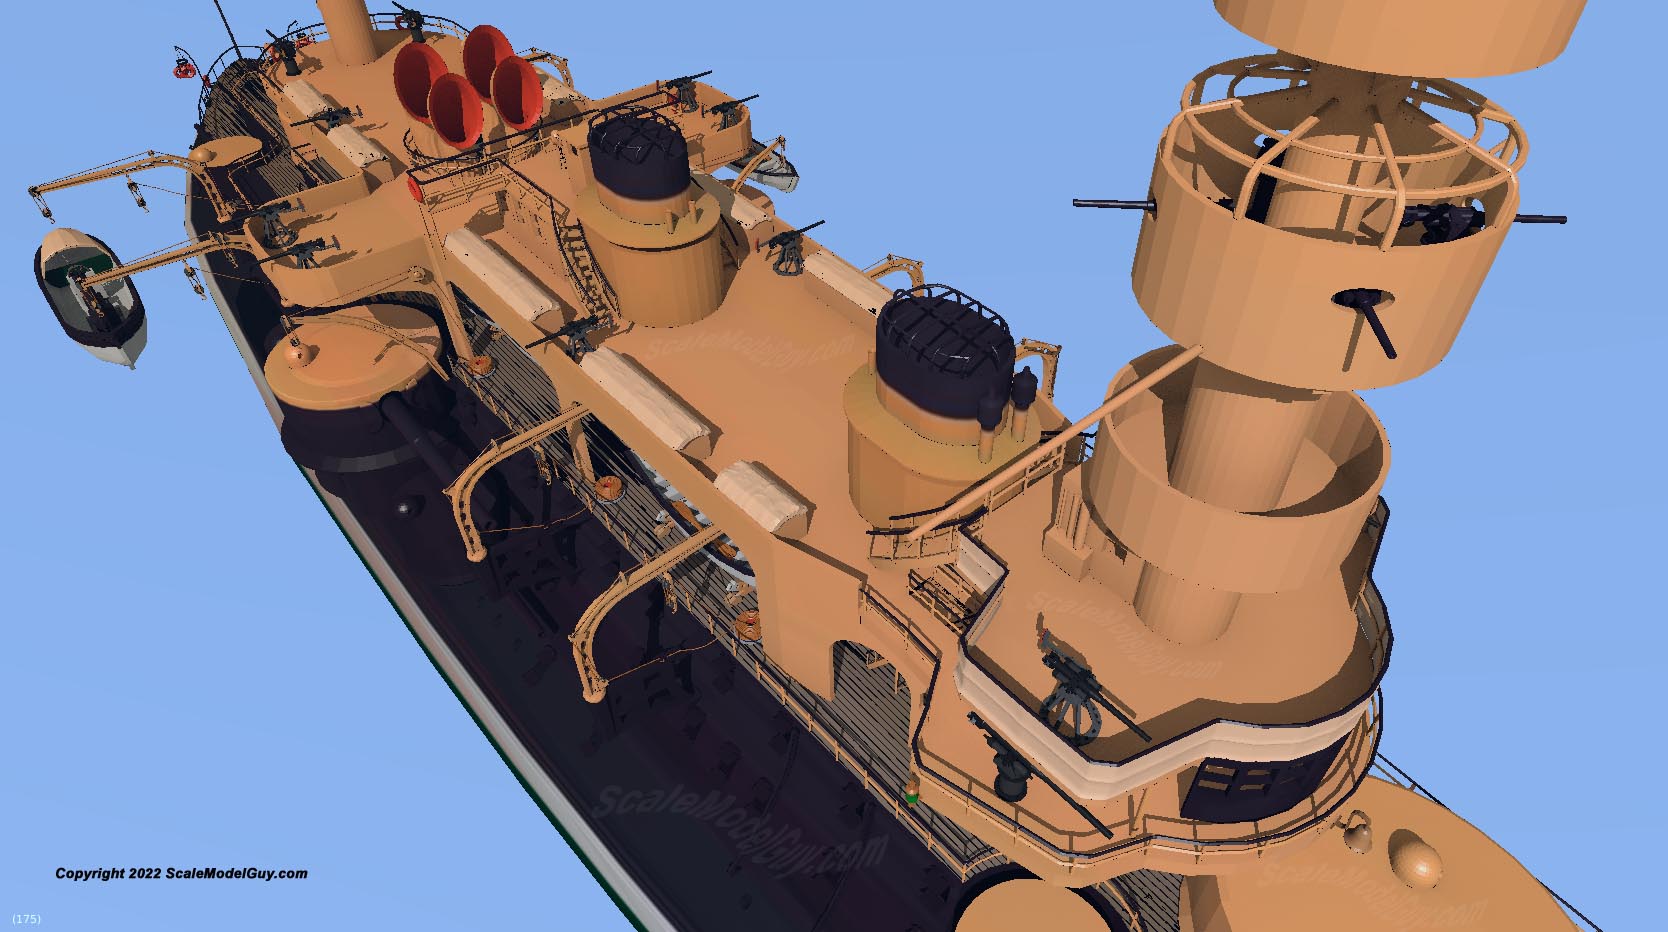
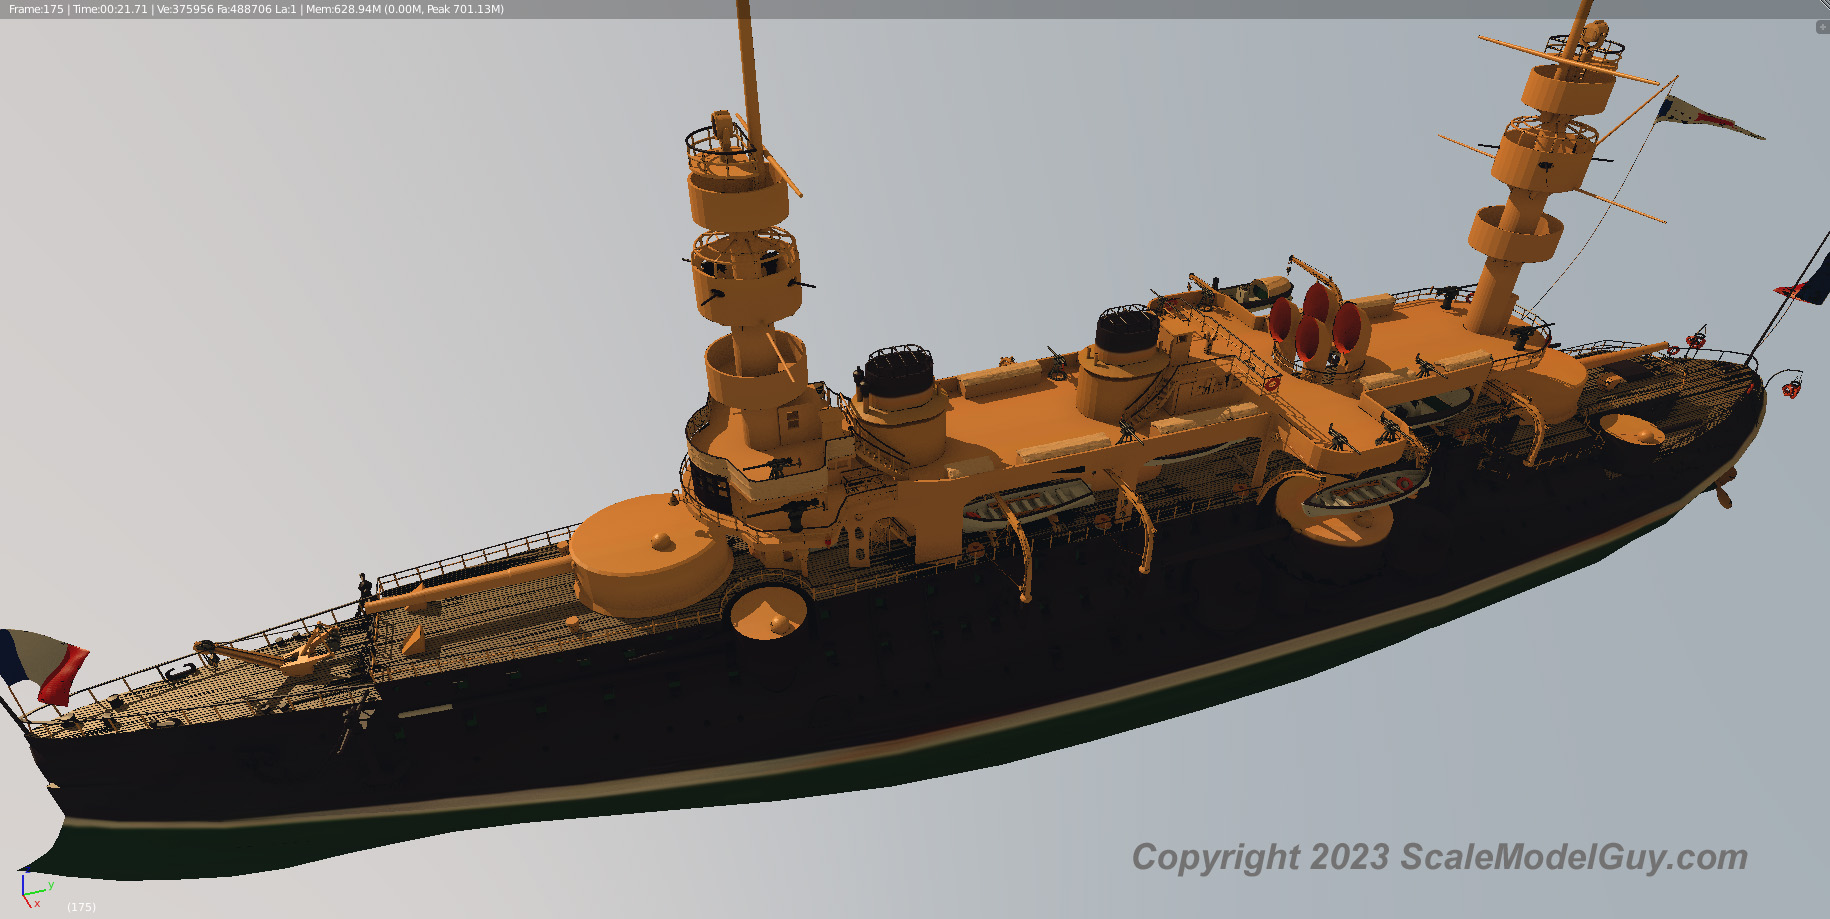
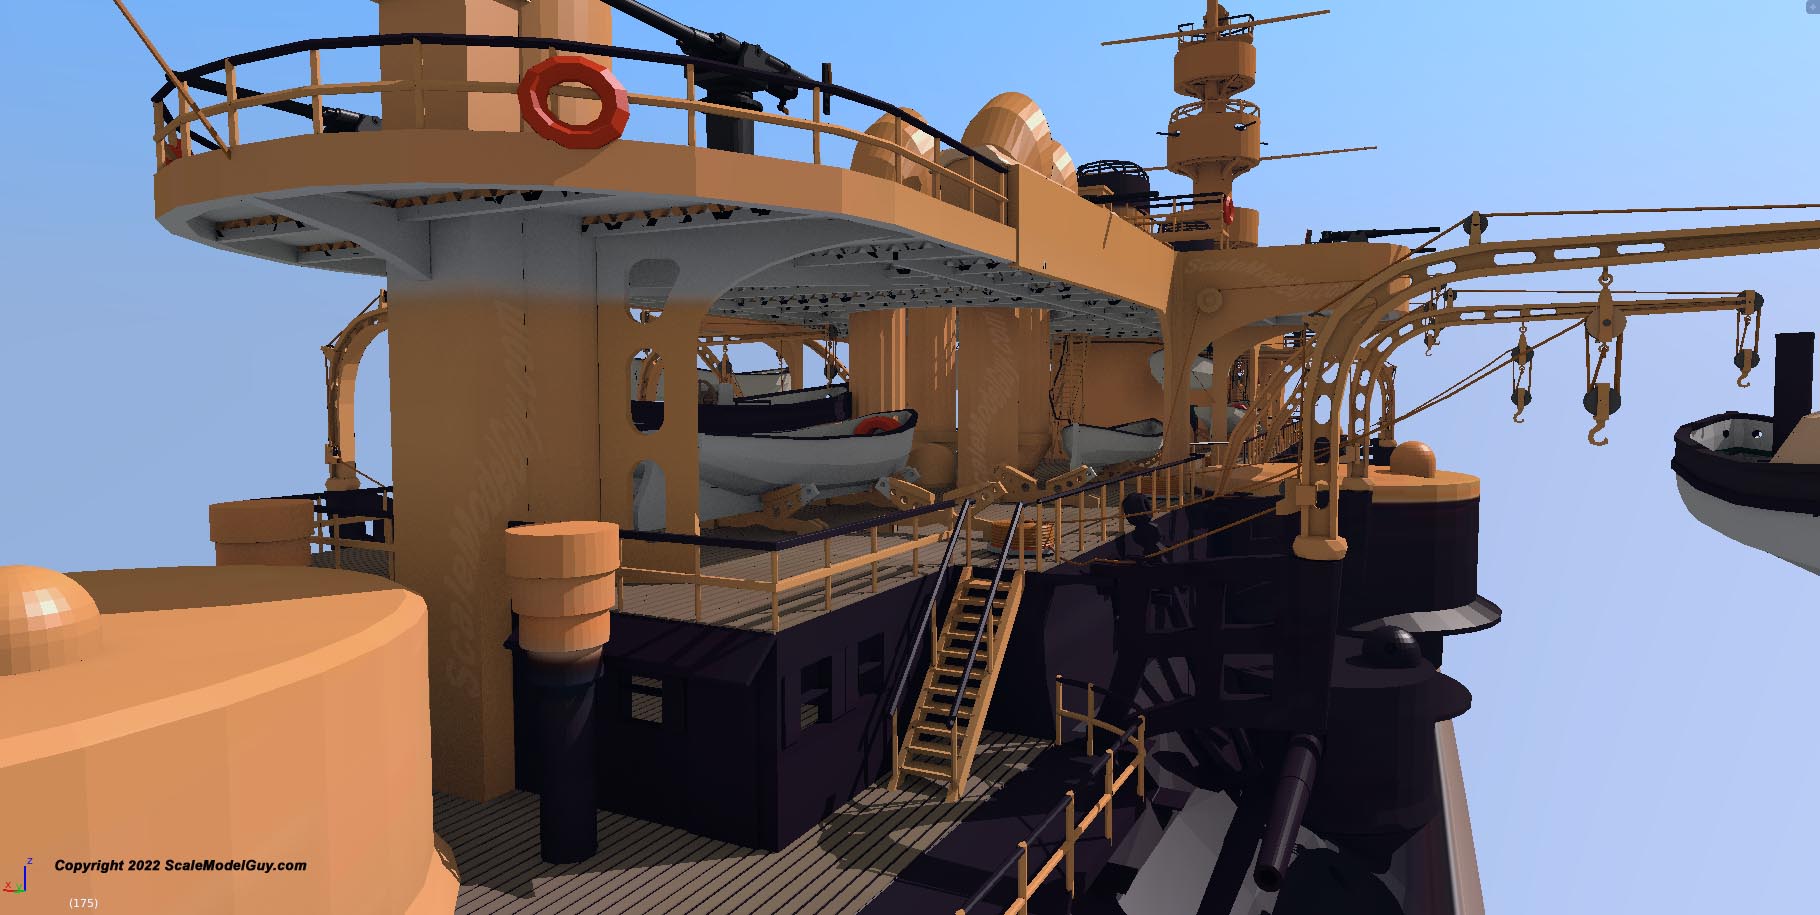
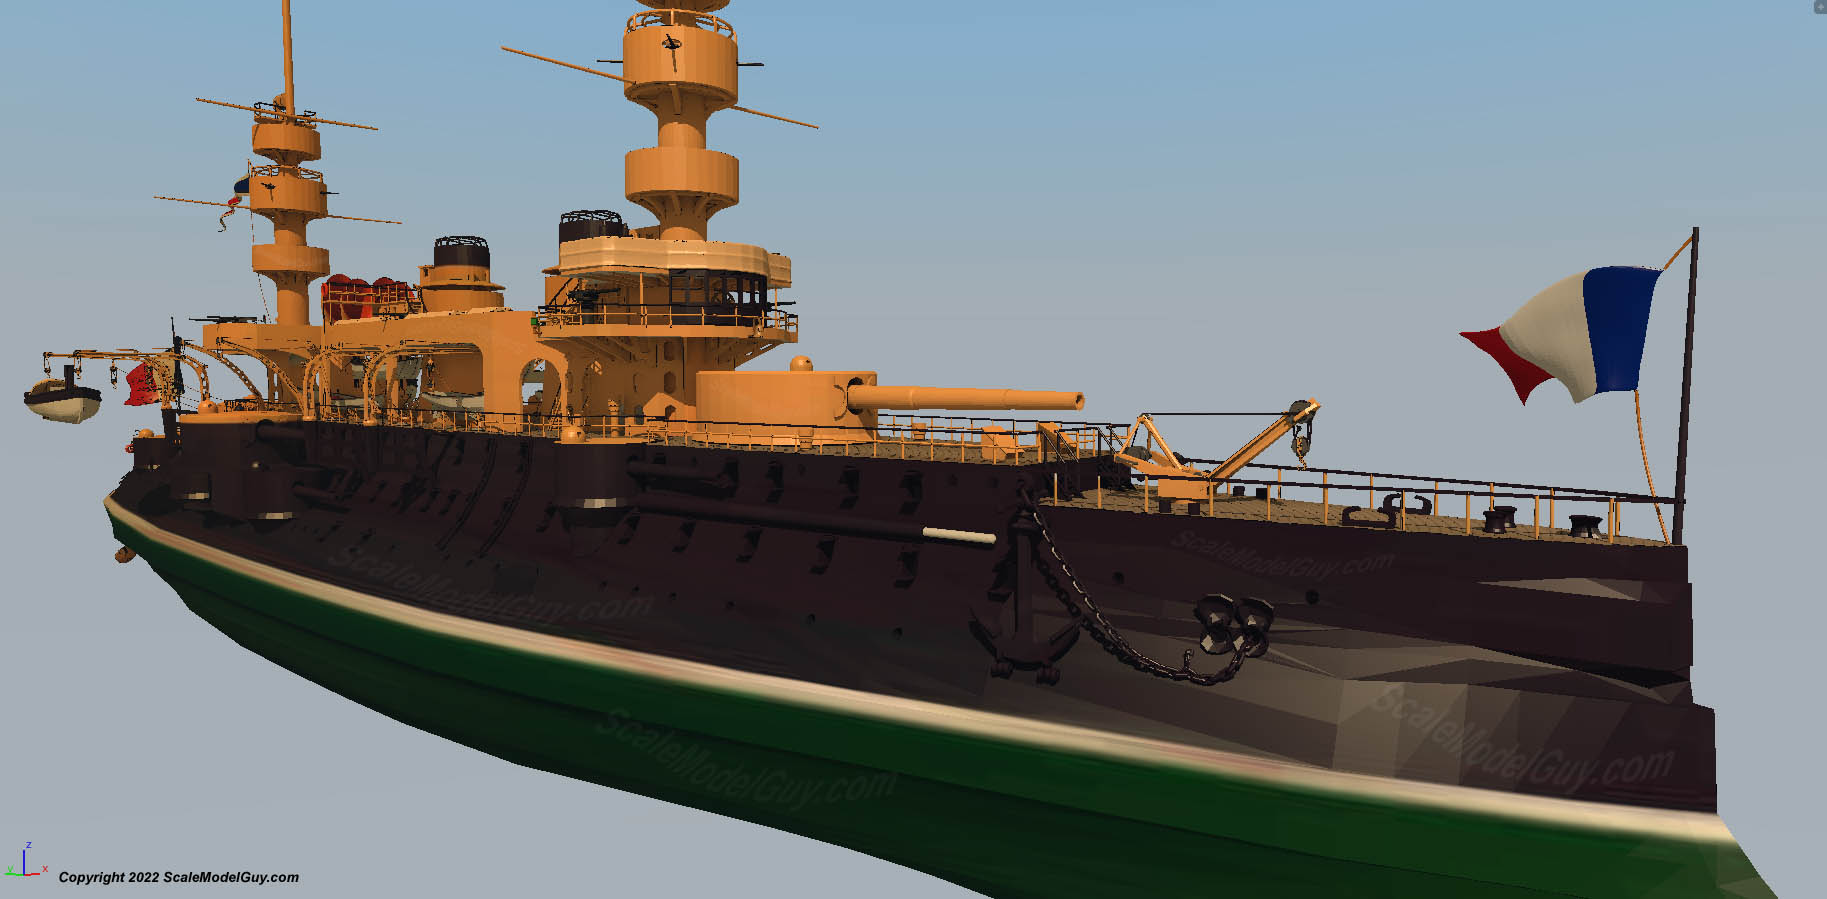
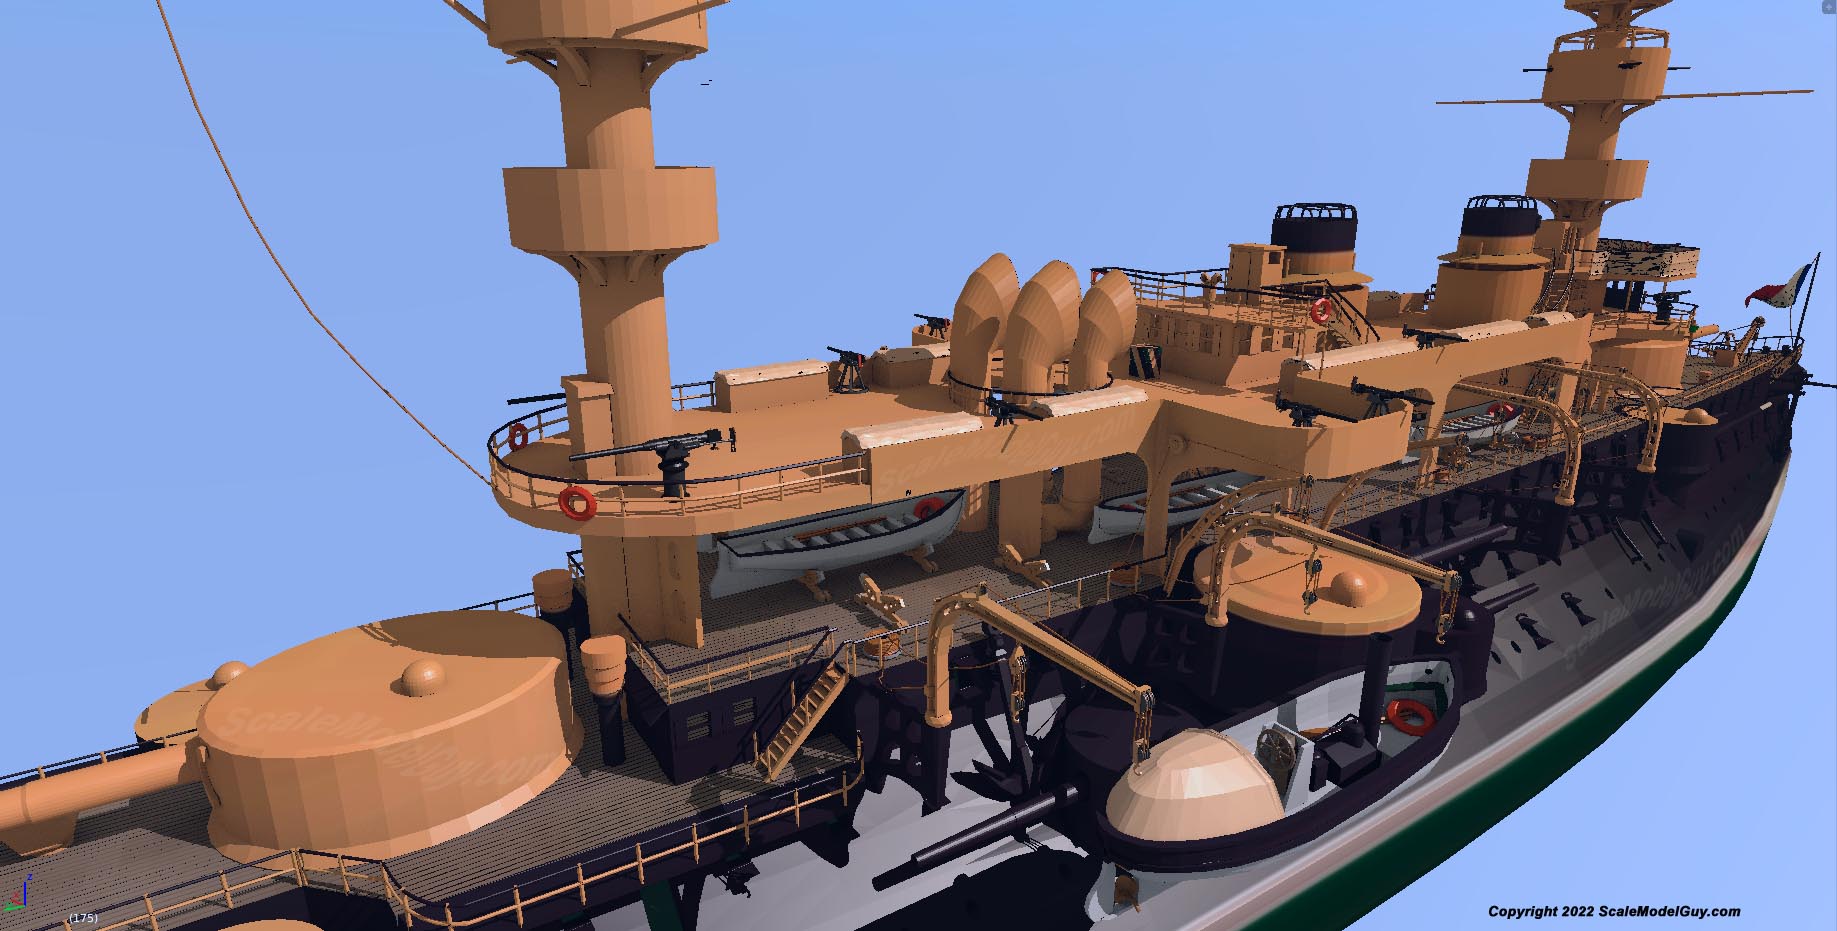
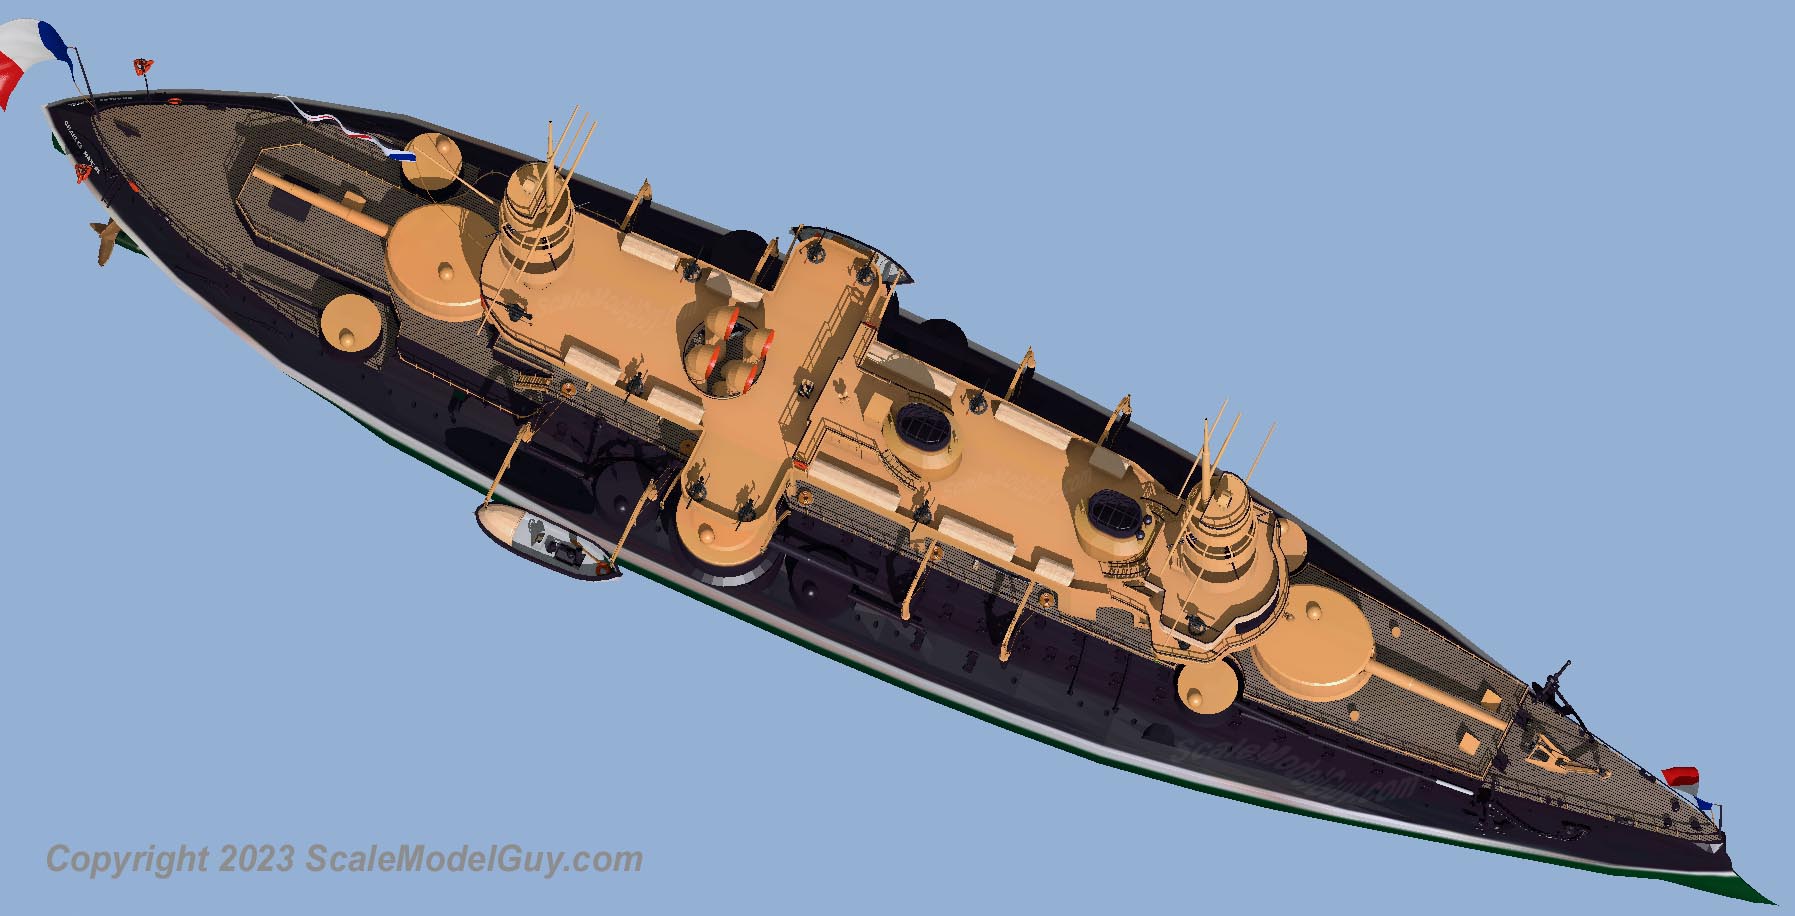
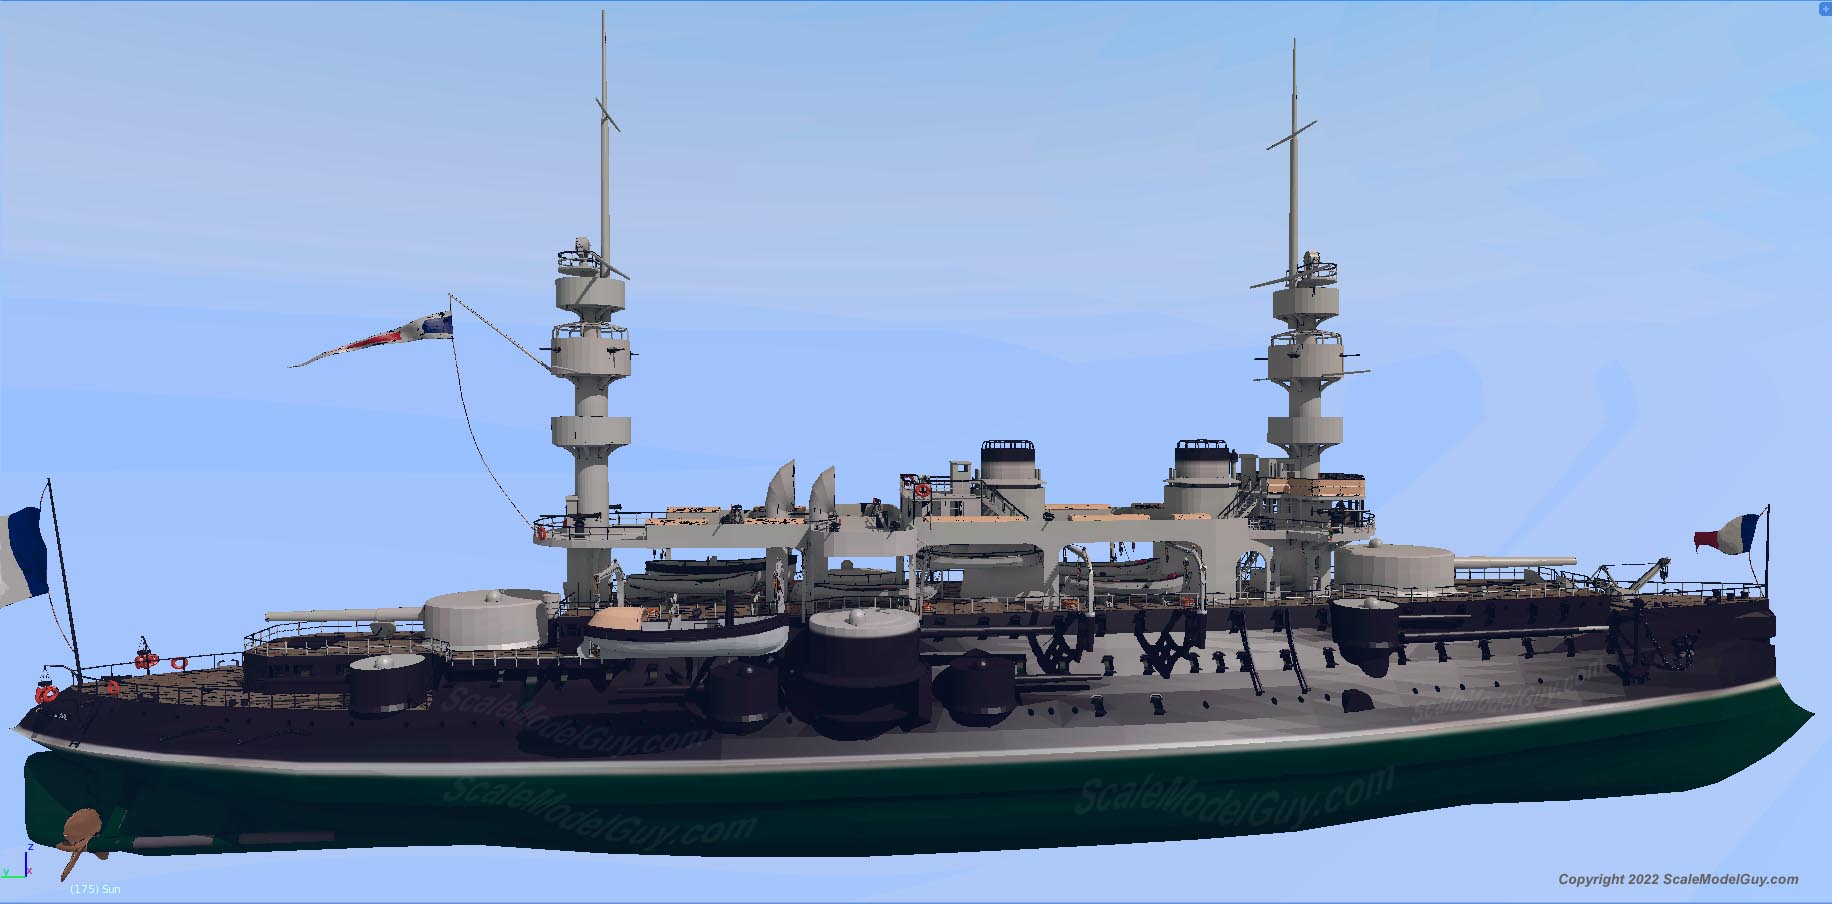
While little to no progress has been made on the physical model, I’ve completed the new flying deck changes in Blender.
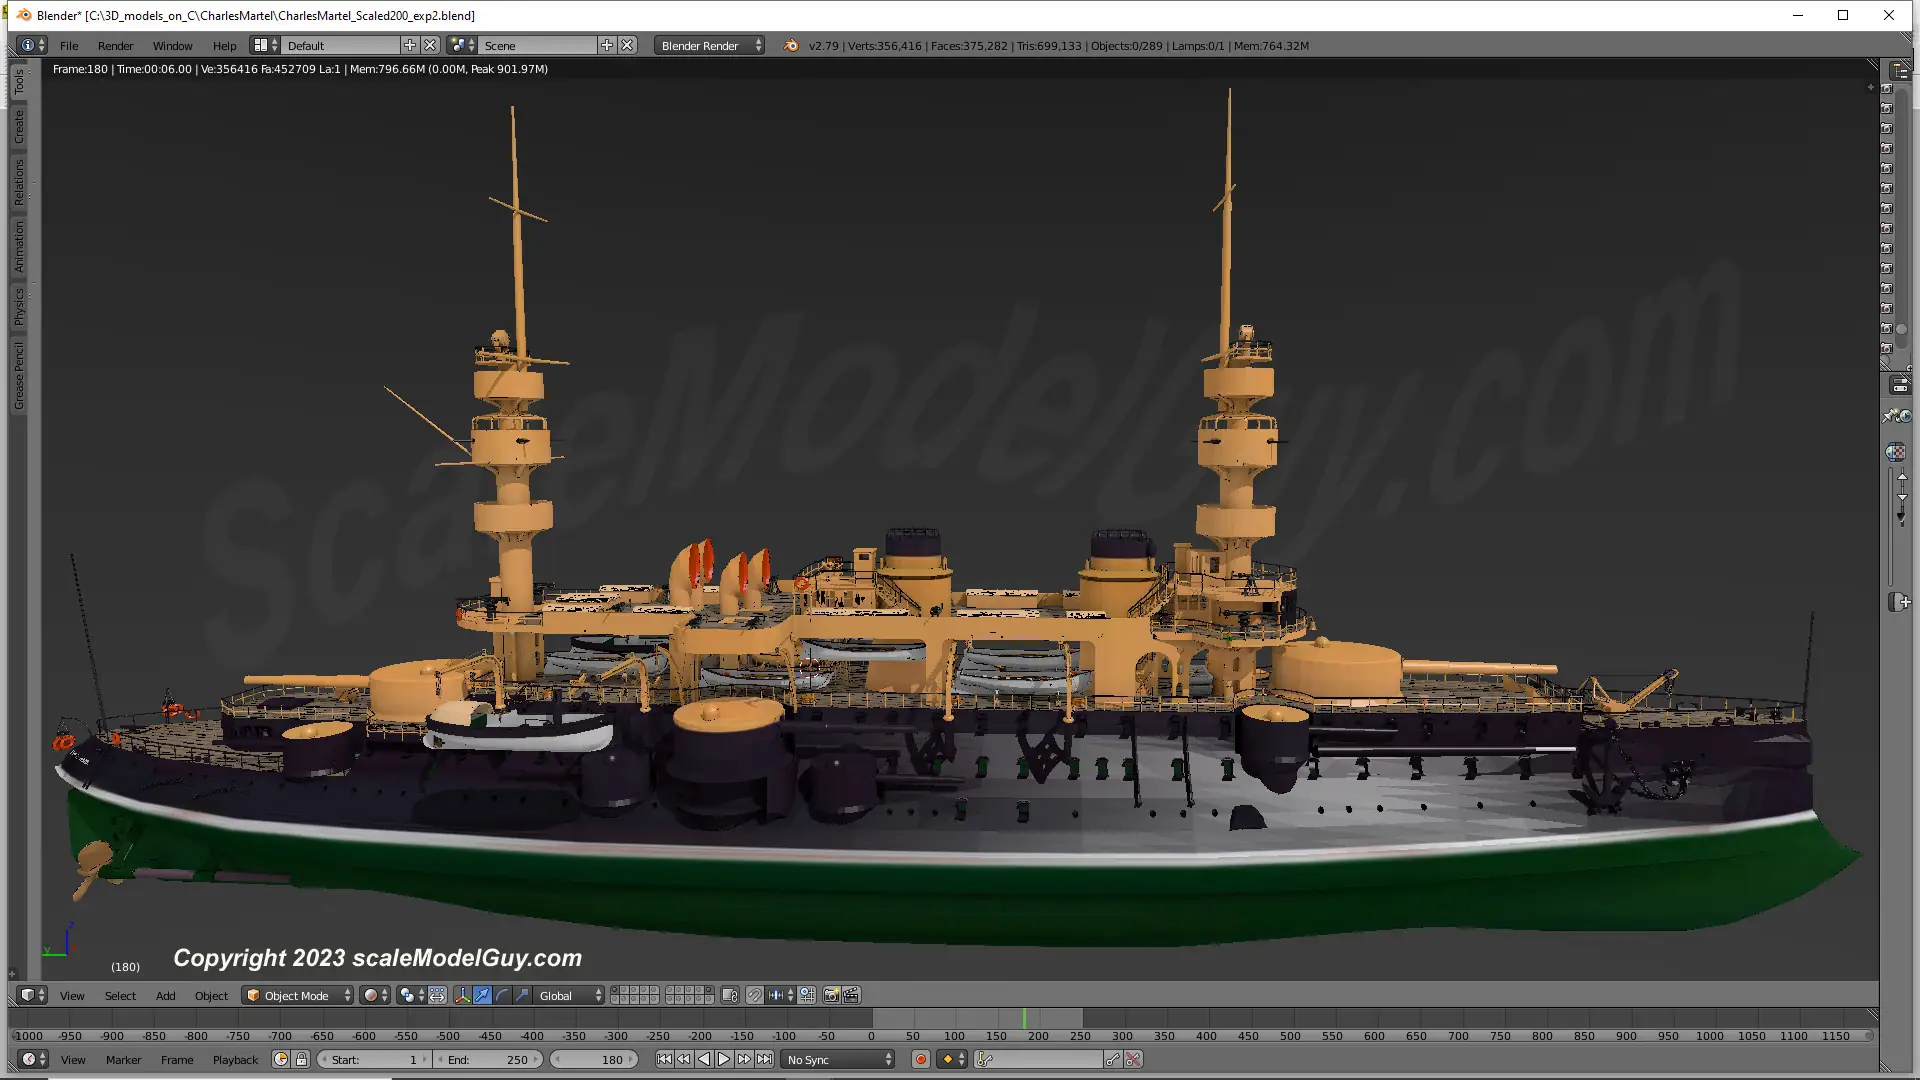
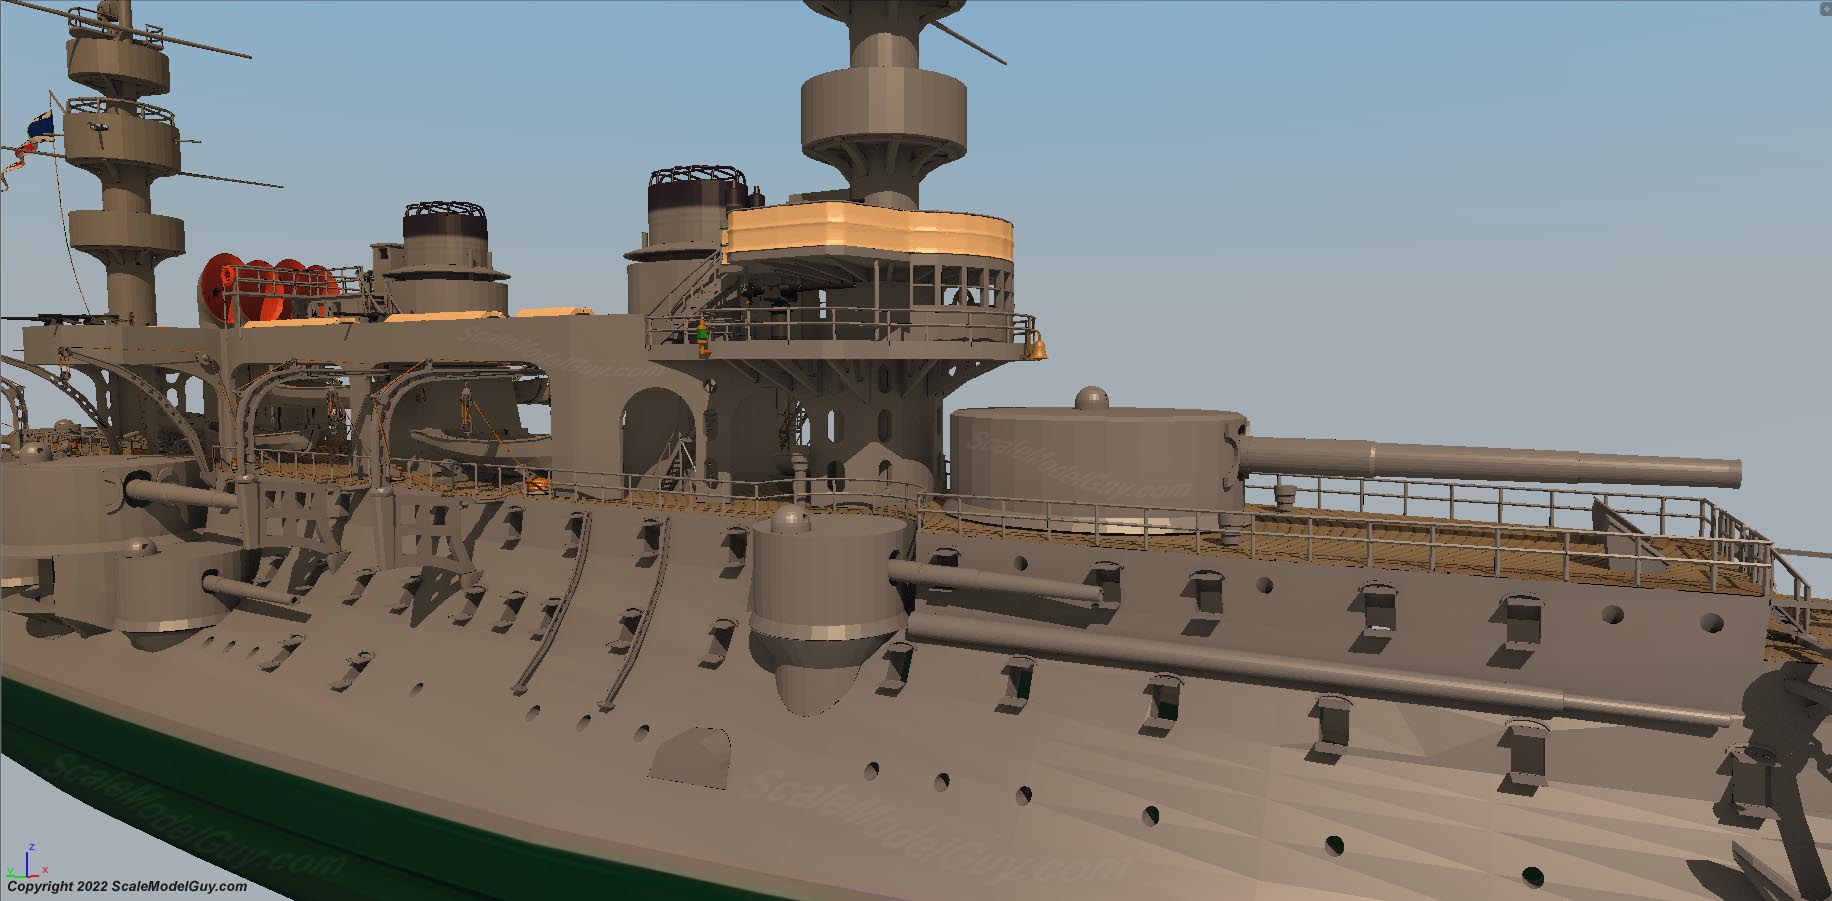
The largest changes were the addition of wooden decking, modifications to how the wing platforms above the port and starboard main guns connect to the flying deck and a reworking of the huge air intakes.
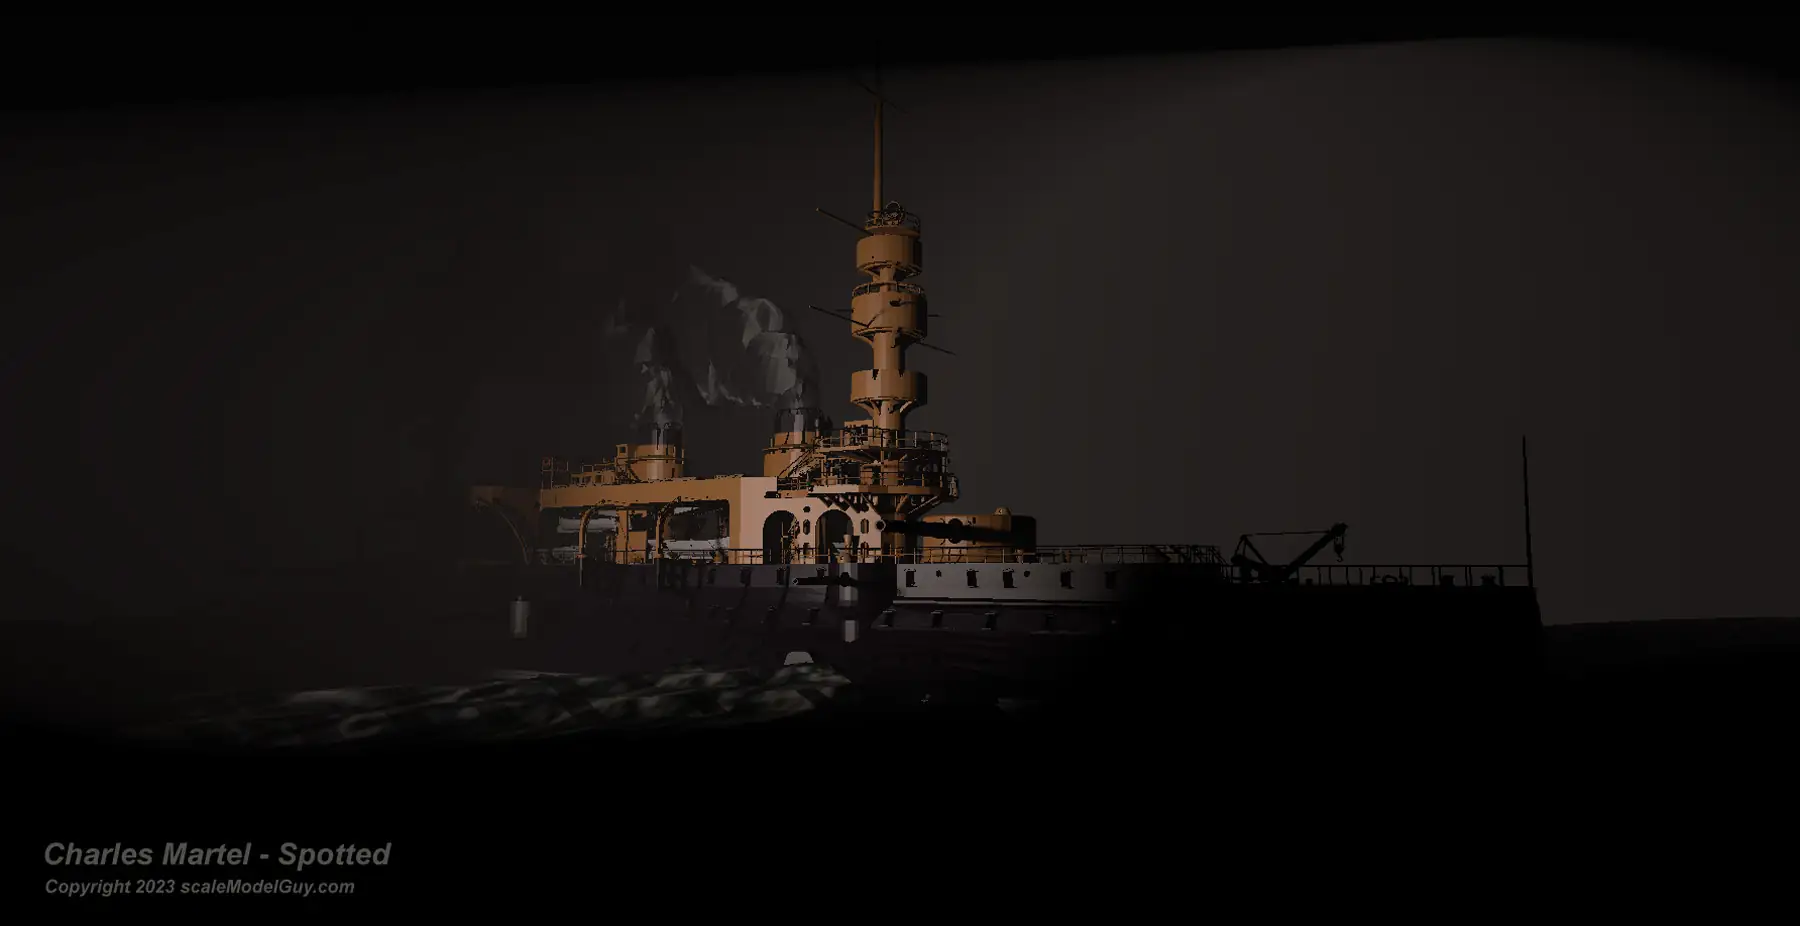
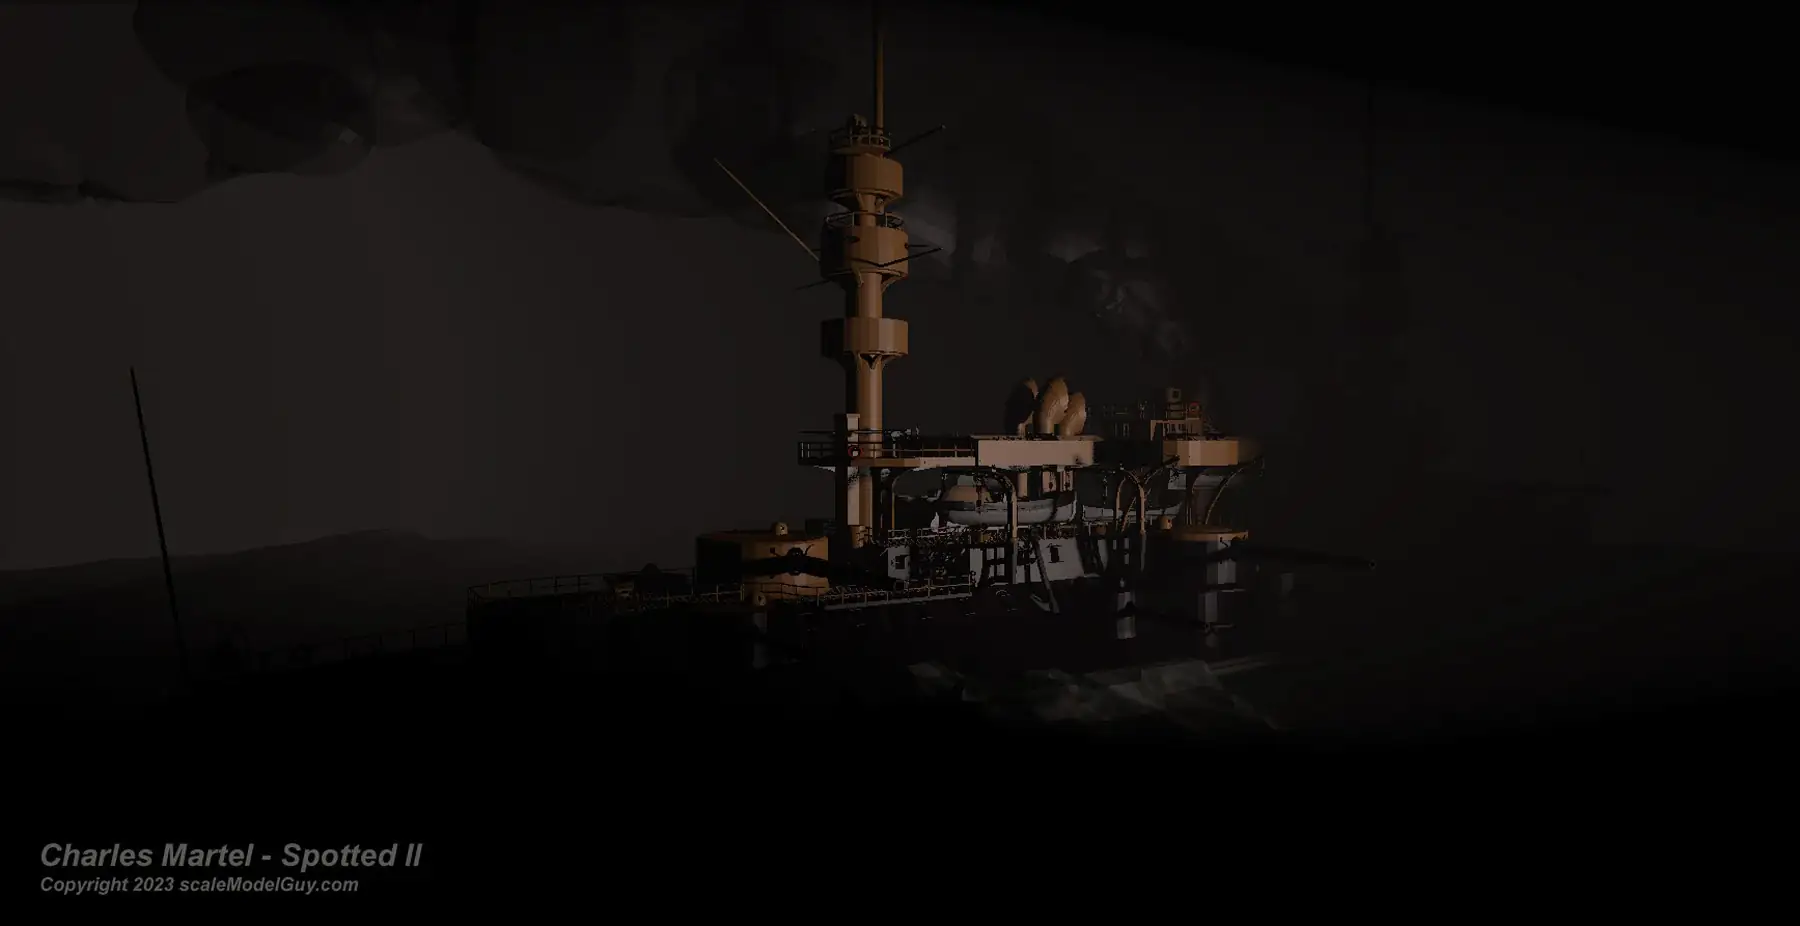
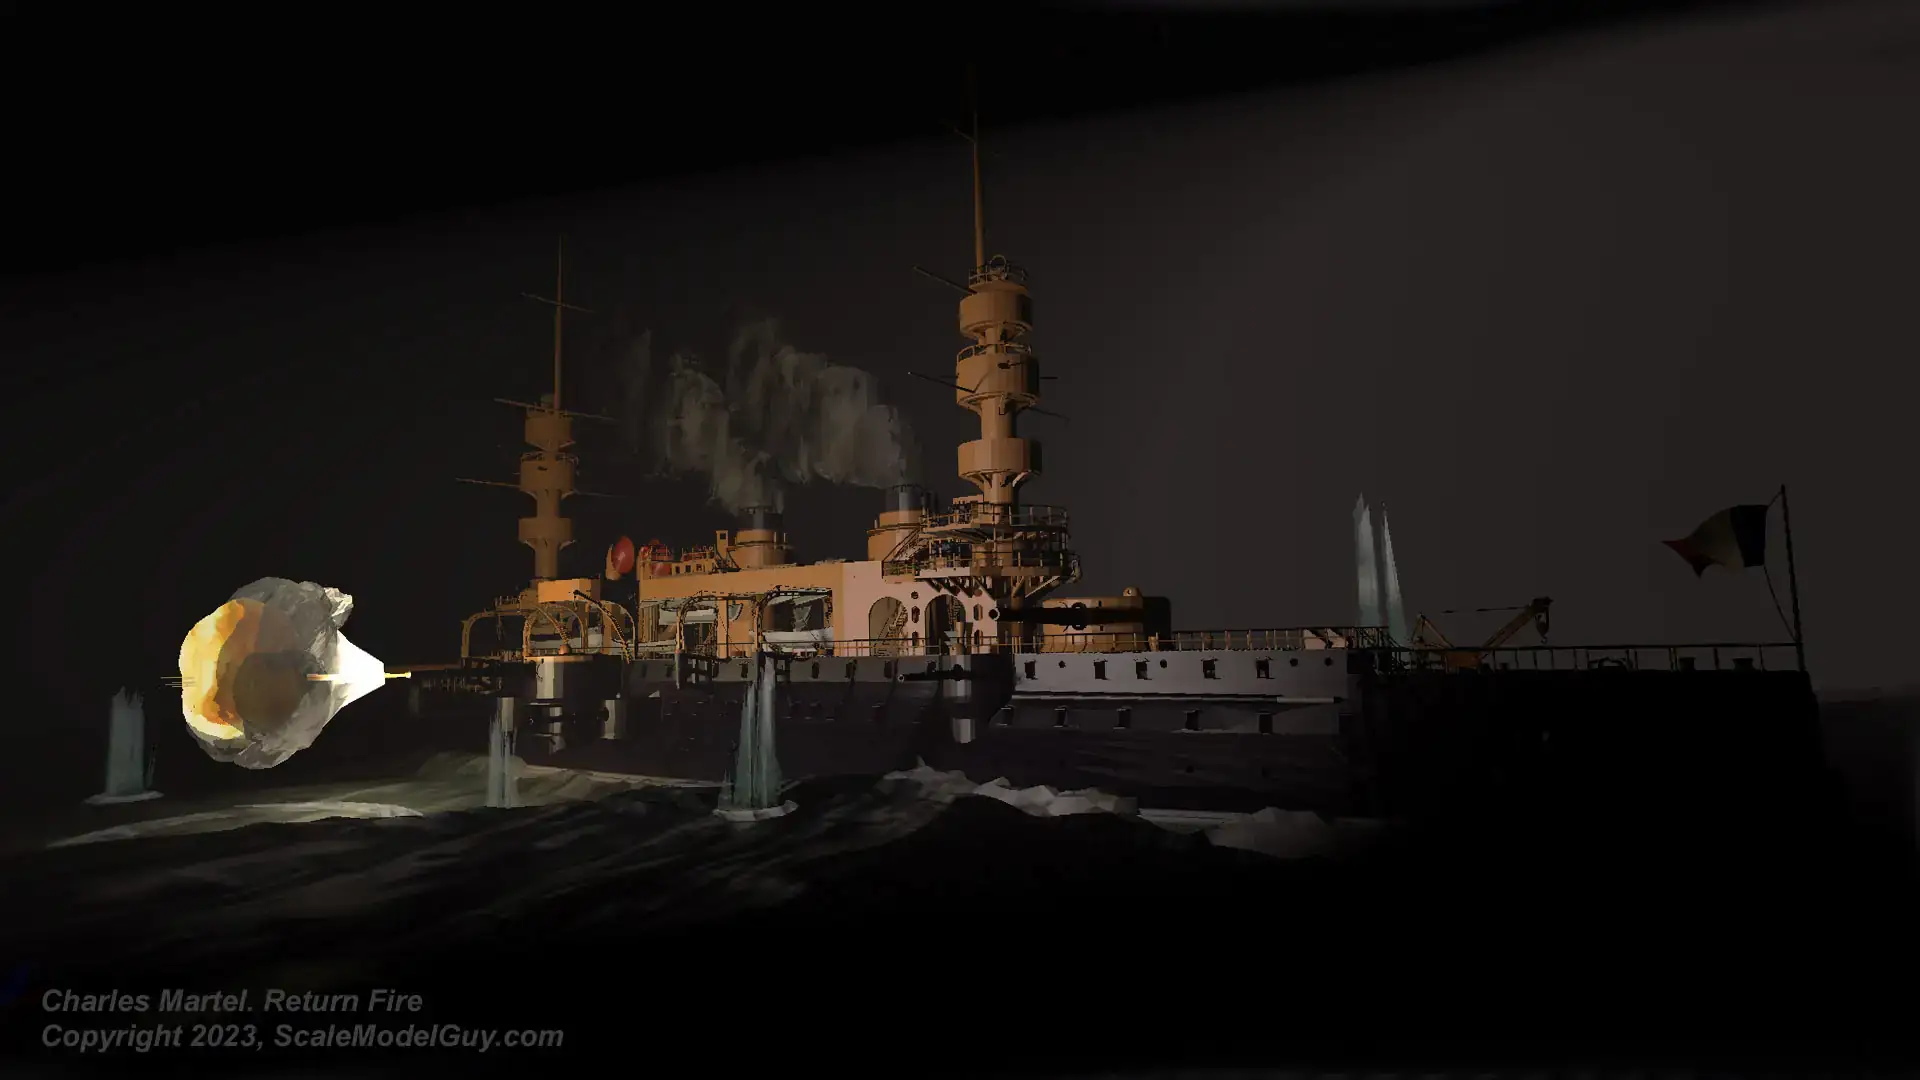
I’ve also been experimenting more and more with Blender features that have nothing to do with printing my models: materials, textures and lighting – They do let me show my Blender models in a new more attractive way and it’s a lot of fun, kind of like coloring for grown nerds!
Update February 19, 2023
Lower Hull Mostly Done
I’ve finished the bulk of the work that can be done without the new upper flying deck parts. I need to wait for warmer weather to reprint them, should be doable in a month or so.
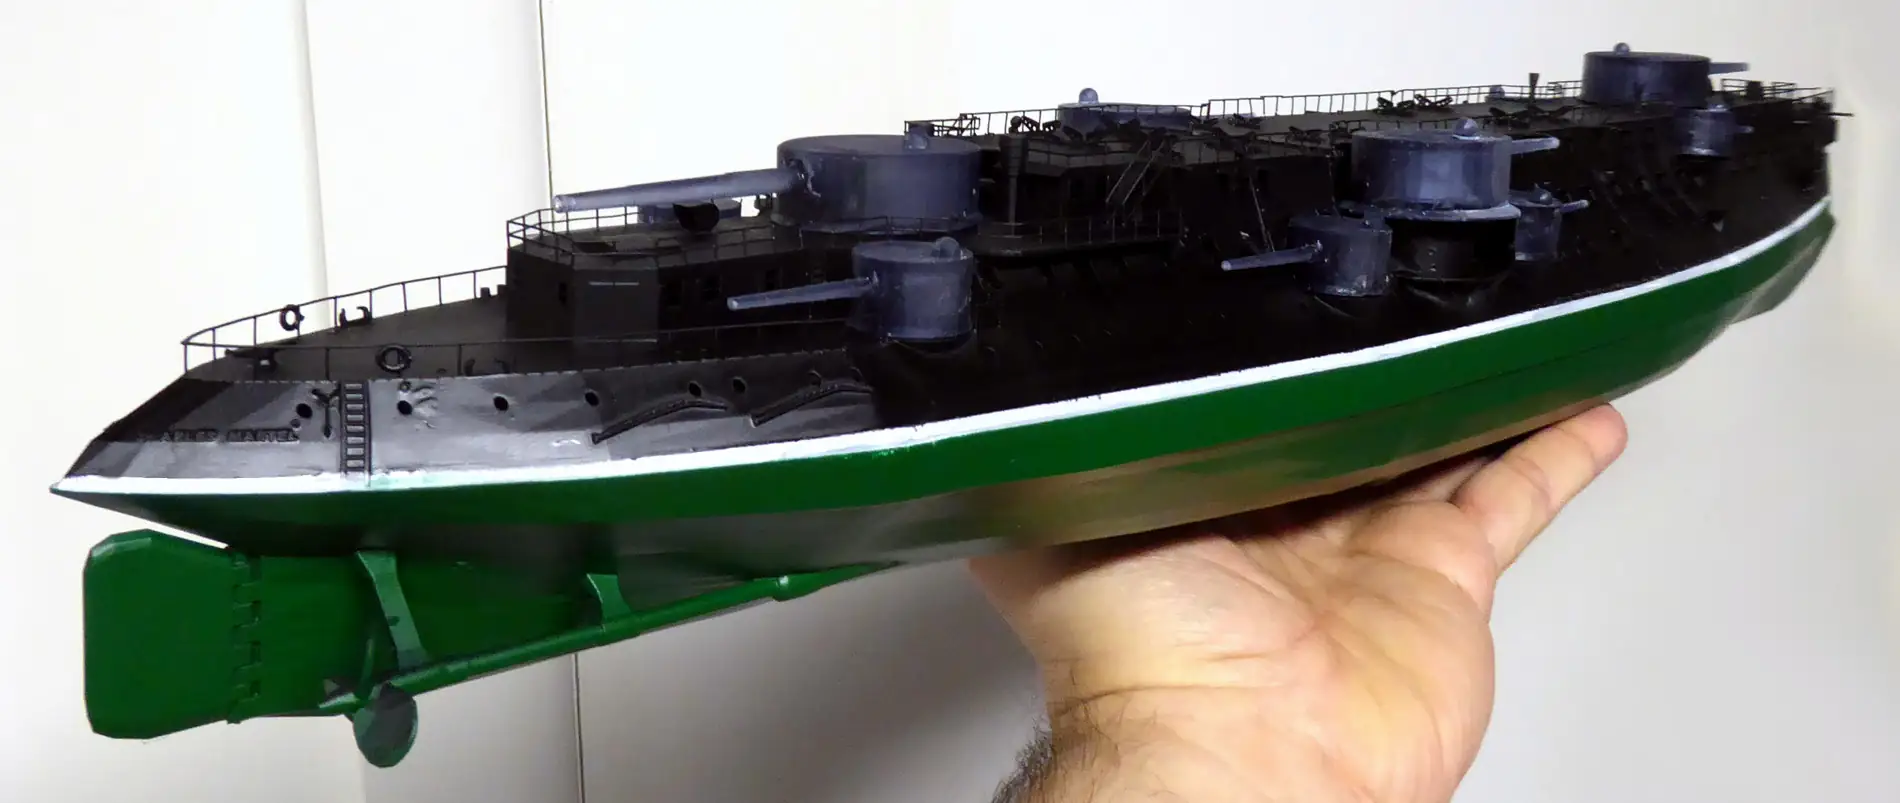
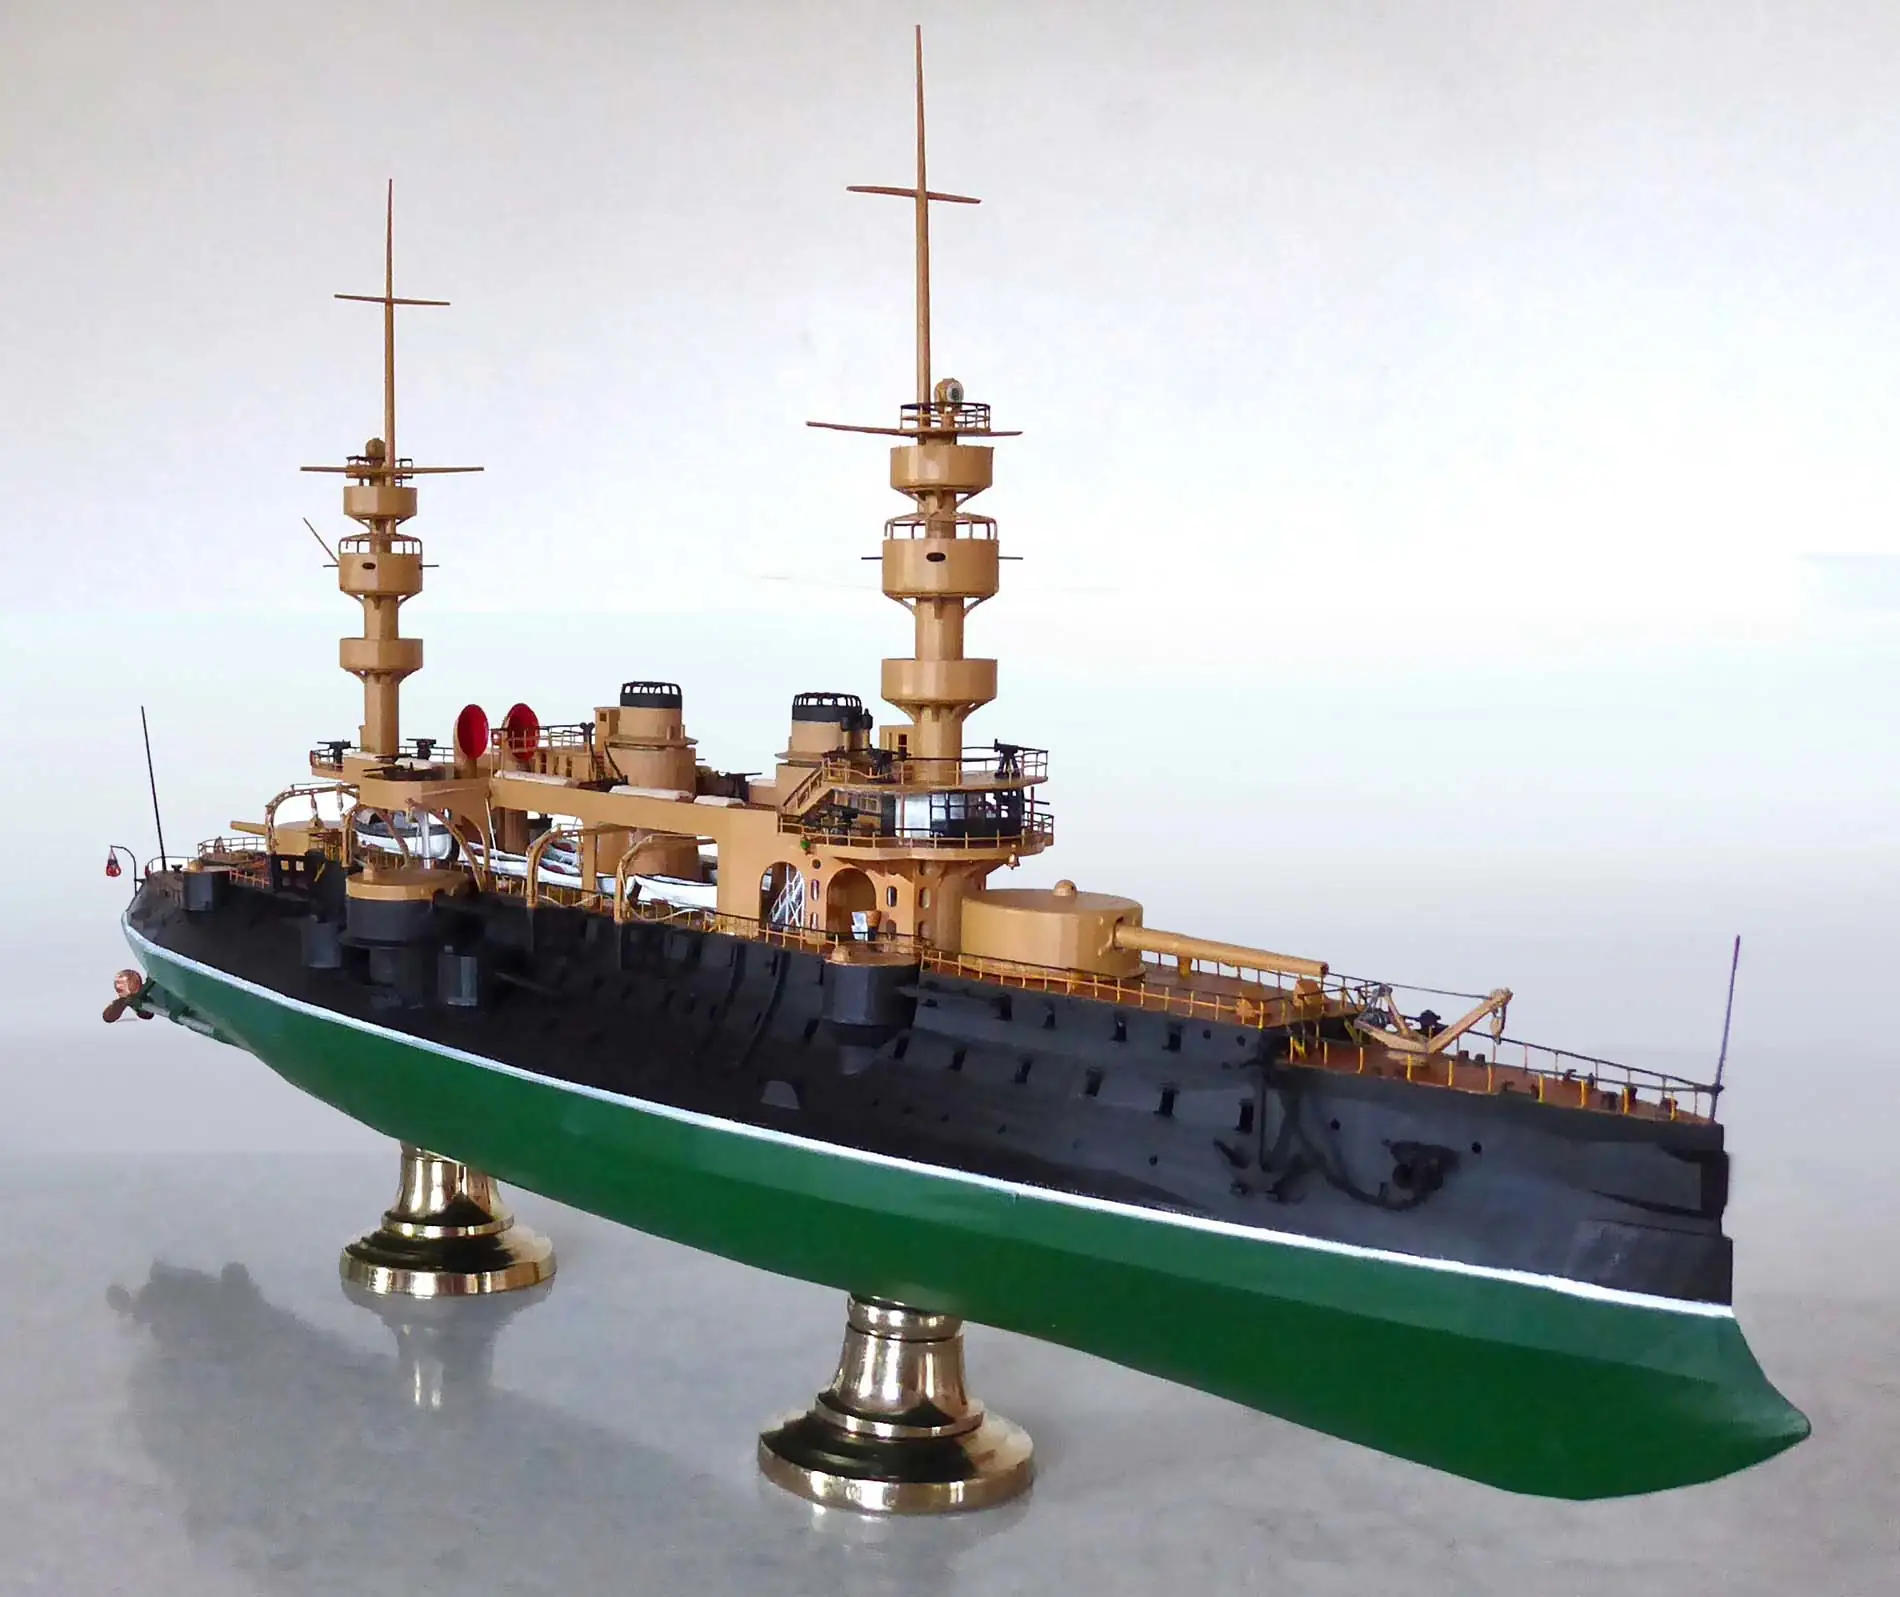
All the davits and utility craft are painted up and the deck is as done as it will ever be. I also finally made up my mind on the upper works color, I did go with buff and finally committed to a shade.
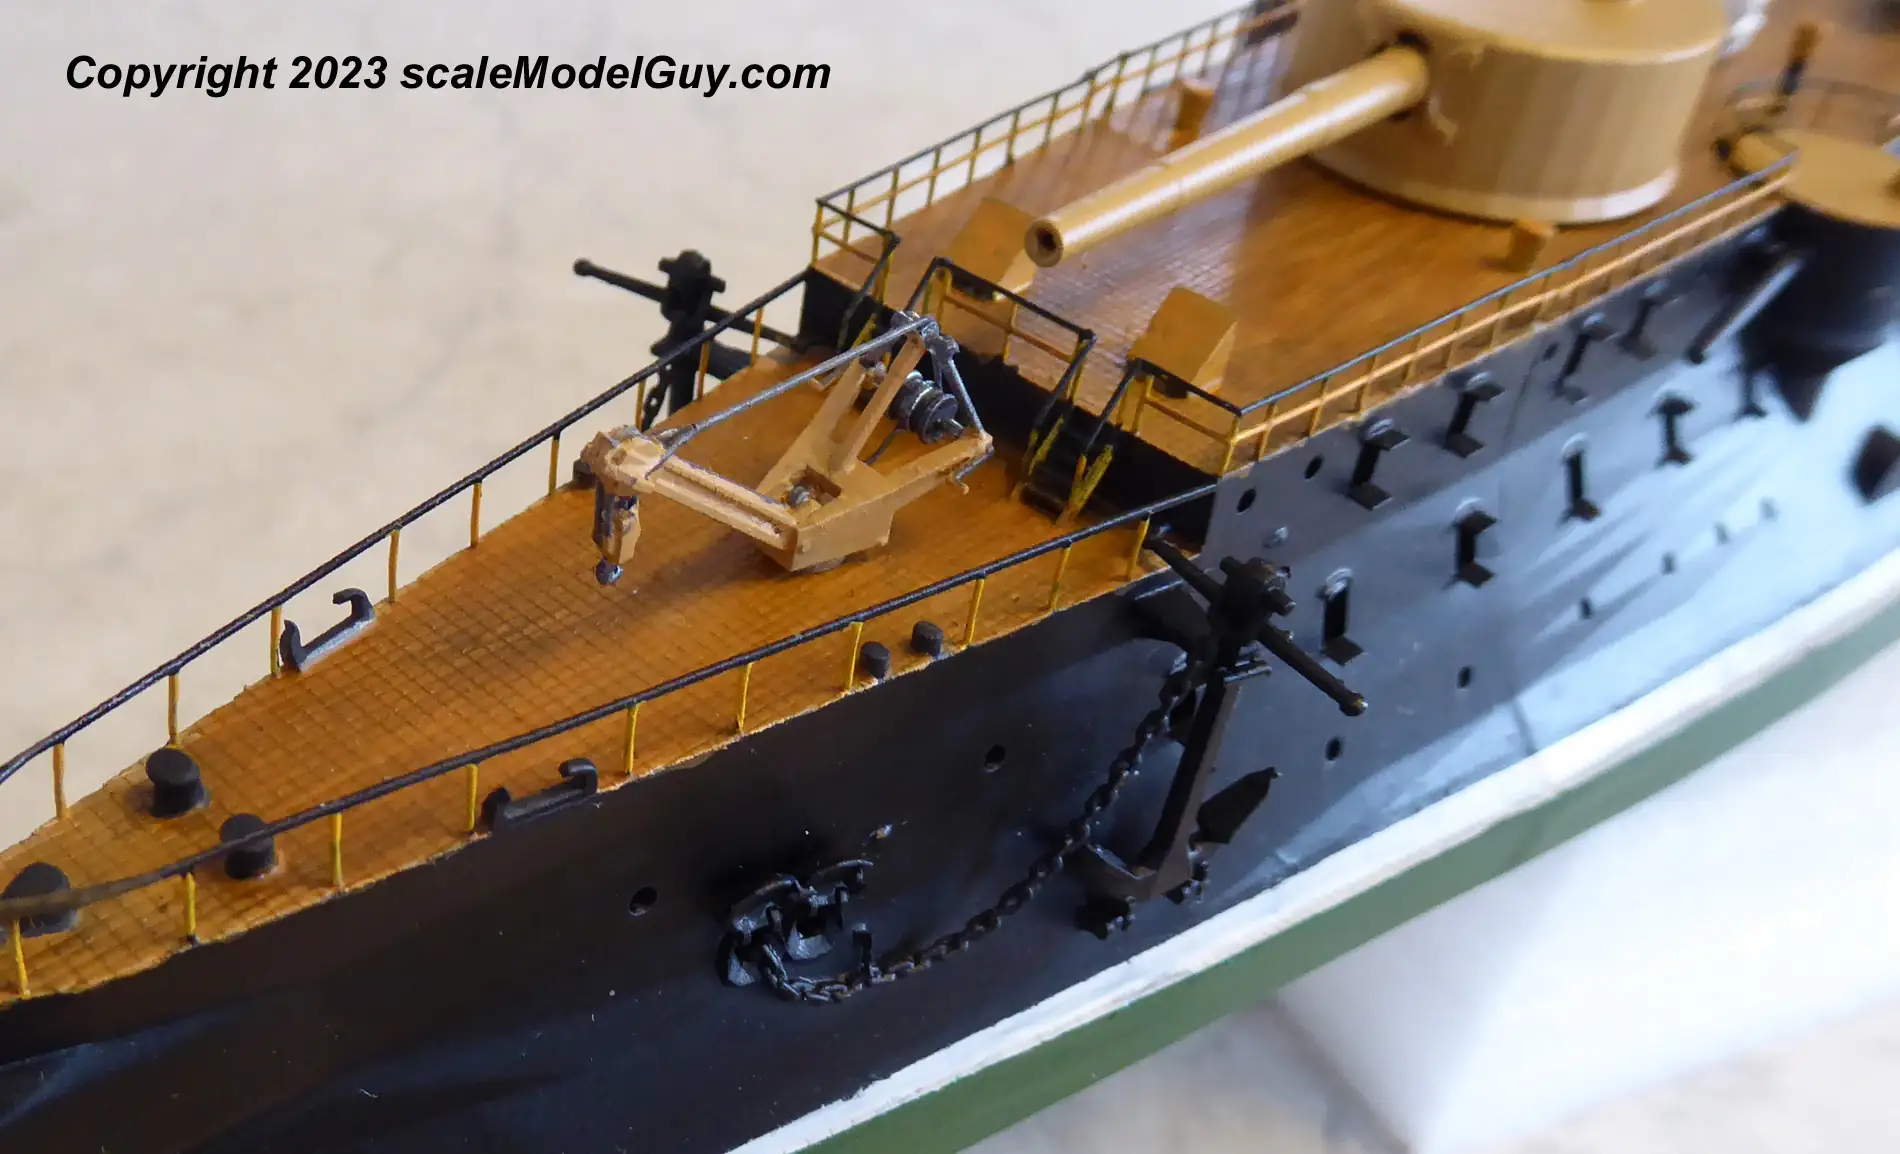
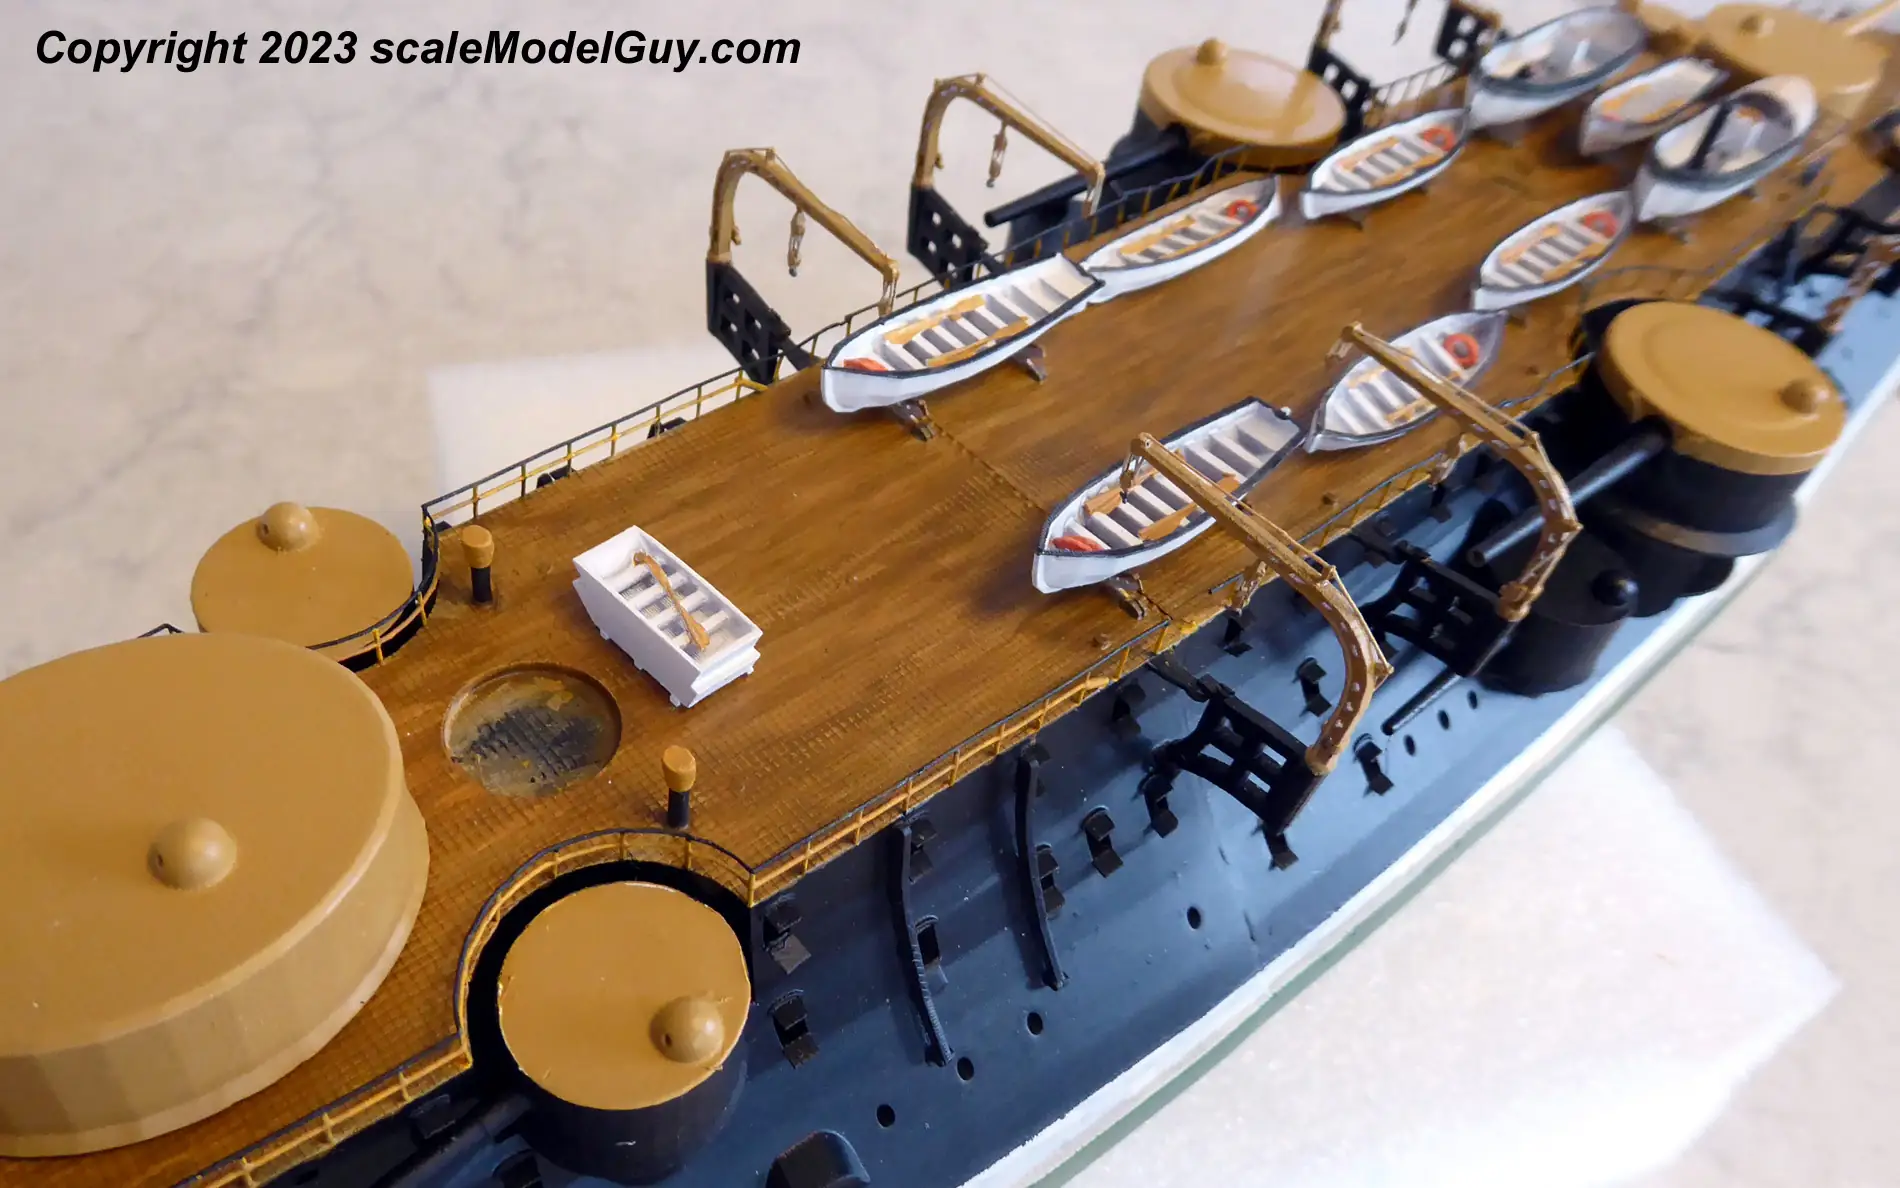
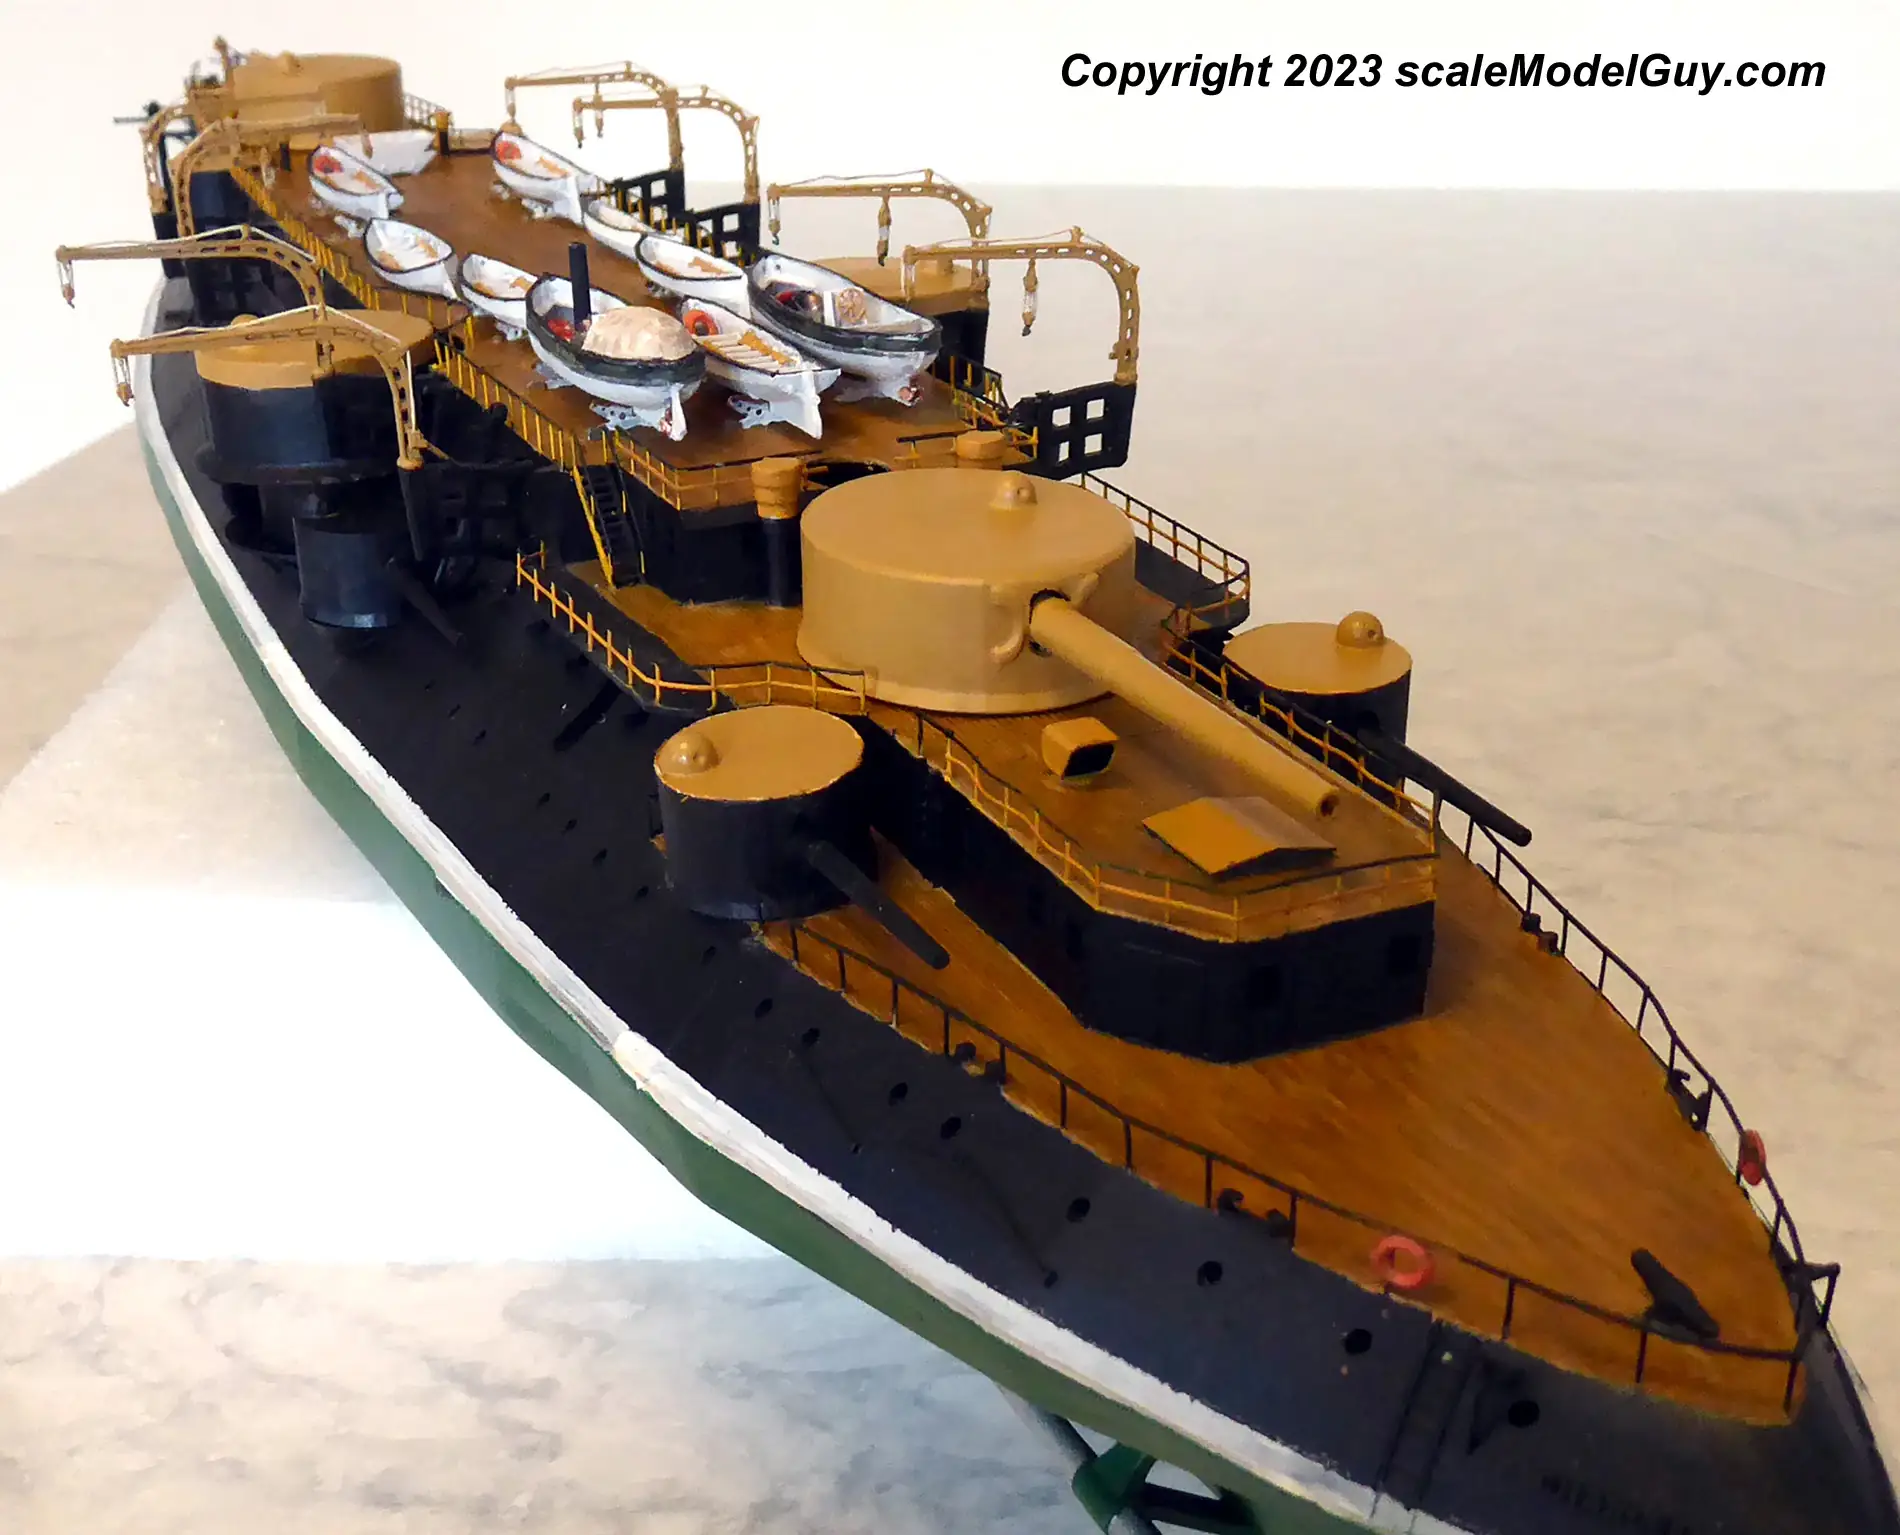
The davits, small boats, turrets and bow crane are not yet secured, I’m waiting to make up my mind on how I want to mount/display the ship first. I have some brass stands but am on the fence as to weather I want to secure them to some type of wooden display base or not or just to the ship. After the display task is settled, I do have some handling repairs that need to happen. Should have plenty of time to wrap these things up before the upper works are reprinted.
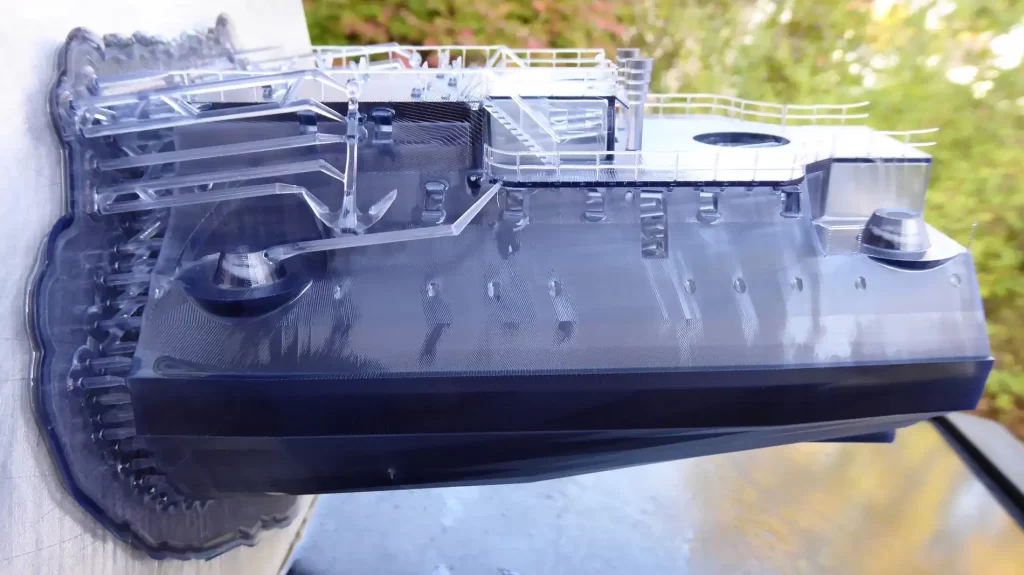
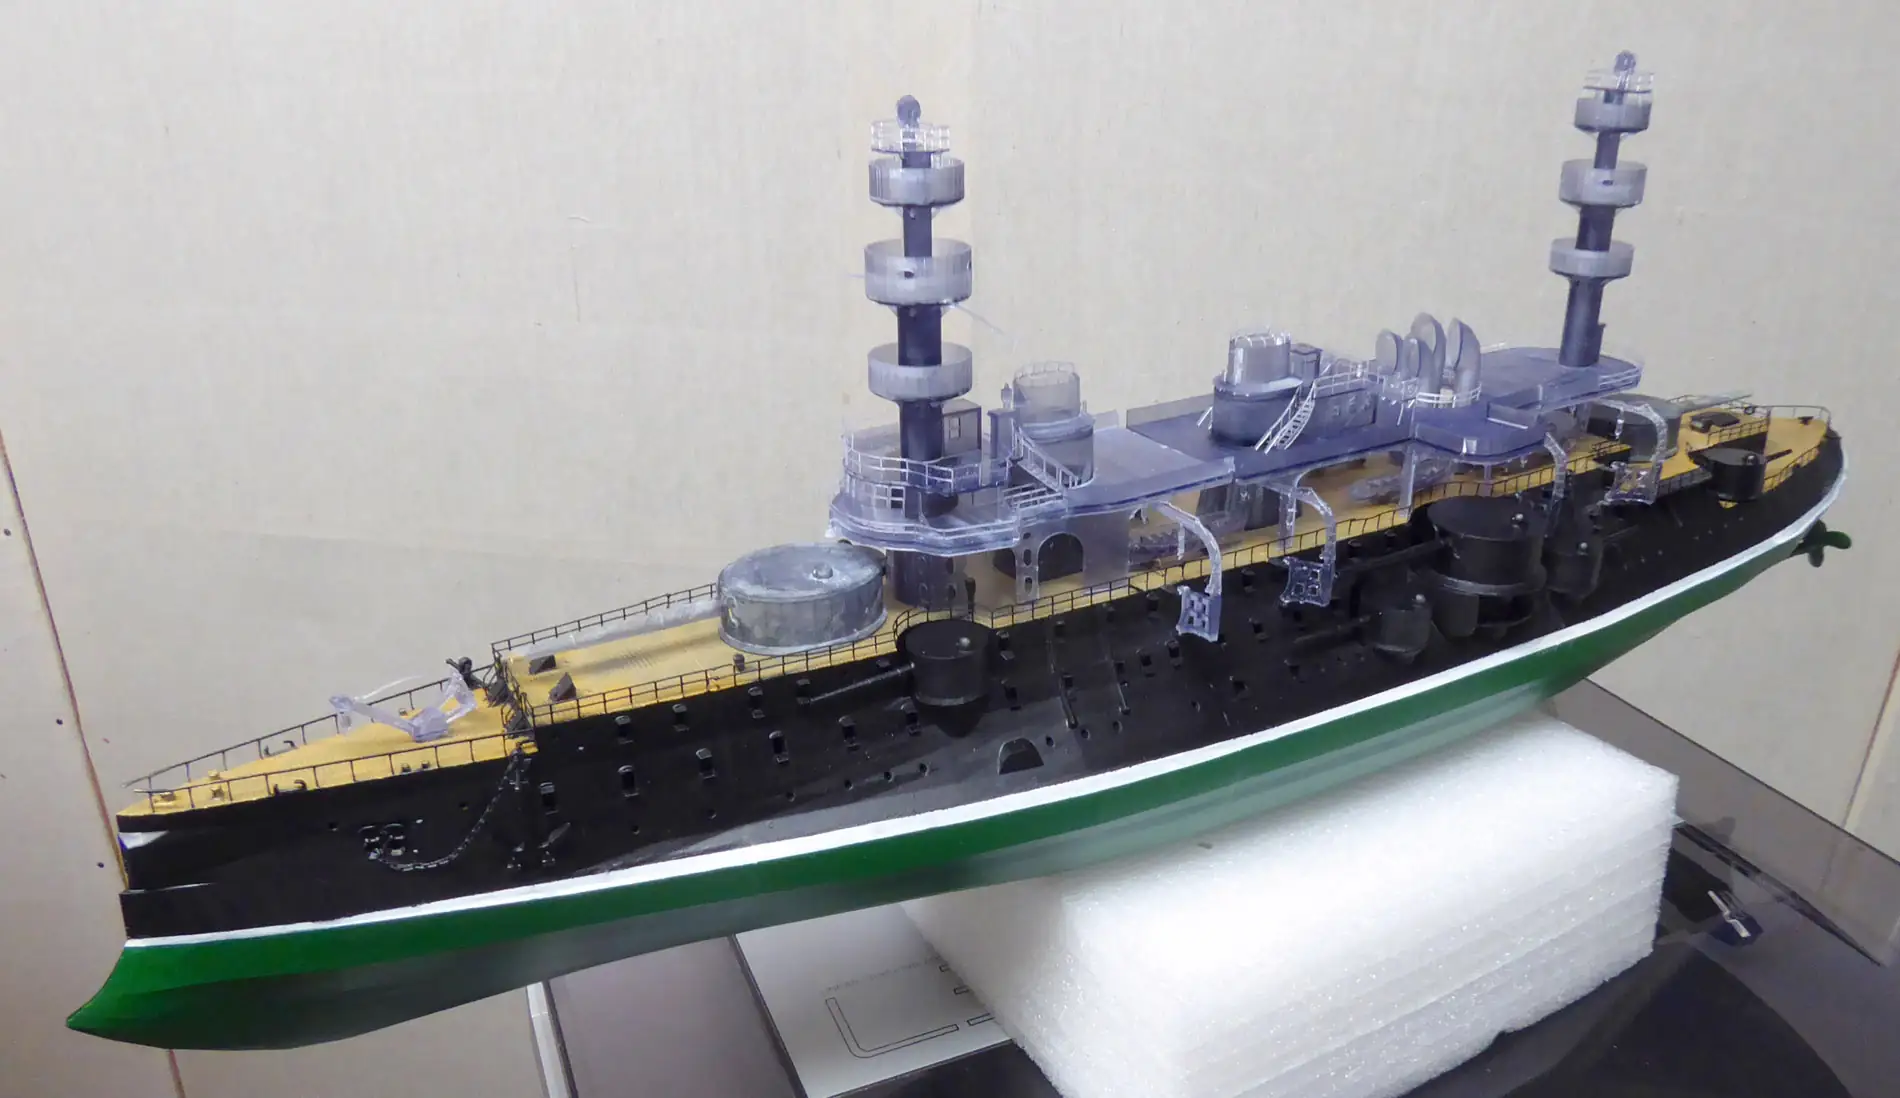
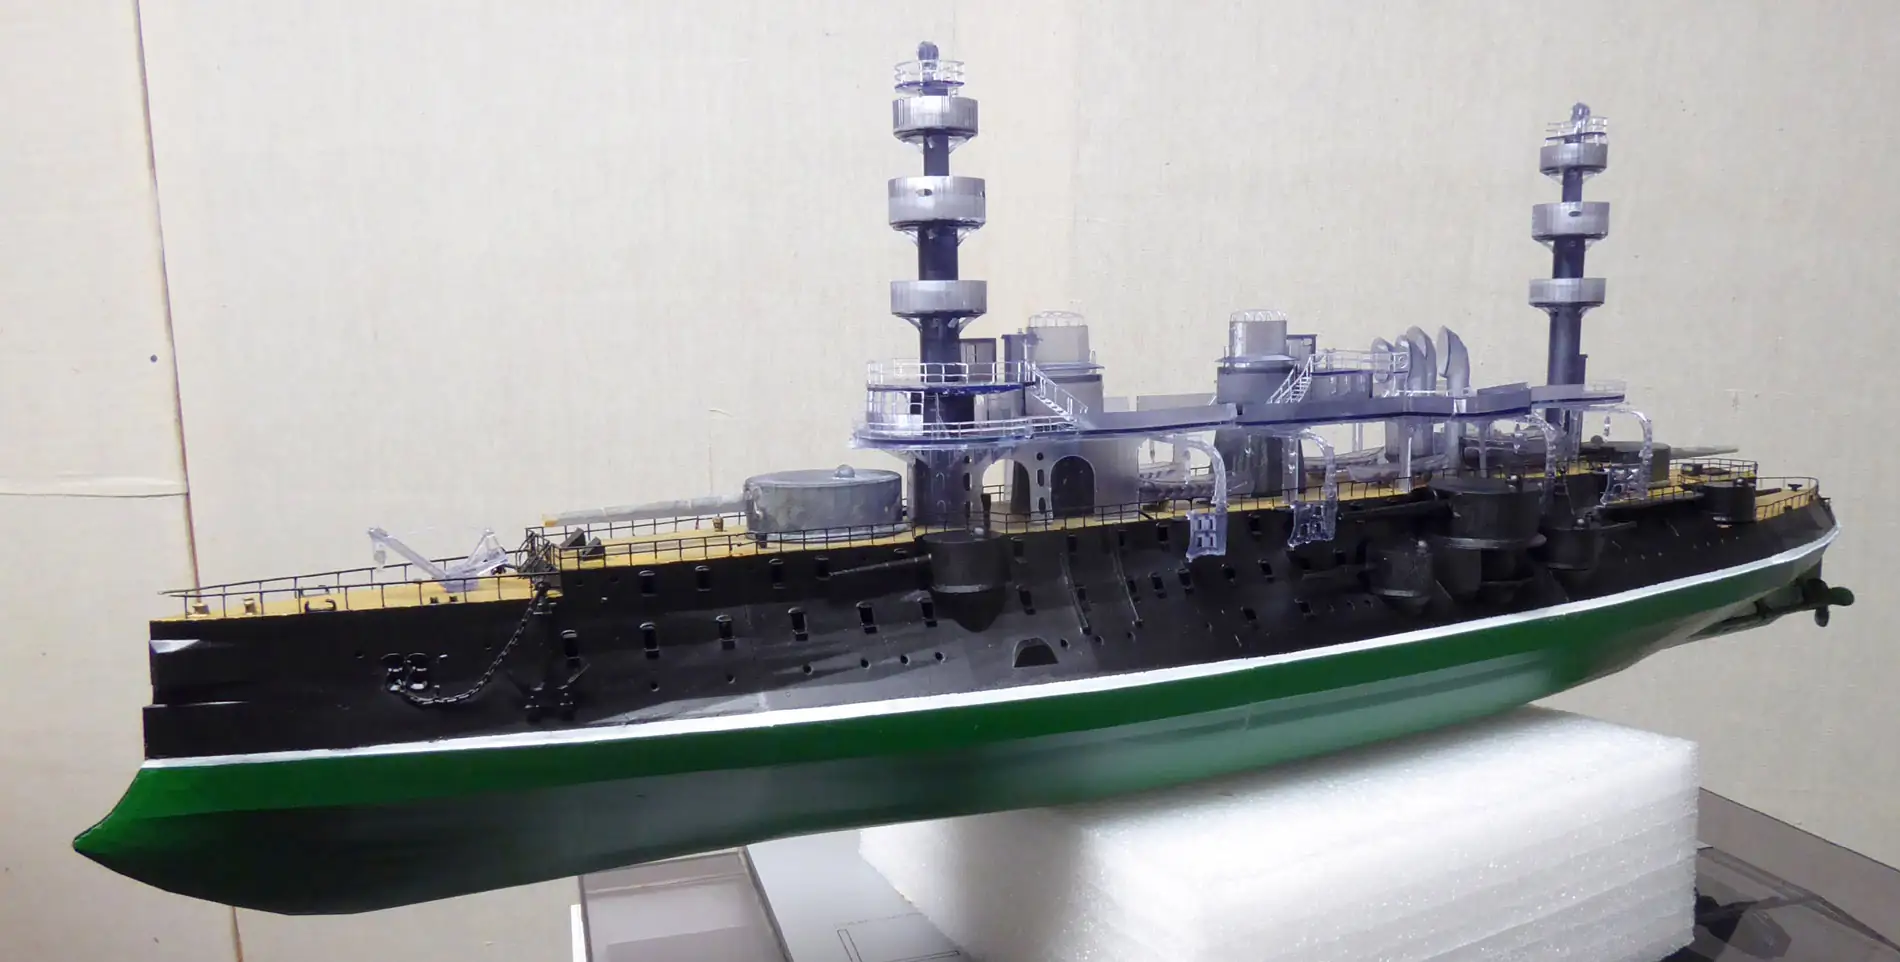
Update February 23, 2023
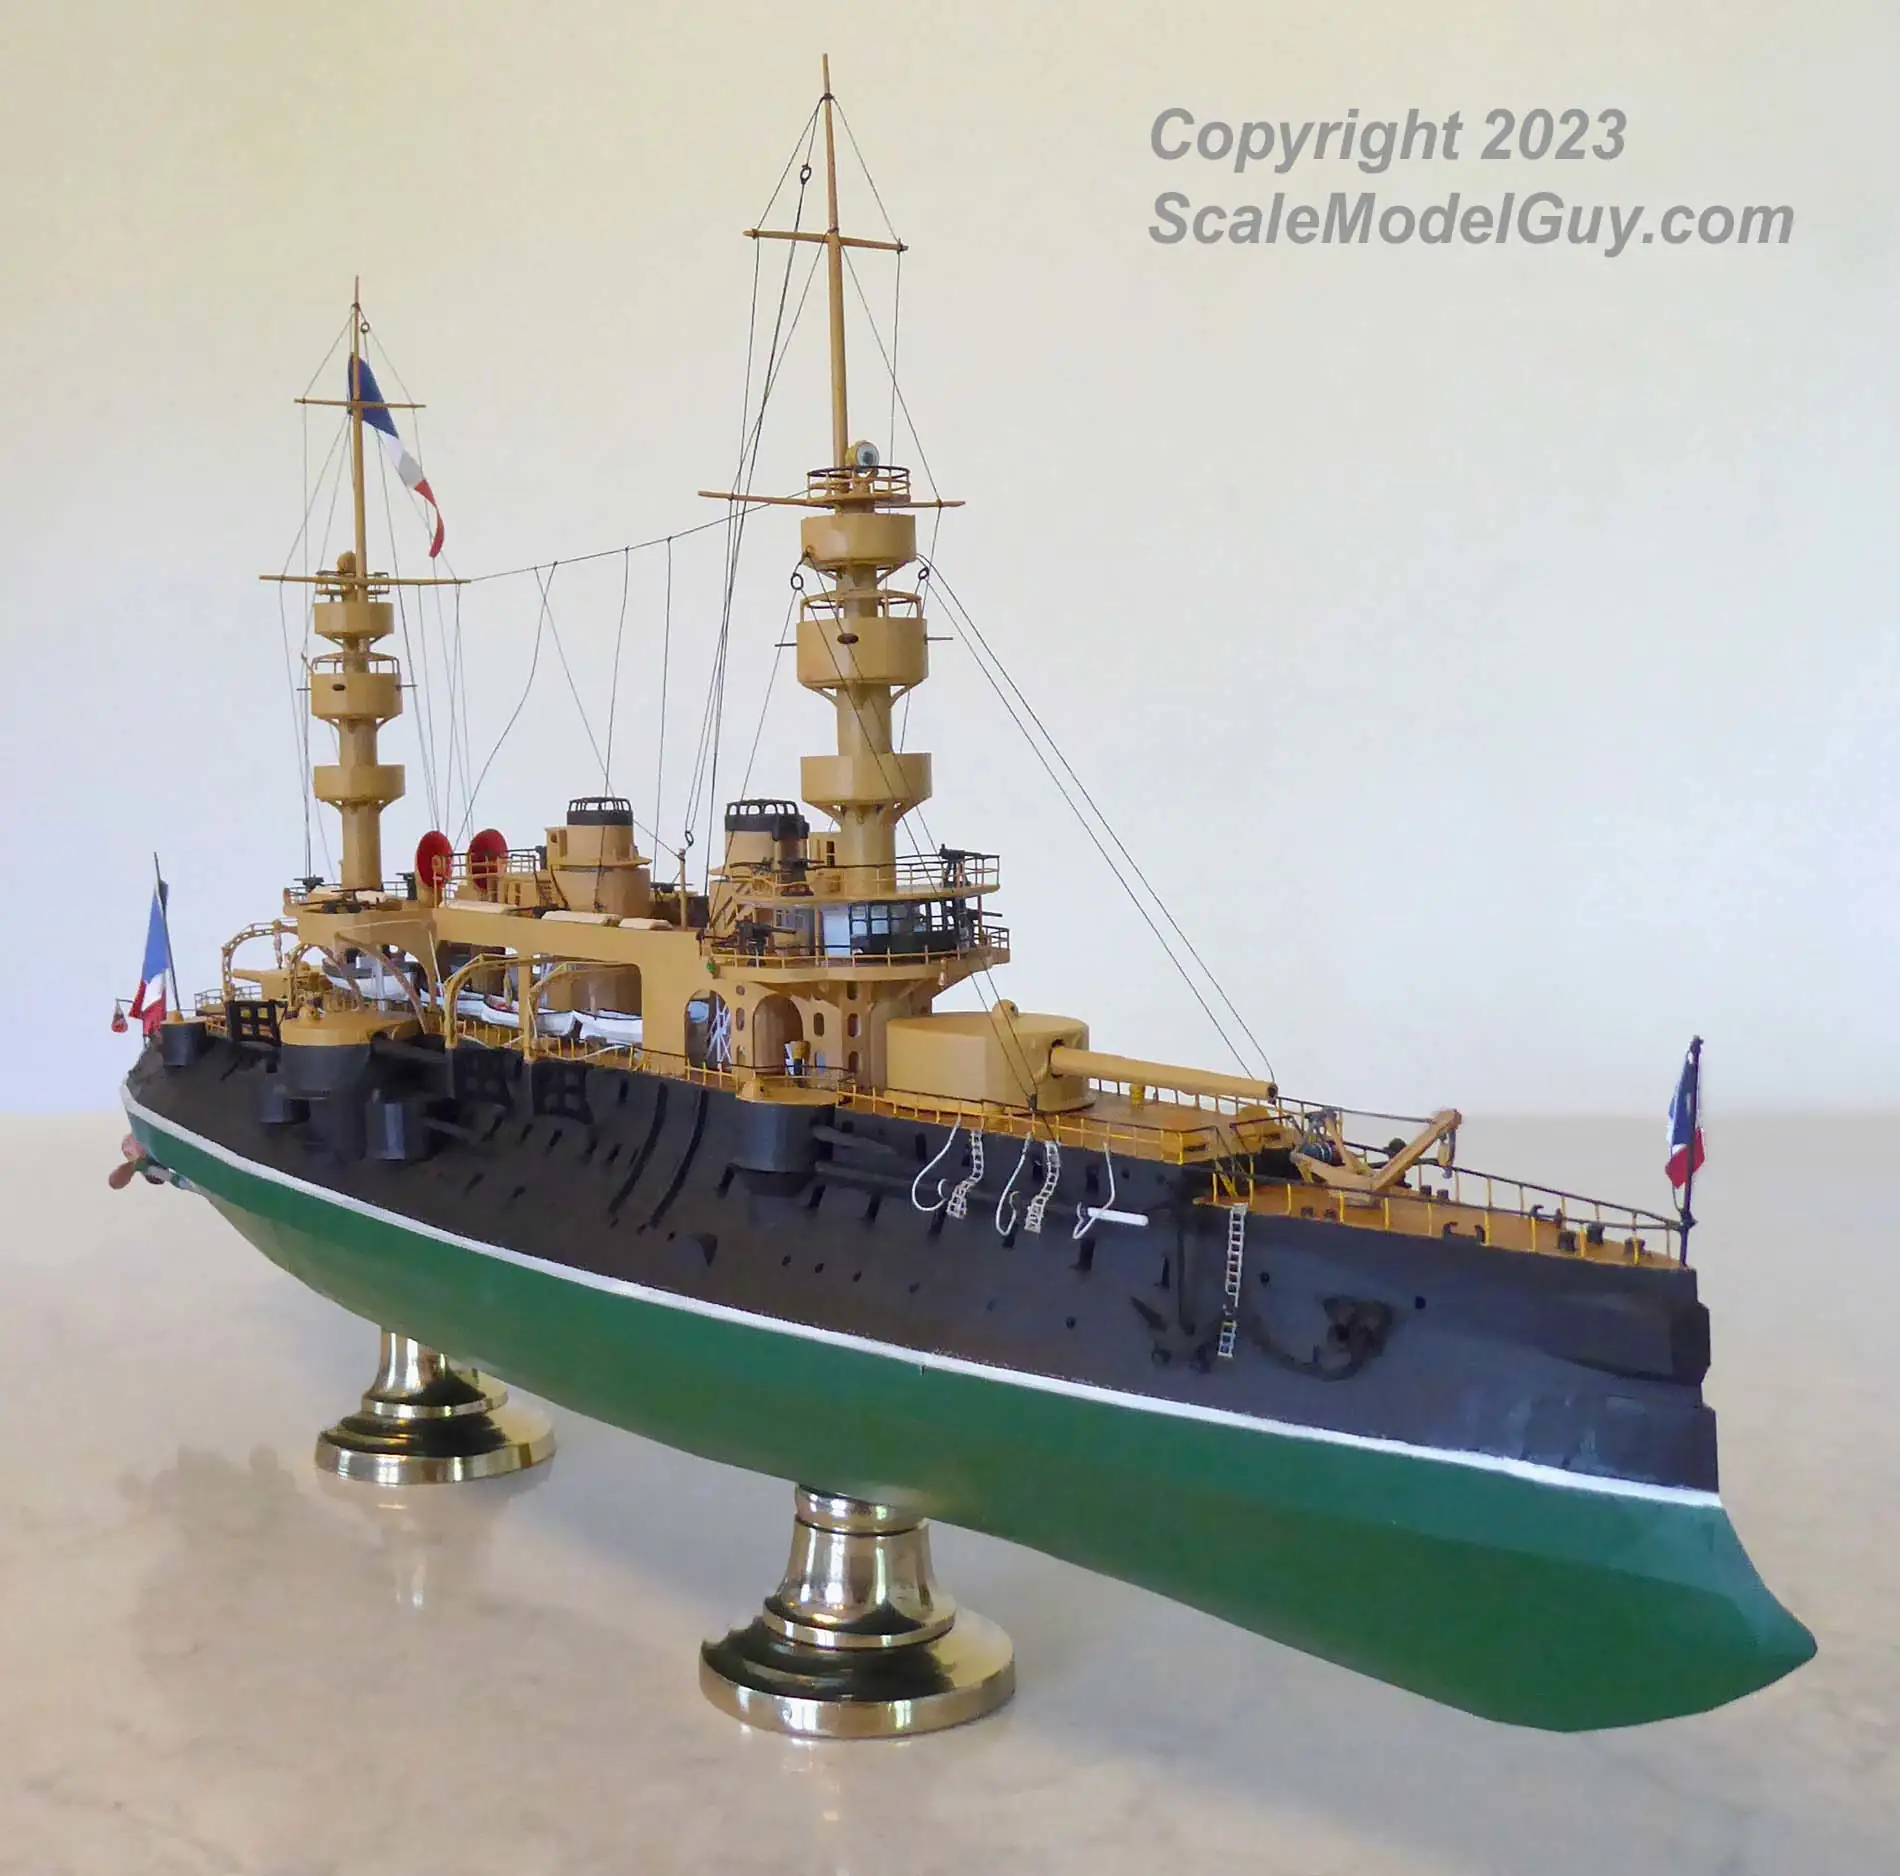
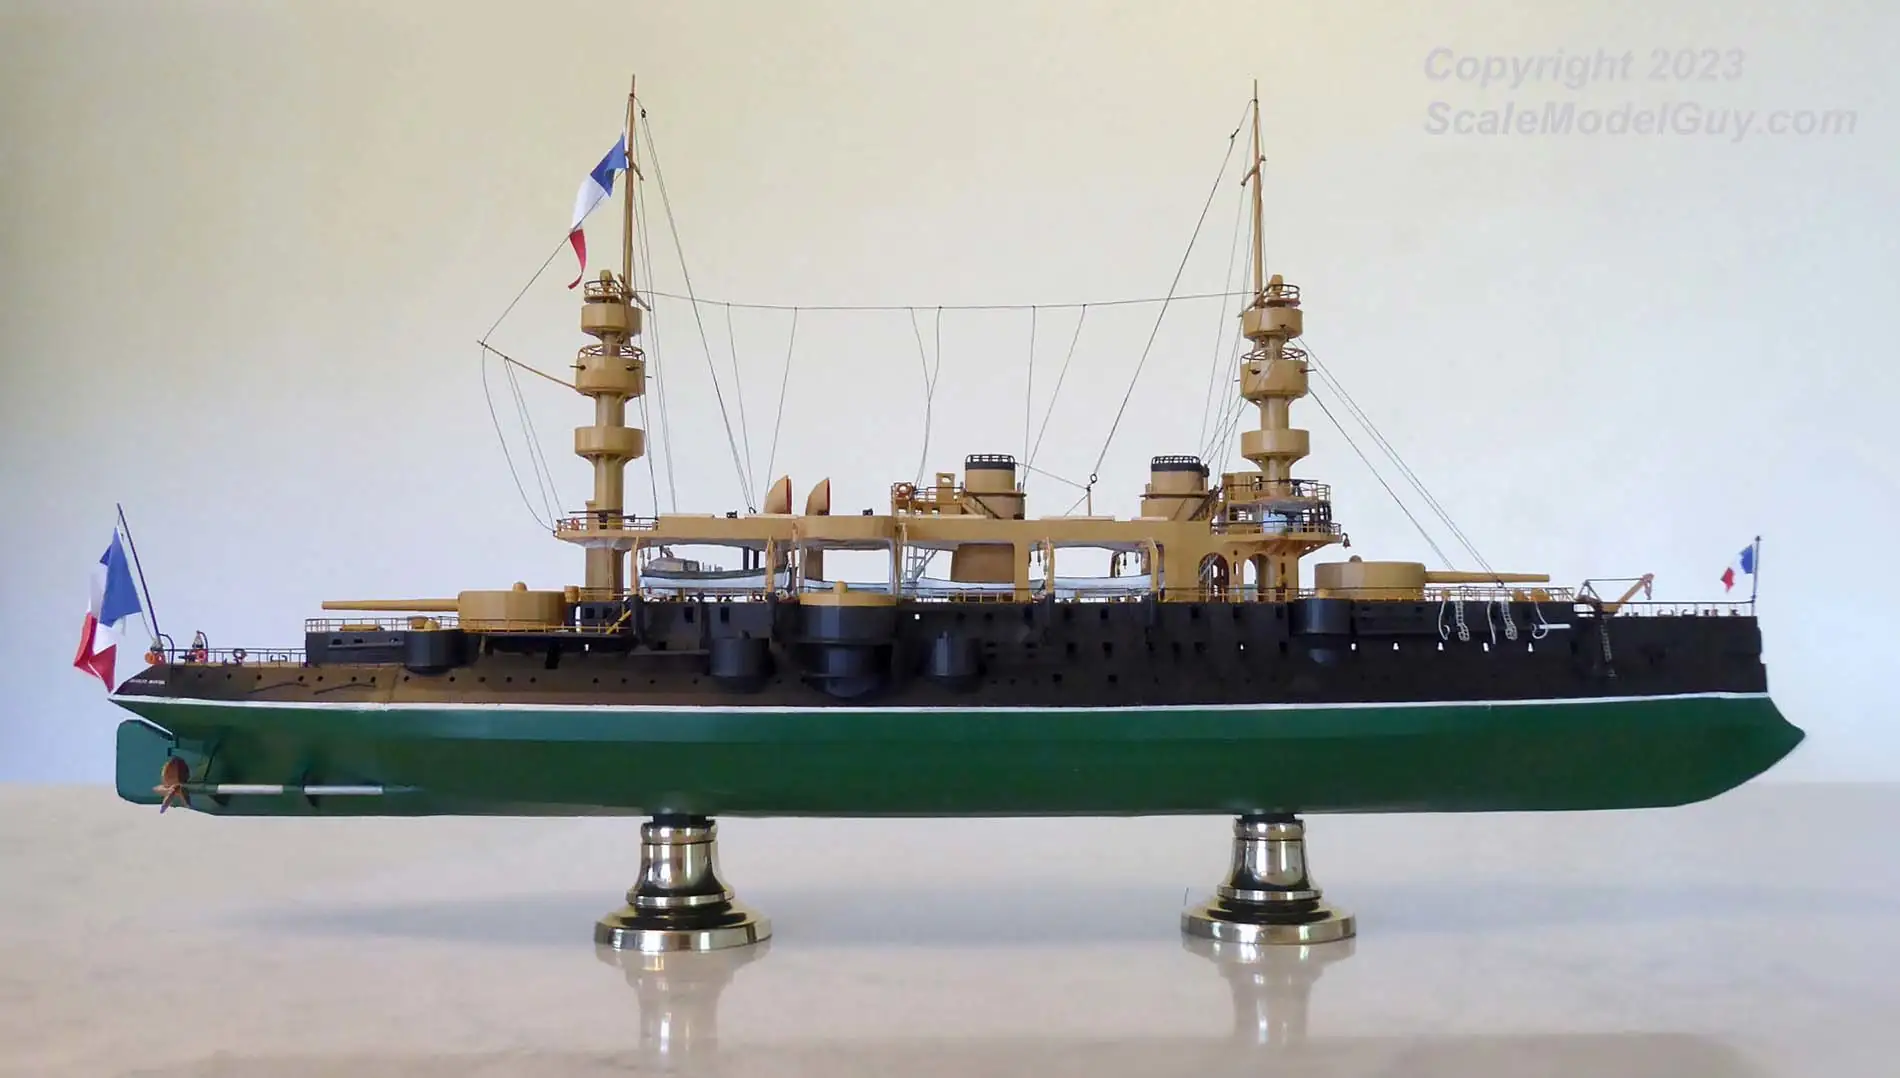
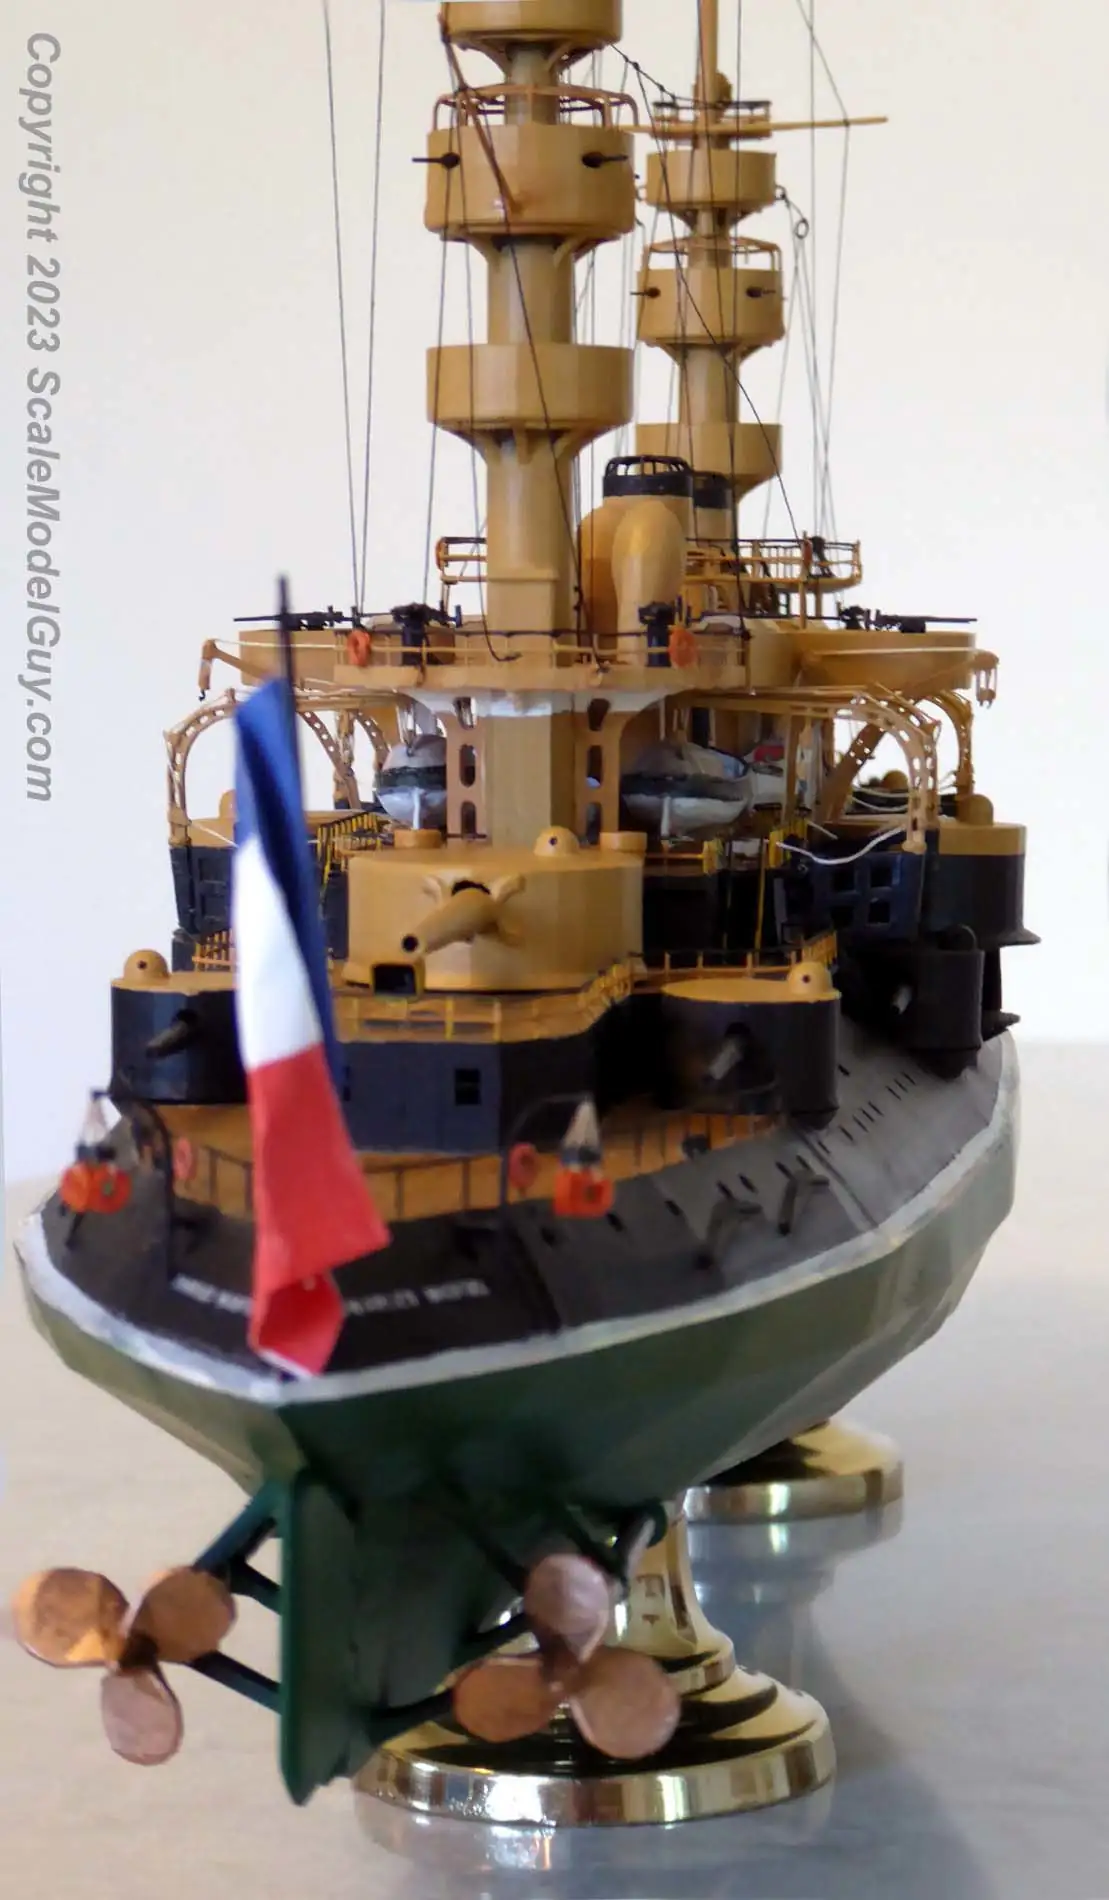
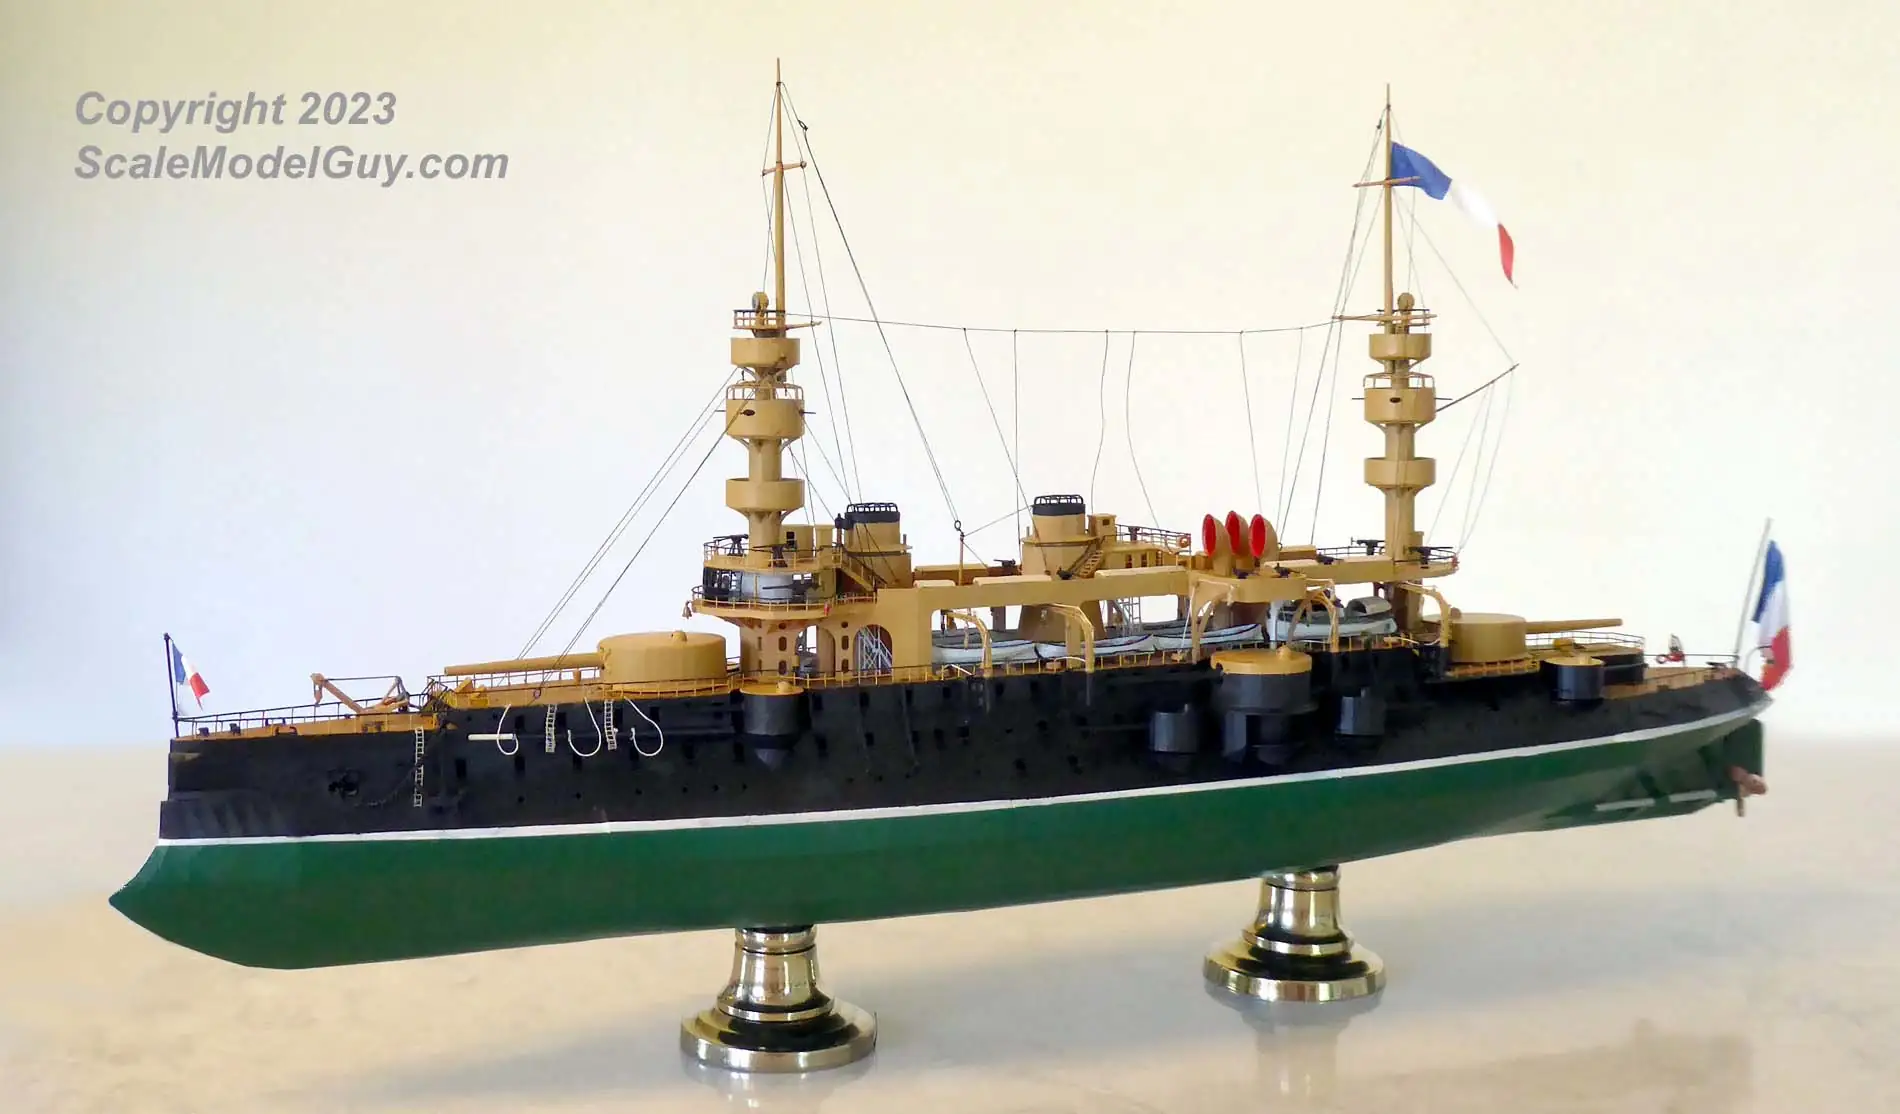
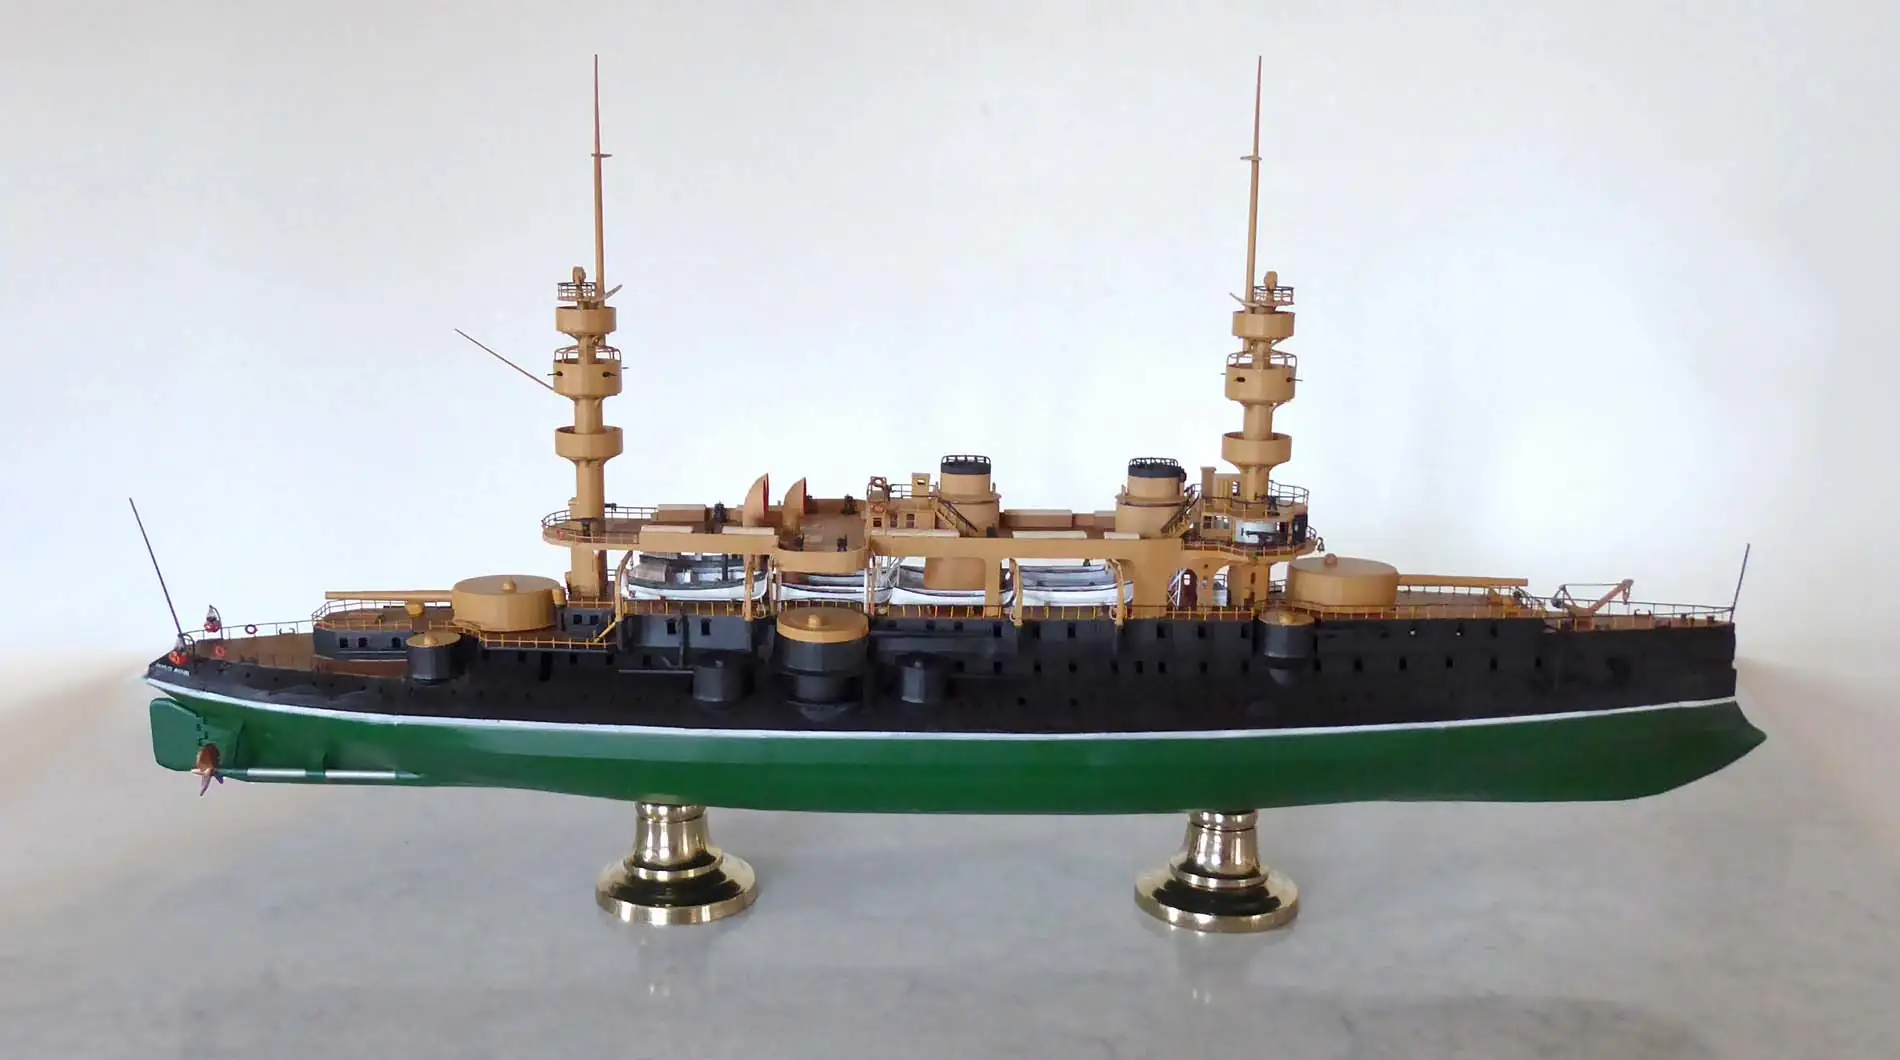
Up on a pedestal (or two)
With the attachment of its spiffy brass stands, Charles Martel has passed yet another hurdle and is shown bellow mocked up again with the old flying deck.
The stands are actually modified candlestick holders ordered from Amazon and are working great. I’ve been dreading this task, terrified that after all this effort I’d crack the hull while trying to drill holes into it for the stands. The holes allow screws to secure the stands into blocks of wood I had previously gorilla glued inside the hull just for this purpose. To help reduce the risk of damage, I used 4 drill bits, each one gradually increasing in size and all went well.
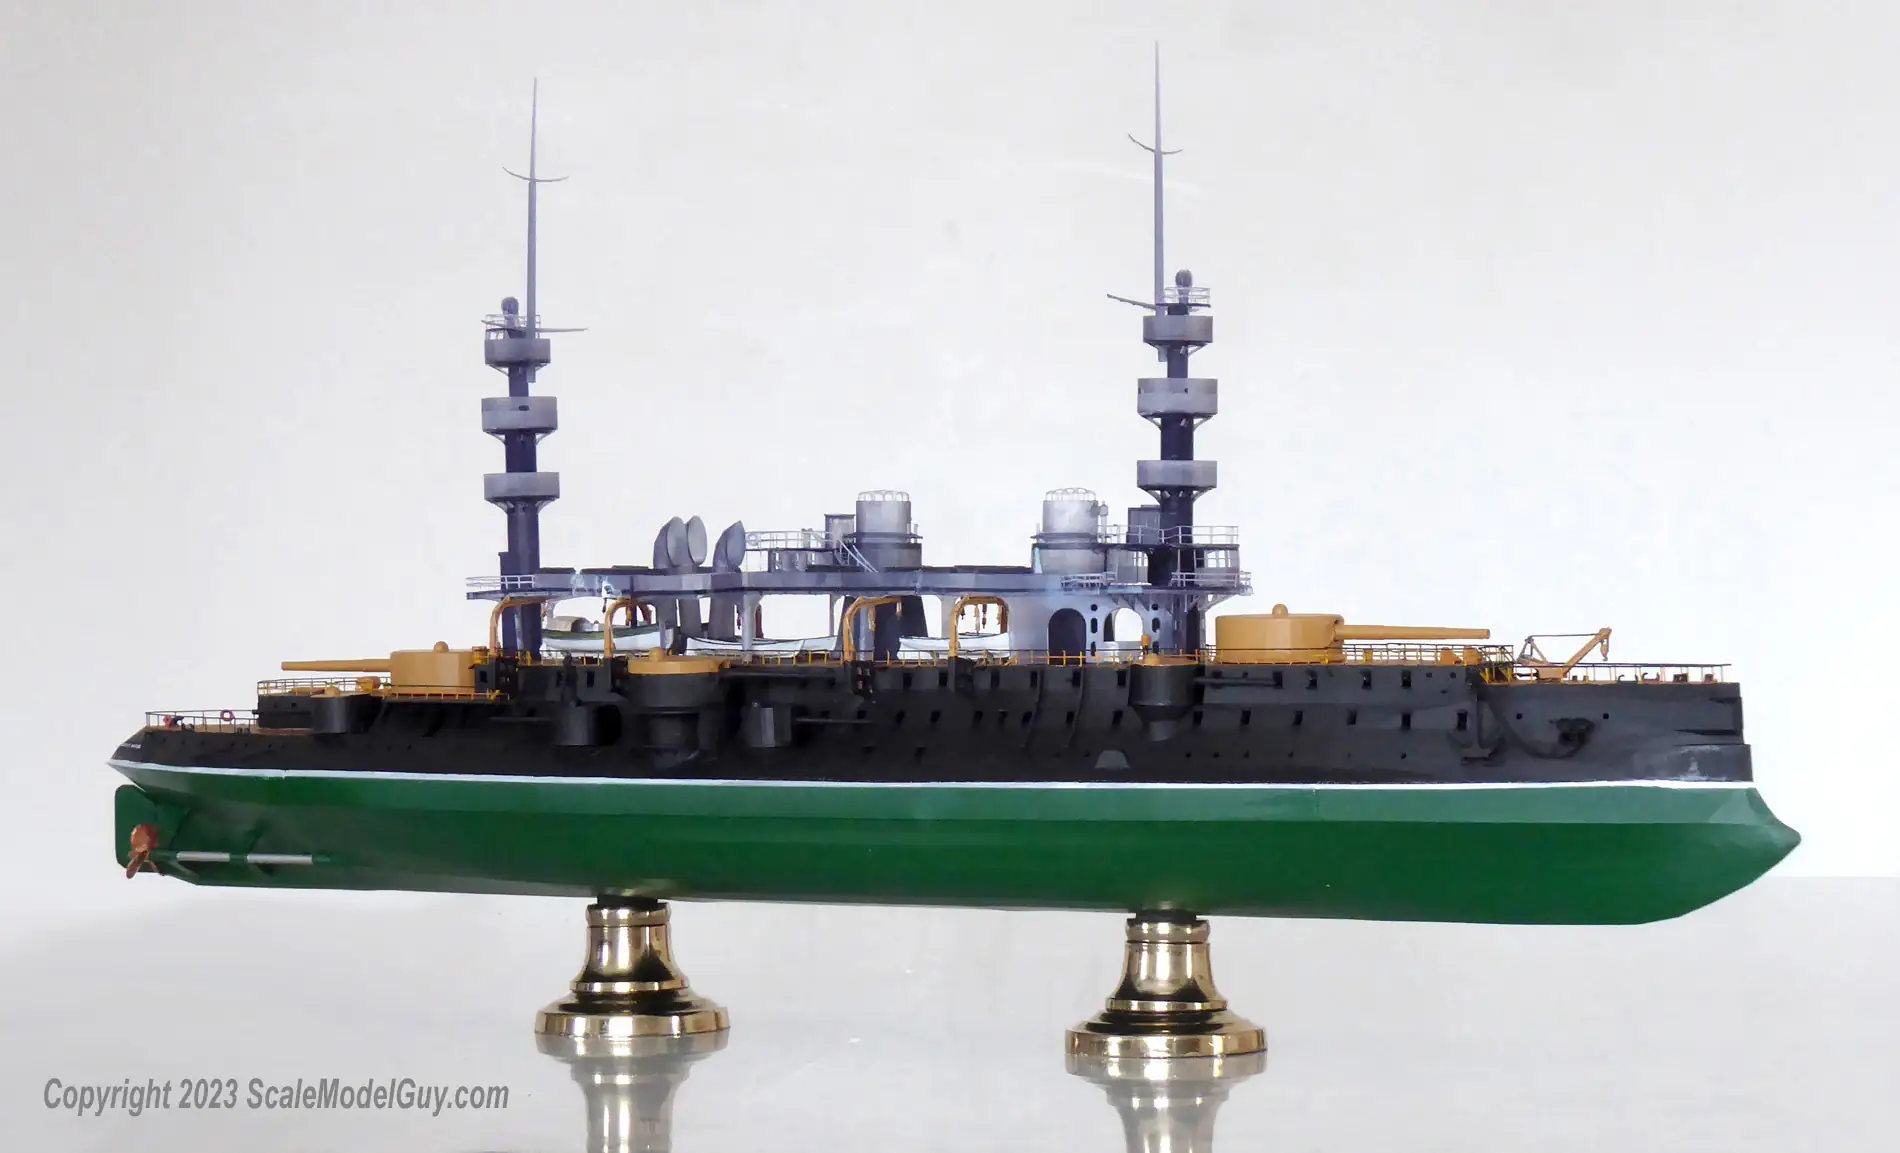
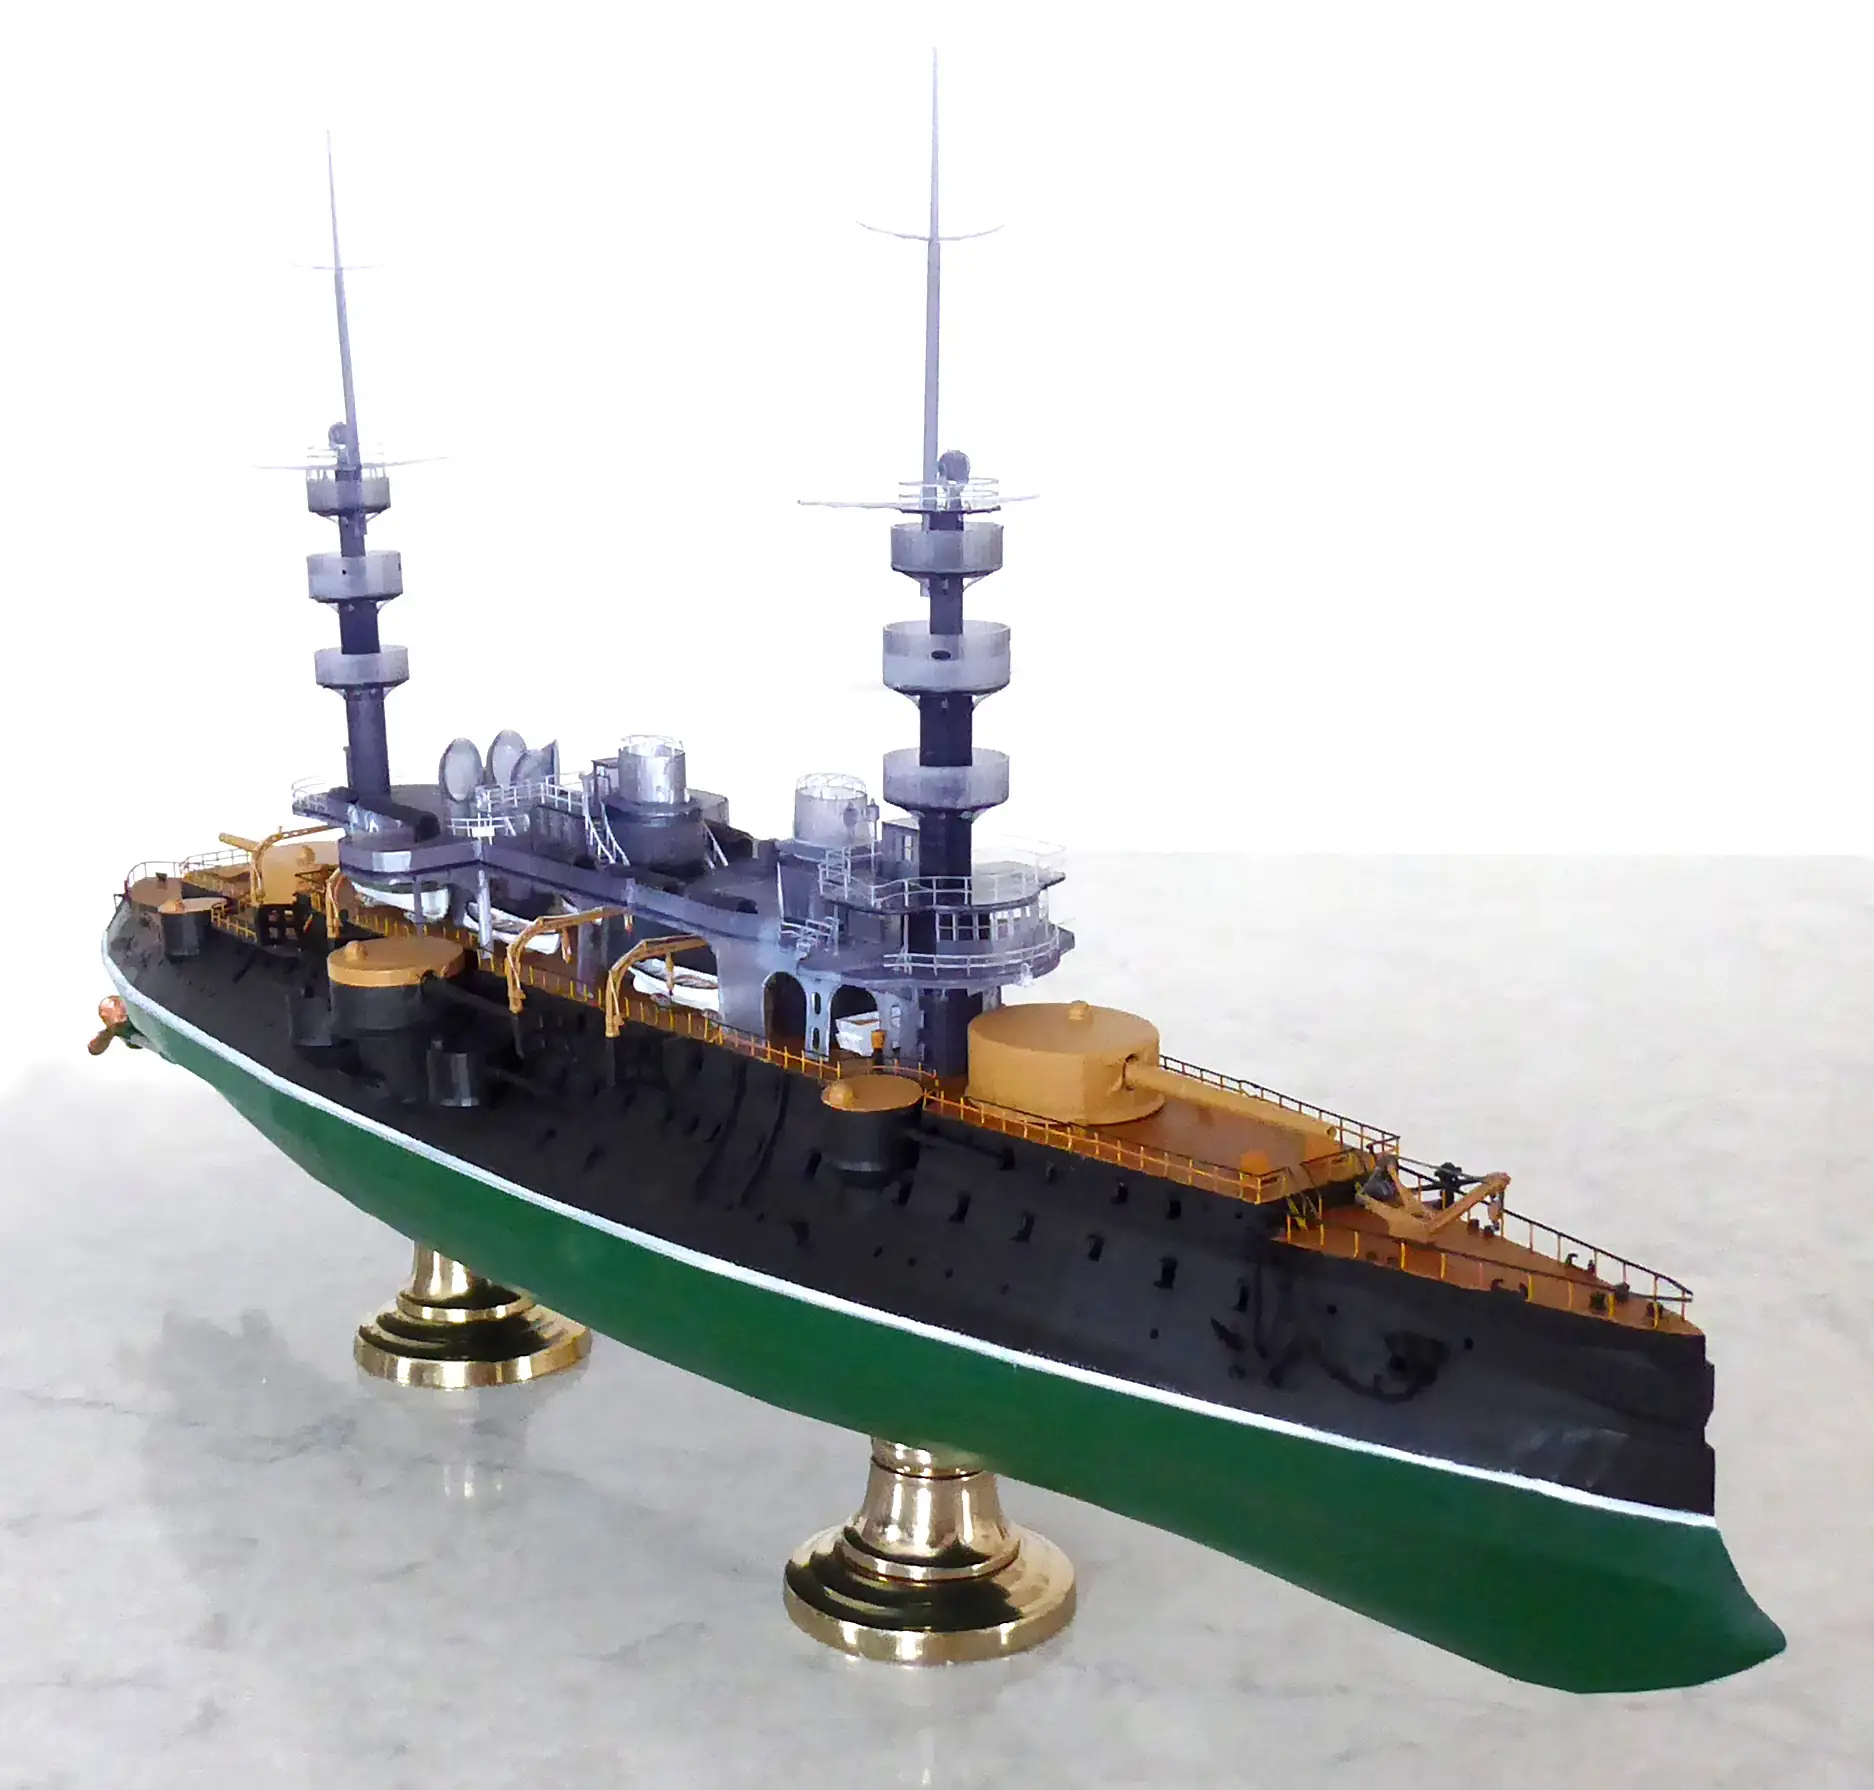
This is the first time I haven’t just glued 3D printed stands onto the hull, Charles Martel is just too darn heavy for that. Plus I like the ability to easily remove them if needed and the brass just looks snazzy!
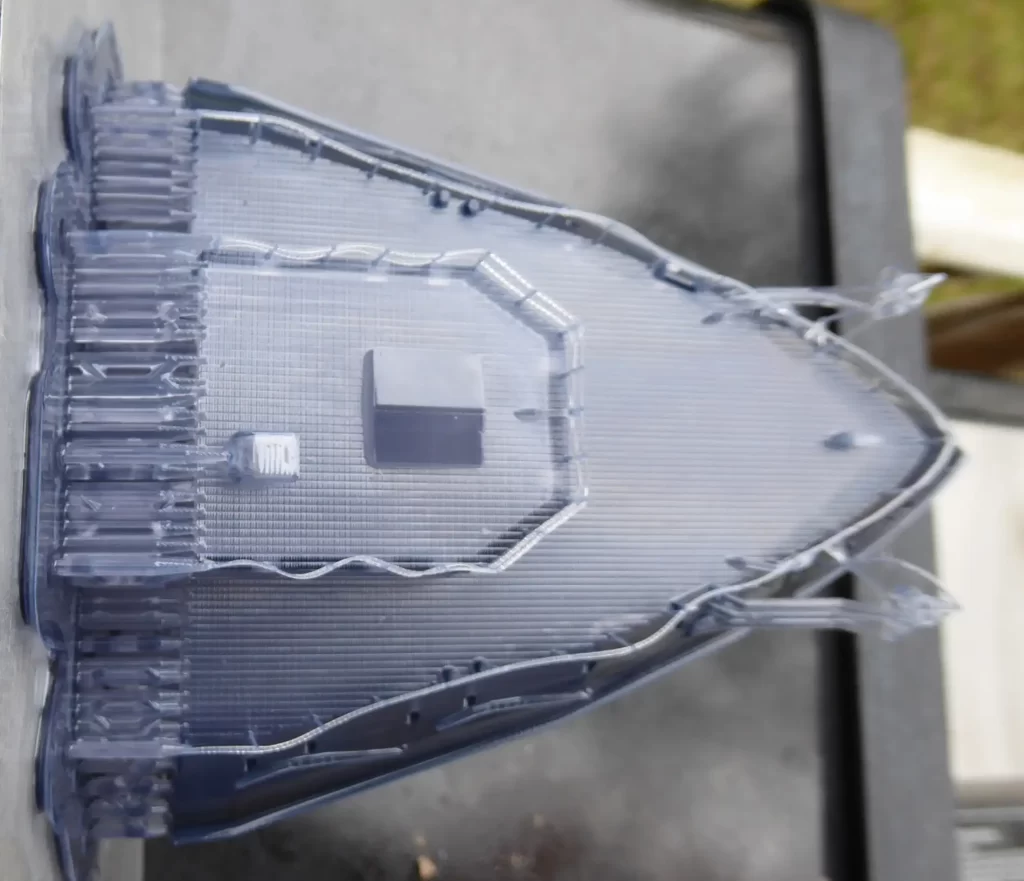
Update April 12, 2023
Fire up the Saturn!
Warmish weather and my schedule finally aliened and I was able to print the new flying deck around mid April. The new design got the job done in 2 sections, an improvement on the 3 of my first attempt.


The printing went well but I did manage to make a problem for myself. You may have noticed no off the build plate picture of the bow flying deck, that’s because by the time I got it off, it was in about 10 pieces. I let is sit in the printer in the shed for a day or three after it was finished… seems to be a really bad idea. The model had to be chiseled off. I’d never had such a time removing a print. Damage was done but I decided I’d try and repair it before reprinting and it went surprisingly well. The last piece of my Charles Martel puzzle was finally in hand.
Update April 23, 2023
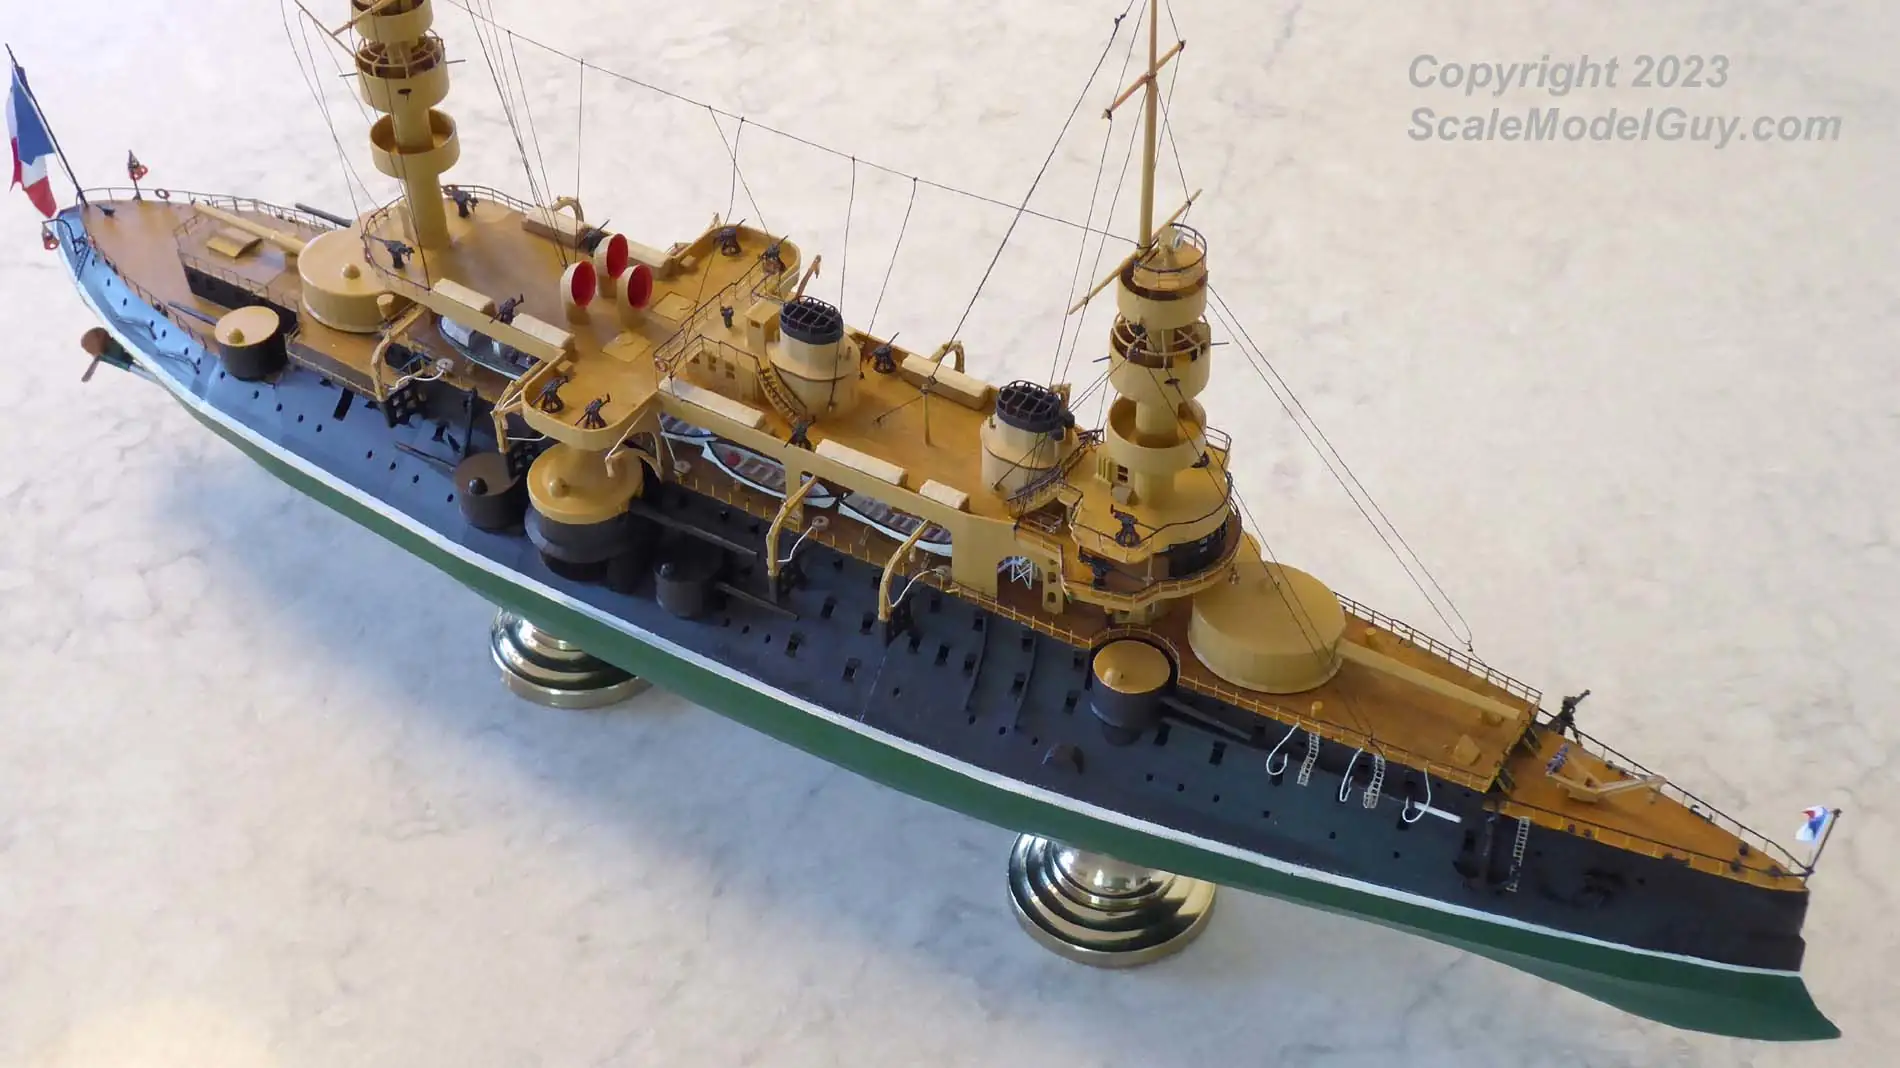
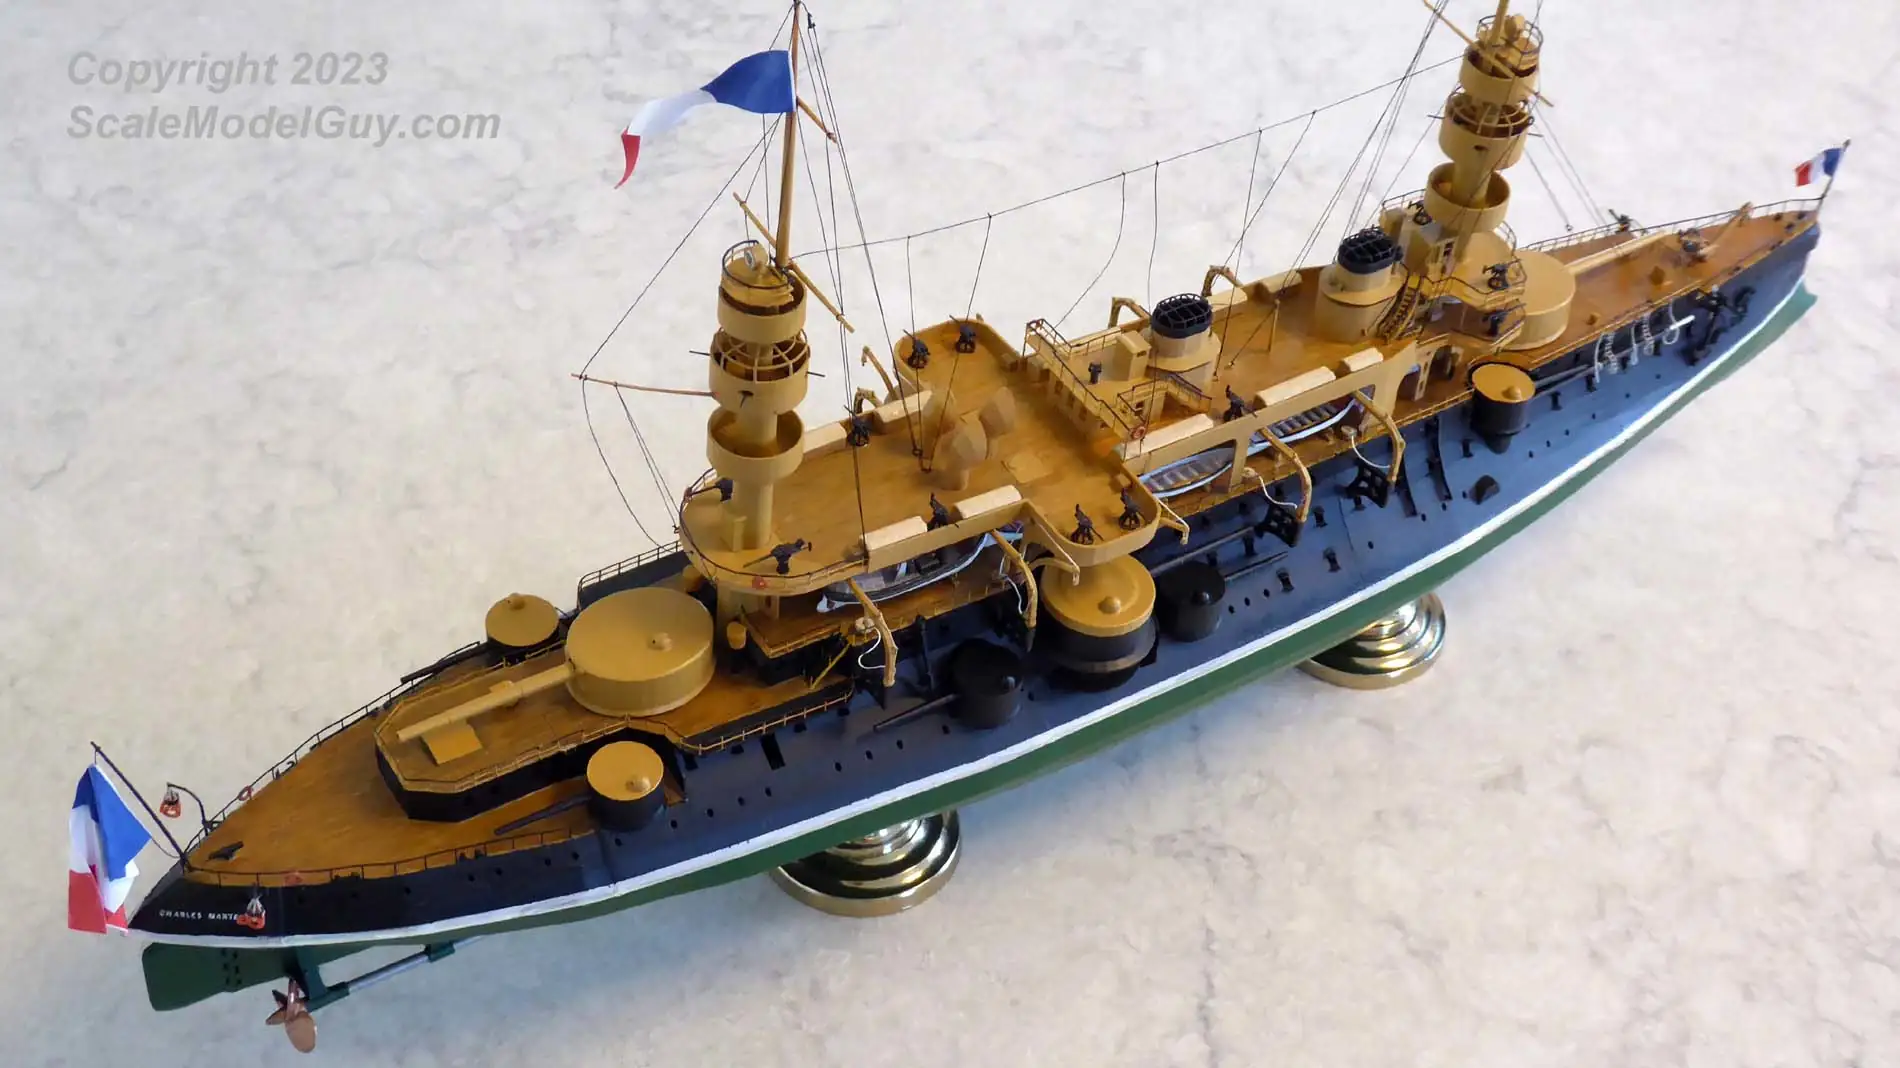
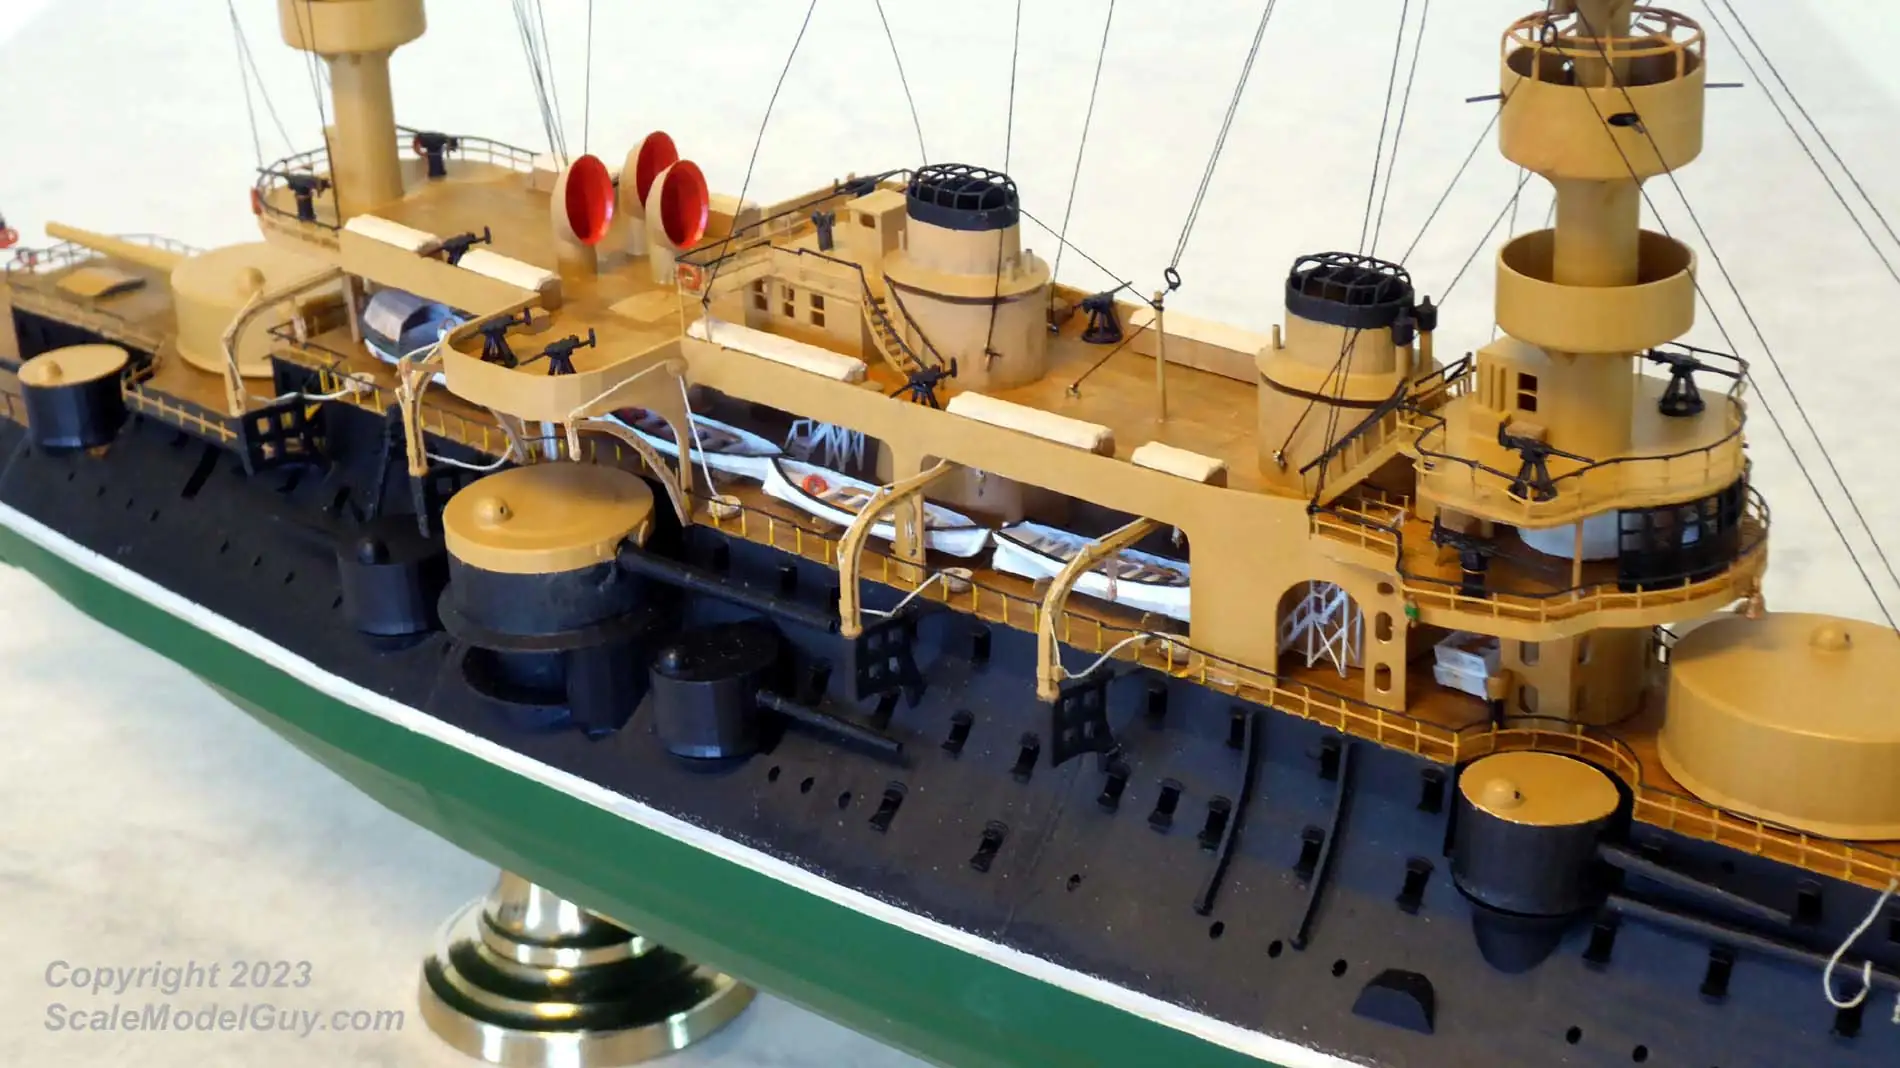
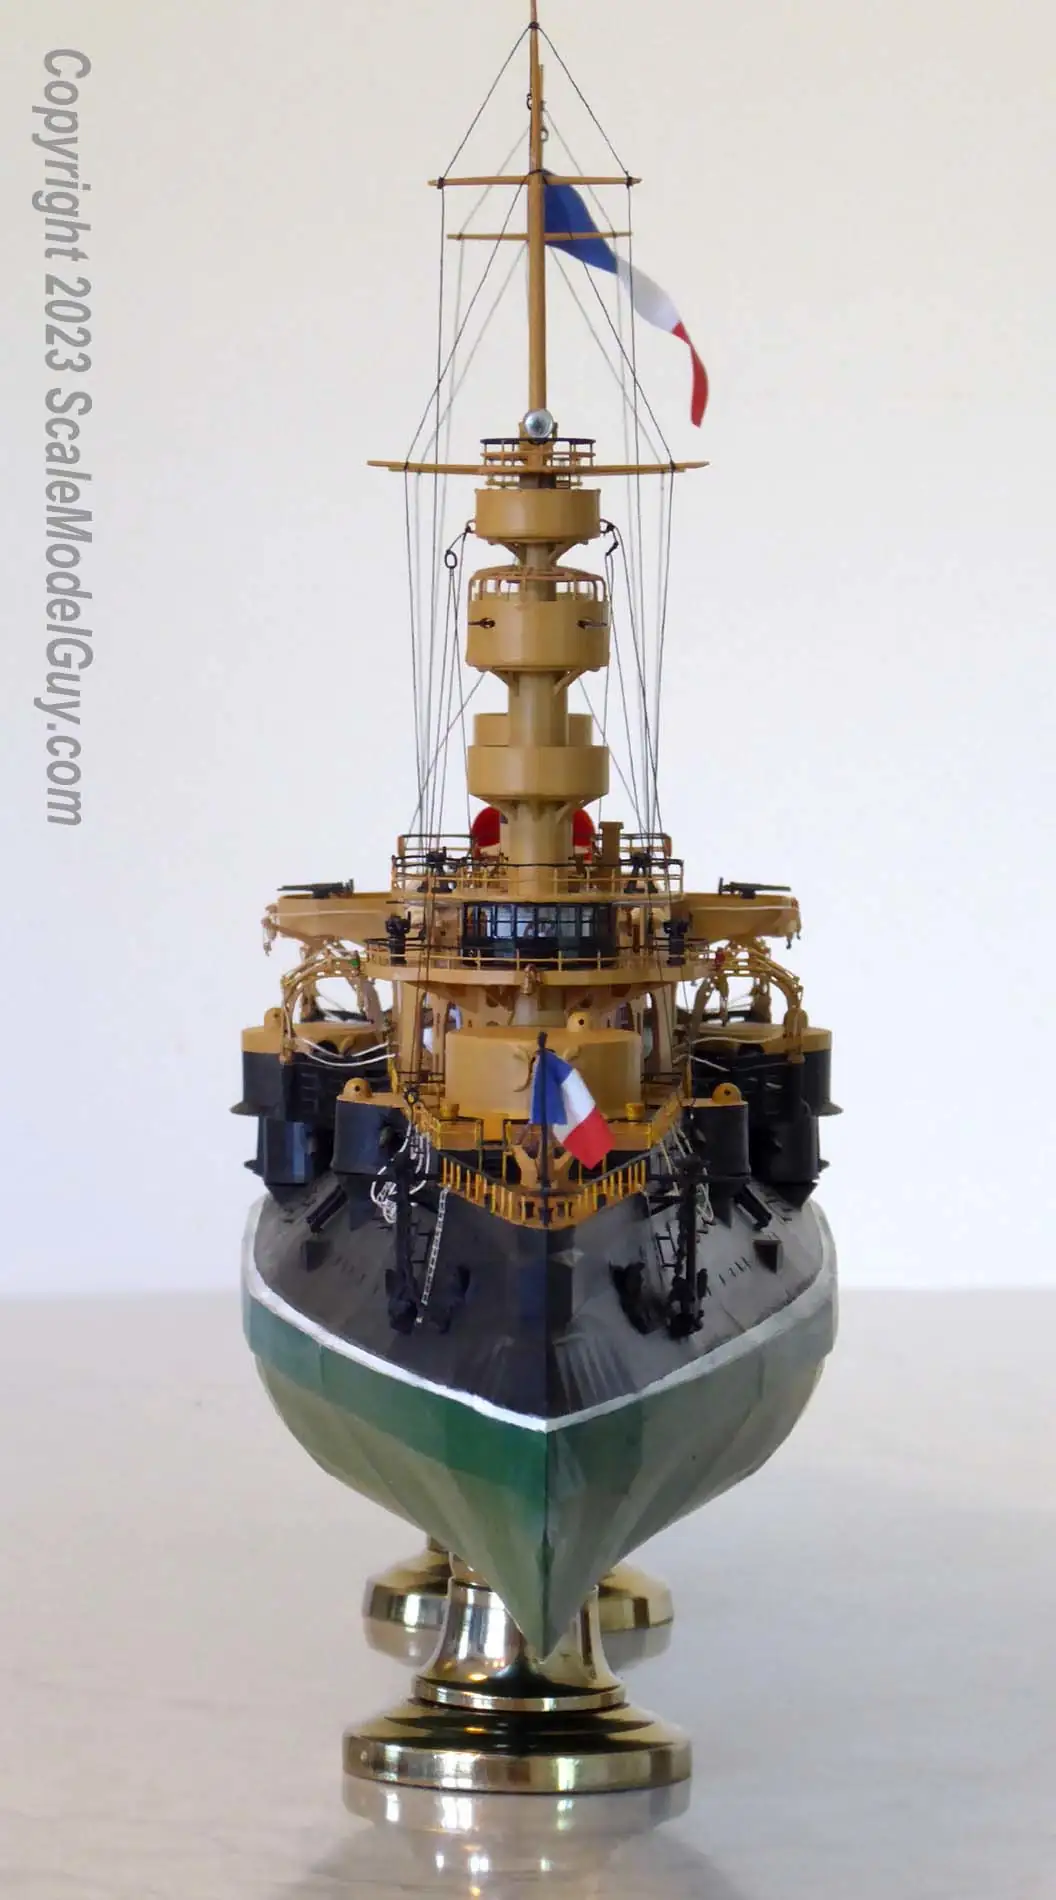
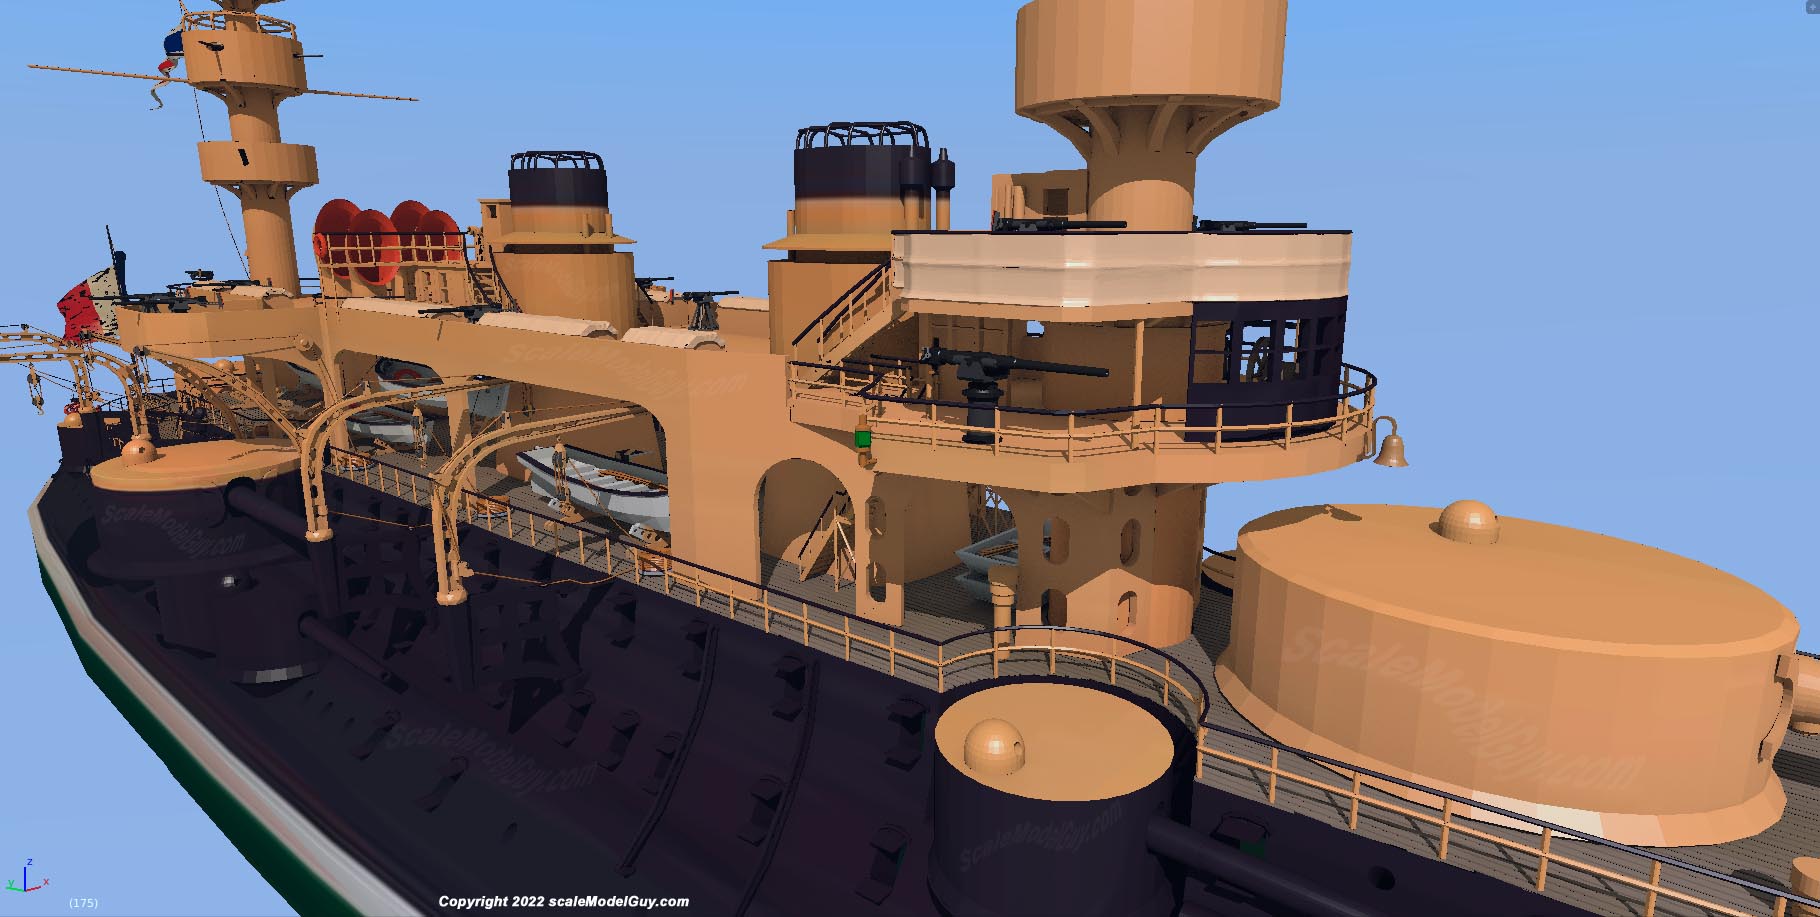
Final Assembly
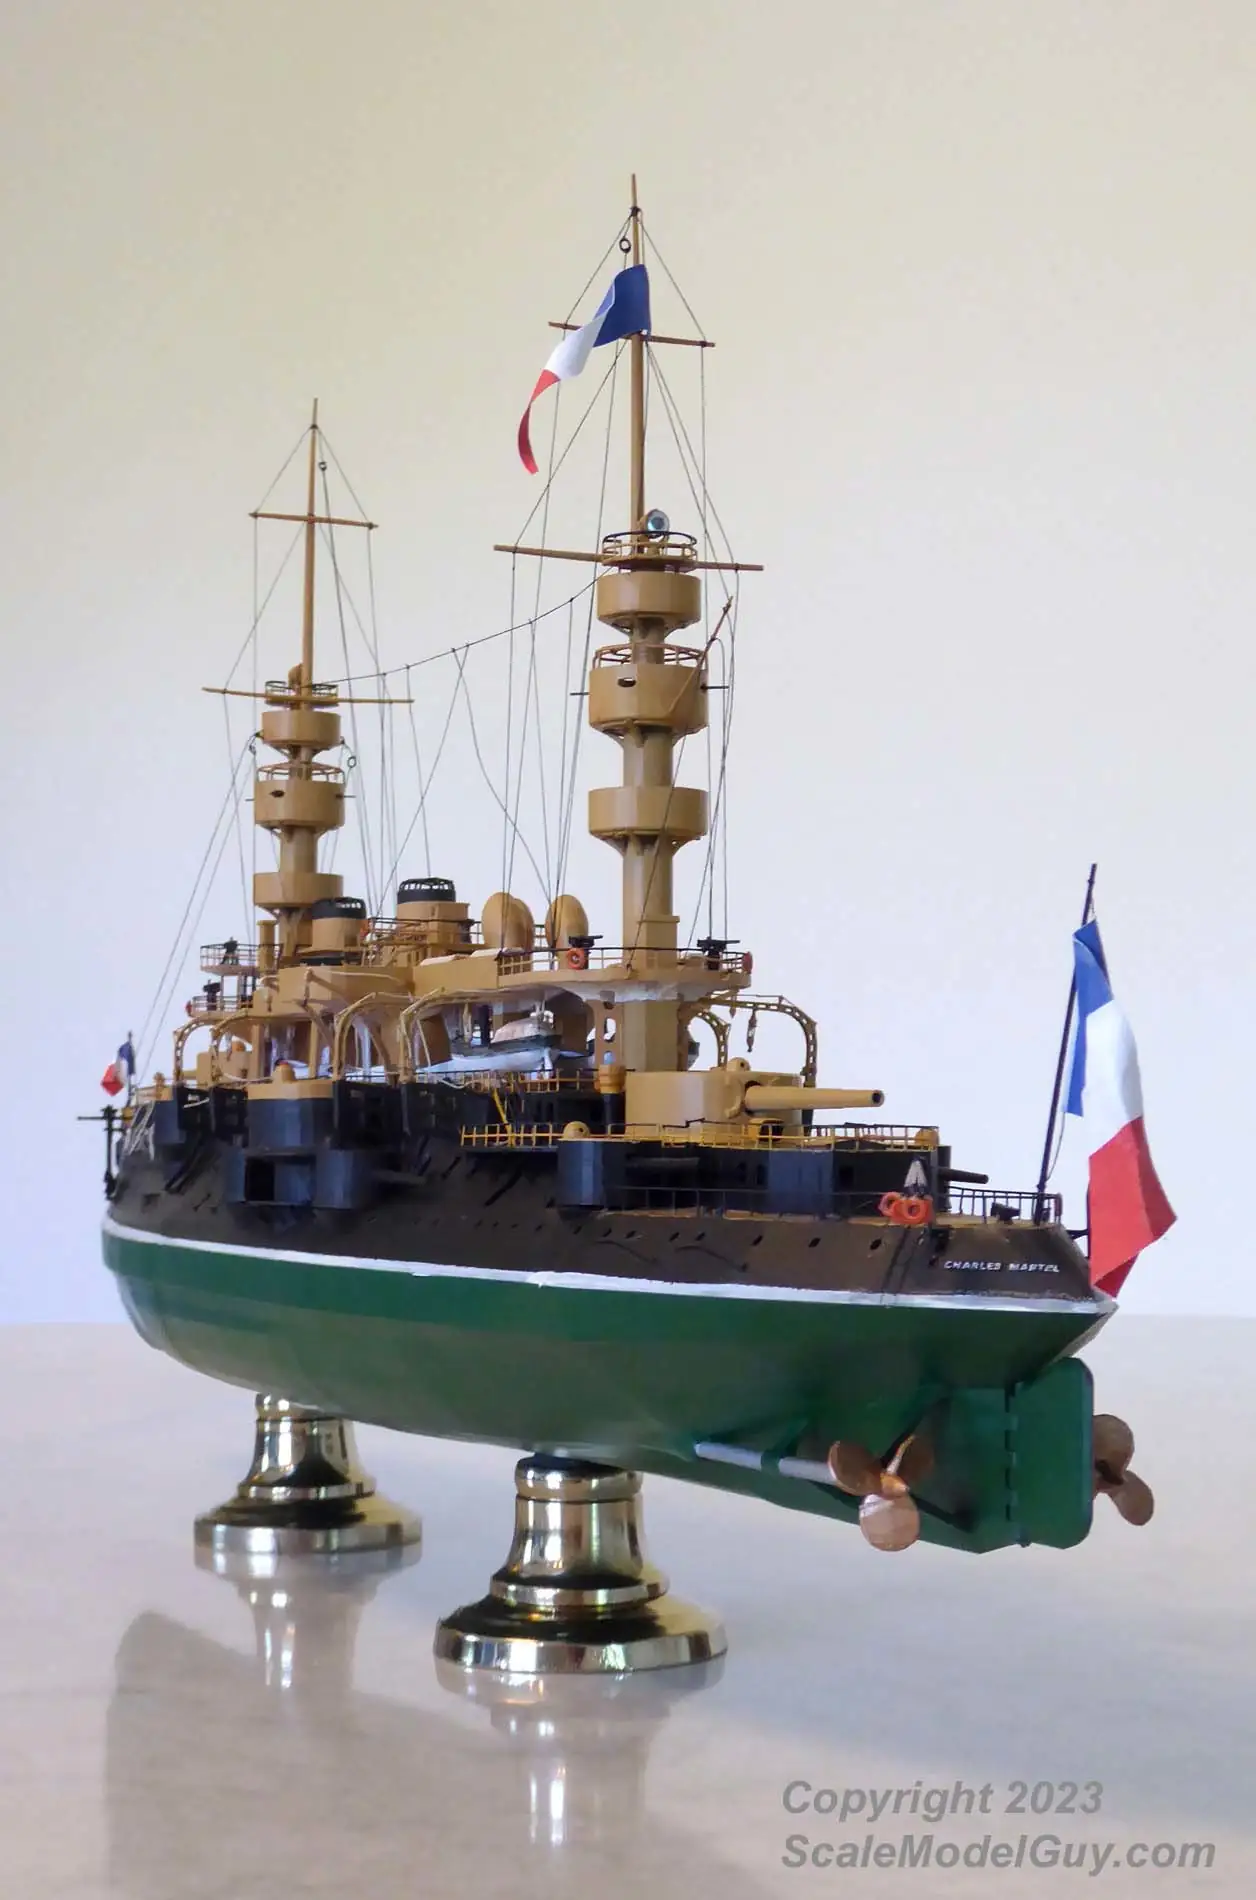
Was time to pull the trigger and glue down all the parts that had only been mocked up till now. I painted much of the upper works before assembly, and when all was finally permanently in place, I was happy and relieved.
Update May 10, 2023
Unprinted Parts
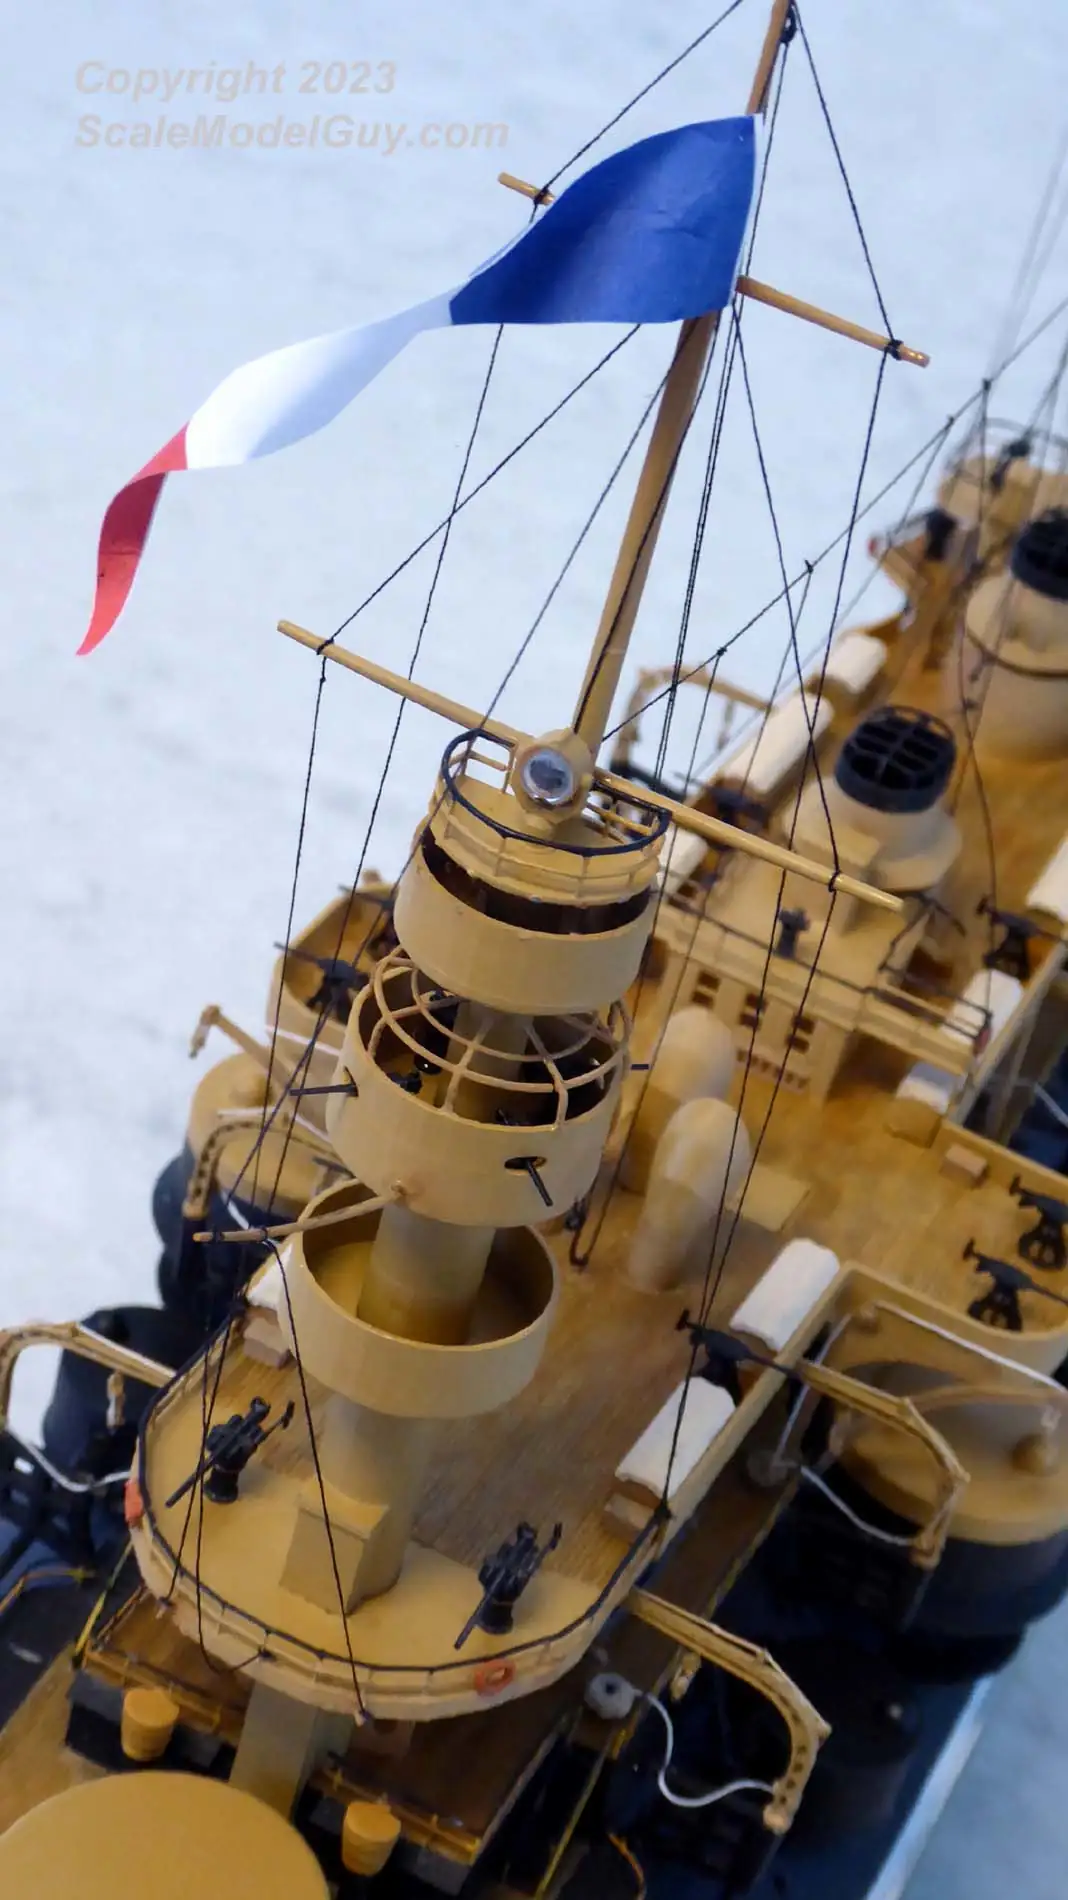
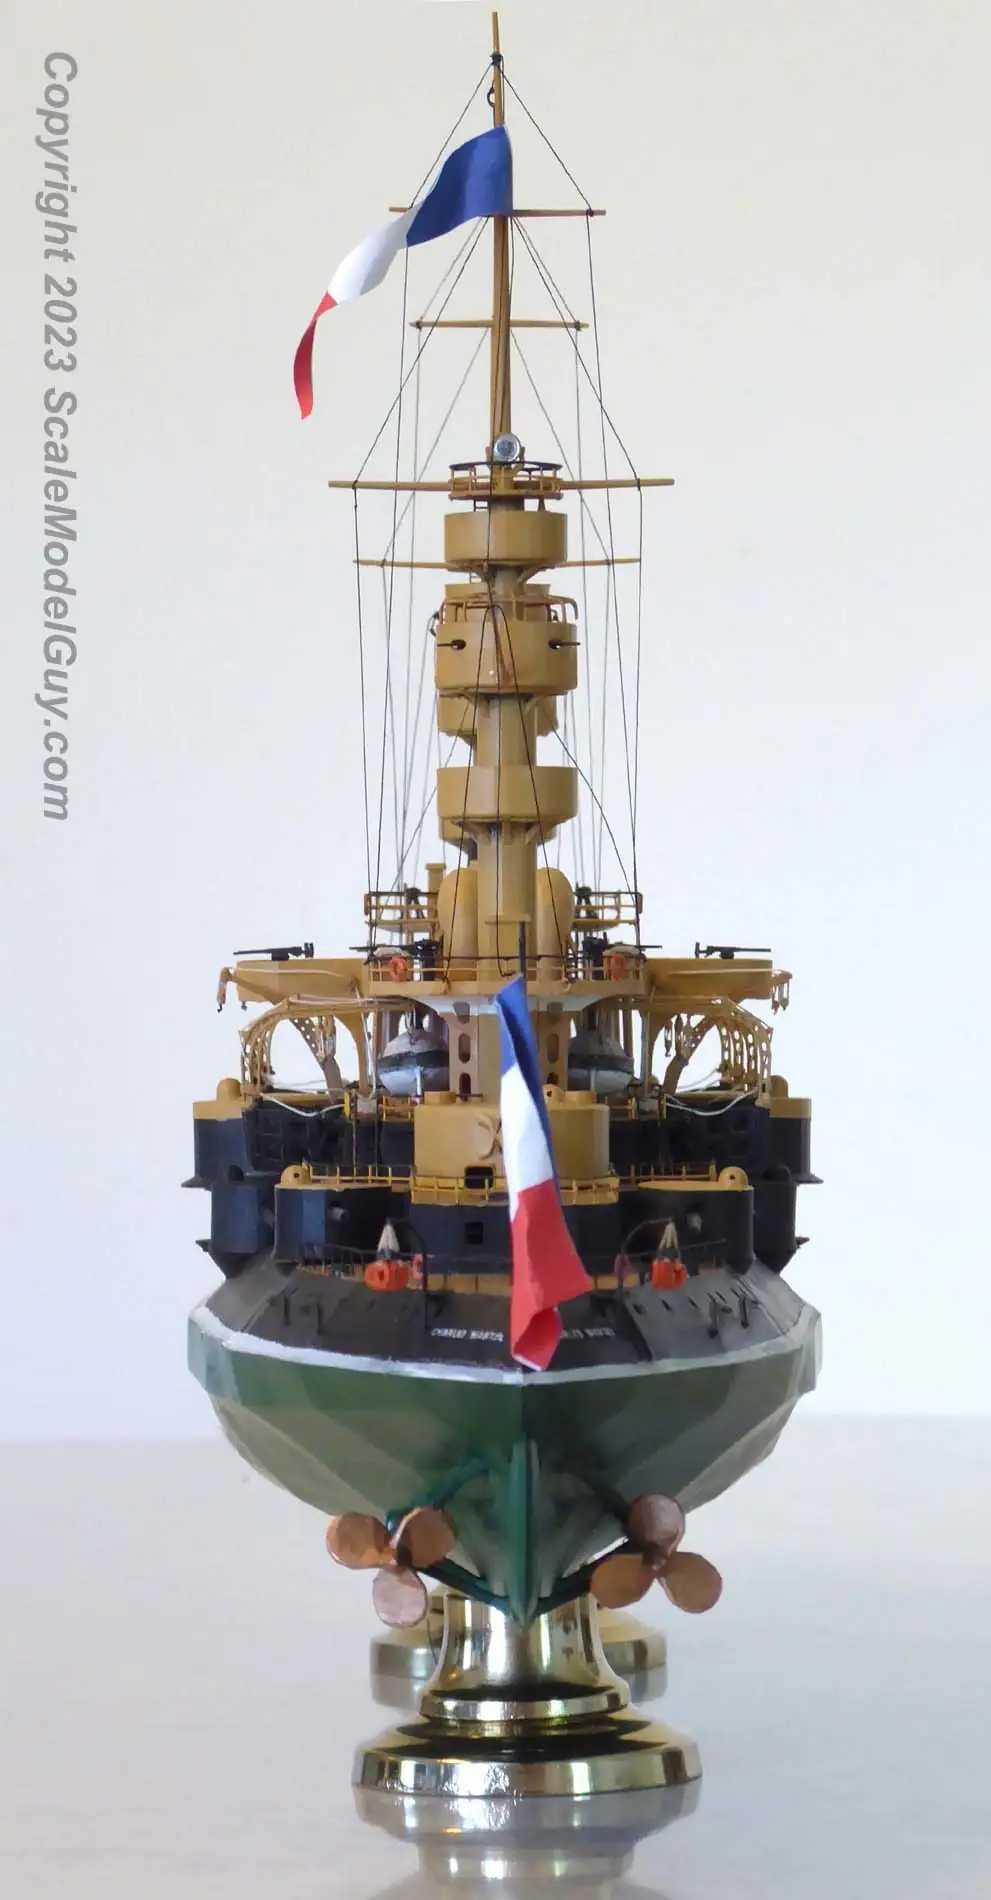
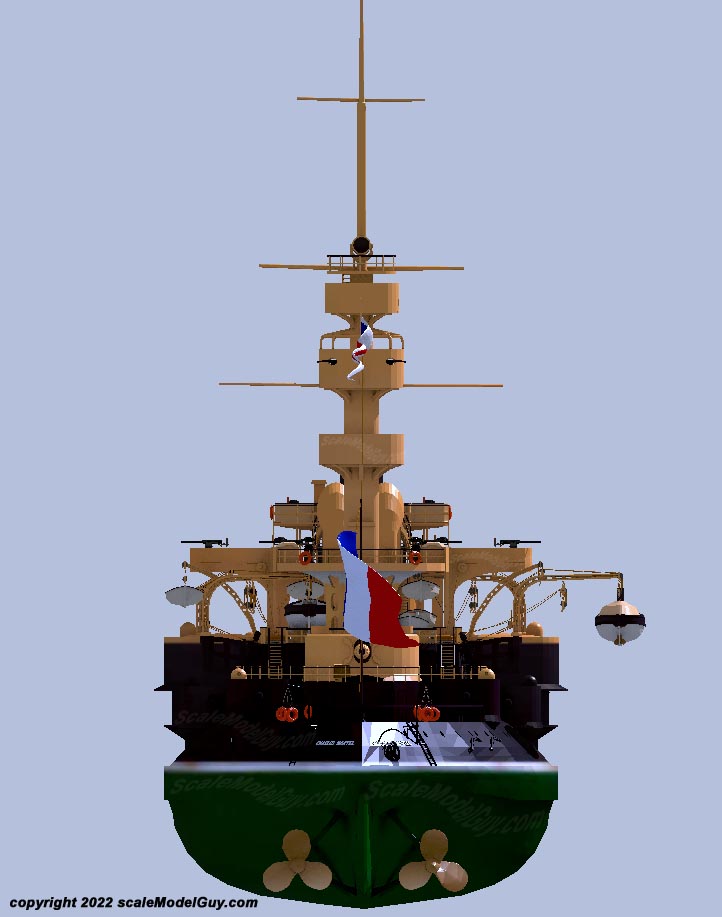
OK – This header isn’t 100% accurate, the flags were printed on an inkjet…
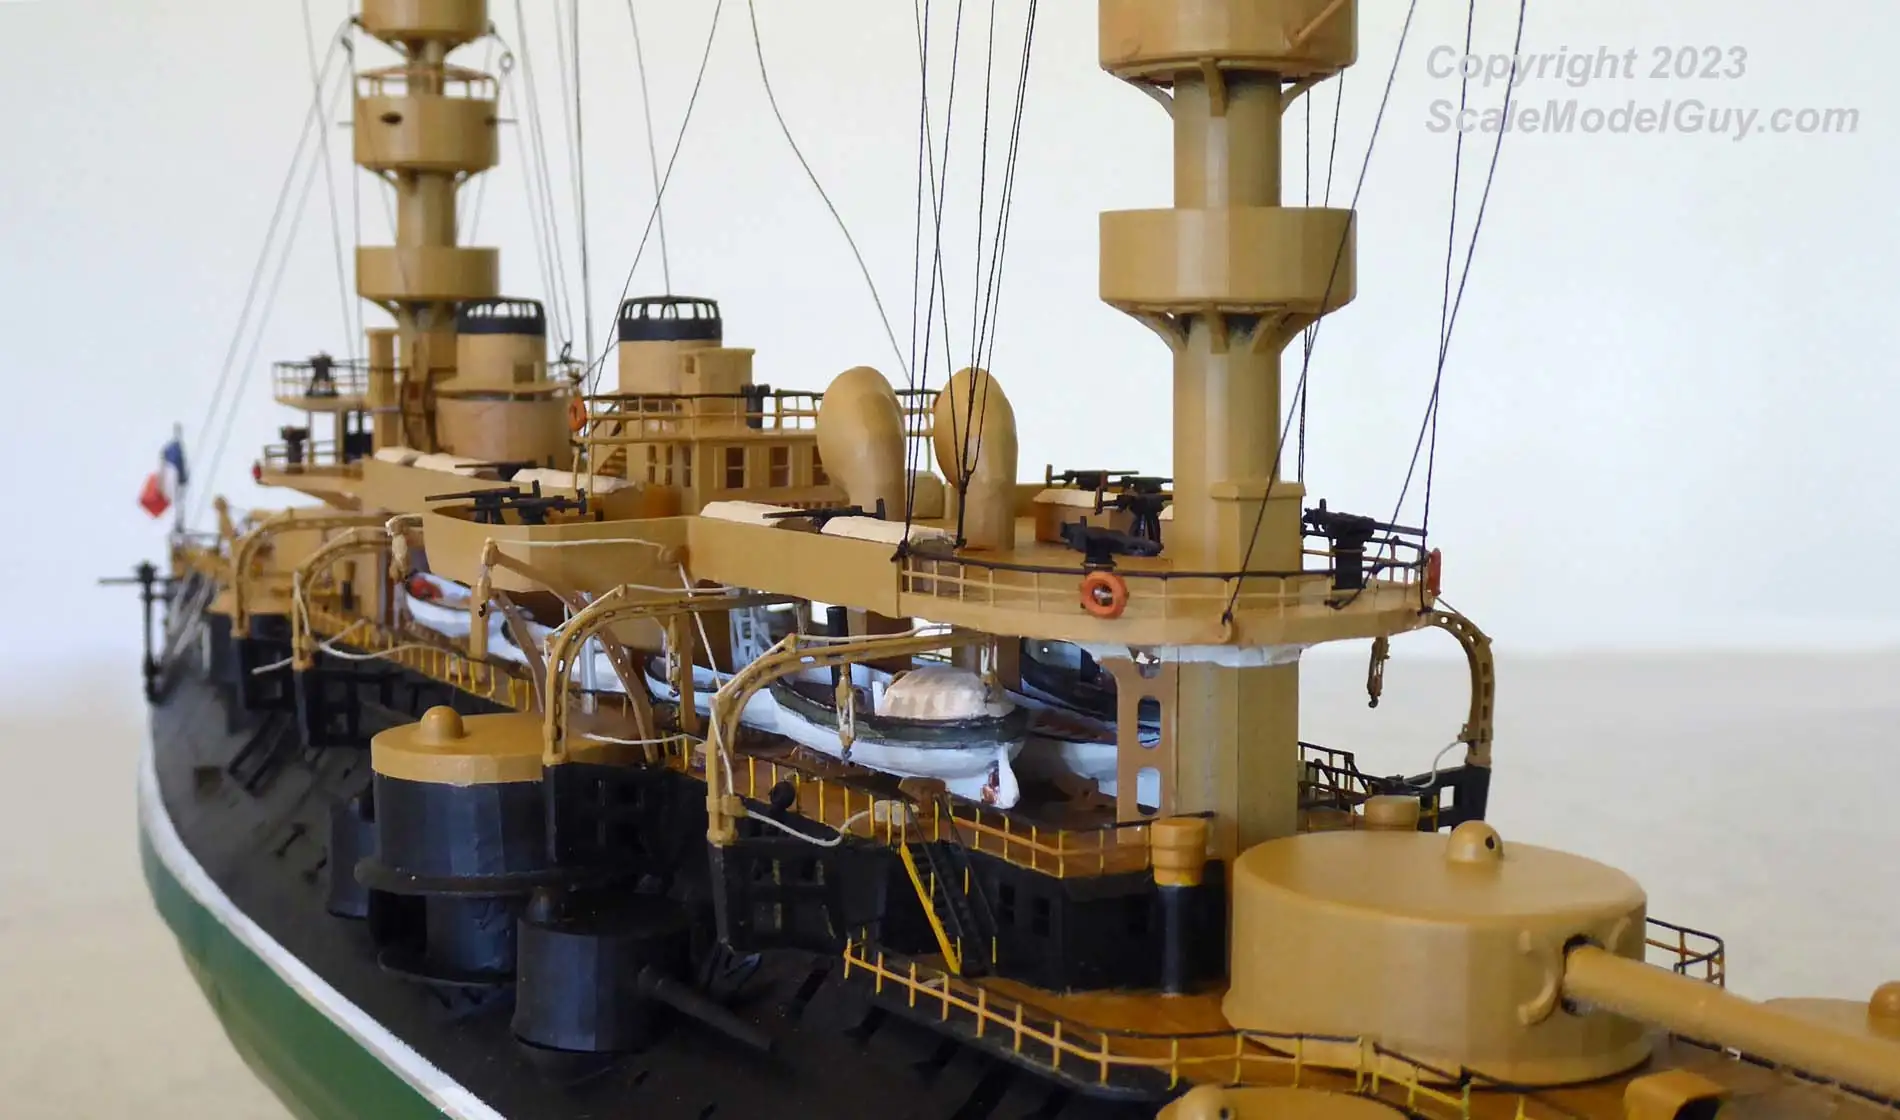
My least favorite part of model ship building, the rigging. A lot of guess work went into this, plenty of pictures of where the rigging starts up in the masts but precious few show where and how it connected to the ship. Flags were easy enough and hopefully I’m not crazy off on the rigging.
The completed pictures are in the update at the top of the page. The only remaining work I have is to create a wooden base and plexiglass case. I’ve never done this before… How hard can it be!?